SpringBoot使用RabbitMQ做消息中间件
说明
MQ全称为Message Queue, 消息队列(MQ)是一种应用程序对应用程序的通信方法。应用程序通过读写出入队列的消息(针对应用程序的数据)来通信,而无需专用连接来链接它们。消息传递指的是程序之间通过在消息中发送数据进行通信,而不是通过直接调用彼此来通信,直接调用通常是用于诸如远程过程调用的技术。排队指的是应用程序通过 队列来通信。队列的使用除去了接收和发送应用程序同时执行的要求。MQ是消费-生产者模型的一个典型的代表,一端往消息队列中不断写入消息,而另一端则可以读取或者订阅队列中的消息。MQ和JMS类似,但不同的是JMS是SUN JAVA消息中间件服务的一个标准和API定义,而MQ则是遵循了AMQP协议的具体实现和产品。
RabbitMQ是一个在AMQP(高级消息队列协议)基础上完成的,可复用的企业消息系统。他遵循Mozilla Public License开源协议。作用:在项目中,将一些无需即时返回且耗时的操作提取出来,进行了异步处理,而这种异步处理的方式大大的节省了服务器的请求响应时间,从而提高了系统的吞吐量
安装
环境:CentOS 7.2
1 安装Erlang
-y参数表示忽略回答安装yes的过程
yum install -y erlang2 安装RabbitMQ
切换到根目录,然后下载(这里演示下载3.6.6版,可在官网找不同版本的rpm的链接,戳-> 点击打开链接)
cd /root/
wget http://www.rabbitmq.com/releases/rabbitmq-server/v3.6.6/rabbitmq-server-3.6.6-1.el7.noarch.rpmyum install rabbitmq-server-3.6.6-1.el7.noarch.rpm
创建rabbitmq.config文件
cd /etc/rabbitmq/
vi rabbitmq.config
输入:(注意最后一行有一个'.'号)
[{rabbit, [{loopback_users, []}]}].
这里的意思是开放使用,rabbitmq默认创建的用户guest,密码也是guest,这个用户默认只能是本机访问,localhost或者127.0.0.1,从外部访问需要添加上面的配置。
启动
service rabbitmq-server start
开启管理UI:默认账户是guest,密码是guest,访问端口:15672
注:如果出现
FirewallD is not running的问题则是防火墙没有开启,使用如下命令:
rabbitmq-plugins enable rabbitmq_management
firewall-cmd --zone=public --add-port=15672/tcp --permanent
firewall-cmd --reload
也可以直接使用命令行添加用户:
rabbitmqctl add_user yunlingfly yunlingfly  //添加用户,后面两个参数分别是用户名和密码
rabbitmqctl set_permissions -p / yunlingfly ".*" ".*" ".*"  //添加权限
rabbitmqctl set_user_tags yunlingfly administrator //修改用户角色systemctl start firewalld
systemctl status firewalld登录:http://ip:15672,输入用户名guest密码guest或者是我配置的yunlingfly密码yunlingfly,见到下面的图说明配置正确,可以进行下一步操作了
开启:
service rabbitmq-server stratservice rabbitmq-server stop重启:
service rabbitmq-server restart查看状态:
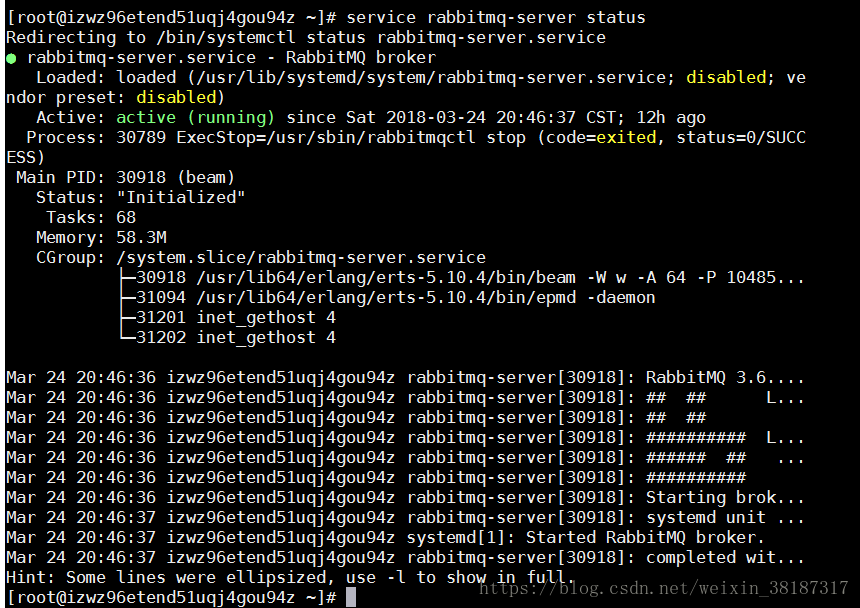
service rabbitmq-server status开机自启:
chkconfig rabbitmq-server on添加用户:
rabbitmqctl add_user username password  //添加用户,后面两个参数分别是用户名和密码
rabbitmqctl set_permissions -p / username ".*" ".*" ".*"  //添加权限
rabbitmqctl set_user_tags username administrator  //修改用户角色
使用SpringBoot集成
环境:IDEA2017,jdk1.8,SpringBoot1.5.10.RELEASE
说明:一般来说消息发送者和消息接收者不是同一个,为了演示方便将二者放在了一个项目下,但是可以发现二者没有耦合,随时可以分开成两个项目
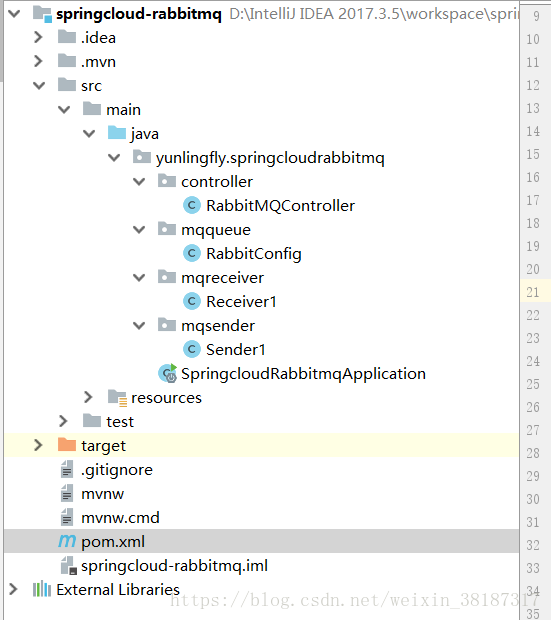
首先给出项目结构:
1 配置pom.xml
	4.0.0

	yunlingfly
	springcloud-rabbitmq
	0.0.1-SNAPSHOT
	jar

	springcloud-rabbitmq
	Demo project for Spring Boot


		org.springframework.boot
		spring-boot-starter-parent
		1.5.10.RELEASE


		UTF-8
		UTF-8
		1.8


			org.springframework.boot
			spring-boot-starter-web


			org.springframework.boot
			spring-boot-starter-amqp


			org.springframework.boot
			spring-boot-starter-actuator


			org.springframework.boot
			spring-boot-starter-test
			test


				org.springframework.boot
				spring-boot-maven-plugin
2 编写启动类
package yunlingfly.springcloudrabbitmq;

import org.springframework.boot.SpringApplication;
import org.springframework.boot.autoconfigure.SpringBootApplication;

@SpringBootApplication
public class SpringcloudRabbitmqApplication {

	public static void main(String[] args) {
		SpringApplication.run(SpringcloudRabbitmqApplication.class, args);
	}
}
3 配置文件application.yml
spring:
  application:
    name: rabbitMQ
  rabbitmq:
    #配置连接IP地址,本机安装的RabbitMQ的话可以用localhost
    host: xxx.xxx.xxx.xxx
    #这里配置的是RabbitMQ的连接端口,是5672哦不是15672
    port: 5672
    username: yunlingfly
    password: yunlingfly
server:
  #这里配置的是该项目的启动端口
  port: 8765
info:
  app:
    name: RabbitMQ测试连接
    version: 0.0.1
4 编写消息发送者
package yunlingfly.springcloudrabbitmq.mqsender;

import org.springframework.amqp.core.AmqpTemplate;
import org.springframework.beans.factory.annotation.Autowired;
import org.springframework.stereotype.Component;

import java.util.Date;

@Component
public class Sender1 {
    /**
     * 注入AmqpTemplate,然后利用AmqpTemplate向一个名为hello的消息队列中发送消息。
     */
    @Autowired
    private AmqpTemplate rabbitTemplate;
    public void send(){
        String msg="hello rabbitMQ:"+new Date()+" 你好,高级消息队列使用ing~";
        System.out.println("单对单发送参数。Sender发出了消息:"+msg);
        this.rabbitTemplate.convertAndSend("hello",msg);
        // 第一个参数表示交换机,第二个参数表示routing key,第三个参数即消息,Topic方式
        // this.rabbitTemplate.convertAndSend("topicExchange","key.da",msg);
    }
}
5 编写队列
package yunlingfly.springcloudrabbitmq.mqqueue;

import org.springframework.amqp.core.Queue;
import org.springframework.context.annotation.Bean;
import org.springframework.context.annotation.Configuration;

@Configuration
public class RabbitConfig {
    @Bean
    public Queue helloQueue(){
        return new Queue("hello");
    }
}
package yunlingfly.springcloudrabbitmq.mqreceiver;

import org.springframework.amqp.rabbit.annotation.RabbitHandler;
import org.springframework.amqp.rabbit.annotation.RabbitListener;
import org.springframework.stereotype.Component;

@Component
@RabbitListener(queues = "hello")
public class Receiver1 {
    @RabbitHandler
    public void process(String msg){
        System.out.println("Receiver收到了消息:"+msg);
    }
}
package yunlingfly.springcloudrabbitmq.controller;

import org.springframework.beans.factory.annotation.Autowired;
import org.springframework.web.bind.annotation.RequestMapping;
import org.springframework.web.bind.annotation.RequestMethod;
import org.springframework.web.bind.annotation.RestController;
import yunlingfly.springcloudrabbitmq.mqsender.Sender1;

@RestController
public class RabbitMQController {
    @Autowired
    private Sender1 sender;
    @RequestMapping(value = "/helloRabbit",method = RequestMethod.GET)
    public String sendMQ(){
        System.out.println("准备发送消息。。。");
        sender.send();
        return "success";
    }
}
8 运行
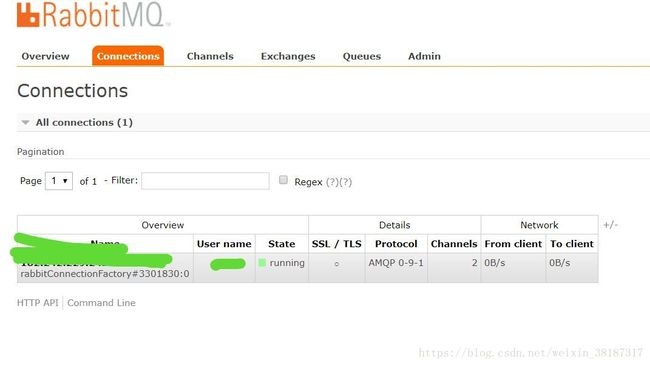
[INFO]Created new connection: rabbitConnectionFactory表示连接成功

9 外网访问
输入:http://localhost:8765/helloRabbit
看到控制台输出:
看到控制台输出:


