- Cuppa CMS任意文件读取漏洞(CVE-2022-25401)
风中追风-fzzf
#文件读取安全web安全
一、漏洞概述CuppaCMSv1.0中文件管理器的复制功能允许将任何文件复制到当前目录,从而授予攻击者对任意文件得读取权限,/templates/default/html/windows/right.php文件存在任意文件读取漏洞。二、影响范围v1.0三、访问页面四、漏洞复现1、访问接口POST接口/templates/default/html/windows/right.phpPOST/temp
- Linux驱动开发: USB驱动开发
DS小龙哥
Linux系统编程与驱动开发linuxUSB驱动嵌入式
一、USB简介1.1什么是USB?USB是连接计算机系统与外部设备的一种串口总线标准,也是一种输入输出接口的技术规范,被广泛地应用于个人电脑和移动设备等信息通讯产品,USB就是简写,中文叫通用串行总线。最早出现在1995年,伴随着奔腾机发展而来。自微软在Windows98中加入对USB接口的支持后,USB接口才推广开来,USB设备也日渐增多,如数码相机、摄像头、扫描仪、游戏杆、打印机、键盘、鼠标等
- 最通用的跨平台引擎:ShiVa 3D引擎
pizi0475
图形图像其它文章图形引擎游戏引擎引擎跨平台脚本服务器sslsoap
ShiVa3D引擎是最通用的跨平台引擎,可以在Web浏览器运行并且也支持Windows,Mac,Linux,Wii,iPhone,iPad,Android,WebOS和AirplaySDK。该引擎支持SSL–securized插件扩展,很像PhysX引擎,FMOD声音库,ARToolkit和ScaleformHUD引擎。ClassicGeometry经典的图形处理支持多边形网,其中包括:-静态网格
- 白帽黑客系列教程之Windows驱动开发(64位环境)入门教程(七)
黑客影儿
技术分享原创文章系统安全驱动开发c语言windows系统安全程序人生学习方法visualstudio
为什么要写这篇文章呢?作为一名白帽黑客,如果想要学习ROOTKIT攻防技术,就必须要有能力进行驱动开发!本文章仅提供学习,切勿将其用于不法手段!在Windows操作系统的64位环境中,进行ROOTKIT攻防,就必须要学会Windows驱动开发!Windows驱动开发,是掌握Rootkit技术的硬性基础之一!不会Windows环境下的驱动开发,你就难以透彻理解ROOTKIT攻防技术的真相!接上一篇文
- 指定的服务已标记为删除
勤不了一点
windowswindows
同时也适合xampp下的apache、mysql等各个服务转发:https://www.iteye.com/blog/inexus-1608761想重新在windows里部署svn服务,所以第一步删除svn服务:管理员权限下运行cmd:“scdeletesvnserver”之后再部署svn的服务:“sccreatesvnserverbinpath="C:\ProgramFiles\Tortoise
- nginx 安装(下载解压就行,免安装)
当归1024
nginxnginx运维
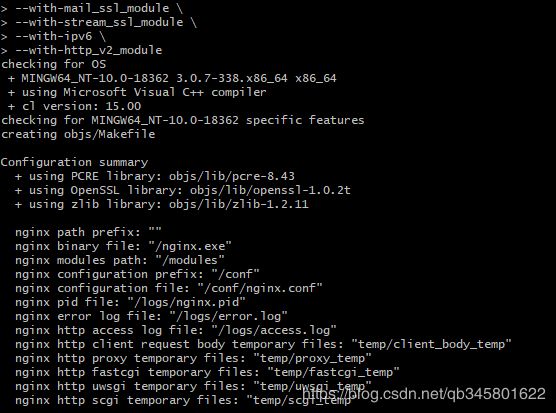
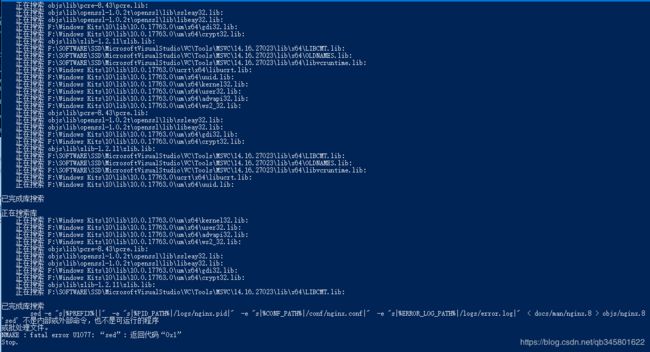
nginx是一个高性能的HTTP和反向代理web服务器,同时也提供了IMAP/POP3/SMTP服务。nginx由C语言编写,内存占用少,性能稳定,并发能力强,功能丰富;可以在大多数UnixLinuxOS上编译运行,并有Windows移植版。1、nginx下载地址:nginx:download2、windows安装及启动nginx是绿色免安装的,解压后可以直接启动双击nginx.exe即可启动服务
- opencv 自适应阈值
虚假程序设计
opencv人工智能计算机视觉
需要安装扩展库opencv-contrib-pythonCV_class.pyimportcv2importnumpyasnp#importserialimportos,sysfromdatetimeimportdatetimeimport_threadimportthreadingimporttimeimportwin32ui#只有windows能用.#fromCV_classimport*de
- Wireshark详解
靖节先生
wireshark测试工具网络
Wireshark使用详解1.Wireshark简介2.下载与安装1.下载地址2.安装步骤(以Windows为例)3.界面与核心功能1.主界面布局2.常用菜单功能4.过滤功能详解1.过滤类型2.常用过滤命令5.过滤命令与网络结构对应6.使用注意事项7.案例分析TCP三次握手1.实验目标2.操作步骤3.预期结果8.扩展学习1.Wireshark简介Wireshark是一款开源的网络协议分析工具,支持
- OpenCV开源机器视觉软件
视觉人机器视觉
杂说opencv开源人工智能
OpenCV(OpenSourceComputerVisionLibrary)是一个开源的计算机视觉和机器学习软件库,广泛应用于实时图像处理、视频分析、物体检测、人脸识别等领域。它由英特尔实验室于1999年发起,现已成为计算机视觉领域最流行的工具之一,支持多种编程语言(如C++、Python、Java)和操作系统(Windows、Linux、macOS、Android、iOS)。核心功能图像处理基
- 使用内置命令查看笔记本电池健康状态
jay丿
电脑单片机嵌入式硬件
如何使用powercfg/batteryreport命令查看笔记本电池健康状态在Windows系统中,了解笔记本电池的健康状态对于维护电脑性能和预测电池寿命至关重要。Windows10和Windows11系统提供了一个内置命令powercfg/batteryreport,可以生成一份详细的电池使用情况报告,帮助我们评估电池的健康状态。以下是使用此命令的详细教程:一、打开命令提示符快捷键打开:按下键
- (一文搞定)使用sd卡,往野火EBF6UL/LL-pro板子,移植官方uboot、kernel以及构建rootfs
又摆有菜
嵌入式硬件arm开发linux
0、事先声明1、我的pc是Linux操作系统,接下来的操作也都是在linux系统上的。不是windows操作系统。(如若你是win系统,可安装虚拟机,解决这个问题。此帖不讨论如何在win上安装虚拟机)。2、只在win下面使用了串口软件mobaxterm。(此操作,事先请先安装usb转串口ch340驱动)1、EBF6UL/LL-pro简介这是野火的开发版,芯片使用的nxp的imx6ull。其他不在介
- Spring 学习笔记(一)Spring两大核心技术IOC控制反转/DI依赖注入和AOP面向切面 案例 | 优化传统的Web开发 | MVC架构DAO层与Service层之间的解耦
「已注销」
#SSMSpring
文章目录参考资料运行环境一、Spring概述1.1Spring产生背景1.2两大核心技术IOC/DI+AOP二、Spring核心技术2.1IOC/DI2.1.1案例:IOC实现解耦2.1.2IOC/DI使用总结2.2AOP2.2.1案例:AOP实现日志打印2.2.2AOP使用总结:三、总结参考资料SPOC运行环境windows10IDEA2021.1专业版JDK8Spring-5.0.5一、Spr
- ubuntu系统 pycharm 卡死了,我用资源监视器将其杀死后,再打开就变成了直接卡死 且在点击Quit Windows无法关闭,只能再次杀死
不会编程的-程序猿
Ubuntu操作命令ubuntupycharmlinux
1.问题分析:ubuntu系统中pycharm意外卡死了,我用资源监视器将其杀死后,再打开就变成了直接卡死且在点击QuitWindows无法关闭此时,只能通过再次杀死Java进程来关掉,但是关掉之后,再打开还是卡死。我必须重启电脑后才能解决上述问题2.解答每次都需要重启电脑才能解决,这说明问题可能与未完全清理的进程或临时文件有关。当用户强制杀死PyCharm进程时,可能仍有后台进程残留,比如Jav
- ffmpeg拉流设置暂停_解决ffmpeg拉流转发频繁丢包问题max delay reached. need to consume packet...
weixin_39872191
ffmpeg拉流设置暂停
软件:1、流媒体服务器EasyDarwin-windows-8.1.0-19011411512、ffmpeg-20181001-dcbd89e-win64-static3、直播源:rtsp://192.168.1.168/04、流媒体服务器EasyDarwin地址rtsp://192.168.1.28/3问题现象[rtsp@0000000000122bc0]maxdelayreached.need
- PowerShell 脚本实现计算机加入AD域
winkel_wang
WindowsPowerShellwindows运维
要将Windows计算机加入ActiveDirectory(AD)域,可以使用PowerShell脚本来自动化这个过程。以下是一个示例脚本,它将计算机加入指定的AD域,并自动重启计算机以完成加入过程。PowerShell脚本示例定义变量$domainName=“yourdomain.com”#替换为你的域名$domainAdmin=“adminuser”#替换为有权限加入域的域管理员账户$doma
- Windows系统如何mount盘符到目录
winkel_wang
笔记
申明:内容取自网上,书籍,自己整理。在Windows上如何将一个文件系统分区挂载到一个目录,这其实是一个硬需求!是的,非常硬的需求。因为我们总是面临C盘,D盘满了却无法动态扩容问题。所以,在有一天我因为路上堵车撸了一个Linux上的最小的tinyfs之后,就想到顺便解决一下Windows的mount问题,并且发现了方法,就记录了下来。我以前确实不知道Windows系统也能mount文件系统分区到目
- Ollama本地私有化部署通义千问大模型Qwen2.5
ErbaoLiu
数据分析&大模型机器学习&大模型自然语言处理&大模型大模型LLMQwen2.5Qwen2Ollama
目录Qwen2.5介绍Qwen2.5新闻Ollama介绍Linux安装Ollama一键安装Ollama手工安装Ollama卸载OllamaOllama运行Qwen2基于Transformers进行推理本文复现环境:Python3.12.6+Windows8.1+LinuxCentOS7+PyCharmCommunityEdition2022.3.3。Qwen2.5github地址如下:GitHub
- 【对比】远程桌面控制软件盘点(2025年)
T-I-M
零散笔记远程控制桌面控制
远程手机连接电脑的软件可以帮助用户实现远程控制、文件传输、屏幕共享等功能。这些软件通常适用于技术支持、远程办公、设备管理等场景。以下是一些好用且常用的远程连接工具:1.向日葵(Sunlogin)特点:国内知名远程控制软件,支持跨平台操作(Windows、Mac、Linux、Android、iOS)。提供免费版和付费版,功能强大且易于使用。支持远程桌面、文件传输、远程开机(需硬件支持)等功能。内网穿
- 免费获取Parallels Desktop19中文版
牛马baby
windows
ParallelsDesktop是一款由Parallels公司开发的桌面虚拟化软件,允许用户在Mac上运行Windows和其他操作系统。ParallelsDesktop最新绿色安装包下载如下:https://pan.quark.cn/s/1a70f9ae46f3ParallelsDesktop官方安装包下载如下:https://www.parallels.cn/一、软件功能跨平台运行:通过Para
- Mac 安装 PrettyZoo 指南
黄豪宙
Mac安装PrettyZoo指南ZK客户端mac安装PrettyZoo项目地址:https://gitcode.com/Resource-Bundle-Collection/b5cf2概述PrettyZoo是一款免费开源的Zookeeper客户端工具,支持Mac、Linux和Windows平台。本指南主要介绍如何在Mac平台上安装PrettyZoo,并解决安装过程中可能遇到的安全策略问题。环境描述
- 学影刀有什么好处?为什么学习影刀?
sc0_joker
学习rpa
引言:影刀RPA,学了有用吗?公司在推广用这个软件,在让大家学,学得好可以转岗RPA专员,请问一下大家值不值得花时间学?我个人觉得如果有时间的话还是学,后期对你的帮助是巨大的我作为一名数字营销专业人士,每周需要处理大量的数据。去年,我开始寻找能够自动化Windows软件操作的工具,以提高工作效率。在尝试了多种RPA工具后,我最终选择了影刀RPA,并开始了我的自动化之旅。在寻找自动化工具的过程中,我
- 使用vim做笔记-vimtex
vimlatex
本文基本上是对HowI'mabletotakenotesinmathematicslecturesusingLaTeXandVim一文的实践操作。感谢原作者的分享。本文基础平台Windows11软件gvimSumatraPDFmiktexStrawberryperlVim插件vimtexutilsnip正文下载安装上述软件,包括gvim,SumatraPDF,miktex,Strawberrype
- 如何连接到服务器
Honeysea_70
基础知识服务器运维
连接到服务器的方法取决于你使用的操作系统和服务器的类型(如Linux服务器、Windows服务器等)。这里我提供两种常见的连接方法:通过SSH连接Linux服务器和通过RDP连接Windows服务器。1.通过SSH连接Linux服务器如果你要连接的是Linux服务器(例如Ubuntu、CentOS等),可以通过SSH协议进行连接。以下是步骤:在Linux或MacOS系统中:打开终端。使用以下命令连
- mongodb【实用教程】
朝阳39
#数据库mongodb数据库
MongoDB是一个开源的文档型数据库管理系统下载安装Windows系统https://blog.csdn.net/weixin_41192489/article/details/126777309GUI工具【推荐】MongoDBCompasshttps://www.mongodb.com/zh-cn/docs/compass/current/Robo3Thttps://blog.csdn.net
- 为什么选择Linux而放弃windows,比较Windows和Mac它出色的优势在哪儿?
MAX在码字
程序人生程序员LinuxWindowsMac
前言:MacOS全封闭,只支持自家硬件,设计风格和使用体验比较独特;Windows半封闭,虽然源码不开放,但适配市面上几乎所有的x86机器,Windows和各家硬件厂商总体是合作共建生态圈,从市场份额看,Windows是个人电脑桌面操作系统的霸主;Linux内核开放、开源,可以基于Linux内核开发一系列各种各样的操作系统(其中最著名的是Android系统),支持x86、ARM等各种硬件,是目前嵌
- 使用linux抛弃Windows,抛弃Windows选Linux?这些原因告诉你为何要这么做
e o
本文由腾讯数码独家发布不想再用Windows系统了?如果你安装了Windows7(微软将于2020年1月14日停止对Windows7的支持),然后之后又不想再用Windows系统,那么你面前有两个选择。要么有闲钱换一台苹果设备,否则除了Linux操作系统之外,没有多少其他的操作系统可供选择。有些人可能会说如果更换操作系统的话还要去花时间适应新的操作系统,很麻烦。的确虽然在更换系统时可能会遇到不适应
- linux c和windows c,windows C 与 linux C区别?
冷承志
linuxc和windowsc
windowsC库格式为.dll(动态链接库英文为DLL,是DynamicLinkLibrary的缩写形式,DLL是一个包含可由多个程序同时使用的代码和数据的库,DLL不是可执行文件)。生成的*.exe。linuxC库格式为.so(.so为共享库:动态库(sharedlibrary/sharedobject/dynamiclinklibrary)。生成*elf(LinuxELFELF=Execut
- 一文搞懂!不同笔记本 SSH 远程连接服务器全攻略
a小胡哦
ssh服务器运维
在如今数字化办公和开发的大环境下,使用SSH远程连接服务器是很多技术人员必备技能。无论是MacBook、Windows笔记本还是Linux系统的笔记本,掌握SSH远程连接,都能极大提升工作效率。本文将详细介绍不同笔记本使用SSH远程连接服务器的用处、优点以及实用技巧,特别是在数据传输方面。一、SSH远程连接服务器的用处(一)远程管理与操作无需直接在服务器物理终端上操作,通过SSH可以在世界任何角落
- 程序员如何选择操作系统 Mac、Windows还是Linux
开发者每周简报
windowslinuxmac
曾几何时,有一位程序员站在科技的十字路口,面临着职业生涯中最重要的决定:选择哪一个操作系统——Mac、Windows还是Linux。每一个选择都将带来截然不同的后果。程序员知道,选择Windows意味着加入庞大的“Windows集体”,一个由公司控制的用户群体。只要点击“同意”条款,自己便成为了微软计划的一部分。而打开那台崭新的MacBook,表面上看似美好,但实际上是无意识地加入了“苹果教派”,
- Windows 基础(一):深入理解Windows,掌握命令行与Shell
vortex5
星河飞雪windows基础知识终端shell命令行
内容预览≧∀≦ゞWindows基础(一)声明导语一、Windows和Linux的区别二、Windows的ShellShell和终端的区别1.命令提示符(CMD)2.WindowsPowerShell3.WindowsTerminal4.WindowsSubsystemforLinux(WSL)三、Windows常用命令1.文件与目录操作2.文本处理3.系统与网络管理结语Windows基础(一)声明
- redis学习笔记——不仅仅是存取数据
Everyday都不同
returnSourceexpire/delincr/lpush数据库分区redis
最近项目中用到比较多redis,感觉之前对它一直局限于get/set数据的层面。其实作为一个强大的NoSql数据库产品,如果好好利用它,会带来很多意想不到的效果。(因为我搞java,所以就从jedis的角度来补充一点东西吧。PS:不一定全,只是个人理解,不喜勿喷)
1、关于JedisPool.returnSource(Jedis jeids)
这个方法是从red
- SQL性能优化-持续更新中。。。。。。
atongyeye
oraclesql
1 通过ROWID访问表--索引
你可以采用基于ROWID的访问方式情况,提高访问表的效率, , ROWID包含了表中记录的物理位置信息..ORACLE采用索引(INDEX)实现了数据和存放数据的物理位置(ROWID)之间的联系. 通常索引提供了快速访问ROWID的方法,因此那些基于索引列的查询就可以得到性能上的提高.
2 共享SQL语句--相同的sql放入缓存
3 选择最有效率的表
- [JAVA语言]JAVA虚拟机对底层硬件的操控还不完善
comsci
JAVA虚拟机
如果我们用汇编语言编写一个直接读写CPU寄存器的代码段,然后利用这个代码段去控制被操作系统屏蔽的硬件资源,这对于JVM虚拟机显然是不合法的,对操作系统来讲,这样也是不合法的,但是如果是一个工程项目的确需要这样做,合同已经签了,我们又不能够这样做,怎么办呢? 那么一个精通汇编语言的那种X客,是否在这个时候就会发生某种至关重要的作用呢?
&n
- lvs- real
男人50
LVS
#!/bin/bash
#
# Script to start LVS DR real server.
# description: LVS DR real server
#
#. /etc/rc.d/init.d/functions
VIP=10.10.6.252
host='/bin/hostname'
case "$1" in
sta
- 生成公钥和私钥
oloz
DSA安全加密
package com.msserver.core.util;
import java.security.KeyPair;
import java.security.PrivateKey;
import java.security.PublicKey;
import java.security.SecureRandom;
public class SecurityUtil {
- UIView 中加入的cocos2d,背景透明
374016526
cocos2dglClearColor
要点是首先pixelFormat:kEAGLColorFormatRGBA8,必须有alpha层才能透明。然后view设置为透明glView.opaque = NO;[director setOpenGLView:glView];[self.viewController.view setBackgroundColor:[UIColor clearColor]];[self.viewControll
- mysql常用命令
香水浓
mysql
连接数据库
mysql -u troy -ptroy
备份表
mysqldump -u troy -ptroy mm_database mm_user_tbl > user.sql
恢复表(与恢复数据库命令相同)
mysql -u troy -ptroy mm_database < user.sql
备份数据库
mysqldump -u troy -ptroy
- 我的架构经验系列文章 - 后端架构 - 系统层面
agevs
JavaScriptjquerycsshtml5
系统层面:
高可用性
所谓高可用性也就是通过避免单独故障加上快速故障转移实现一旦某台物理服务器出现故障能实现故障快速恢复。一般来说,可以采用两种方式,如果可以做业务可以做负载均衡则通过负载均衡实现集群,然后针对每一台服务器进行监控,一旦发生故障则从集群中移除;如果业务只能有单点入口那么可以通过实现Standby机加上虚拟IP机制,实现Active机在出现故障之后虚拟IP转移到Standby的快速
- 利用ant进行远程tomcat部署
aijuans
tomcat
在javaEE项目中,需要将工程部署到远程服务器上,如果部署的频率比较高,手动部署的方式就比较麻烦,可以利用Ant工具实现快捷的部署。这篇博文详细介绍了ant配置的步骤(http://www.cnblogs.com/GloriousOnion/archive/2012/12/18/2822817.html),但是在tomcat7以上不适用,需要修改配置,具体如下:
1.配置tomcat的用户角色
- 获取复利总收入
baalwolf
获取
public static void main(String args[]){
int money=200;
int year=1;
double rate=0.1;
&
- eclipse.ini解释
BigBird2012
eclipse
大多数java开发者使用的都是eclipse,今天感兴趣去eclipse官网搜了一下eclipse.ini的配置,供大家参考,我会把关键的部分给大家用中文解释一下。还是推荐有问题不会直接搜谷歌,看官方文档,这样我们会知道问题的真面目是什么,对问题也有一个全面清晰的认识。
Overview
1、Eclipse.ini的作用
Eclipse startup is controlled by th
- AngularJS实现分页功能
bijian1013
JavaScriptAngularJS分页
对于大多数web应用来说显示项目列表是一种很常见的任务。通常情况下,我们的数据会比较多,无法很好地显示在单个页面中。在这种情况下,我们需要把数据以页的方式来展示,同时带有转到上一页和下一页的功能。既然在整个应用中这是一种很常见的需求,那么把这一功能抽象成一个通用的、可复用的分页(Paginator)服务是很有意义的。
&nbs
- [Maven学习笔记三]Maven archetype
bit1129
ArcheType
archetype的英文意思是原型,Maven archetype表示创建Maven模块的模版,比如创建web项目,创建Spring项目等等.
mvn archetype提供了一种命令行交互式创建Maven项目或者模块的方式,
mvn archetype
1.在LearnMaven-ch03目录下,执行命令mvn archetype:gener
- 【Java命令三】jps
bit1129
Java命令
jps很简单,用于显示当前运行的Java进程,也可以连接到远程服务器去查看
[hadoop@hadoop bin]$ jps -help
usage: jps [-help]
jps [-q] [-mlvV] [<hostid>]
Definitions:
<hostid>: <hostname>[:
- ZABBIX2.2 2.4 等各版本之间的兼容性
ronin47
zabbix更新很快,从2009年到现在已经更新多个版本,为了使用更多zabbix的新特性,随之而来的便是升级版本,zabbix版本兼容性是必须优先考虑的一点 客户端AGENT兼容
zabbix1.x到zabbix2.x的所有agent都兼容zabbix server2.4:如果你升级zabbix server,客户端是可以不做任何改变,除非你想使用agent的一些新特性。 Zabbix代理(p
- unity 3d还是cocos2dx哪个适合游戏?
brotherlamp
unity自学unity教程unity视频unity资料unity
unity 3d还是cocos2dx哪个适合游戏?
问:unity 3d还是cocos2dx哪个适合游戏?
答:首先目前来看unity视频教程因为是3d引擎,目前对2d支持并不完善,unity 3d 目前做2d普遍两种思路,一种是正交相机,3d画面2d视角,另一种是通过一些插件,动态创建mesh来绘制图形单元目前用的较多的是2d toolkit,ex2d,smooth moves,sm2,
- 百度笔试题:一个已经排序好的很大的数组,现在给它划分成m段,每段长度不定,段长最长为k,然后段内打乱顺序,请设计一个算法对其进行重新排序
bylijinnan
java算法面试百度招聘
import java.util.Arrays;
/**
* 最早是在陈利人老师的微博看到这道题:
* #面试题#An array with n elements which is K most sorted,就是每个element的初始位置和它最终的排序后的位置的距离不超过常数K
* 设计一个排序算法。It should be faster than O(n*lgn)。
- 获取checkbox复选框的值
chiangfai
checkbox
<title>CheckBox</title>
<script type = "text/javascript">
doGetVal: function doGetVal()
{
//var fruitName = document.getElementById("apple").value;//根据
- MySQLdb用户指南
chenchao051
mysqldb
原网页被墙,放这里备用。 MySQLdb User's Guide
Contents
Introduction
Installation
_mysql
MySQL C API translation
MySQL C API function mapping
Some _mysql examples
MySQLdb
- HIVE 窗口及分析函数
daizj
hive窗口函数分析函数
窗口函数应用场景:
(1)用于分区排序
(2)动态Group By
(3)Top N
(4)累计计算
(5)层次查询
一、分析函数
用于等级、百分点、n分片等。
函数 说明
RANK() &nbs
- PHP ZipArchive 实现压缩解压Zip文件
dcj3sjt126com
PHPzip
PHP ZipArchive 是PHP自带的扩展类,可以轻松实现ZIP文件的压缩和解压,使用前首先要确保PHP ZIP 扩展已经开启,具体开启方法就不说了,不同的平台开启PHP扩增的方法网上都有,如有疑问欢迎交流。这里整理一下常用的示例供参考。
一、解压缩zip文件 01 02 03 04 05 06 07 08 09 10 11
- 精彩英语贺词
dcj3sjt126com
英语
I'm always here
我会一直在这里支持你
&nb
- 基于Java注解的Spring的IoC功能
e200702084
javaspringbeanIOCOffice
- java模拟post请求
geeksun
java
一般API接收客户端(比如网页、APP或其他应用服务)的请求,但在测试时需要模拟来自外界的请求,经探索,使用HttpComponentshttpClient可模拟Post提交请求。 此处用HttpComponents的httpclient来完成使命。
import org.apache.http.HttpEntity ;
import org.apache.http.HttpRespon
- Swift语法之 ---- ?和!区别
hongtoushizi
?swift!
转载自: http://blog.sina.com.cn/s/blog_71715bf80102ux3v.html
Swift语言使用var定义变量,但和别的语言不同,Swift里不会自动给变量赋初始值,也就是说变量不会有默认值,所以要求使用变量之前必须要对其初始化。如果在使用变量之前不进行初始化就会报错:
var stringValue : String
//
- centos7安装jdk1.7
jisonami
jdkcentos
安装JDK1.7
步骤1、解压tar包在当前目录
[root@localhost usr]#tar -xzvf jdk-7u75-linux-x64.tar.gz
步骤2:配置环境变量
在etc/profile文件下添加
export JAVA_HOME=/usr/java/jdk1.7.0_75
export CLASSPATH=/usr/java/jdk1.7.0_75/lib
- 数据源架构模式之数据映射器
home198979
PHP架构数据映射器datamapper
前面分别介绍了数据源架构模式之表数据入口、数据源架构模式之行和数据入口数据源架构模式之活动记录,相较于这三种数据源架构模式,数据映射器显得更加“高大上”。
一、概念
数据映射器(Data Mapper):在保持对象和数据库(以及映射器本身)彼此独立的情况下,在二者之间移动数据的一个映射器层。概念永远都是抽象的,简单的说,数据映射器就是一个负责将数据映射到对象的类数据。
&nb
- 在Python中使用MYSQL
pda158
mysqlpython
缘由 近期在折腾一个小东西须要抓取网上的页面。然后进行解析。将结果放到
数据库中。 了解到
Python在这方面有优势,便选用之。 由于我有台
server上面安装有
mysql,自然使用之。在进行数据库的这个操作过程中遇到了不少问题,这里
记录一下,大家共勉。
python中mysql的调用
百度之后能够通过MySQLdb进行数据库操作。
- 单例模式
hxl1988_0311
java单例设计模式单件
package com.sosop.designpattern.singleton;
/*
* 单件模式:保证一个类必须只有一个实例,并提供全局的访问点
*
* 所以单例模式必须有私有的构造器,没有私有构造器根本不用谈单件
*
* 必须考虑到并发情况下创建了多个实例对象
* */
/**
* 虽然有锁,但是只在第一次创建对象的时候加锁,并发时不会存在效率
- 27种迹象显示你应该辞掉程序员的工作
vipshichg
工作
1、你仍然在等待老板在2010年答应的要提拔你的暗示。 2、你的上级近10年没有开发过任何代码。 3、老板假装懂你说的这些技术,但实际上他完全不知道你在说什么。 4、你干完的项目6个月后才部署到现场服务器上。 5、时不时的,老板在检查你刚刚完成的工作时,要求按新想法重新开发。 6、而最终这个软件只有12个用户。 7、时间全浪费在办公室政治中,而不是用在开发好的软件上。 8、部署前5分钟才开始测试。


