整合Mybatis分为两种模式,一种是xml配置,一种是注解。(类似JPA)
我在这里重点放在xml配置上,因为如果想用注解的话,建议直接用jpa代替,因为Jpa有更成熟的CRUD接口更方便开发。我在后文中也会把注解方式说清楚。
大概介绍下流程:
- 借助idea实现mybatis逆向工程
- 用xml配置实现整合
- 用cmd命令行实现mybatis逆向工程
- 用mapping.xml配置实现数据交互
- 用注解的方式实现数据交互
首先我的开发环境:
jdk1.8+maven3+IDEA
1. mybatis逆向攻城
逆向工程方式很多,我目前接触到的就两种,一种是借助于ide开发工具,一种是在cmd中执行命令。(其实二者原理都一样,都是执行maven的generator命令,具体请看下文)。
1. 完善pom文件
    4.0.0

    springboot-mybatis
    springboot-mybatis
    0.0.1-SNAPSHOT
    jar

    springboot-mybatis
    Demo project for Spring Boot


        springboot-integration
        springboot-integration
        1.0-SNAPSHOT


            org.springframework.boot
            spring-boot-starter-jdbc


            org.mybatis.spring.boot
            mybatis-spring-boot-starter
            1.3.0


            org.springframework.boot
            spring-boot-starter-thymeleaf


            org.springframework.boot
            spring-boot-starter-web


            org.springframework.boot
            spring-boot-starter-test
            test


            mysql
            mysql-connector-java
            5.1.35


            com.alibaba
            druid
            1.0.11


            com.alibaba
            druid-spring-boot-starter
            1.1.0


            junit
            junit
            test


            com.github.pagehelper
            pagehelper
            5.0.4


        springboot-mybatis


                org.apache.maven.plugins
                maven-surefire-plugin

                    true


                org.mybatis.generator
                mybatis-generator-maven-plugin
                1.3.2

                    true
                    true
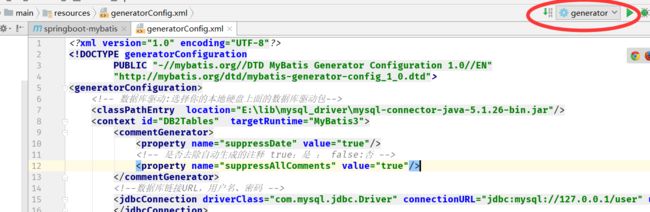
2. 逆向所需配置文件generatorConfig.xml
3. 利用IDE创建逆向工程启动类
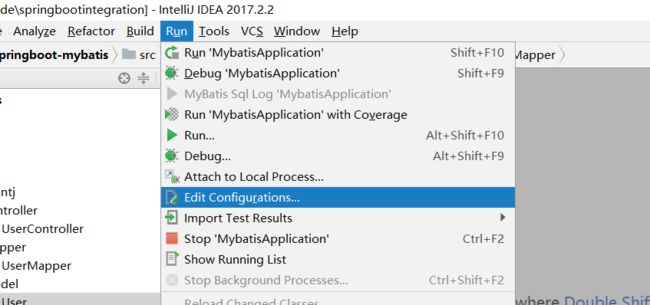
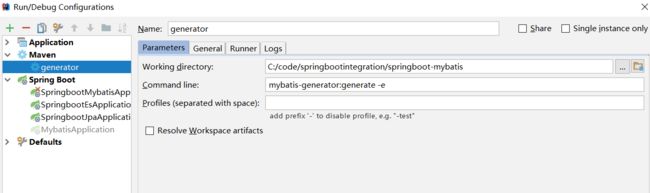
4. add一个Maven configuration
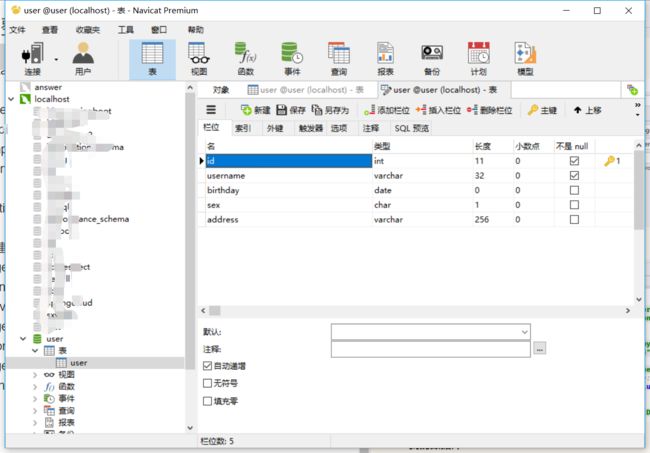
5. 我的数据库和表结构
6. application配置文件
server:
  port: 8080

spring:
  datasource:
    name: test
    url: jdbc:mysql://127.0.0.1:3306/user
    username: root
    password: root
    # druid 连接池
    type: com.alibaba.druid.pool.DruidDataSource
    driver-class-name: com.mysql.jdbc.Driver
    filters: stat
    maxActive: 20
    initialSize: 1
    maxWait: 60000
    minIdle: 1
    timeBetweenEvictionRunsMillis: 60000
    minEvictableIdleTimeMillis: 300000
    validationQuery: select 'x'
    testWhileIdle: true
    testOnBorrow: false
    testOnReturn: false
    poolPreparedStatements: true
    maxOpenPreparedStatements: 20

mybatis:
  mapper-locations: classpath:mapping/*.xml
  type-aliases-package: com.fant.model

#pagehelper分页插件
pagehelper:
    helperDialect: mysql
    reasonable: true
    supportMethodsArguments: true
    params: count=countSql
运行generator工程 自动生成代码
生成的文件
User.java
package com.fantj.model;

import java.util.Date;

public class User {
    private Integer id;

    private String username;

    private Date birthday;

    private String sex;

    private String address;

    public Integer getId() {
        return id;
    }

    public void setId(Integer id) {
        this.id = id;
    }

    public String getUsername() {
        return username;
    }

    public void setUsername(String username) {
        this.username = username == null ? null : username.trim();
    }

    public Date getBirthday() {
        return birthday;
    }

    public void setBirthday(Date birthday) {
        this.birthday = birthday;
    }

    public String getSex() {
        return sex;
    }

    public void setSex(String sex) {
        this.sex = sex == null ? null : sex.trim();
    }

    public String getAddress() {
        return address;
    }

    public void setAddress(String address) {
        this.address = address == null ? null : address.trim();
    }
}
UserMapper .java
package com.fantj.mapper;

import com.fantj.model.User;

import java.util.List;

public interface UserMapper {
    int deleteByPrimaryKey(Integer id);

    int insert(User record);

    int insertSelective(User record);

    User selectByPrimaryKey(Integer id);

    int updateByPrimaryKeySelective(User record);

    int updateByPrimaryKey(User record);

    List selectAll();
}
UserMapper.xml
id, username, birthday, sex, address
delete from user
where id = #{id,jdbcType=INTEGER}
insert into user (id, username, birthday,
sex, address)
values (#{id,jdbcType=INTEGER}, #{username,jdbcType=VARCHAR}, #{birthday,jdbcType=DATE},
#{sex,jdbcType=CHAR}, #{address,jdbcType=VARCHAR})
insert into user
id,
username,
birthday,
sex,
address,
#{id,jdbcType=INTEGER},
#{username,jdbcType=VARCHAR},
#{birthday,jdbcType=DATE},
#{sex,jdbcType=CHAR},
#{address,jdbcType=VARCHAR},
update user
username = #{username,jdbcType=VARCHAR},
birthday = #{birthday,jdbcType=DATE},
sex = #{sex,jdbcType=CHAR},
address = #{address,jdbcType=VARCHAR},
where id = #{id,jdbcType=INTEGER}
update user
set username = #{username,jdbcType=VARCHAR},
birthday = #{birthday,jdbcType=DATE},
sex = #{sex,jdbcType=CHAR},
address = #{address,jdbcType=VARCHAR}
where id = #{id,jdbcType=INTEGER}
修改启动类
逆向生成代码后,我们还需要在启动类上添加一个@MapperScan("com.fantj.mapper")注解,告诉我们的Mapper需要扫描的包,这样就不用每个Mapper上都添加@Mapper注解了。
@SpringBootApplication
@MapperScan("com.fantj.mapper")
public class MybatisApplication {

    public static void main(String[] args) {
        SpringApplication.run(MybatisApplication.class, args);
    }

}
完善controller和service
UserController.java
@RestController
@RequestMapping("/user")
public class UserController {

    @Autowired
    private UserService userService;

    @RequestMapping(method = RequestMethod.GET,value = "/delete/{id}")
    public void delete(@PathVariable("id")int id){
        userService.delete(id);
    }

    @RequestMapping(method = RequestMethod.POST,value = "/insert")
    public void insert(User user){
        userService.insert(user);
    }
    @RequestMapping(method = RequestMethod.POST,value = "/update/{id}")
    public void update(@RequestParam User user){
        userService.update(user);
    }

    @RequestMapping(method = RequestMethod.GET,value = "/{id}/select")
    public User select(@PathVariable("id")int id){
        return userService.selectById(id);
    }

    @RequestMapping(method = RequestMethod.GET,value = "/selectAll/{pageNum}/{pageSize}")
    public List selectAll(@PathVariable("pageNum") int pageNum, @PathVariable("pageSize") int pageSize){
        return userService.selectAll(pageNum,pageSize);
    }

}
UserService.java
package com.fantj.service;

import com.fantj.model.User;

import java.util.List;

public interface UserService {
    /** 删除 */
    public void delete(int id);
    /** 增加*/
    public void insert(User user);
    /** 更新*/
    public int update(User user);
    /** 查询单个*/
    public User selectById(int id);
    /** 查询全部列表*/
    public List selectAll(int pageNum, int pageSize);
}
UserServiceImpl .java
@Service
public class UserServiceImpl implements UserService {

    @Autowired
    private UserMapper userMapper;

    /**
     * 删除
     *
     * @param id
     */
    @Override
    public void delete(int id) {
        userMapper.deleteByPrimaryKey(id);
    }

    /**
     * 增加
     *
     * @param user
     */
    @Override
    public void insert(User user) {
        userMapper.insert(user);
    }

    /**
     * 更新
     *
     * @param user
     */
    @Override
    public int update(User user) {
        return userMapper.updateByPrimaryKey(user);
    }

    /**
     * 查询单个
     *
     * @param id
     */
    @Override
    public User selectById(int id) {
        return userMapper.selectByPrimaryKey(id);
    }

    /**
     * 查询全部列表,并做分页
     *
     * @param pageNum 开始页数
     * @param pageSize 每页显示的数据条数
     */
    @Override
    public List selectAll(int pageNum, int pageSize) {
        //将参数传给这个方法就可以实现物理分页了,非常简单。
        PageHelper.startPage(pageNum,pageSize);
        return userMapper.selectAll();
    }
}
浏览器访问127.0.0.1/user/selectAll/0/1
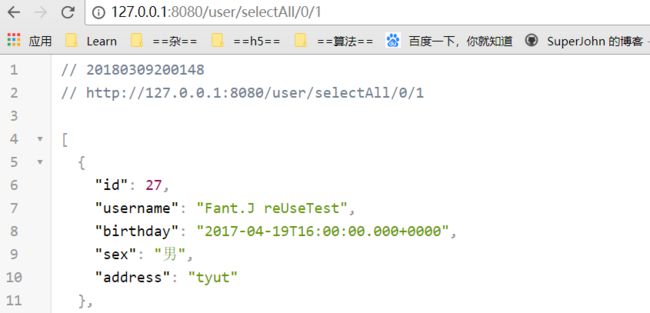
说明我们成功了。
一个小甜点
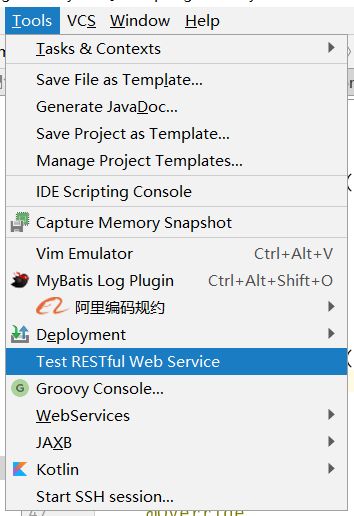
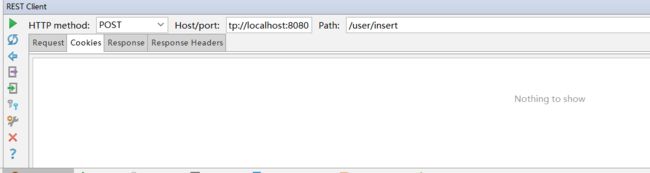
有人问,get方法可以直接从浏览器地址中的url来测试,那post请求怎么测试呢?
个人建议用postman工具,也可以写测试类用代码来完成测试。也可以使用idea的一个测试工具Test RESTful Web Service
注解方式
好了,配置方式我们介绍完了,我在这里稍微聊一聊注解开发方式,个人建议如果想用注解开发,直接用jpa,可以更方便自己的开发。
mybatis java api :http://www.mybatis.org/mybatis-3/zh/java-api.html
UserMapper.java
package com.fantj.mapper;

import com.fantj.model.User;
import org.apache.ibatis.annotations.*;

import java.util.List;

public interface UserMapper {
    /*int deleteByPrimaryKey(Integer id);

    int insert(User record);

    int insertSelective(User record);

    User selectByPrimaryKey(Integer id);

    int updateByPrimaryKeySelective(User record);

    int updateByPrimaryKey(User record);

    List selectAll();*/
    //如果实例对象中的属性名和数据表中字段名不一致,用@Result注解进行说明映射关系,我在这里只是告诉你怎么写
    @Select("SELECT * FROM user")
    @Results({
            @Result(property = "username", column = "username"),
            @Result(property = "sex",  column = "sex"),
            @Result(property = "address",column = "address")
    })
    List selectAll();

    @Select("SELECT * FROM user WHERE id = #{id}")
    @Results({
            @Result(property = "sex",  column = "sex"),
            @Result(property = "username", column = "username")
    })
    User selectByPrimaryKey(int id);

    @Insert({"INSERT INTO user(username,birthday,sex,address}) VALUES(#{userName}, #{birthday}, #{sex},#{address})"})
    void insert(User user);

    @Update("UPDATE user SET userName=#{userName} WHERE id =#{id}")
    int updateByPrimaryKey(User user);

    @Delete("DELETE FROM user WHERE id =#{id}")
    int deleteByPrimaryKey(int id);
}
注解的一些解释
- @Select 是查询类的注解,所有的查询均使用这个
- @Result 修饰返回的结果集,关联实体类属性和数据库字段一一对应,如果实体类* 属性和数据库属性名保持一致,就不需要这个属性来修饰。
- @Insert 插入数据库使用,直接传入实体类会自动解析属性到对应的值
- @Update 负责修改,也可以直接传入对象
- @delete 负责删除
注意将application配置文件中的mybatis.mapper-locations:属性注视掉再启动项目。否则它会报错:Mapped Statements collection already contains value for com.fantj.mapper.UserMapper.insert 。意思是mapper中方法重复。
最后一个甜点
还有一个东西忘说了 -.-,就是用cmd来逆向生成代码。
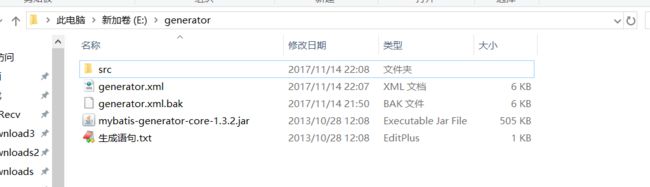
声称语句
java -jar mybatis-generator-core-1.3.2.jar -configfile generator.xml -overwrite
src目录请忽略,这是生成的目录。
好了 干货都分享了,谢谢大家。0.0