window.history路由及在react-router-dom中的使用
首先来看history暴露出属性和方法(以下图来自MDN)

以及谷歌浏览器的history输出,可以看到History的构造方法和原型对象
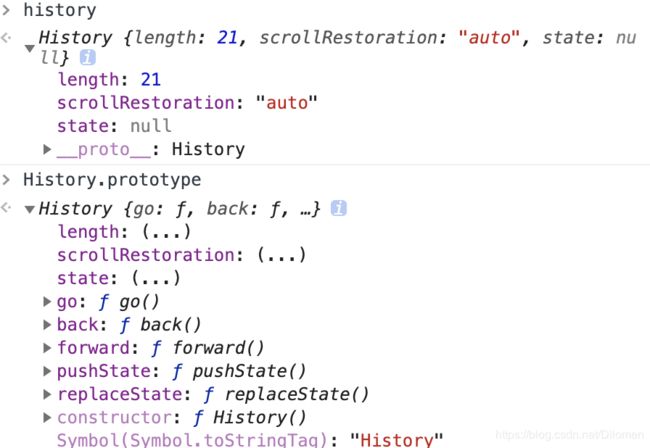
属性:
| length | 当前窗口的浏览路径数量 |
| scrollRestoration | 设置默认的滚动恢复行为, 可选值 "auto" || "manual", 前者进入页面还会停到之前的滚动位置,后者会重置滚动位置到顶端 |
| state | 传递的状态,可以通过pushState和repalceState进行传值 |
方法:
| go | 跳转到摸个历史页面 |
| back | 跳转到前一个页面 |
| forward | 前进到下一个页面 |
| pushState | 添加路由 |
| replaceState | 替换路由 |
单页面作为路由跳转可以通过hash路由和history路由实现
hash路由:
- vue:mode:hash
- react:
首先加入以下代码,就可以通过onhashchange事件来监听路由hash的变化
window.onhashchange = () => {
    console.log(window.location.hash)
}
当我们在url后加了#xxx的时候,控制台也输出了相应的hash值


history路由:
- vue:mode:history
- react:
pushState:添加状态
前两者可以不写,第一个是传的是state, 可以是各种类型,第二个参数由于不怎么支持,所以一般传null,主要是第三个参数,作为跳转的路由
history.pushState("test", null, "/3333");这样就可以在页面不发生刷新的情况下,跳转路由
replaceState:也可以页面不发生刷新的情况下替换状态
// 和pushState参数一致
history.replaceState(null, null, "/4444")
也可以通过第一个参数作为传参
window.history.replaceState({a:1}, '', '/b')我们就可以在切换后路径下的history找到传参内容

onpopstate:监听路由变化
window.onpopstate = () => {console.log(window.location.pathname)}pushState, replaceState会改变当前路径,但是他不会导致单页面的重新渲染,我们所使用时,页面的渲染是由react或vue中的Router中监听了路由的变化
// 监听路由变化
this.unlisten = props.history.listen(location => {
  if (this._isMounted) {
      this.setState({ location });
  } else {
      this._pendingLocation = location;
  }
});
// 以下就是Route在当路由发生变化时做的渲染
{props.match
  ? children
    ? typeof children === "function"
      ? __DEV__
        ? evalChildrenDev(children, props, this.props.path)
        : children(props)
      : children
    : component
    ? React.createElement(component, props)
    : render
    ? render(props)
    : null
  : typeof children === "function"
  ? __DEV__
    ? evalChildrenDev(children, props, this.props.path)
    : children(props)
  : null}
react-router-dom:源码地址(https://github.com/ReactTraining/react-router)
当我们需要在react项目中进行路由操作时,我们需要使用withRouter将组件包裹,这样我们就可以从props中取到history对象
首先找到源码中的withRouter.js (packages/react-router/modules/withRouter.js), 可以看出这是一个高阶组件,就是给我们的组件套了一个装饰器,而这里我们只需要知道context里面一定有我们需要的history对象
...
{context => {
invariant(
context,
`You should not use <${displayName} /> outside a `
);
return (
...而这个context从invariant方法来看,就可以知道它的路由必须被Router包裹,从而我们可以想到BrowerRouter和HashRouter
查看BrowserRouter和HashRouter (packages/react-router-dom/modules/BrowserRouter.js | HashRouter.js) , 都找到了以下代码,说明history对象确实是这里传递下去的
history = createHistory(this.props);
render() {
return 由于这里使用到了Router组件,然后我们在接着找到Router.js (packages/react-router/modules/Router.js),“真相”更加清晰了
上图可以看到向下传递了history,location,match,staticContext,而这真是我们所取到的内容

???context不是对下面的所有组件生效吗?那为什么不加withRouter就不能拿到history对象呢?
// 首先这是我们平时使用的用法
再看Router.js,发现match和location只是对history的数据进行处理,当然他们也有相应的作用
// location
this.state = {
  location: props.history.location
};

// match
match: Router.computeRootMatch(this.state.location.pathname)
static computeRootMatch(pathname) {
    return { path: "/", url: "/", params: {}, isExact: pathname === "/" };
}
可以看到在Router中,我们会传入Route的组件作为children,所以我们来看Route.js (packages/react-router/modules/Route.js)
   {props.match
      ? children
         ? typeof children === "function"
            ? __DEV__
            ? evalChildrenDev(children, props, this.props.path)
         : ...}
一堆的三元运算符,还好一般情况,我们第一层就出去了,所以只渲染了组件,并没有赋值context,所以我们取不到context中history对象了
而withRouter恰恰就是为组件做了一层装饰器,将context赋值给组件,所以我们就可以取到了
{context => {
...
return (
还是回到history!!!
从BrowserRouter.js和HashRouter.js文件中可以看到,history对象是由history插件生成的
// BrowserRouter.js
import { createBrowserHistory as createHistory } from "history";
history = createHistory(this.props);

// 用于createHistory传入的配置对象参数,也说明了这个配置是有父级传递的,而不是BrowserRouter自身的
BrowserRouter.propTypes = {
   basename: PropTypes.string,
   children: PropTypes.node,
   forceRefresh: PropTypes.bool,
   getUserConfirmation: PropTypes.func,
   keyLength: PropTypes.number
};

// HashRouter.js
import { createHashHistory as createHistory } from "history";
history = createHistory(this.props);

// 用于createHistory传入的配置对象参数
HashRouter.propTypes = {
   basename: PropTypes.string,
   children: PropTypes.node,
   getUserConfirmation: PropTypes.func,
   hashType: PropTypes.oneOf(["hashbang", "noslash", "slash"])
};
history插件
源码: https://github.com/ReactTraining/history
文档: https://github.com/ReactTraining/history/blob/3f69f9e07b0a739419704cffc3b3563133281548/docs/GettingStarted.md
基本使用:
npm install --save history

import { createBrowserHistory } from 'history';

createBrowserHistory({
    basename: '', // 基链接
    forceRefresh: false, // 是否强制刷新整个页面
    keyLength: 6, // location.key的长度
    getUserConfirmation: (message,callback) => callback(window.confirm(message)) // 跳转拦截函数
})

// 返回的方法是卸载监听
const unlisten = history.listen(myListener);

unlisten();
接着我们看到history暴露出来的api,由于本文是讲history的,所以只看
createBrowserHistory.js (/modules/createBrowserHistory.js)
  const history = {
    length: globalHistory.length,
    action: 'POP',
    location: initialLocation,
    createHref,
    push,
    replace,
    go,
    goBack,
    goForward,
    block,
    listen
  };
首先length,go,goBack,goForward不用说,完全就是原生history.go实现的
const globalHistory = window.history;
history.length = globalHistory.length;
function go(n) {
  globalHistory.go(n);
}
function goBack() {
  go(-1);
}
function goForward() {
  go(1);
}
push方法
function push(path, state) {
   ...
   // 如果当前环境支持window.history,那么就直接使用原生history的pushState方法
   if (canUseHistory) {
     globalHistory.pushState({ key, state }, null, href);
     // 如果需要刷新当前页面,就直接将当前的location的href重新赋值一遍
     if (forceRefresh) {
        window.location.href = href;
     }
     ...
     }
  );
}
replace方法
function replace(path, state) {
    // 和push一致,也是判断使用原生replace还是
    ...
    if (canUseHistory) {
      globalHistory.replaceState({ key, state }, null, href);
      if (forceRefresh) {
      window.location.replace(href);
    }
    ...
  }
);
listen方法
// 就是使用onpopstate事件

const PopStateEvent = 'popstate';

function listen(listener) {
  const unlisten = transitionManager.appendListener(listener);
  checkDOMListeners(1);

  return () => {
    checkDOMListeners(-1);
    unlisten();
  };
}

function checkDOMListeners(delta) {
  listenerCount += delta;
  if (listenerCount === 1 && delta === 1) {
    window.addEventListener(PopStateEvent, handlePopState);
    ...
  } else if (listenerCount === 0) {
    window.removeEventListener(PopStateEvent, handlePopState);
    ...
  }
}