使用netty实现聊天功能
前言
学习Java总是离不开网络编程的,真是觉得越学习越发现自己很菜,不会的东西还很多,该学习的东西还很多,我的学习就是靠网上各位大佬分享的博客,还有找一些免费视频,当然也会去图书馆借一些书,废话不多说,就歇一歇最近学习的netty框架吧
netty是什么
我所理解的netty,就是一个比较底层的网络编程的框架,它和tomcat的区别是什么呢?就是tomcat是一个已经封装好的容器,你可以直接使用,而netty是可以写出像tomcat这种容器的。而且tomcat支持的网络协议是http,但是使用netty,可以写出支持任何协议的容易。当然,由于我现在只是初雪,所以还没有学的那么深,就只是使用netty实现简单的功能而已。网上很多大神对netty的分析都很深入很到位,优点也说了很多,简单来说,就是使用netty就可以实现性能好,高并发量的功能,他是NIO的封装,总结就是:零拷贝,同意的IO,可拓展的时间模型。其他很多特点可以直接通过官网来了解。下面就是直接上实例了。
netty所需要的环境
这个环境很简单,不需要下载什么插件,只要一个jar包,如果是使用maven工程,可以直接在pom.xml中添加以下jar包:
    io.netty
    netty-all
    5.0.0.Alpha2
或者去maven仓库下载其他版本的也可以,但是我志气啊用的是4点多版本的,在编码的时候会发现有点错误,所以这里还是使用了5的。
实例
实现聊天室功能需要有服务器端和客户端,先写服务器端。
1.服务器端要创建两个EventLoopGroup监听线程组,一个监听客户请求,一个来处理数据
2.然后要创建一个服务器端ServerBootstrap对象,实现配置信息
3.初始化过程,初始化过程就是绑定线程组,设置NIO的通讯模式,设置缓冲区大小,还有实现处理对象
4.上面说到了处理对象,这时候就要创建一个handler来处理需求了,包括接受数据,发送数据等等
代码如下;
package nettyTest1.nettyTest1;
import java.io.UnsupportedEncodingException;
import io.netty.bootstrap.ServerBootstrap;
import io.netty.channel.ChannelFuture;
import io.netty.channel.ChannelHandler;
import io.netty.channel.ChannelInitializer;
import io.netty.channel.ChannelOption;
import io.netty.channel.EventLoopGroup;
import io.netty.channel.nio.NioEventLoopGroup;
import io.netty.channel.socket.SocketChannel;
import io.netty.channel.socket.nio.NioServerSocketChannel;

public class ServerHelloWorld {
	//监听线程组,监听客户端请求
private EventLoopGroup acceptorGroup=null;
//处理客户端相关操作线程组,负责处理与客户端的数据通讯
private EventLoopGroup clientGroup=null;
//服务启动先关配置信息
private ServerBootstrap bootstrap=null;
public ServerHelloWorld(){
	init();
}
private void init() {
	acceptorGroup=new NioEventLoopGroup();
	clientGroup=new NioEventLoopGroup();
	bootstrap=new ServerBootstrap();
	//绑定线程组
	bootstrap.group(acceptorGroup, clientGroup);
	//设定通讯模式为NIO
	bootstrap.channel(NioServerSocketChannel.class);
	//设定缓冲区大小
	bootstrap.option(ChannelOption.SO_BACKLOG, 1024);
	//SO_SNDBUF为发送缓冲区,SO_RCVBUF为接受缓冲区,SO_KEEPALIVE表示心跳检测,保证连接有效
	bootstrap.option(ChannelOption.SO_SNDBUF, 16*1024)
	         .option(ChannelOption.SO_RCVBUF, 16*1024)
	         .option(ChannelOption.SO_KEEPALIVE, true);

}
/*
 * childHandler是bootstrap独有的方法,是用于提供处理对象的
 * 可以一次性处理若干个请求,类似责任连模式的处理方式
 * 增加A.B离鞥个处理线程,在处理的时候按照顺序先运行A再运行B
 *
 * ChannelInitializer用于提供处理器的一个模拟对象
 * 其中定义了initChannel方法
 * 用于初始化逻辑责任链条的
 * 可以保证服务器的bootstrap只被初始化一次
 * */
public ChannelFuture doAccept(int port,final ChannelHandler... acceptorHandlers) throws InterruptedException{
	bootstrap.childHandler(new ChannelInitializer() {

		@Override
		protected void initChannel(SocketChannel ch) throws Exception {
			ch.pipeline().addLast(acceptorHandlers);
		}
	});
	ChannelFuture future=bootstrap.bind(port).sync();
	return future;}
public void release(){
	this.acceptorGroup.shutdownGracefully();
	this.clientGroup.shutdownGracefully();
}
public static void main(String[] args) throws UnsupportedEncodingException {
	ChannelFuture future=null;
	ServerHelloWorld server=null;
	try{
		server=new ServerHelloWorld();
		future=server.doAccept(9999, new ServerHelloWorldHandler());
		System.out.println("server started:");

		future.channel().closeFuture().sync();
	}
	catch(InterruptedException e)
	{
		e.printStackTrace();
	}finally
	{
		if(null != future)
		{
			try{
				future.channel().closeFuture().sync();
			}catch(InterruptedException e){
				e.printStackTrace();
			}
		}
		if(null != server)
		{
			server.release();
		}
	}
}
}
然后就是服务器端handler对象了:
package nettyTest1.nettyTest1;
import java.io.BufferedReader;

import java.io.InputStreamReader;

import io.netty.buffer.ByteBuf;
import io.netty.buffer.Unpooled;
import io.netty.channel.ChannelHandlerAdapter;
import io.netty.channel.ChannelHandlerContext;
import io.netty.channel.ChannelHandler.Sharable;
/**
 * Sharable表示此对象在channel间共享
 * handler类是我们的具体业务类
 * */
@Sharable//注解@Sharable可以让它在channels间共
public class ServerHelloWorldHandler extends ChannelHandlerAdapter{
	@Override
	public void channelRead(ChannelHandlerContext ctx, Object msg)
			throws Exception {
	ByteBuf readBuffer=(ByteBuf)msg;
	byte[] tmpeDatas=new byte[readBuffer.readableBytes()];
	readBuffer.readBytes(tmpeDatas);
	String message=new String(tmpeDatas,"UTF-8");
	System.out.println("from client:"+message);
	if("exit".equals(message))
	{
		ctx.close();
		System.out.println("连接关闭");
		return;
	}
	else{
	System.out.println("to client");
	BufferedReader br=new BufferedReader(new InputStreamReader(System.in));
	String line=br.readLine();
	ctx.writeAndFlush(Unpooled.copiedBuffer(line.getBytes("UTF-8")));
	}
	}

	@Override
	public void exceptionCaught(ChannelHandlerContext ctx, Throwable cause)
			throws Exception {
		System.out.println("server excrptionCaughtvmethod run...");
		ctx.close();
	}

}
然后就是客户端课,客户端和服务器端大同小异,主要不同的就是,客户端只需要创建一个线程组对象:
package nettyTest1.nettyTest1;

import java.util.Scanner;
import java.util.concurrent.TimeUnit;

import io.netty.bootstrap.Bootstrap;
import io.netty.buffer.Unpooled;
import io.netty.channel.ChannelFuture;
import io.netty.channel.ChannelFutureListener;
import io.netty.channel.ChannelHandler;
import io.netty.channel.ChannelInitializer;
import io.netty.channel.EventLoopGroup;
import io.netty.channel.nio.NioEventLoopGroup;
import io.netty.channel.socket.SocketChannel;
import io.netty.channel.socket.nio.NioSocketChannel;

public class ClientHelloWorld {
private EventLoopGroup group=null;
private Bootstrap bootstrap=null;
public ClientHelloWorld(){
	init();
}
private void init() {
	group=new NioEventLoopGroup();
	bootstrap=new Bootstrap();
	bootstrap.group(group);
	bootstrap.channel(NioSocketChannel.class);

}
public ChannelFuture doRequest(String host,int port,final ChannelHandler... handlers) throws InterruptedException
    {
	this.bootstrap.handler(new ChannelInitializer() {

		@Override
		protected void initChannel(SocketChannel ch) throws Exception {
			ch.pipeline().addLast(handlers);

		}
	});
	ChannelFuture future=this.bootstrap.connect(host,port).sync();
	return future;
	}
public void release(){
	this.group.shutdownGracefully();
}
public static void main(String[] args) {
	ClientHelloWorld client=null;
	ChannelFuture future=null;
	try{
		client=new ClientHelloWorld();
		future=client.doRequest("localhost", 9999, new CliemtHelloWprldHandler());
		//Scanner s=null;
		future.channel().writeAndFlush(Unpooled.copiedBuffer("连接成功".getBytes("UTF-8")));


		//future.channel().writeAndFlush(Unpooled.copiedBuffer(line.getBytes("UTF-8")));


	}catch(Exception e){
		e.printStackTrace();
	}finally{
		if(null!=future)
		{
			try{
				future.channel().closeFuture().sync();
			}catch(InterruptedException e){
				e.printStackTrace();
			}
		}
		if(null != client)
		{
			client.release();
		}
	}
}
}
package nettyTest1.nettyTest1;

import java.io.BufferedReader;
import java.io.InputStreamReader;
import java.util.concurrent.TimeUnit;

import io.netty.buffer.ByteBuf;
import io.netty.buffer.Unpooled;
import io.netty.channel.ChannelFutureListener;
import io.netty.channel.ChannelHandlerAdapter;
import io.netty.channel.ChannelHandlerContext;
import io.netty.util.ReferenceCountUtil;

public class CliemtHelloWprldHandler extends ChannelHandlerAdapter {


	@Override
	public void channelRead(ChannelHandlerContext ctx, Object msg)
			throws Exception {
			try{ByteBuf readBuffer=(ByteBuf)msg;
			byte[] tempDatas=new byte[readBuffer.readableBytes()];
			readBuffer.readBytes(tempDatas);
			System.out.println("from server:"+new String(tempDatas,"UTF-8"));
			BufferedReader br=new BufferedReader(new InputStreamReader(System.in));
			String line=br.readLine();
			ctx.writeAndFlush(Unpooled.copiedBuffer(line.getBytes("UTF-8")));

			}
			finally{
				ReferenceCountUtil.release(msg);
			}


	}

	@Override
	public void exceptionCaught(ChannelHandlerContext ctx, Throwable cause)
			throws Exception {
		System.out.println("client exceptionCanght method run...");
        ctx.close();
	}


}
这样求可以直接运行了 先运行服务器端,再运行客户端,就可以互相发送消息了:
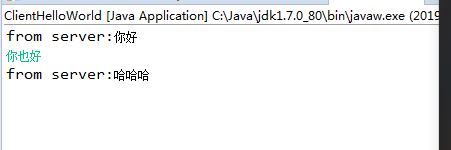

这就是一个简单的例子了,在这里像顺便提一下自己在编码的时候遇到的一个很简单,但是当时自己怎么都找不出错误的地方,就是运行一次服务器端,然后运行两个客户端总是会出错,然后结果原来是,我在ServerHelloWorldHandler类里面少了一个注解@Sharable。少了这个就无法实现多线程。