python——pandas——时间操作函数(to_datetime、DateOffset、DatetimeIndex联合操作)
案例:
有以下数据集:
其中,cmbirth代表的是距离1899年12月的整数月值。现在我们需要根据这个值,计算这些人出生在哪个年代?(70年代?80年代?90年代?)。
先上代码:
month0=pd.to_datetime('1899-12-15')  #返回时间戳。
dates=[month0+pd.DateOffset(months=cm) for cm in resp5['cmbirth']]
resp5['decade']=(pd.DatetimeIndex(dates).year-1900)//10
输出:
图中,decade字段,6代表60年代,7代表70年代,依次类推。
现在我们来一一讲解代码中涉及到的三个函数:to_datetime()、DateOffset()、DatetimeIndex()。
1、pd.to_datetime()
pd.to_datetime():将Str和Unicode转化为时间戳格式
month0=pd.to_datetime('1899-12-15 11:38:30',format='%Y/%m/%d %H:%M:%S')  #返回时间戳,format去掉也可以。
month0
输出:
Timestamp('1899-12-15 11:38:30') #时间戳格式
2、pd.DateOffset()
pd.DateOffset():时间戳的加减
DateOffset常用的参数:
months,设置月。
days,设置天。
years,设置年。
hours,设置小时。
minutes,设置分钟。
seconds,设置秒。
ts=pd.to_datetime('2020-03-14')+pd.DateOffset(days=10)
ts
输出:
Timestamp('2020-03-24 00:00:00')
DateOffset参数也可以组合使用:
ts=pd.to_datetime('2020-03-14')+pd.DateOffset(months=1,days=10,hours=2)
ts
输出:
Timestamp('2020-04-24 02:00:00')
3、pd.DatetimeIndex()
上节介绍的Timestamp、Period和Timedelta对象都是单个值,这些值都可以放在索引或数据中。作为索引的时间序列有:DatetimeIndex、PeriodIndex和TimedeltaIndex,它们都可以作为Series和DataFrame的索引。
例如上面我们执行的:
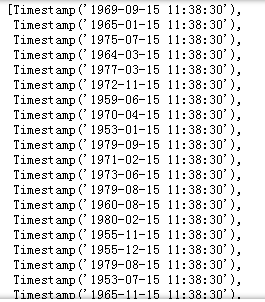
month0=pd.to_datetime('1899-12-15')  #返回时间戳。
dates=[month0+pd.DateOffset(months=cm) for cm in resp5['cmbirth']]
dates
输出:
可知,输出的是包含n个Timestamp的list,要进一步操作,我们需要将list转化为时间序列相关的可操作序列。
pd.DatetimeIndex(dates)输出为:
DatetimeIndex(['1969-09-15 11:38:30', '1965-01-15 11:38:30',
               '1975-07-15 11:38:30', '1964-03-15 11:38:30',
               '1977-03-15 11:38:30', '1972-11-15 11:38:30',
               '1959-06-15 11:38:30', '1970-04-15 11:38:30',
               '1953-01-15 11:38:30', '1979-09-15 11:38:30',
               ...
               '1968-07-15 11:38:30', '1971-03-15 11:38:30',
               '1962-01-15 11:38:30', '1958-07-15 11:38:30',
               '1970-12-15 11:38:30', '1959-11-15 11:38:30',
               '1952-01-15 11:38:30', '1970-02-15 11:38:30',
               '1961-11-15 11:38:30', '1965-12-15 11:38:30'],
              dtype='datetime64[ns]', length=10847, freq=None)
通过以上的转换,我们可以将list类型转换为DatetimeIndex类型。 我们可以拿来做Series和DataFrame的索引,也可以获取其各时间戳的年份(year)、月份(month)、天(day)、时(hour)、分(minute)、秒(second)。
pd.DatetimeIndex(dates).year输出:
Int64Index([1969, 1965, 1975, 1964, 1977, 1972, 1959, 1970, 1953, 1979,
            ...
            1968, 1971, 1962, 1958, 1970, 1959, 1952, 1970, 1961, 1965],
           dtype='int64', length=10847)
【拓展】
4、pd_date_range()
pd_date_range():创建时间序列
根据指定的范围,生成时间序列DatetimeIndex,每个元素的类型为Timestamp。
主要参数:
start: 开始时刻,可以是字符串或者datetime类型的值。默认None。
end: 结束时刻,可以是字符串或者datetime类型的值,如果指定了长度,即periods,则可不设置。默认None。
periods: 时序的长度,整型类型。如果有end,可不设置。默认None。
freq: 时序生成的频率,即每隔多少时刻生成一个时序点。字符串类型或者DateOffset类型。默认'D',即天粒度,见上述代码输出。
tz: 时区,字符串类型。默认None。
normalize: bool类型,没用过,不知道干啥的。
name: 设置时序的名称,字符串类型,默认None。
closed: 是否包含两边的值。默认None,即两边都保留。
其中,freq的取值可以为如下的符号表示间隔,可以结合符号和数字,如'3d',表示每隔三天记录一个时间点。大小写都可以。
ts = pd.date_range('2020-03-01', periods=10, freq='d', normalize=False)
ts
输出:
DatetimeIndex(['2020-03-01', '2020-03-02', '2020-03-03', '2020-03-04',
               '2020-03-05', '2020-03-06', '2020-03-07', '2020-03-08',
               '2020-03-09', '2020-03-10'],
              dtype='datetime64[ns]', freq='D')


