Unity Shader-遮挡处理(X-Ray,遮挡描边,遮挡半透,遮挡溶解)
简介
第三人称游戏,我们经常会遇到相机被场景中的建筑物遮挡的情况。今天,本人就来研究一下相机被遮挡之后的处理。最简单的就是传说中的“鸵鸟法”,假装看不见,在一些游戏里面也有一些玩法设定,或者是本身遮挡较少,影响不大的情况,也可以直接不进行处理。
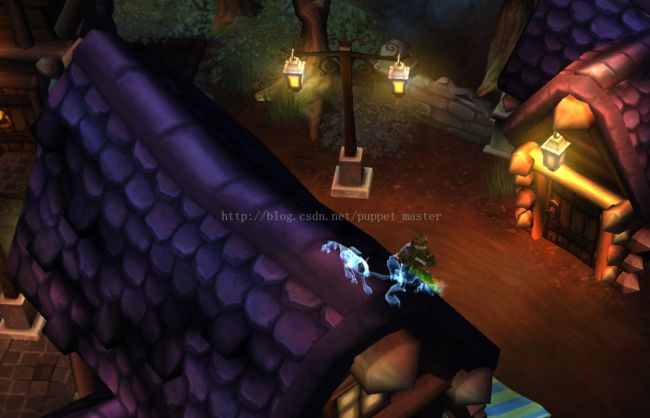
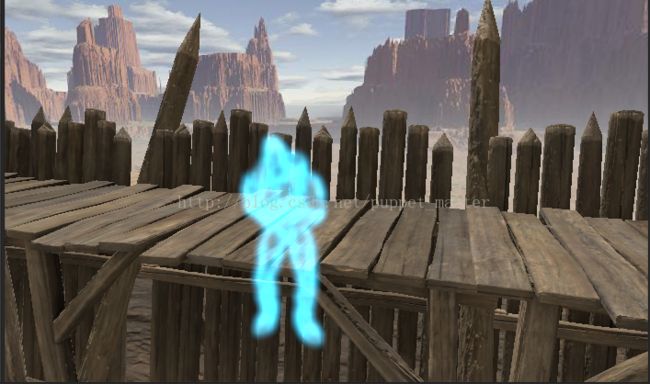
当然,更好一些的遮挡处理,就是X光的效果。在人物被遮挡的部分会透过遮挡物,用一个其他的颜色渲染出来。《火炬之光》中就使用过这个效果:
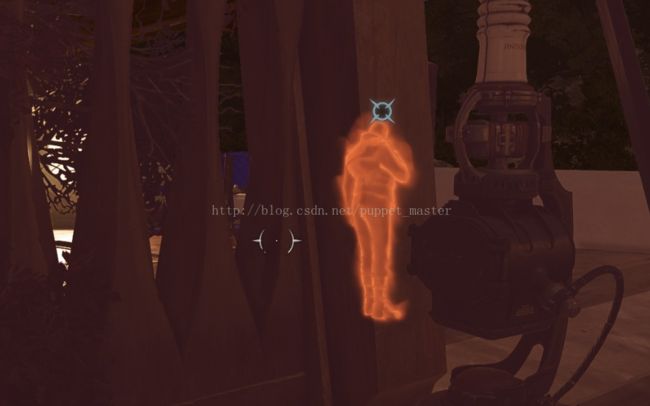
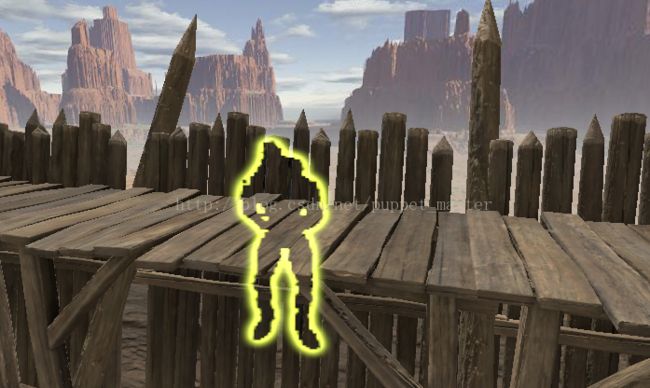
类似的,《耻辱2》中的透视效果也是游戏中经常使用的,这种暂且叫其遮挡高亮或者遮挡描边吧,对于刺杀类型的游戏,这种透视技能简直是神技,比如在柱子后面就能瞄见这货:
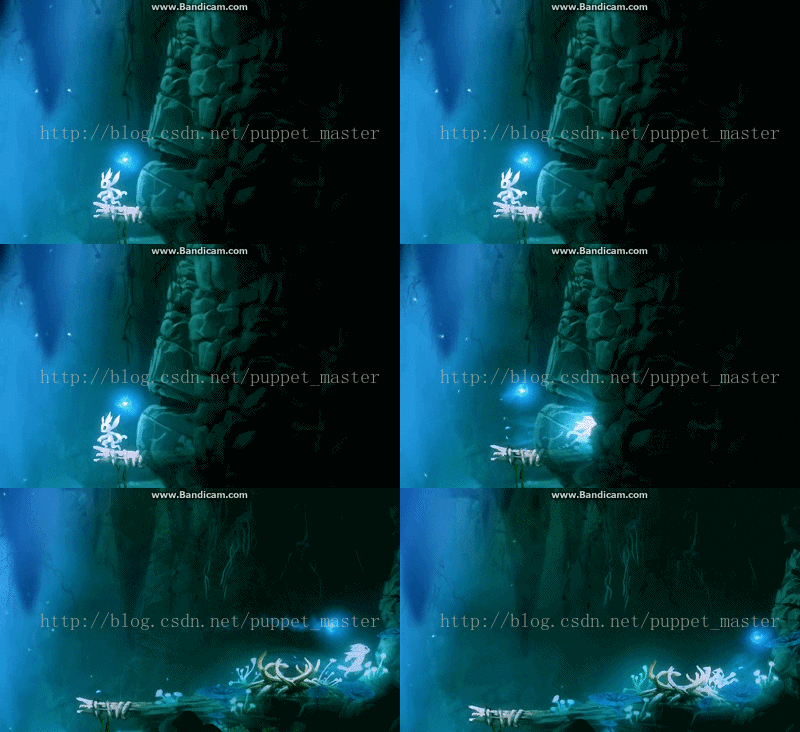
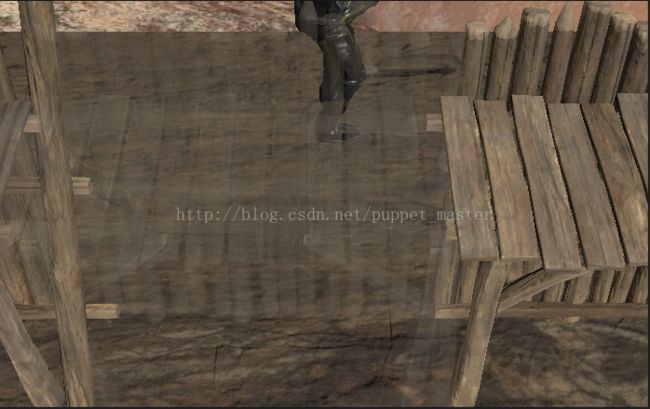
还有一种对于遮挡的处理,就是遮挡半透,这个在很多游戏里面都有出现,比如《黑魂2》,《奥瑞与黑暗森林》,下面是Ori中的一个遮挡半透的效果动图:
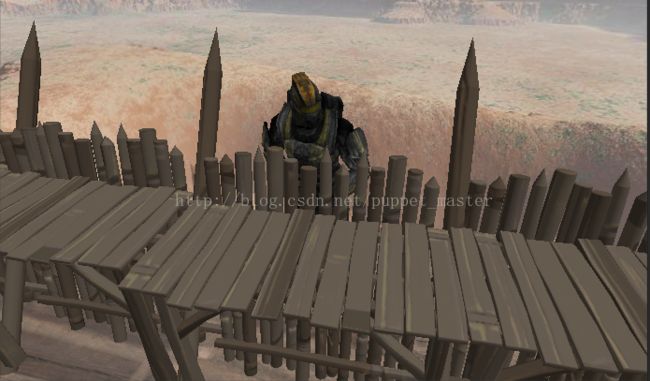
还有一个效果,暂且叫其遮挡溶解吧。这个效果我是在《神界3:原罪》中看到的,说实话,第一次看到这个效果的时候,着实被惊艳到了。
翻箱倒柜找出来这几个游戏,截了一发图,顺道怀念一下。哎呀,一不小心就给自己挖了个超级大的坑。四个效果,下面开始慢慢填坑吧。
X光效果
先来看一下最为古老的X光效果,所谓X光,就是在被遮挡的部分呈现一个其他的颜色。我们需要获得哪个地方被遮挡了,先复习一下 深度测试,渲染队列相关内容。Unity内置了一些渲染队列,并且我们可以自定义一些渲染队列。在同一个渲染队列的情况下,Unity对于不透明物体会按照从前向后的顺序渲染;对于透明物体,会按照从后向前的顺序渲染。比如我们有一个如下的场景:
正常渲染的情况下,首先渲染的是前面遮挡的栅栏,此时深度缓存中有了栅栏的深度值。然后再渲染人模(其实前后无所谓的,因为即使是先渲染人模,再渲染栅栏,遮挡部分深度测试成功也会替代人模的部分,这样会造成OverDraw,所以Unity对于不透明物体一般采用从前向后的顺序),人模被遮挡的部分深度测试失败,颜色不会输出。
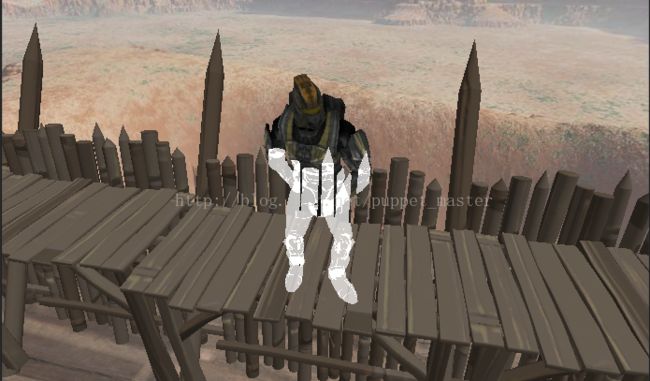
下面再来看一下X光效果的流程。首先,还是先渲染栅栏,必须优先保证栅栏的渲染,所以用渲染队列进行控制渲染顺序更加靠谱一点,毕竟按照物体进行的简单深度排序的不一定完全靠谱。下面,设置人模的渲染队列比栅栏靠后一些,人物通过两个Pass渲染,第一个Pass渲染X光的Pass,这个Pass在渲染的时候使用ZTest Greater,在渲染的时候,有遮挡的部分之前的栅栏的深度,而未遮挡的部分由于深度无穷大深度测试不会通过,不显示任何内容,而被遮挡的部分,深度是栅栏的深度,人物在栅栏后,深度大于栅栏,深度测试通过,会将遮挡部分渲染成Pass的输出,而且,这个Pass不能写入深度,因为我们还需要正常画出人物未被遮挡的部分,此时就可以正常的深度测试ZTest LEqual,被遮挡的部分不渲染,只渲染未被遮挡的部分。我们用一个最简单的shader先试一下效果:
//X光效果
//by:puppet_master
//2017.6.20

Shader "ApcShader/XRayEffect"
{
	Properties
	{
		_MainTex("Base 2D", 2D) = "white"{}
	}

	SubShader
	{
		Tags{ "Queue" = "Geometry" "RenderType" = "Opaque" }

		//渲染X光效果的Pass
		Pass
		{
			Blend SrcAlpha One
			ZWrite Off
			ZTest Greater

			CGPROGRAM
			#include "Lighting.cginc"
			struct v2f
			{
				float4 pos : SV_POSITION;
			};

			v2f vert (appdata_base v)
			{
				v2f o;
				o.pos = mul(UNITY_MATRIX_MVP, v.vertex);
				return o;
			}

			fixed4 frag(v2f i) : SV_Target
			{
				return fixed4(1,1,1,0.5);
			}
			#pragma vertex vert
			#pragma fragment frag
			ENDCG
		}

		//正常渲染的Pass
		Pass
		{
			ZWrite On
			CGPROGRAM
			#include "Lighting.cginc"
			sampler2D _MainTex;
			float4 _MainTex_ST;

			struct v2f
			{
				float4 pos : SV_POSITION;
				float2 uv : TEXCOORD1;
			};

			v2f vert(appdata_base v)
			{
				v2f o;
				o.pos = mul(UNITY_MATRIX_MVP, v.vertex);
				o.uv = TRANSFORM_TEX(v.texcoord, _MainTex);
				return o;
			}

			fixed4 frag(v2f i) : SV_Target
			{
				return tex2D(_MainTex, i.uv);
			}

			#pragma vertex vert
			#pragma fragment frag
			ENDCG
		}
	}

	FallBack "Diffuse"
}
上图基本实现了X光的效果,不过效果不是很美观,我们将X光的Pass更换一下,使用半透+边缘光的效果进行渲染,代码如下:
//X光效果
//by:puppet_master
//2017.6.20

Shader "ApcShader/XRayEffect"
{
	Properties
	{
		_MainTex("Base 2D", 2D) = "white"{}
		_XRayColor("XRay Color", Color) = (1,1,1,1)
	}

	SubShader
	{
		Tags{ "Queue" = "Geometry+100" "RenderType" = "Opaque" }

		//渲染X光效果的Pass
		Pass
		{
			Blend SrcAlpha One
			ZWrite Off
			ZTest Greater

			CGPROGRAM
			#include "Lighting.cginc"
			fixed4 _XRayColor;
			struct v2f
			{
				float4 pos : SV_POSITION;
				float3 normal : normal;
				float3 viewDir : TEXCOORD0;
			};

			v2f vert (appdata_base v)
			{
				v2f o;
				o.pos = mul(UNITY_MATRIX_MVP, v.vertex);
				o.viewDir = ObjSpaceViewDir(v.vertex);
				o.normal = v.normal;
				return o;
			}

			fixed4 frag(v2f i) : SV_Target
			{
				float3 normal = normalize(i.normal);
				float3 viewDir = normalize(i.viewDir);
				float rim = 1 - dot(normal, viewDir);
				return _XRayColor * rim;
			}
			#pragma vertex vert
			#pragma fragment frag
			ENDCG
		}

		//正常渲染的Pass
		Pass
		{
			ZWrite On
			CGPROGRAM
			#include "Lighting.cginc"
			sampler2D _MainTex;
			float4 _MainTex_ST;

			struct v2f
			{
				float4 pos : SV_POSITION;
				float2 uv : TEXCOORD0;
			};

			v2f vert(appdata_base v)
			{
				v2f o;
				o.pos = mul(UNITY_MATRIX_MVP, v.vertex);
				o.uv = TRANSFORM_TEX(v.texcoord, _MainTex);
				return o;
			}

			fixed4 frag(v2f i) : SV_Target
			{
				return tex2D(_MainTex, i.uv);
			}

			#pragma vertex vert
			#pragma fragment frag
			ENDCG
		}
	}

	FallBack "Diffuse"
}
遮挡描边效果
除了X光效果可以表现遮挡,还有一种后处理也可以达到类似的效果。关于描边的具体实现,可以参考 描边效果这篇文章。后处理的描边,是通过额外的相机渲染需要描边的模型到RT上(或者使用Commond Buffer插入渲染事件),得到Mask图进行扣除处理之后,再叠加回原始图像上。描边有个弊端就是后处理的遮挡关系不好处理,但是如果我们要做遮挡处理的效果,弊端就变成了优势。因为即使被描边的对象被其他对象遮挡,由于另外一个相机渲染到RT上时,只会渲染自身,而不会渲染遮挡物,所以Mask图上只会有要描边的对象。下面来炒一发冷饭,掏出我们之前的描边效果的后处理,看一下效果。
不过有一个地方需要注意一下,直接描边的话,在自身看不是很明显,但是如果在遮挡的情况下,只显示一个描边,有一个解决的办法就是开AA。RT默认的没有办法走硬件AA的,跟我们正常工程的设置AA无关,Unity倒是也给我们提供了RT的AA设置(1,2,4,8),but,这个东西的实现原理是超采样,从Profiler里面看的话,不仅仅有我们申请的一张RT,还会出现两张更大(貌似是翻倍的)RT,用于这个效果。所以,在移动平台申请RT的时候,对于是否开AA还是需要慎重考虑一下,一个2048的RT,开了4级别的AA可能会有60M的占用!
下面,我们再稍微加工一下这个描边效果,让它更像《耻辱》游戏里面的这个样子。描边的做法是先渲物体到RT上,然后把RT进行Blur外扩,再与原图相减,最终再叠加回去。我们可以不进行相减这一个操作,直接将RT叠加回去。不过这样的话,人物就是一个大色块了,并不是很好看。我们之前的文章写过CommandBuffer,CmdBuffer是允许我们用任意一个自定义的shader渲染一个物体的,所以可以直接用一个RimLight的shader作为把人物渲染到RT上的prepass shader,其他与做法与描边类似,只是不进行Blur图与原图相减的操作,C#代码如下:
/********************************************************************
 FileName: OccOutLineEffect.cs
 Description: 遮挡描边后处理效果
 Created: 2017/07/20
 by puppet_master
*********************************************************************/
using UnityEngine;
using System.Collections;
using UnityEngine.Rendering;

public class OccOutLineEffect : PostEffectBase
{
    private RenderTexture renderTexture = null;
    private CommandBuffer commandBuffer = null;
    //采样率
    public float samplerScale = 1;
    //降采样
    public int downSample = 1;
    //迭代次数
    public int iteration = 2;
    //描边强度
    [Range(0.0f, 10.0f)]
    public float outLineStrength = 3.0f;
    //目标对象
    public GameObject targetObject = null;

    void OnEnable()
    {
        Renderer[] renderers = targetObject.GetComponentsInChildren();
        //RT可以设置AA等级,降低锯齿效果
        if (renderTexture == null)
            renderTexture = RenderTexture.GetTemporary(Screen.width >> downSample, Screen.height >> downSample);
        //创建描边prepass的command buffer
        commandBuffer = new CommandBuffer();
        commandBuffer.SetRenderTarget(renderTexture);
        commandBuffer.ClearRenderTarget(true, true, Color.black);
        foreach (Renderer r in renderers)
            commandBuffer.DrawRenderer(r, r.sharedMaterial);
    }

    void OnDisable()
    {
        if (renderTexture)
        {
            RenderTexture.ReleaseTemporary(renderTexture);
            renderTexture = null;
        }
        if (commandBuffer != null)
        {
            commandBuffer.Release();
            commandBuffer = null;
        }

    }

    void OnRenderImage(RenderTexture source, RenderTexture destination)
    {
        if (_Material && renderTexture && commandBuffer != null)
        {
            //直接通过Graphic执行Command Buffer
            Graphics.ExecuteCommandBuffer(commandBuffer);

            //对RT进行Blur处理
            RenderTexture temp1 = RenderTexture.GetTemporary(source.width >> downSample, source.height >> downSample, 0);
            RenderTexture temp2 = RenderTexture.GetTemporary(source.width >> downSample, source.height >> downSample, 0);

            //高斯模糊,两次模糊,横向纵向,使用pass0进行高斯模糊
            _Material.SetVector("_offsets", new Vector4(0, samplerScale, 0, 0));
            Graphics.Blit(renderTexture, temp1, _Material, 0);
            _Material.SetVector("_offsets", new Vector4(samplerScale, 0, 0, 0));
            Graphics.Blit(temp1, temp2, _Material, 0);

            //如果有叠加再进行迭代模糊处理
            for (int i = 0; i < iteration; i++)
            {
                _Material.SetVector("_offsets", new Vector4(0, samplerScale, 0, 0));
                Graphics.Blit(temp2, temp1, _Material, 0);
                _Material.SetVector("_offsets", new Vector4(samplerScale, 0, 0, 0));
                Graphics.Blit(temp1, temp2, _Material, 0);
            }

            //叠加效果
            _Material.SetTexture("_BlurTex", temp1);
            _Material.SetFloat("_OutlineStrength", outLineStrength);
            Graphics.Blit(source, destination, _Material, 2);

            RenderTexture.ReleaseTemporary(temp1);
            RenderTexture.ReleaseTemporary(temp2);
        }
        else
        {
            Graphics.Blit(source, destination);
        }
    }
}
//后处理描边Shader
//by:puppet_master
//2017.1.12

Shader "Custom/OutLinePostEffect" {

	Properties{
		_MainTex("Base (RGB)", 2D) = "white" {}
		_BlurTex("Blur", 2D) = "white"{}
	}

	CGINCLUDE
	#include "UnityCG.cginc"

	//用于剔除中心留下轮廓
	struct v2f_cull
	{
		float4 pos : SV_POSITION;
		float2 uv : TEXCOORD0;
	};

	//用于模糊
	struct v2f_blur
	{
		float4 pos : SV_POSITION;
		float2 uv  : TEXCOORD0;
		float4 uv01 : TEXCOORD1;
		float4 uv23 : TEXCOORD2;
		float4 uv45 : TEXCOORD3;
	};

	//用于最后叠加
	struct v2f_add
	{
		float4 pos : SV_POSITION;
		float2 uv  : TEXCOORD0;
		float2 uv1 : TEXCOORD1;
	};

	sampler2D _MainTex;
	float4 _MainTex_TexelSize;
	sampler2D _BlurTex;
	float4 _BlurTex_TexelSize;
	float4 _offsets;
	float _OutlineStrength;

	//Blur图和原图进行相减获得轮廓
	v2f_cull vert_cull(appdata_img v)
	{
		v2f_cull o;
		o.pos = mul(UNITY_MATRIX_MVP, v.vertex);
		o.uv = v.texcoord.xy;
		//dx中纹理从左上角为初始坐标,需要反向
#if UNITY_UV_STARTS_AT_TOP
		if (_MainTex_TexelSize.y < 0)
			o.uv.y = 1 - o.uv.y;
#endif
		return o;
	}

	fixed4 frag_cull(v2f_cull i) : SV_Target
	{
		fixed4 colorMain = tex2D(_MainTex, i.uv);
		fixed4 colorBlur = tex2D(_BlurTex, i.uv);
		//最后的颜色是_BlurTex - _MainTex,周围0-0=0,黑色;边框部分为描边颜色-0=描边颜色;中间部分为描边颜色-描边颜色=0。最终输出只有边框
		//return fixed4((colorBlur - colorMain).rgb, 1);
		return colorBlur - colorMain;
	}

	//高斯模糊 vert shader(之前的文章有详细注释,此处也可以用BoxBlur,更省一点)
	v2f_blur vert_blur(appdata_img v)
	{
		v2f_blur o;
		_offsets *= _MainTex_TexelSize.xyxy;
		o.pos = mul(UNITY_MATRIX_MVP, v.vertex);
		o.uv = v.texcoord.xy;

		o.uv01 = v.texcoord.xyxy + _offsets.xyxy * float4(1, 1, -1, -1);
		o.uv23 = v.texcoord.xyxy + _offsets.xyxy * float4(1, 1, -1, -1) * 2.0;
		o.uv45 = v.texcoord.xyxy + _offsets.xyxy * float4(1, 1, -1, -1) * 3.0;

		return o;
	}

	//高斯模糊 pixel shader
	fixed4 frag_blur(v2f_blur i) : SV_Target
	{
		fixed4 color = fixed4(0,0,0,0);
		color += 0.40 * tex2D(_MainTex, i.uv);
		color += 0.15 * tex2D(_MainTex, i.uv01.xy);
		color += 0.15 * tex2D(_MainTex, i.uv01.zw);
		color += 0.10 * tex2D(_MainTex, i.uv23.xy);
		color += 0.10 * tex2D(_MainTex, i.uv23.zw);
		color += 0.05 * tex2D(_MainTex, i.uv45.xy);
		color += 0.05 * tex2D(_MainTex, i.uv45.zw);
		return color;
	}

	//最终叠加 vertex shader
	v2f_add vert_add(appdata_img v)
	{
		v2f_add o;
		//mvp矩阵变换
		o.pos = mul(UNITY_MATRIX_MVP, v.vertex);
		//uv坐标传递
		o.uv.xy = v.texcoord.xy;
		o.uv1.xy = o.uv.xy;
#if UNITY_UV_STARTS_AT_TOP
		if (_MainTex_TexelSize.y < 0)
			o.uv.y = 1 - o.uv.y;
#endif
		return o;
	}

	fixed4 frag_add(v2f_add i) : SV_Target
	{
		//取原始场景图片进行采样
		fixed4 ori = tex2D(_MainTex, i.uv1);
		//取得到的轮廓图片进行采样
		fixed4 blur = tex2D(_BlurTex, i.uv);
		//return blur;
		fixed4 final = ori + blur * _OutlineStrength;
		return final;
	}

		ENDCG

	SubShader
	{
		//pass 0: 高斯模糊
		Pass
		{
			ZTest Off
			Cull Off
			ZWrite Off
			Fog{ Mode Off }

			CGPROGRAM
			#pragma vertex vert_blur
			#pragma fragment frag_blur
			ENDCG
		}

		//pass 1: 剔除中心部分
		Pass
		{
			ZTest Off
			Cull Off
			ZWrite Off
			Fog{ Mode Off }

			CGPROGRAM
			#pragma vertex vert_cull
			#pragma fragment frag_cull
			ENDCG
		}


		//pass 2: 最终叠加
		Pass
		{

			ZTest Off
			Cull Off
			ZWrite Off
			Fog{ Mode Off }

			CGPROGRAM
			#pragma vertex vert_add
			#pragma fragment frag_add
			ENDCG
		}
	}
}
其实上面的做法稍微感觉有点费,当然,我们也可以按照 CommondBuffer假景深效果的做法,直接通过CommandBuffer把人物渲染顺序直接调整到最后渲染,然后在人物身上用一个边缘光的效果,虽然可以达到在人模不被遮挡地渲染,不过效果可能不会有模糊的效果好。模糊外扩的效果用常规的shader一般是很难做出来的,还是全屏的Blur比较容易出这种效果。
遮挡半透
遮挡半透的原理其实比较简单,就是我们需要做一下从摄像机到人之间的射线查询,如果查询到了物体,那么就说明这个物体是一个遮挡物,然后我们就可以把它用一个半透的shader进行渲染,当查询失效之后,我们再将其恢复成原始的shader,基本的遮挡半透就完成了。不过这样会比较突兀,所以一般在开始半透和结束半透的时候,都是有一个渐变的过程的。我们先来把这一套机制实现一下,因为这个毕竟比较简单,属于逻辑层级的。真正复杂的东东还是半透渲染本身带来的一系列问题。不多说,上代码:
/********************************************************************
 FileName: TransparentControl.cs
 Description: 遮挡半透查询控制器,挂于摄像机
 Created: 2017/07/23
 history: 23:7:2017 12:45 by puppet_master
*********************************************************************/
using System.Collections;
using System.Collections.Generic;
using UnityEngine;
using System.Linq;

public class TransparentControl : MonoBehaviour {

    public class TransparentParam
    {
        public Material[] materials = null;
        public Material[] sharedMats = null;
        public float currentFadeTime = 0;
        public bool isTransparent = true;
    }

    public Transform targetObject = null;   //目标对象
    public float height = 3.0f;             //目标对象Y方向偏移
    public float destTransparent = 0.2f;    //遮挡半透的最终半透强度,
    public float fadeInTime = 1.0f;         //开始遮挡半透时渐变时间
    private int transparentLayer;           //需要遮挡半透的层级
    private Dictionary transparentDic = new Dictionary();
    private List clearList = new List();

	void Start ()
    {
        transparentLayer = 1 << LayerMask.NameToLayer("OcclusionTran");
	}

	void Update ()
    {
        if (targetObject == null)
            return;
        UpdateTransparentObject();
        UpdateRayCastHit();
        RemoveUnuseTransparent();
    }

    public void UpdateTransparentObject()
    {
        var var = transparentDic.GetEnumerator();
        while (var.MoveNext())
        {
            TransparentParam param = var.Current.Value;
            param.isTransparent = false;
            foreach (var mat in param.materials)
            {
                Color col = mat.GetColor("_Color");
                param.currentFadeTime += Time.deltaTime;
                float t = param.currentFadeTime / fadeInTime;
                col.a = Mathf.Lerp(1, destTransparent, t);
                mat.SetColor("_Color", col);
            }
        }
    }

    public void UpdateRayCastHit()
    {
        RaycastHit[] rayHits = null;
        //视线方向为从自身(相机)指向目标位置
        Vector3 targetPos = targetObject.position + new Vector3(0, height, 0);
        Vector3 viewDir = (targetPos - transform.position).normalized;
        Vector3 oriPos = transform.position;
        float distance = Vector3.Distance(oriPos, targetPos);
        Ray ray = new Ray(oriPos, viewDir);
        rayHits = Physics.RaycastAll(ray, distance, transparentLayer);
        //直接在Scene画一条线,方便观察射线
        Debug.DrawLine(oriPos, targetPos, Color.red);
        foreach (var hit in rayHits)
        {
            Renderer[] renderers = hit.collider.GetComponentsInChildren();
            foreach (Renderer r in renderers)
            {
                AddTransparent(r);
            }
        }
    }

    public void RemoveUnuseTransparent()
    {
        clearList.Clear();
        var var = transparentDic.GetEnumerator();
        while(var.MoveNext())
        {
            if (var.Current.Value.isTransparent == false)
            {
                //用完后材质实例不会销毁,可以被unloadunuseasset销毁或切场景销毁。
                var.Current.Key.materials = var.Current.Value.sharedMats;
                clearList.Add(var.Current.Key);
            }
        }
        foreach(var v in clearList)
            transparentDic.Remove(v);
    }

    void AddTransparent(Renderer renderer)
    {
        TransparentParam param = null;
        transparentDic.TryGetValue(renderer, out param);
        if (param == null)
        {
            param = new TransparentParam();
            transparentDic.Add(renderer, param);
            //此处顺序不能反,调用material会产生材质实例。
            param.sharedMats = renderer.sharedMaterials;
            param.materials = renderer.materials;
            foreach(var v in param.materials)
            {
                v.shader = Shader.Find("ApcShader/OcclusionTransparent");
            }
        }
        param.isTransparent = true;
    }
}
Shader "ApcShader/OcclusionTransparent" {
	Properties {
		_Color ("Main Color", Color) = (1,1,1,1)
		_MainTex ("Base (RGB)", 2D) = "white" {}
	}
	SubShader {
		Tags { "RenderType"="Transparent" "Queue" = "Transparent"}

		ZWrite Off

		CGPROGRAM
		#pragma surface surf Lambert alpha

		sampler2D _MainTex;
		fixed4 _Color;

		struct Input {
			float2 uv_MainTex;
		};

		void surf (Input IN, inout SurfaceOutput o) {
			fixed4 c = tex2D(_MainTex, IN.uv_MainTex) * _Color;
			o.Albedo = c.rgb;
			o.Alpha = c.a;
		}
		ENDCG
	}
	FallBack "VertexLit"
}
从上图中,我们可以看到,遮挡的栅栏变成了半透的效果。不过,这个半透看起来的效果有点奇怪,我们会看到这个物体内部的一些正常情况下看不见的东西,其实这种效果并不是我想要的,我们想要的一般就是正常与不透明渲染一样,只是能看到离我们最近的一个面,其他的部分都看不到。我们一般的半透都是用于特效,玻璃等效果,这种东西一般都是一个薄片,这种情况不是很明显,但是栅栏这种比较复杂的物体,自身存在前后遮挡的关系,这种效果就暴露得比较明显。
为什么会出现这种情况?我们还是要来复习一下渲染的基本知识。我们为了保证渲染的正确性,一般是有两种方法保证渲染的正确性。一种是Z Buffer算法,也是我们现在渲染最常用的一种。比如我们渲染一个物体的一个像素,首先要进行Z Test(深度测试),如果深度测试不通过,那么它本身就没有必要在这个像素进行渲染了。而Z Write(深度写入)则是在上面的深度测试通过之后,更新该像素深度值的一个操作。半透渲染深度测试也是有效的,比如一个半透物体如果在一个不透明的物体之后,深度测试失败,那么就没有必要再进行混合操作了,但是半透渲染没有办法开启深度写入,因为半透需要Blend,需要原缓冲区的颜色与当前fragment的颜色进行混合,如果前后两个物体同时开启了深度写入,那么前面那个就会挡住后面那个。不过这种情况在Unity里面我们并没有看到,其实是因为Unity对半透明物体采用了另一种算法,也就是画家算法,所谓画家算法就是先画后面的,再画前面的。Unity会对同一个渲染队列的半透物体进行排序,然后再按照远近顺序进行渲染。这样基本就可以保证Blend的正确性。
虽然说一般我们不会开启半透物体的深度写入,但是这样就会出现上图的问题。比如我们想渲染一个人,不透明渲染的话,从左边看,我们只会看到人的左手边,但是如果用了半透渲染,我们就会在看到人的左手的同时看到右手,这肯定效果很奇怪。有一种解决办法,就是我们可以进行一次Z PrePass操作,用两个pass渲染遮挡物体,先用一个不写入颜色,只写入深度的pass渲染一遍,这样这个位置就已经写入了深度;第二个pass进行正常的渲染,离我们近的面深度测试成功,会正常渲染,但是远离我们的面深度测试失败,就不会渲染了。把上面的shader加工一下,增加一个Prepass:
//增加prepass的半透渲染
//by:puppet_master
//2017.7.23
Shader "ApcShader/OcclusionTransparent" {
	Properties {
		_Color ("Main Color", Color) = (1,1,1,1)
		_MainTex ("Base (RGB)", 2D) = "white" {}
	}
	SubShader {
		Tags { "RenderType"="Transparent" "Queue" = "Transparent-1"}

		Pass
		{
			ZWrite On 	//开启深度写入
			ColorMask 0	//不写颜色
		}

		ZWrite Off
		CGPROGRAM
		#pragma surface surf Lambert alpha

		sampler2D _MainTex;
		fixed4 _Color;

		struct Input {
			float2 uv_MainTex;
		};

		void surf (Input IN, inout SurfaceOutput o) {
			fixed4 c = tex2D(_MainTex, IN.uv_MainTex) * _Color;
			o.Albedo = c.rgb;
			o.Alpha = c.a;
		}
		ENDCG
	}
	FallBack "VertexLit"
}
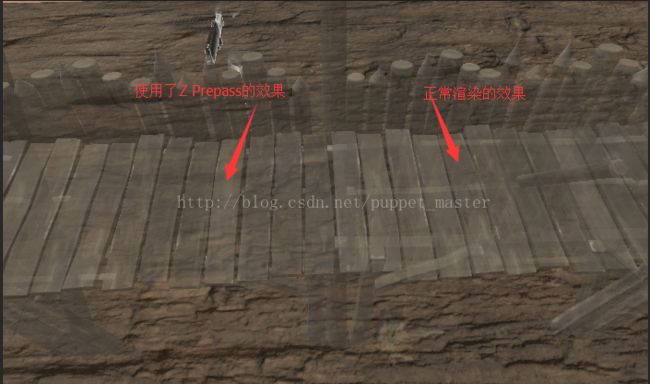
左边使用了Z Prepass,我们只能看到离我们最近的面,但是右侧只用一个pass渲染的时候,我们可以很明显地看到台子的支柱等里面的内容。下面来一张动图看一下遮挡半透的效果,增加了开始半透时的渐变效果(结束的时候偷个懒,就先不加啦):
遮挡溶解
遮挡溶解效果,个人感觉是这四种效果中最好玩的效果,当然也是最复杂最费的效果。这个效果我最早是在《神界》中看到,当时就被这个效果吸引住了,不过一直没想通是怎么做出来的,一直想用NSight抓,然而家里的电脑还是个坑爹的A卡,AMD那个神奇的工具从来没抓成功过(包括自己写的小图形程序也抓不到.....),唉,不吐槽了,还是得努力搬砖攒钱换块N卡。就在我一筹莫展的时候,看到了腾讯GAD上的两篇翻译文章: Trifox遮挡处理(上)和 Trifox遮挡处理(下),简直如醍醐灌顶, 英文原文在这里,再次膜拜一下大神。
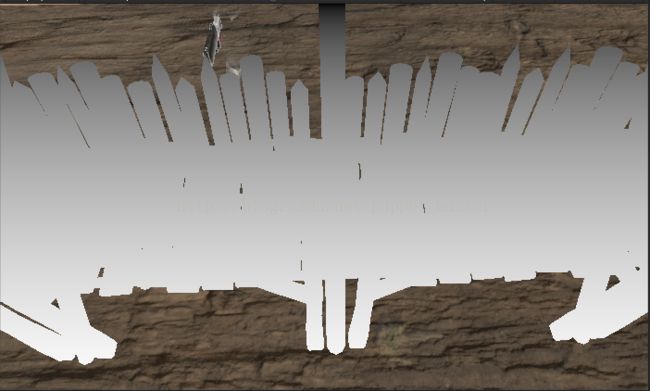
遮挡溶解,这种效果的处理方法与之前的又大不相同,并不是一直进行射线检测,而是把可能需要这种溶解效果的对象直接设置为溶解shader,这个shader主要是一种 溶解的效果,但与之前的普通溶解不同,我们需要让物体只在我们视野范围内一定距离才进行溶解。这就需要引入一个新的空间,在计算fragment阶段时,我们需要知道这个像素在我们屏幕空间的位置,在研究 GrabPass的时候,我们使用过一个函数-ComputeGrabScreenPos,这个函数就可以通过传入mvp变化后的顶点,计算出该顶点对于屏幕空间的位置。不过要真正获得这个顶点的位置,我们计算的时候需要除以最后一个分量,比如上面的栅栏,我们用这样一个函数直接输出它每个像素对于屏幕空间的位置值:
		//vertex阶段
		o.pos = mul(UNITY_MATRIX_MVP, v.vertex);
		o.screenPos = ComputeGrabScreenPos(o.pos);
		//fragment阶段
		float screenSpacePos = i.screenPos.y / i.screenPos.w;
		return fixed4(screenSpacePos, screenSpacePos, screenSpacePos, 1);
既然我们可以得到这个物体每个像素点位于屏幕的位置,我们就可以计算出这个顶点距离中心点的距离,代码如下:
		float2 screenPos = i.screenPos.xy / i.screenPos.w;
		float2 dir = float2(0.5, 0.5) - screenPos;
		float distance = sqrt(dir.x * dir.x + dir.y * dir.y);
		return fixed4(distance, distance, distance, 1);
吼吼,这下,只要在屏幕中心的,就被我们挖出了一个洞。在 屏幕水波纹效果中我们进行全屏后处理的时候有过类似的做法。

然后给一个阈值,大于这个阈值的正常渲染,小于这个阈值的进行溶解或者不显示,溶解的shader如下:
//遮挡溶解效果
//by:puppet_master
//2017.7.23

Shader "ApcShader/OcclusionDissolve"
{
	Properties{
		_Diffuse("Diffuse", Color) = (1,1,1,1)
		_DissolveColorA("Dissolve Color A", Color) = (0,0,0,0)
		_DissolveColorB("Dissolve Color B", Color) = (1,1,1,1)
		_MainTex("Base 2D", 2D) = "white"{}
		_DissolveMap("DissolveMap", 2D) = "white"{}
		_DissolveThreshold("DissolveThreshold", Range(0,2)) = 0
		_ColorFactorA("ColorFactorA", Range(0,1)) = 0.7
		_ColorFactorB("ColorFactorB", Range(0,1)) = 0.8
	}

	CGINCLUDE
	#include "Lighting.cginc"
	uniform fixed4 _Diffuse;
	uniform fixed4 _DissolveColorA;
	uniform fixed4 _DissolveColorB;
	uniform sampler2D _MainTex;
	uniform float4 _MainTex_ST;
	uniform sampler2D _DissolveMap;
	uniform float _DissolveThreshold;
	uniform float _ColorFactorA;
	uniform float _ColorFactorB;

	struct v2f
	{
		float4 pos : SV_POSITION;
		float3 worldNormal : TEXCOORD0;
		float2 uv : TEXCOORD1;
		float4 screenPos : TEXCOORD2;
	};

	v2f vert(appdata_base v)
	{
		v2f o;
		o.pos = mul(UNITY_MATRIX_MVP, v.vertex);
		o.uv = TRANSFORM_TEX(v.texcoord, _MainTex);
		o.worldNormal = mul(v.normal, (float3x3)unity_WorldToObject);
		o.pos = mul(UNITY_MATRIX_MVP, v.vertex);
		//计算屏幕坐标
		o.screenPos = ComputeGrabScreenPos(o.pos);
		return o;
	}

	fixed4 frag(v2f i) : SV_Target
	{
		float2 screenPos = i.screenPos.xy / i.screenPos.w;
		//计算距离中心点距离
		float2 dir = float2(0.5, 0.5) - screenPos;
		float distance = sqrt(dir.x * dir.x + dir.y * dir.y);
		//距离中心点近的才进行溶解处理
		float disolveFactor = (0.5 - distance) * _DissolveThreshold;
		//采样Dissolve Map
		fixed4 dissolveValue = tex2D(_DissolveMap, i.uv);
		//小于阈值的部分直接discard
		if (dissolveValue.r < disolveFactor)
		{
			discard;
		}
		//Diffuse + Ambient光照计算
		fixed3 worldNormal = normalize(i.worldNormal);
		fixed3 worldLightDir = normalize(_WorldSpaceLightPos0.xyz);
		fixed3 lambert = saturate(dot(worldNormal, worldLightDir));
		fixed3 albedo = lambert * _Diffuse.xyz * _LightColor0.xyz + UNITY_LIGHTMODEL_AMBIENT.xyz;
		fixed3 color = tex2D(_MainTex, i.uv).rgb * albedo;
		//这里为了比较方便,直接用color和最终的边缘lerp了
		float lerpValue = disolveFactor / dissolveValue.r;
		if (lerpValue > _ColorFactorA)
		{
			if (lerpValue > _ColorFactorB)
				return _DissolveColorB;
			return _DissolveColorA;
		}
		return fixed4(color, 1);
	}
	ENDCG

	SubShader
	{
		Tags{ "RenderType" = "Opaque" }
		Pass
		{
			CGPROGRAM
			#pragma vertex vert
			#pragma fragment frag
			ENDCG
		}
	}
	FallBack "Diffuse"
}
哇塞,有一种鼬神天照的赶脚,看哪哪溶解。要是什么时候Get到这样的神技就好了。不过现在这种效果确实有些太猛了点,视线之内寸草不生,貌似不是我们想要的效果,毕竟我们想解决的只是挡住主角的那一部分。所以,我们需要给一个距离限制,当这个像素点距离相机在这个距离限制之内,就进行溶解,否则不进行溶解。其实这个距离刚好就可以给成我们相机到主角之间的距离,这样,只要人物经过哪里,人物和相机之间的内容就会进行溶解。我们给上面的shader加工一下,增加一个距离的限制:
//遮挡溶解效果
//by:puppet_master
//2017.7.26

Shader "ApcShader/OcclusionDissolve"
{
	Properties{
		_Diffuse("Diffuse", Color) = (1,1,1,1)
		_DissolveColorA("Dissolve Color A", Color) = (0,1,1,0)
		_DissolveColorB("Dissolve Color B", Color) = (0.3,0.3,0.3,1)
		_MainTex("Base 2D", 2D) = "white"{}
		_DissolveMap("DissolveMap", 2D) = "white"{}
		_DissolveThreshold("DissolveThreshold", Range(0,2)) = 2
		_ColorFactorA("ColorFactorA", Range(0,1)) = 0.7
		_ColorFactorB("ColorFactorB", Range(0,1)) = 0.8
		_DissolveDistance("DissolveDistance", Range(0, 20)) = 14
		_DissolveDistanceFactor("DissolveDistanceFactor", Range(0,3)) = 3
	}

	CGINCLUDE
	#include "Lighting.cginc"
	uniform fixed4 _Diffuse;
	uniform fixed4 _DissolveColorA;
	uniform fixed4 _DissolveColorB;
	uniform sampler2D _MainTex;
	uniform float4 _MainTex_ST;
	uniform sampler2D _DissolveMap;
	uniform float _DissolveThreshold;
	uniform float _ColorFactorA;
	uniform float _ColorFactorB;
	uniform float _DissolveDistance;
	uniform float _DissolveDistanceFactor;

	struct v2f
	{
		float4 pos : SV_POSITION;
		float3 worldNormal : TEXCOORD0;
		float2 uv : TEXCOORD1;
		float4 screenPos : TEXCOORD2;
		float3 viewDir : TEXCOORD3;
	};

	v2f vert(appdata_base v)
	{
		v2f o;
		o.pos = mul(UNITY_MATRIX_MVP, v.vertex);
		o.uv = TRANSFORM_TEX(v.texcoord, _MainTex);
		o.worldNormal = mul(v.normal, (float3x3)unity_WorldToObject);
		o.pos = mul(UNITY_MATRIX_MVP, v.vertex);
		o.viewDir = ObjSpaceViewDir(v.vertex);
		//计算屏幕坐标
		o.screenPos = ComputeGrabScreenPos(o.pos);
		return o;
	}

	fixed4 frag(v2f i) : SV_Target
	{
		float2 screenPos = i.screenPos.xy / i.screenPos.w;
		//计算距离中心点距离作为一个控制系数
		float2 dir = float2(0.5, 0.5) - screenPos;
		float screenSpaceDistance = 0.5 - sqrt(dir.x * dir.x + dir.y * dir.y);
		//计算一下像素点到相机距离作为另一个控制系数
		float viewDistance =  max(0,(_DissolveDistance - length(i.viewDir)) / _DissolveDistance) * _DissolveDistanceFactor;
		//用两个控制系数作为最终溶解的系数
		float disolveFactor = viewDistance * screenSpaceDistance * _DissolveThreshold;
		//采样Dissolve Map
		fixed4 dissolveValue = tex2D(_DissolveMap, i.uv);
		//小于阈值的部分直接discard
		if (dissolveValue.r < disolveFactor)
		{
			discard;
		}
		//Diffuse + Ambient光照计算
		fixed3 worldNormal = normalize(i.worldNormal);
		fixed3 worldLightDir = normalize(_WorldSpaceLightPos0.xyz);
		fixed3 lambert = saturate(dot(worldNormal, worldLightDir));
		fixed3 albedo = lambert * _Diffuse.xyz * _LightColor0.xyz + UNITY_LIGHTMODEL_AMBIENT.xyz;
		fixed3 color = tex2D(_MainTex, i.uv).rgb * albedo;
		//这里为了比较方便,直接用color和最终的边缘lerp了
		float lerpValue = disolveFactor / dissolveValue.r;
		if (lerpValue > _ColorFactorA)
		{
			if (lerpValue > _ColorFactorB)
				return _DissolveColorB;
			return _DissolveColorA;
		}
		return fixed4(color, 1);
	}
	ENDCG

	SubShader
	{
		Tags{ "RenderType" = "Opaque" }
		Pass
		{
			CGPROGRAM
			#pragma vertex vert
			#pragma fragment frag
			ENDCG
		}
	}
	FallBack "Diffuse"
}
最终效果如下图所示,人物走过的部分可能会遮挡人物的物体就都被溶解掉了:
当然,这个遮挡溶解的效果与原文的效果还是有一定差距的,主要是溶解我们使用的还是噪声图的溶解,没有使用程序噪声,采样方法也不一样,进一步优化打算等之后的文章再写啦,这篇写得好累....
