【 FastDFS 】—— 使用
1、java客户端
余庆先生提供了一个Java客户端,但是作为一个C程序员,写的java代码可想而知。而且已经很久不维护了。
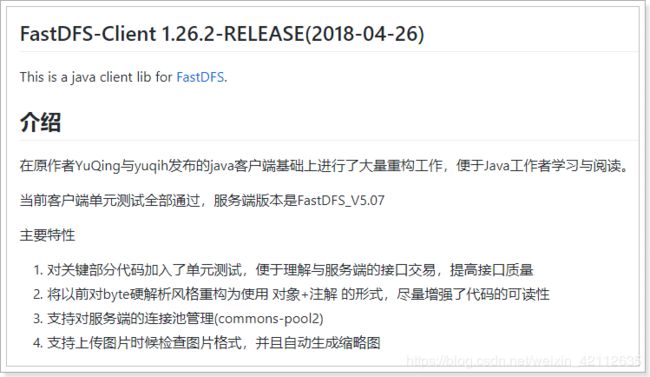
这里推荐一个开源的 FastDFS 客户端,支持最新的 SpringBoot2.0。
配置使用极为简单,支持连接池,支持自动生成缩略图,狂拽酷炫吊炸天啊,有木有。
地址:tobato/FastDFS_client
1.1 引入依赖
在父工程中,我们已经管理了依赖,版本为:
<fastDFS.client.version>1.26.1-RELEASEfastDFS.client.version>
因此,这里我们直接引入坐标即可:
<dependency>
    <groupId>com.github.tobatogroupId>
    <artifactId>fastdfs-clientartifactId>
dependency>
1.2 引入配置类
纯 java 配置:
package com.leyou.upload.config;

import com.github.tobato.fastdfs.FdfsClientConfig;
import org.springframework.context.annotation.Configuration;
import org.springframework.context.annotation.EnableMBeanExport;
import org.springframework.context.annotation.Import;
import org.springframework.jmx.support.RegistrationPolicy;

@Configuration
@Import(FdfsClientConfig.class)
// 解决jmx重复注册bean的问题
@EnableMBeanExport(registration = RegistrationPolicy.IGNORE_EXISTING)
public class FastClientImporter {
}
1.3 编写FastDFS属性
fdfs:
  so-timeout: 1501
  connect-timeout: 601
  thumb-image: # 缩略图
    width: 60
    height: 60
  tracker-list: # tracker地址
    - 192.168.25.11:22122
1.4 测试
package com.leyou.upload;

import com.github.tobato.fastdfs.domain.StorePath;
import com.github.tobato.fastdfs.domain.ThumbImageConfig;
import com.github.tobato.fastdfs.service.FastFileStorageClient;
import org.junit.Test;
import org.junit.runner.RunWith;
import org.springframework.beans.factory.annotation.Autowired;
import org.springframework.boot.test.context.SpringBootTest;
import org.springframework.test.context.junit4.SpringRunner;

import java.io.File;
import java.io.FileInputStream;
import java.io.FileNotFoundException;

@RunWith(SpringRunner.class)
@SpringBootTest
public class FdfsTest {

    @Autowired
    private FastFileStorageClient storageClient;

    @Autowired
    private ThumbImageConfig thumbImageConfig;

    @Test
    public void testUpload() throws FileNotFoundException {
        File file = new File("D:\\BOS\\1.png");
        // 上传并且生成缩略图
        StorePath storePath = this.storageClient.uploadFile(
                new FileInputStream(file), file.length(), "png", null);
        // 带分组的路径
        System.out.println(storePath.getFullPath());
        // 不带分组的路径
        System.out.println(storePath.getPath());
    }

    @Test
    public void testUploadAndCreateThumb() throws FileNotFoundException {
        File file = new File("D:\\BOS\\1.png");
        // 上传并且生成缩略图
        StorePath storePath = this.storageClient.uploadImageAndCrtThumbImage(
                new FileInputStream(file), file.length(), "png", null);
        // 带分组的路径
        System.out.println(storePath.getFullPath());
        // 不带分组的路径
        System.out.println(storePath.getPath());
        // 获取缩略图路径
        String path = thumbImageConfig.getThumbImagePath(storePath.getPath());
        System.out.println(path);
    }
}
结果:
group1/M00/00/00/wKgZC1yFT32AACf2AABBD0w8uG4940.png
M00/00/00/wKgZC1yFT32AACf2AABBD0w8uG4940.png
M00/00/00/wKgZC1yFT32AACf2AABBD0w8uG4940_60x60.png
访问第一个路径:
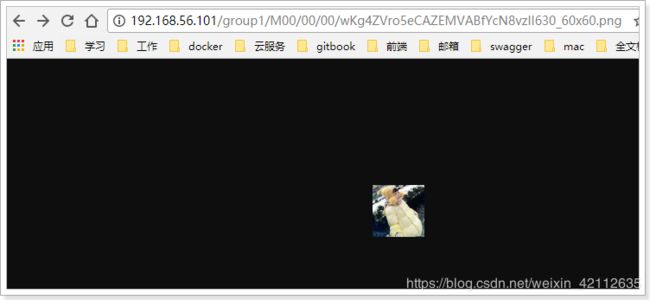
访问最后一个路径(缩略图路径),注意加组名:
1.5 改造上传逻辑
package com.leyou.upload.service;

import com.github.tobato.fastdfs.domain.StorePath;
import com.github.tobato.fastdfs.service.FastFileStorageClient;
import com.leyou.common.enums.ExceptionEnum;
import com.leyou.common.exception.LyException;
import lombok.extern.slf4j.Slf4j;
import org.apache.commons.lang.StringUtils;
import org.springframework.beans.factory.annotation.Autowired;
import org.springframework.stereotype.Service;
import org.springframework.web.multipart.MultipartFile;

import javax.imageio.ImageIO;
import java.awt.image.BufferedImage;
import java.io.File;
import java.io.IOException;
import java.util.Arrays;
import java.util.List;

@Service
@Slf4j
public class UploadService {

    @Autowired
    private FastFileStorageClient fastFileStorageClient;

    // 支持的文件类型
    private static final List<String> ALLOW_TYPES = Arrays.asList("image/png", "image/jpeg");

    public String uploadImage(MultipartFile file) {
        try {
            // 1、图片信息校验
            // 1)校验文件类型
            String contentType = file.getContentType();
            if (!ALLOW_TYPES.contains(contentType)) {
                throw new LyException(ExceptionEnum.INVALID_FILE_TYPE);
            }
            // 2)校验图片内容
            BufferedImage image = ImageIO.read(file.getInputStream());
            if (image == null) {
                throw new LyException(ExceptionEnum.INVALID_FILE_TYPE);
            }

            // 2、上传到 fastdfs
            String extension = StringUtils.substringAfterLast(file.getOriginalFilename(), ".");
            StorePath storePath = fastFileStorageClient.uploadFile(file.getInputStream(), file.getSize(), extension, null);
            // 返回路径
            return "http://image.leyou.com/" + storePath.getFullPath();
        } catch (IOException e){
            // 上传失败
            log.error("上传文件失败", e);
            throw new LyException(ExceptionEnum.UPLOAD_FILE_ERROR);
        }

    }
}
只需要把原来保存文件的逻辑去掉,然后上传到 FastDFS 即可。
1.6 测试
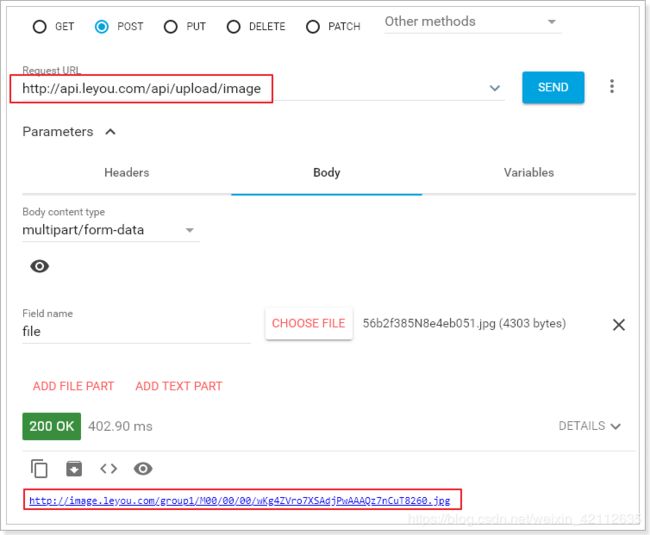
通过RestClient测试:
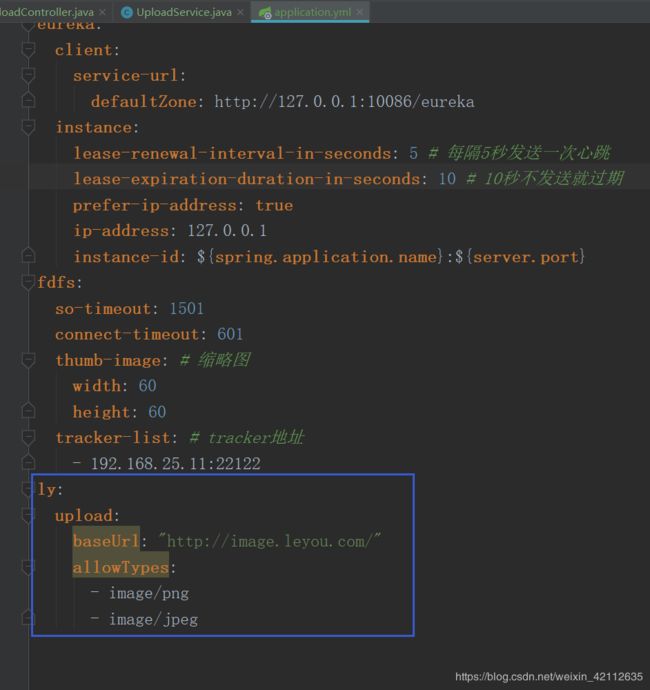
修改上面的 可能修改的配置 ,到配置文件中读取
server:
  port: 8082
spring:
  application:
    name: upload-service
  servlet:
    multipart:
      max-file-size: 5MB # 限制文件上传的大小
# Eureka
eureka:
  client:
    service-url:
      defaultZone: http://127.0.0.1:10086/eureka
  instance:
    lease-renewal-interval-in-seconds: 5 # 每隔5秒发送一次心跳
    lease-expiration-duration-in-seconds: 10 # 10秒不发送就过期
    prefer-ip-address: true
    ip-address: 127.0.0.1
    instance-id: ${spring.application.name}:${server.port}
fdfs:
  so-timeout: 1501
  connect-timeout: 601
  thumb-image: # 缩略图
    width: 60
    height: 60
  tracker-list: # tracker地址
    - 192.168.25.11:22122
ly:
  upload:
    baseUrl: "http://image.leyou.com/"
    allowTypes:
      - image/png
      - image/jpeg
package com.leyou.upload.config;

import lombok.Data;
import org.springframework.boot.context.properties.ConfigurationProperties;

import java.util.List;

@Data
@ConfigurationProperties(prefix = "ly.upload")
public class UploadProperties {

    private String baseUrl;
    private List<String> allowTypes;

}
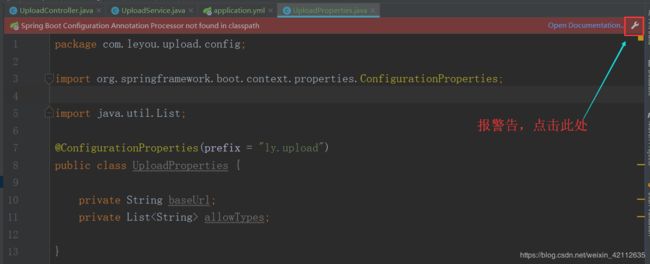
要注入值的类上加注解 @EnableConfigurationProperties(UploadProperties.class)
package com.leyou.upload.service;

import com.github.tobato.fastdfs.domain.StorePath;
import com.github.tobato.fastdfs.service.FastFileStorageClient;
import com.leyou.common.enums.ExceptionEnum;
import com.leyou.common.exception.LyException;
import com.leyou.upload.config.UploadProperties;
import lombok.extern.slf4j.Slf4j;
import org.apache.commons.lang.StringUtils;
import org.springframework.beans.factory.annotation.Autowired;
import org.springframework.boot.context.properties.EnableConfigurationProperties;
import org.springframework.stereotype.Service;
import org.springframework.web.multipart.MultipartFile;

import javax.imageio.ImageIO;
import java.awt.image.BufferedImage;
import java.io.IOException;
import java.util.Arrays;
import java.util.List;

@Service
@Slf4j
@EnableConfigurationProperties(UploadProperties.class)
public class UploadService {

    @Autowired
    private FastFileStorageClient fastFileStorageClient;

    @Autowired
    private UploadProperties prop;

    // 支持的文件类型
    //private static final List ALLOW_TYPES = Arrays.asList("image/png", "image/jpeg");

    public String uploadImage(MultipartFile file) {
        try {
            // 1、图片信息校验
            // 1)校验文件类型
            String contentType = file.getContentType();
            if (!prop.getAllowTypes().contains(contentType)) {
                throw new LyException(ExceptionEnum.INVALID_FILE_TYPE);
            }
            // 2)校验图片内容
            BufferedImage image = ImageIO.read(file.getInputStream());
            if (image == null) {
                throw new LyException(ExceptionEnum.INVALID_FILE_TYPE);
            }

            // 2、上传到 fastdfs
            String extension = StringUtils.substringAfterLast(file.getOriginalFilename(), ".");
            StorePath storePath = fastFileStorageClient.uploadFile(file.getInputStream(), file.getSize(), extension, null);
            // 返回路径
            return prop.getBaseUrl() + storePath.getFullPath();
        } catch (IOException e){
            // 上传失败
            log.error("上传文件失败", e);
            throw new LyException(ExceptionEnum.UPLOAD_FILE_ERROR);
        }

    }
}
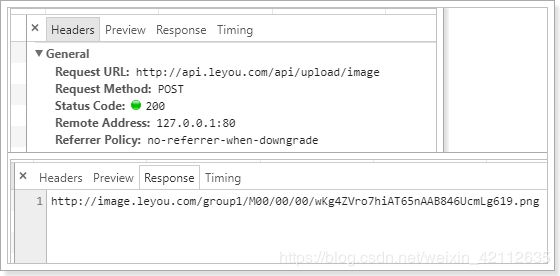
2、页面测试上传
发现上传成功:
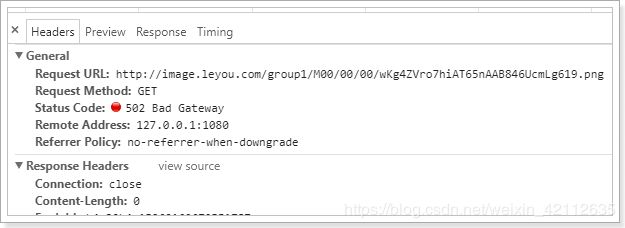
不过,当我们访问页面时:
这是因为我们图片是上传到虚拟机的,ip为:192.168.56.101
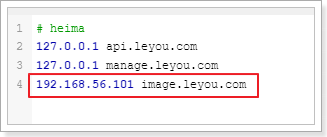
因此,我们需要将image.leyou.com映射到192.168.56.101
修改我们的hosts:
再次上传:
注意:nginx 也对文件上传的大小有限制,可以修改相关参数。
配置:client_max_body_size 10M;
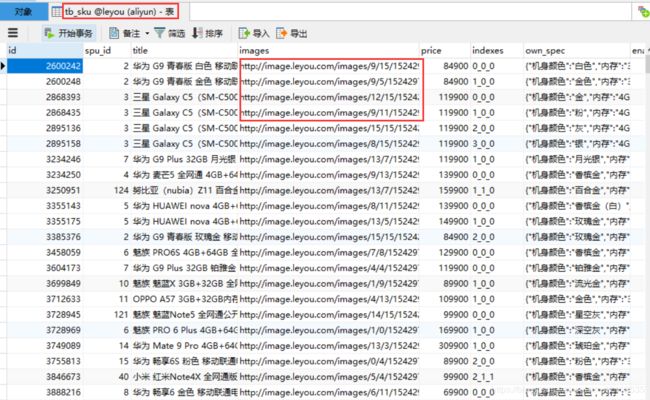
导入图片到虚拟机
tb_sku里面炫耀图片
点击下载图片
修改 nginx 的配置,指向上传的图片:sudo vi /opt/nginx/conf/nginx.conf
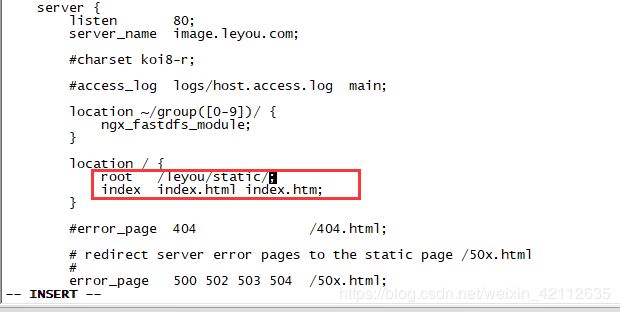
重新加载:sudo nginx -s reload

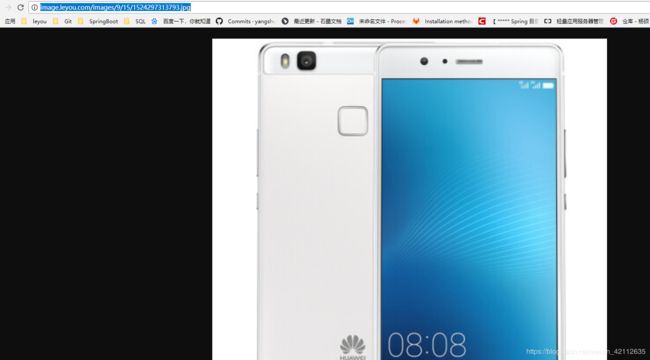
测试:
访问该路径:http://image.leyou.com/images/9/15/1524297313793.jpg

------------------------------------------------- 未完成
3、修改品牌(作业)
修改的难点在于回显。
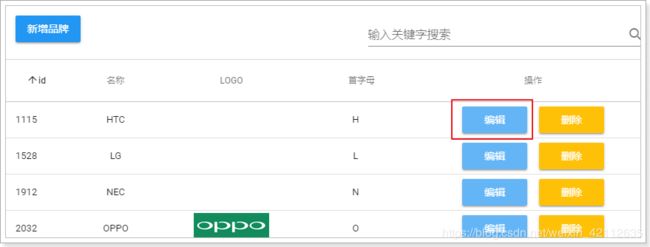
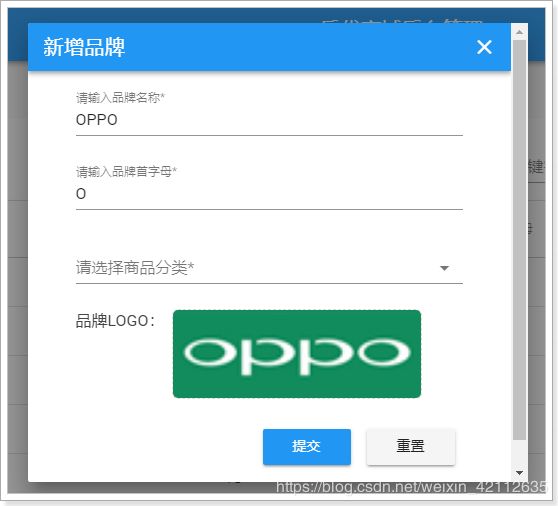
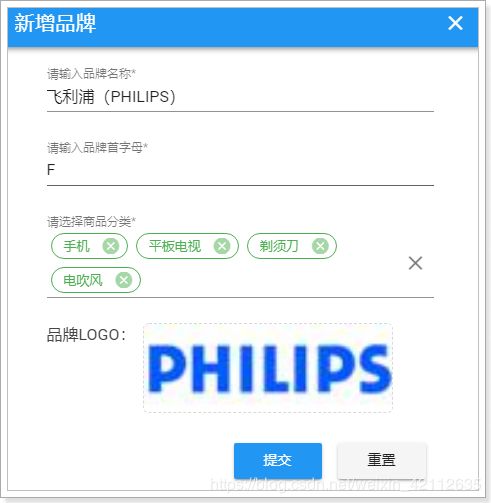
当我们点击编辑按钮,希望弹出窗口的同时,看到原来的数据:
点击编辑出现弹窗
这个比较简单,修改show属性为true即可实现,我们绑定一个点击事件:
<v-btn color="info" @click="editBrand">编辑v-btn>
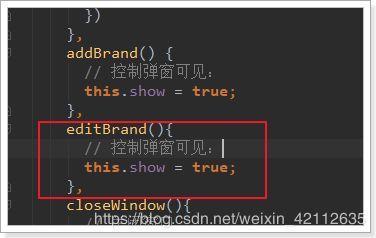
然后编写事件,改变show 的状态:
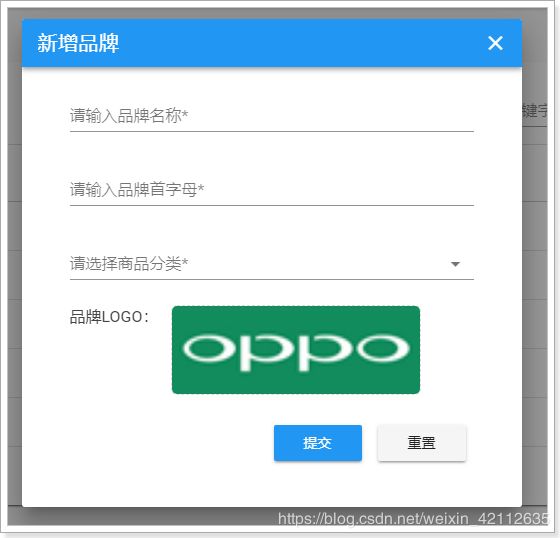
如果仅仅是这样,编辑按钮与新增按钮将没有任何区别,关键在于,如何回显呢?
回显数据
回显数据,就是把当前点击的品牌数据传递到子组件(MyBrandForm)。而父组件给子组件传递数据,通过props属性。
-
第一步:在编辑时获取当前选中的品牌信息,并且记录到data中
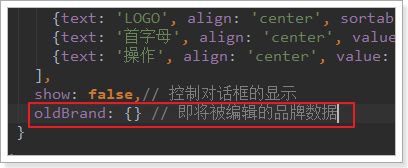
先在data中定义属性,用来接收用来编辑的brand数据:
我们在页面触发编辑事件时,把当前的brand传递给editBrand方法:
<v-btn color="info" @click="editBrand(props.item)">编辑v-btn>
然后在editBrand中接收数据,赋值给oldBrand:
editBrand(oldBrand){
  // 控制弹窗可见:
  this.show = true;
  // 获取要编辑的brand
  this.oldBrand = oldBrand;
},
-
第二步:把获取的brand数据 传递给子组件
<v-card-text class="px-5"> <my-brand-form @close="closeWindow" :oldBrand="oldBrand"/> v-card-text> -
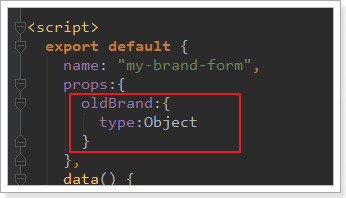
第三步:在子组件中通过props接收要编辑的brand数据,Vue会自动完成回显
接收数据:
通过watch函数监控oldBrand的变化,把值copy到本地的brand:
watch: {
    oldBrand: {// 监控oldBrand的变化
        handler(val) {
            if(val){
                // 注意不要直接复制,否则这边的修改会影响到父组件的数据,copy属性即可
                this.brand =  Object.deepCopy(val)
            }else{
                // 为空,初始化brand
                this.brand = {
                    name: '',
                    letter: '',
                    image: '',
                    categories: [],
                }
            }
        },
            deep: true
    }
}
- Object.deepCopy 自定义的对对象进行深度复制的方法。
- 需要判断监听到的是否为空,如果为空,应该进行初始化
测试:发现数据回显了,除了商品分类以外:
商品分类回显
为什么商品分类没有回显?
因为品牌中并没有商品分类数据。我们需要在进入编辑页面之前,查询商品分类信息:
后台提供接口
controller
/**
     * 通过品牌id查询商品分类
     * @param bid
     * @return
     */
@GetMapping("bid/{bid}")
public ResponseEntity<List<Category>> queryByBrandId(@PathVariable("bid") Long bid) {
    List<Category> list = this.categoryService.queryByBrandId(bid);
    if (list == null || list.size() < 1) {
        return new ResponseEntity<>(HttpStatus.NOT_FOUND);
    }
    return ResponseEntity.ok(list);
}
Service
public List<Category> queryByBrandId(Long bid) {
    return this.categoryMapper.queryByBrandId(bid);
}
mapper
因为需要通过中间表进行子查询,所以这里要手写Sql:
/**
     * 根据品牌id查询商品分类
     * @param bid
     * @return
     */
@Select("SELECT * FROM tb_category WHERE id IN (SELECT category_id FROM tb_category_brand WHERE brand_id = #{bid})")
List<Category> queryByBrandId(Long bid);
前台查询分类并渲染
我们在编辑页面打开之前,先把数据查询完毕:
editBrand(oldBrand){
    // 根据品牌信息查询商品分类
    this.$http.get("/item/category/bid/" + oldBrand.id)
        .then(({data}) => {
        // 控制弹窗可见:
        this.show = true;
        // 获取要编辑的brand
        this.oldBrand = oldBrand
        // 回显商品分类
        this.oldBrand.categories = data;
    })
}
再次测试:数据成功回显了
新增窗口数据干扰
但是,此时却产生了新问题:新增窗口竟然也有数据?
原因:
如果之前打开过编辑,那么在父组件中记录的oldBrand会保留。下次再打开窗口,如果是编辑窗口到没问题,但是新增的话,就会再次显示上次打开的品牌信息了。
解决:
新增窗口打开前,把数据置空。
addBrand() {
    // 控制弹窗可见:
    this.show = true;
    // 把oldBrand变为null
    this.oldBrand = null;
}
提交表单时判断是新增还是修改
新增和修改是同一个页面,我们该如何判断?
父组件中点击按钮弹出新增或修改的窗口,因此父组件非常清楚接下来是新增还是修改。
因此,最简单的方案就是,在父组件中定义变量,记录新增或修改状态,当弹出页面时,把这个状态也传递给子组件。
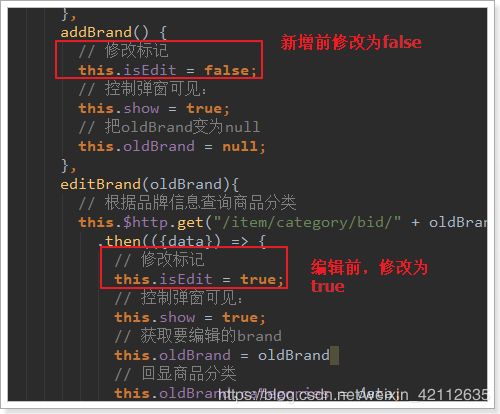
第一步:在父组件中记录状态:
第二步:在新增和修改前,更改状态:
第三步:传递给子组件
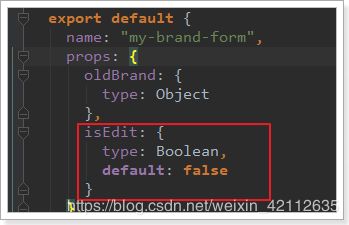
第四步,子组件接收标记:
标题的动态化:
表单提交动态:
axios除了除了get和post外,还有一个通用的请求方式:
// 将数据提交到后台
// this.$http.post('/item/brand', this.$qs.stringify(params))
this.$http({
    method: this.isEdit ? 'put' : 'post', // 动态判断是POST还是PUT
    url: '/item/brand',
    data: this.$qs.stringify(this.brand)
}).then(() => {
    // 关闭窗口
    this.$emit("close");
    this.$message.success("保存成功!");
})
    .catch(() => {
    this.$message.error("保存失败!");
});
