双目相机的标定加校正详细过程(附代码)
一.标定
标定相机我用到了matlab的标定工具箱,使用方法很简单,网上也有很全的解释。
首先用双目相机拍摄棋盘格:

 最后生成的结果为:
 上图包括了左右相机的所有内参以及外参。

这是其中左相机的内参矩阵,值得一提的是matlab标定得到的内参矩阵是经过转置的。
多啰嗦下我对数据的一些处理过程:
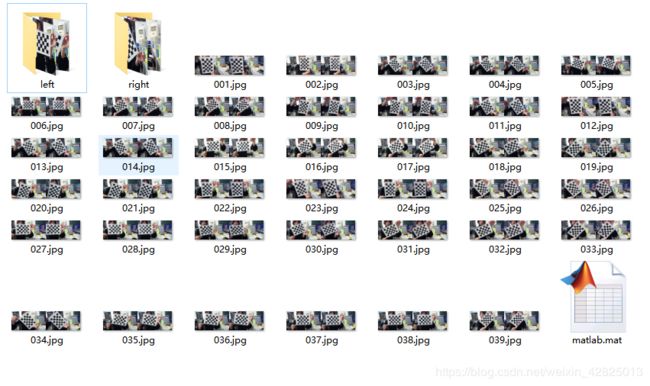
 这些密密麻麻的是我用双目相机拍摄的一些数据集
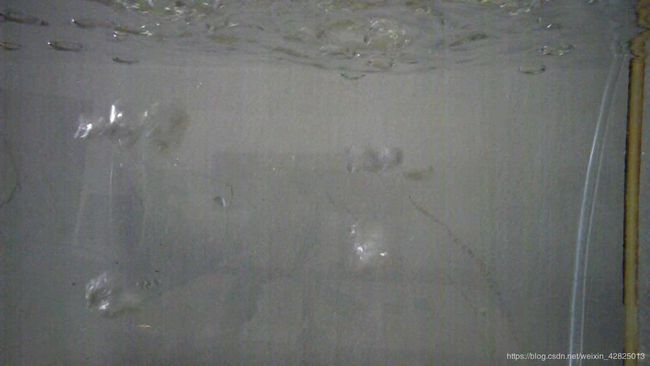
 是水缸中的一些气泡。
首先我要对这些图片批量重命名
图片批量重命名
import os

class ImageRename():
    def __init__(self):
        self.path = 'D:\\learn\\气泡\\train\\right'

    def rename(self):
        filelist = os.listdir(self.path)
        total_num = len(filelist)

        i = 1

        for item in filelist:
            if item.endswith('.jpg'):
                src = os.path.join(os.path.abspath(self.path), item)
                dst = os.path.join(os.path.abspath(self.path),  '0'+format(str(i), '0>3s') + '.jpg')
                os.rename(src, dst)
                print('converting %s to %s ...' % (src, dst))
                i = i + 1
        print('total %d to rename & converted %d jpgs' % (total_num, i))


if __name__ == '__main__':
    newname = ImageRename()
    newname.rename()
批量裁剪图片
# coding: utf-8
from PIL import Image
import os
import os.path
import numpy as np
import cv2

# 指明被遍历的文件夹
rootdir = r'D:\learn\气泡\train'
for parent, dirnames, filenames in os.walk(rootdir):  # 遍历每一张图片
    for filename in filenames:
        print('parent is :' + parent)
        print('filename is :' + filename)
        currentPath = os.path.join(parent, filename)
        print('the fulll name of the file is :' + currentPath)

        img = Image.open(currentPath)
        print(img.format, img.size, img.mode)
        # img.show()
        box1 = (0, 0, 1280, 720)  # 设置左、上、右、下的像素
        image1 = img.crop(box1)  # 图像裁剪
        image1.save(r"C:\Users\ouc\Desktop\left" + '\\' + filename)  # 存储裁剪得到的图像
二.图像校正
将我们标定得到的内参和外参写进camera_configs.py
# filename: camera_configs.py
import cv2
import numpy as np

left_camera_matrix = np.array([[921.3077, 0., 651.7025],
                               [0., 924.6726, 344.8535],
                               [0., 0., 1.]])
left_distortion = np.array([[0.0186, 0.0520, 0.00000, 0.00000, 0.00000]])

right_camera_matrix = np.array([[920.8879, 0., 651.3146],
                                [0., 924.2502, 350.8585],
                                [0., 0., 1.]])
right_distortion = np.array([[0.0338, -0.0329, 0.00000, 0.00000, 0.00000]])

#om = np.array([0.01911, 0.03125, -0.00960]) # 旋转关系向量
#R = cv2.Rodrigues(om)[0]  # 使用Rodrigues变换将om变换为R
R = np.array([[0.9999,-0.0044,0.0092],[0.0044,1.0000,-0.0015],[-0.0092,0.0016,1.0000]])
T = np.array([-63.6997, -0.7008, 0.3941]) # 平移关系向量

size = (1280, 720) # 图像尺寸

# 进行立体更正
R1, R2, P1, P2, Q, validPixROI1, validPixROI2 = cv2.stereoRectify(left_camera_matrix, left_distortion,
                                                                  right_camera_matrix, right_distortion, size, R,
                                                                  T)
# 计算更正map
left_map1, left_map2 = cv2.initUndistortRectifyMap(left_camera_matrix, left_distortion, R1, P1, size, cv2.CV_16SC2)
right_map1, right_map2 = cv2.initUndistortRectifyMap(right_camera_matrix, right_distortion, R2, P2, size, cv2.CV_16SC2)
import numpy as np
import cv2
import camera_configs

# cv2.namedWindow("left")
# cv2.namedWindow("right")
# cv2.namedWindow("depth")
# cv2.moveWindow("left", 0, 0)
# cv2.moveWindow("right", 600, 0)
# cv2.createTrackbar("num", "depth", 0, 10, lambda x: None)
# cv2.createTrackbar("blockSize", "depth", 5, 255, lambda x: None)
# camera1 = cv2.VideoCapture(0)
# camera2 = cv2.VideoCapture(1)

# 添加点击事件,打印当前点的距离
def callbackFunc(e, x, y, f, p):
    if e == cv2.EVENT_LBUTTONDOWN:
        print(threeD[y][x])

cv2.setMouseCallback("depth", callbackFunc, None)

# while True:
#     ret1, frame1 = camera1.read()
#     ret2, frame2 = camera2.read()
#
#     if not ret1 or not ret2:
#         break
for i in range(1, 316):
    frame1 = cv2.imdecode(np.fromfile('D:\\learn\\气泡\\train\\left\\' + str(i) + '.jpg', dtype=np.uint8),
                          cv2.IMREAD_COLOR)
    frame2 = cv2.imdecode(np.fromfile('D:\\learn\\气泡\\train\\right\\' + str(i) + '.jpg', dtype=np.uint8),
                          cv2.IMREAD_COLOR)
    # 根据更正map对图片进行重构
    img1_rectified = cv2.remap(frame1, camera_configs.left_map1, camera_configs.left_map2, cv2.INTER_LINEAR)
    img2_rectified = cv2.remap(frame2, camera_configs.right_map1, camera_configs.right_map2, cv2.INTER_LINEAR)
    cv2.imencode('.jpg', img1_rectified)[1].tofile('D:\\learn\\气泡\\train\\jleft\\' + str(i) + '.jpg')
    #cv2.imwrite("jleft.png", img1_rectified)
    cv2.imencode('.jpg', img2_rectified)[1].tofile('D:\\learn\\气泡\\train\\jright\\' + str(i) + '.jpg')
    #cv2.imwrite("jright.png", img2_rectified)

    # 将图片置为灰度图,为StereoBM作准备
    imgL = cv2.cvtColor(img1_rectified, cv2.COLOR_BGR2GRAY)
    imgR = cv2.cvtColor(img2_rectified, cv2.COLOR_BGR2GRAY)

    # 两个trackbar用来调节不同的参数查看效果
    num = cv2.getTrackbarPos("num", "depth")
    blockSize = cv2.getTrackbarPos("blockSize", "depth")
    if blockSize % 2 == 0:
        blockSize += 1
    if blockSize < 5:
        blockSize = 5

    # 根据Block Maching方法生成差异图(opencv里也提供了SGBM/Semi-Global Block Matching算法,有兴趣可以试试)
    stereo = cv2.StereoBM_create(numDisparities=16*num, blockSize=blockSize)
    disparity = stereo.compute(imgL, imgR)

    disp = cv2.normalize(disparity, disparity, alpha=0, beta=255, norm_type=cv2.NORM_MINMAX, dtype=cv2.CV_8U)
    # 将图片扩展至3d空间中,其z方向的值则为当前的距离
    threeD = cv2.reprojectImageTo3D(disparity.astype(np.float32)/16., camera_configs.Q)

    # cv2.imshow("left", img1_rectified)
    # cv2.imshow("right", img2_rectified)
    # cv2.imshow("depth", disp)

    #cv2.imwrite("jleft.jpg", imgL)
    #cv2.imwrite("jright.jpg", imgR)
    #cv2.imwrite("depth.png", disp)

    # key = cv2.waitKey(1)
    # if key == ord("q"):
    #     break
    # elif key == ord("s"):
    #     cv2.imwrite("./snapshot/BM_left.jpg", imgL)
    #     cv2.imwrite("./snapshot/BM_right.jpg", imgR)
    #     cv2.imwrite("./snapshot/BM_depth.jpg", disp)

    # camera1.release()
    # camera2.release()
    # cv2.destroyAllWindows()
jiaozheng.py实现了左右图的校正

 最后再将校正后的图片拼接
图片拼接
# -*- coding:utf-8 -*-

from PIL import Image


def join(flag='horizontal'):
    for i in range(1, 316):
       png1 = 'D:\\learn\\气泡\\train\\jleft\\'+str(i) + '.jpg'
       png2 = 'D:\\learn\\气泡\\train\\jright\\'+str(i) + '.jpg'
       img1, img2 = Image.open(png1), Image.open(png2)
       size1, size2 = img1.size, img2.size
       if flag == 'horizontal':
          joint = Image.new('RGB', (size1[0]+size2[0], size1[1]))
          loc1, loc2 = (0, 0), (size1[0], 0)
          joint.paste(img1, loc1)
          joint.paste(img2, loc2)
          joint.save('D:\\learn\\气泡\\train\\result\\'+str(i) + '.jpg')
       elif flag == 'vertical':
          joint = Image.new('RGB', (size1[0], size1[1]+size2[1]))
          loc1, loc2 = (0, 0), (0, size1[1])
          joint.paste(img1, loc1)
          joint.paste(img2, loc2)
          joint.save('vertical.jpg')


if __name__ == '__main__':
    join(flag='horizontal')
    #join(png, png, flag='vertical')


