学习学习SpringSecurity
Spring Security
思维导图
[外链图片转存失败,源站可能有防盗链机制,建议将图片保存下来直接上传(img-WP0wmsj1-1591518754336)(http://imgs.iming.info//a879297d888bec8167d72c43d8fa8968)]
简介
SpringSecurity是Spring下的一个安全框架,与shiro 类似,一般用于用户认证(Authentication)和用户授权(Authorization)两个部分,常与与SpringBoot相整合。
初阶 Spring Security
添加maven依赖
            org.springframework.boot
            spring-boot-starter-security
用户名默认为 user
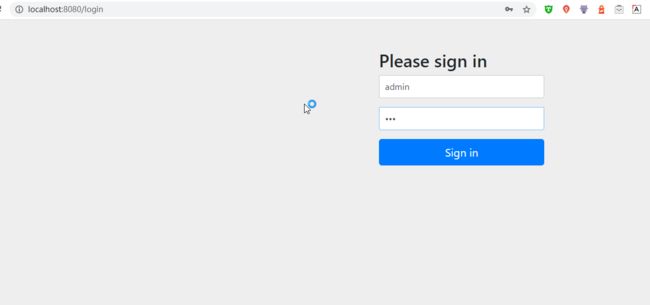
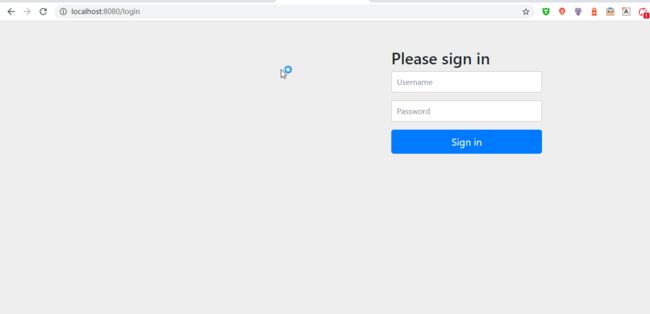
输入用户名和密码
[外链图片转存失败,源站可能有防盗链机制,建议将图片保存下来直接上传(img-2b4qayP1-1591518754360)(http://imgs.iming.info//d70f27ac397fb947cb32a6578bc05367)]
[外链图片转存失败,源站可能有防盗链机制,建议将图片保存下来直接上传(img-rZ3FEshk-1591518754367)(http://imgs.iming.info//3c64f6cd49bae49700a4aa9095bdbd35)]
登录成功
中阶 Security 内存用户名和密码
用户名密码登录
在上面的章节中,添加了Security依赖,直接就出现了登录界面,这次让用户名,密码保存到内存当中
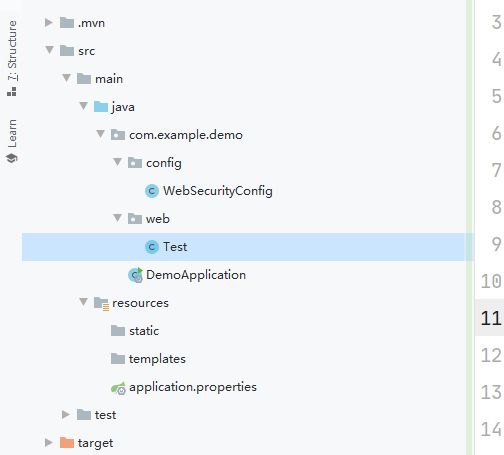
写一个extends WebSecurityConfigurerAdapter的配置类:
配置类内容如下
package com.example.demo.config;

import org.springframework.context.annotation.Bean;
import org.springframework.context.annotation.Configuration;
import org.springframework.security.config.annotation.authentication.builders.AuthenticationManagerBuilder;
import org.springframework.security.config.annotation.method.configuration.EnableGlobalMethodSecurity;
import org.springframework.security.config.annotation.web.builders.HttpSecurity;
import org.springframework.security.config.annotation.web.configuration.EnableWebSecurity;
import org.springframework.security.config.annotation.web.configuration.WebSecurityConfigurerAdapter;
import org.springframework.security.crypto.bcrypt.BCryptPasswordEncoder;
import org.springframework.security.crypto.password.PasswordEncoder;


@Configuration
@EnableWebSecurity
@EnableGlobalMethodSecurity(prePostEnabled = true, securedEnabled = true, jsr250Enabled = true)
public class WebSecurityConfig  extends WebSecurityConfigurerAdapter {
    //密码加密函数
    @Bean
    PasswordEncoder passwordEncoder(){
        return new BCryptPasswordEncoder();
    }
    //password为BCryptPasswordEncoder加密123后的值
    @Override
    protected void configure(AuthenticationManagerBuilder auth) throws Exception {
        auth.inMemoryAuthentication().withUser("admin").password("$2a$10$2cPRItUHyE1GSZnrYWHiQevpbxn4ikWgOa1PYL5miWvqK8GFVCWb6").roles("admin")
                .and().withUser("java").password("$2a$10$rygGQylvmoAFmPcKQP6xvepNVAw9Bxp0sbAphxKQwhAV79Au0ECvq").roles("user");
    }

    @Override
    protected void configure(HttpSecurity http) throws Exception {
        http.authorizeRequests()
                .antMatchers("/admin/**").hasRole("admin")
                .antMatchers("/user/**").hasAnyRole("admin","user")
                .anyRequest().authenticated()  //其他路径认证之后就可以访问
                .and()
                .formLogin()
                .loginProcessingUrl("/doLogin")  //处理登录请求的地址
                .permitAll()
                .and()
                .csrf().disable();
    }
}
输入用户名,密码,进行登录

可以看到,登录成功

其中,
1.通过 @EnableWebSecurity注解开启Spring Security的功能。使用@EnableGlobalMethodSecurity(prePostEnabled = true)这个注解,可以开启security的注解,我们可以在需要控制权限的方法上面使用@PreAuthorize,@PreFilter这些注解。
2.extends 继承 WebSecurityConfigurerAdapter 类,并重写它的方法来设置一些web安全的细节。我们结合@EnableWebSecurity注解和继承WebSecurityConfigurerAdapter,来给我们的系统加上基于web的安全机制。
角色权限控制
当我们的系统功能模块当需求发展到一定程度时,会不同的用户,不同角色使用我们的系统。这样就要求我们的系统可以做到,能够对不同的系统功能模块,开放给对应的拥有其访问权限的用户使用。
Spring Security提供了Spring EL表达式,允许我们在定义URL路径访问(@RequestMapping)的方法上面添加注解,来控制访问权限。
在标注访问权限时,根据对应的表达式返回结果,控制访问权限:
true,表示有权限
fasle,表示无权限
package com.example.demo.web;

import org.springframework.web.bind.annotation.RequestMapping;
import org.springframework.web.bind.annotation.ResponseBody;
import org.springframework.web.bind.annotation.RestController;

@RestController
@RequestMapping("/test")
public class Test {
    @RequestMapping("/mapping")
    @ResponseBody
    public String test(){
        return "test";
    }
}
可以看到已经访问成功
[外链图片转存失败,源站可能有防盗链机制,建议将图片保存下来直接上传(img-DNj6Xa5y-1591518754393)(http://imgs.iming.info//82375442665fb967cc03c8788826da13)]
添加权限注解
package com.example.demo.web;

import org.springframework.security.access.prepost.PreAuthorize;
import org.springframework.web.bind.annotation.RequestMapping;
import org.springframework.web.bind.annotation.ResponseBody;
import org.springframework.web.bind.annotation.RestController;

@RestController
@RequestMapping("/test")
public class Test {
    @RequestMapping("/mapping")
    @ResponseBody
    @PreAuthorize("hasRole('admin')") // Spring Security默认的角色前缀是”ROLE_”,使用hasRole方法时已经默认加上了
    public String test(){
        return "test";
    }
}
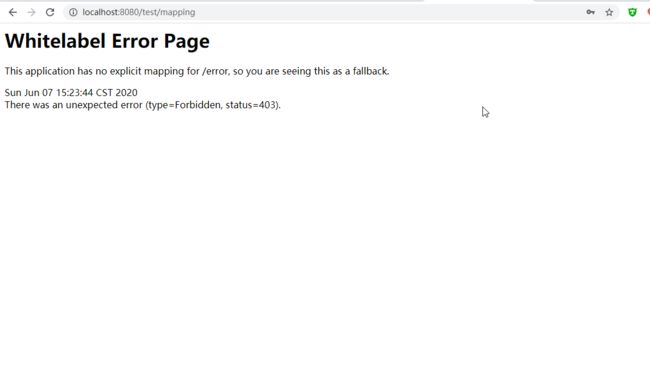
此时访问
403错误
高阶: 使用数据库保存用户名和密码
用户表
@Entity
class User {

  @Id
  @GeneratedValue(strategy = GenerationType.AUTO)
  @BeanProperty
  var id: Integer = _
  @BeanProperty
  var userName: String = _
  @BeanProperty
  var password: String = _

}
角色表
···
@Entity
class Role {
@Id
@GeneratedValue(strategy = GenerationType.AUTO)
@BeanProperty
var id: Integer = _
@BeanProperty
var role: String = _
}
···
用户角色表
@Entity
class UserRole {
  @Id
  @GeneratedValue(strategy = GenerationType.AUTO)
  @BeanProperty
  var id: Integer = _
  @BeanProperty
  var userId: Integer = _
  @BeanProperty
  var roleId: Integer = _


}
更改SpringSecurity
···
@Override
protected void configure(AuthenticationManagerBuilder auth) throws Exception {
auth.inMemoryAuthentication().withUser(“admin”).password("$2a$10$2cPRItUHyE1GSZnrYWHiQevpbxn4ikWgOa1PYL5miWvqK8GFVCWb6").roles(“admin”)
.and().withUser(“java”).password("$2a 10 10 10rygGQylvmoAFmPcKQP6xvepNVAw9Bxp0sbAphxKQwhAV79Au0ECvq").roles(“user”);
}
···
更改为
    @Override
    @Bean
    public UserDetailsService userDetailsService() { //覆盖写userDetailsService方法 (1)
        return new LightSwordUserDetailService();

    }


//AuthenticationManager使用我们的 lightSwordUserDetailService 来获取用户信息
        auth.userDetailsService(userDetailsService());
具体的 new LightSwordUserDetailService(); 实现类,需要自己进行配置
这个接口需要我们实现一个方法:loadUserByUsername。即从数据库中取出用户名、密码以及权限相关的信息。最后返回一个UserDetails 实现类。
@Service
class LightSwordUserDetailService extends UserDetailsService {

  @Autowired var userRoleDao: UserRoleDao = _
  @Autowired var userDao: UserDao = _
  @Autowired var roleDao: RoleDao = _


  override def loadUserByUsername(username: String): UserDetails = {

//    val user = userDao.findByUsername(username) // 直接调用jpa自动生成的方法
    val user = userDao.getUserByUsername(username)
    if (user == null) throw new UsernameNotFoundException(username + " not found")

    val authorities = new util.ArrayList[SimpleGrantedAuthority]
    val userRoles = userRoleDao.listByUserId(user.id)

    // Scala中调用java的collection类,使用scala的foreach,编译器会提示无法找到result的foreach方法。因为这里的userRoles的类型为java.util.List。若要将其转换为Scala的集合,就需要增加如下语句:
    import scala.collection.JavaConversions._
    for (userRole <- userRoles) {
      val roleId = userRole.roleId
      val roleName = roleDao.findOne(roleId).role
      if (!StringUtils.isEmpty(roleName)) {
        authorities.add(new SimpleGrantedAuthority(roleName))
      }

      System.err.println("username is " + username + ", " + roleName)
    }

    new User(username, user.password, authorities)
  }
}
在上方,通过内部类的方式,获取到了一个User对象。并添加进入了UserDetails中
这样就完成了高阶教程


