nacos动态网关gateway+docker部署
首先启动nacos,在docker中安装好,启动nacos服务
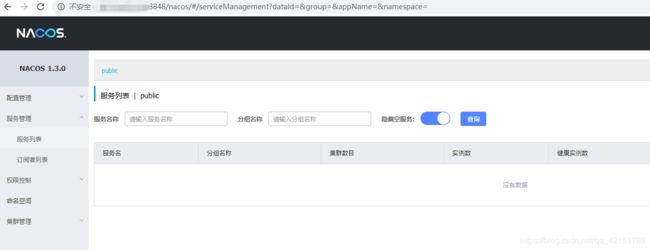
nacos的管理页面: nacos默认端口是8848
编写网关服务: nacos-gateway
pom文件:
    4.0.0

        com.wm
        nacos-parent
        0.0.1-SNAPSHOT

    gateway
    0.0.1-SNAPSHOT
    gateway
    网关服务


        1.8
        Hoxton.SR1


            org.springframework.cloud
            spring-cloud-starter-gateway


            org.springframework.cloud
            spring-cloud-starter-alibaba-nacos-config


            org.springframework.cloud
            spring-cloud-starter-alibaba-nacos-discovery


            org.springframework.boot
            spring-boot-starter-actuator


                org.springframework.cloud
                spring-cloud-dependencies
                ${spring-cloud.version}
                pom
                import


                org.springframework.boot
                spring-boot-maven-plugin


                com.spotify
                docker-maven-plugin
                1.0.0


                    mynacosdocker/${project.artifactId}


                        latest


                    ${project.basedir}

                    http://虚拟机ip:2375


                            /

                            ${project.build.directory}

                            ${project.build.finalName}.jar
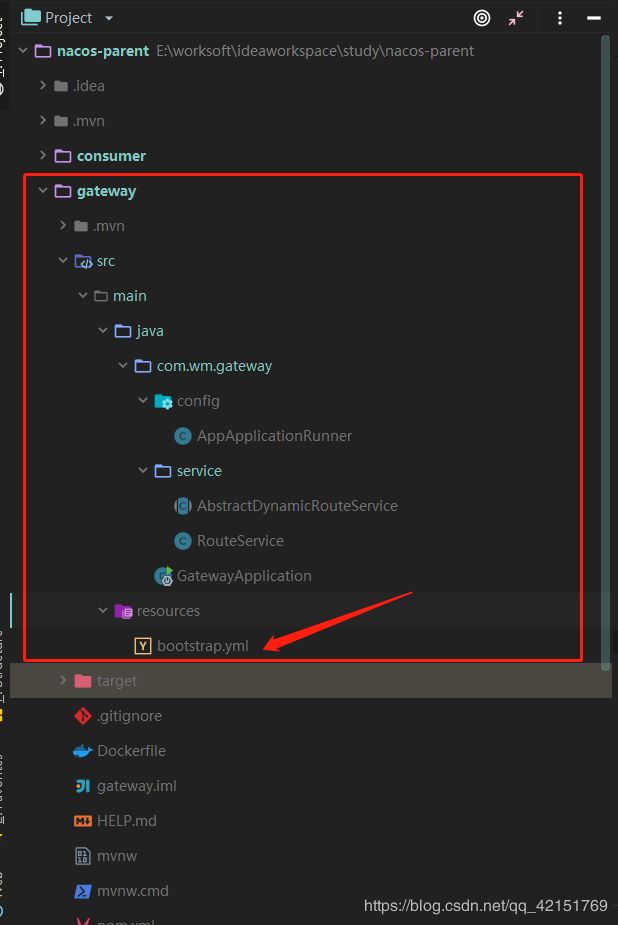
目录结构,需要用bootstrap.yml ,原因是我也使用了nacosa的配置中心,优先于application.yml加载,且不能被覆盖
bootstrap.yml的配置:
server:
  port: 9100
spring:
  application:
    name: nacos-gateway
  cloud:
    nacos:
      discovery:
        server-addr: nacosip:8848
      config:
        server-addr: nacosip:8848
        file-extension: yml
        timeout: 5000
        group: DEFAULT_GROUP
        refreshable-dataids: ${spring.application.name}

# 暴露端点
management:
  endpoints:
    web:
      exposure:
        include: '*'
  endpoint:
    health:
      show-details: always
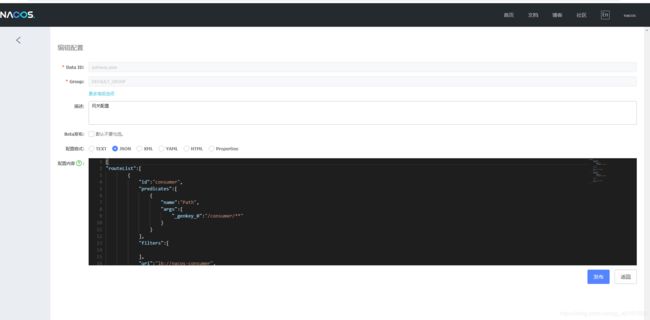
在nacos页面配置远程配置文件,更多细节详情请查看官网的配置: https://nacos.io/zh-cn/docs/sdk.html
在启动类,注册服务发现:
package com.wm.gateway;

import org.springframework.boot.SpringApplication;
import org.springframework.boot.autoconfigure.SpringBootApplication;
import org.springframework.cloud.client.discovery.EnableDiscoveryClient;

@SpringBootApplication
@EnableDiscoveryClient
public class GatewayApplication {

    public static void main(String[] args) {
        SpringApplication.run(GatewayApplication.class, args);
    }

}
动态网关的核心类:
package com.wm.gateway.service;

import org.springframework.beans.factory.annotation.Autowired;
import org.springframework.cloud.gateway.event.RefreshRoutesEvent;
import org.springframework.cloud.gateway.route.RouteDefinition;
import org.springframework.cloud.gateway.route.RouteDefinitionWriter;
import org.springframework.cloud.gateway.support.NotFoundException;
import org.springframework.context.ApplicationEventPublisher;
import org.springframework.context.ApplicationEventPublisherAware;
import org.springframework.http.ResponseEntity;
import reactor.core.publisher.Mono;

/***
 * @ClassName: DynamicRouteService
 * @Description: 动态路由服务  重写cloud的动态路由操作
 * @Author: wm_yu
 * @Create_time: 17:30 2020-3-27
 */
public abstract class AbstractDynamicRouteService implements ApplicationEventPublisherAware {

    @Autowired
    private RouteDefinitionWriter routeDefinitionWriter;

    private ApplicationEventPublisher publisher;

    @Override
    public void setApplicationEventPublisher(ApplicationEventPublisher applicationEventPublisher) {
        this.publisher = applicationEventPublisher;
    }


    //增加路由
    public String add(RouteDefinition definition) {
        routeDefinitionWriter.save(Mono.just(definition)).subscribe();
        this.publisher.publishEvent(new RefreshRoutesEvent(this));
        return "success";
    }


    //更新路由
    public String update(RouteDefinition definition) {
        try {
            delete(definition.getId());
        } catch (Exception e) {
            return "update fail,not find route  routeId: "+ definition.getId();
        }
        try {
            routeDefinitionWriter.save(Mono.just(definition)).subscribe();
            this.publisher.publishEvent(new RefreshRoutesEvent(this));
            return "success";
        } catch (Exception e) {
            return "update route fail";
        }
    }


    //删除路由
    public Mono> delete(String id) {
        return this.routeDefinitionWriter.delete(Mono.just(String.valueOf(id)))
                .then(Mono.defer(() -> Mono.just(ResponseEntity.ok().build())))
                .onErrorResume(t -> t instanceof NotFoundException, t -> Mono.just(ResponseEntity.notFound().build()));
    }
}
需要编写监听nacos配置文件的变化,按照官网的模式来的:
package com.wm.gateway.service;

import com.alibaba.fastjson.JSONObject;
import com.alibaba.nacos.api.NacosFactory;
import com.alibaba.nacos.api.PropertyKeyConst;
import com.alibaba.nacos.api.config.ConfigService;
import com.alibaba.nacos.api.config.listener.Listener;
import com.alibaba.nacos.api.exception.NacosException;
import lombok.extern.slf4j.Slf4j;
import org.springframework.cloud.gateway.route.RouteDefinition;
import org.springframework.stereotype.Service;
import org.springframework.util.CollectionUtils;

import java.util.List;
import java.util.Properties;
import java.util.concurrent.Executor;


/**
 * @author 半卷流年
 * @date 2020-7-3 11:11
 */
@Service
@Slf4j
public class RouteService extends AbstractDynamicRouteService {

    private static final String DATA_ID = "gateway.json";

      /** 刷新路由
     * @return
     */
    //@Bean
    public void autoRefresh() throws NacosException {
        Properties properties = new Properties();
        properties.put(PropertyKeyConst.SERVER_ADDR, "47.104.15.104:8848");
        ConfigService configService = NacosFactory.createConfigService(properties);
        //nacos会在配置文件修改时立即进行推送,否则会每隔30s进行推送最新的配置
        configService.addListener(DATA_ID, "DEFAULT_GROUP", new Listener() {
            @Override
            public Executor getExecutor() {
                return null;
            }
            @Override
            public void receiveConfigInfo(String configInfo) {
                log.info("监听到nacos的配置变化:{}",configInfo);
                JSONObject object = JSONObject.parseObject(configInfo);
                if(!CollectionUtils.isEmpty(object)){
                    //更新路由
                    List list = JSONObject.parseArray(object.get("routeList").toString(), RouteDefinition.class);
                    //List list = JSON.parseArray(object.getString("routeList")).toJavaList(RouteDefinition.class);
                    if(!CollectionUtils.isEmpty(list)){
                        for (RouteDefinition definition : list) {
                              //刷新路由
                            update(definition);
                        }
                    }
                }
            }
        });
    }
}
具体的我在代码中已经写明了:
然后在nacos配置中新增 gateway.json配置文件,专门配置网关的服务
网关json的具体内容如下:
{
"routeList":[
        {
            "id":"consumer",
            "predicates":[
                {
                    "name":"Path",
                    "args":{
                        "_genkey_0":"/consumer/**"
                    }
                }
            ],
            "filters":[

            ],
            "uri":"lb://nacos-consumer",
            "order":1
        },
 {
            "id":"provider",
            "predicates":[
                {
                    "name":"Path",
                    "args":{
                        "_genkey_0":"/provider/**"
                    }
                }
            ],
            "filters":[

            ],
            "uri":"lb://nacos-provider",
            "order":2
        }
    ]
}
在spring启动的时候也加载配置网关配置到内存中:
package com.wm.gateway.config;

import com.wm.gateway.service.RouteService;
import lombok.extern.slf4j.Slf4j;
import org.springframework.beans.factory.annotation.Autowired;
import org.springframework.boot.CommandLineRunner;
import org.springframework.stereotype.Component;

/**
 * @author 半卷流年
 * @date 2020-7-3 13:54
 */
@Component
@Slf4j
public class AppApplicationRunner implements CommandLineRunner {

    @Autowired
    private RouteService routeService;

    @Override
    public void run(String... args) throws Exception {
      log.info("初始化加载路由.............");
        routeService.autoRefresh();
    }
}
下面我们启动网关服务:
如下:
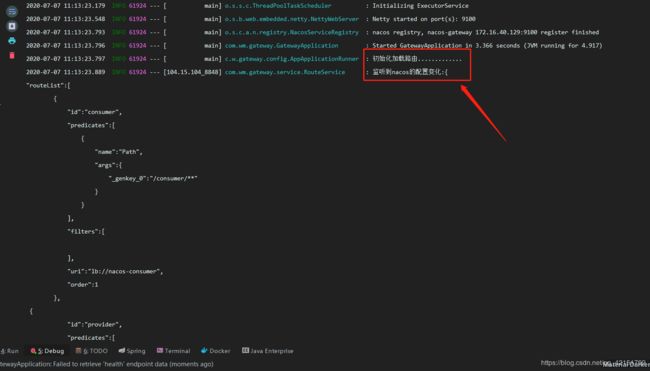
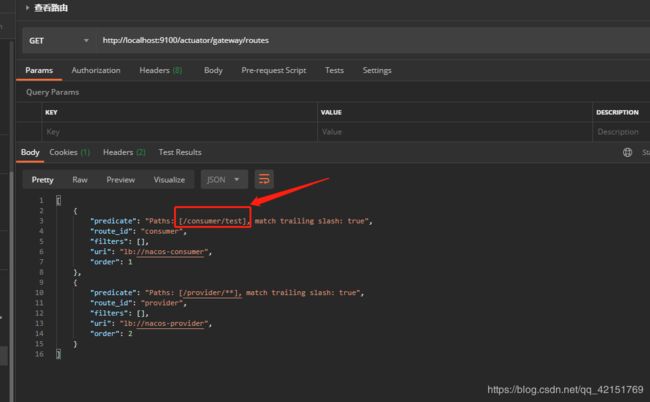
启动项目,初始化和网关都加载了,我们查看当前内存所有的网关信息: http://localhost:9100/actuator/gateway/routes
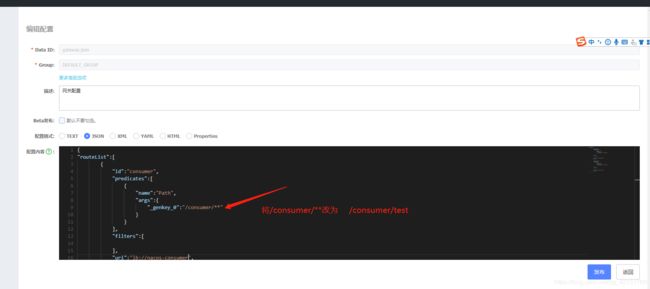
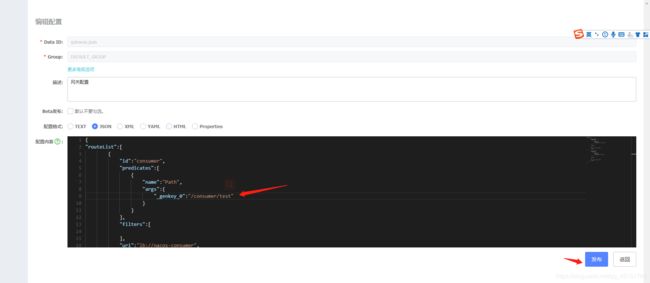
可以看到网关加载成功了,下面我们更改网关的配置,看nacos监听到了并且更新了网关路由信息不:
进行发布:
可以看到确实是监听到了,数据的变化,再次查看所有的路由信息:
刷新了网关信息,改回原来的样子,接着创建consumer和provider服务:
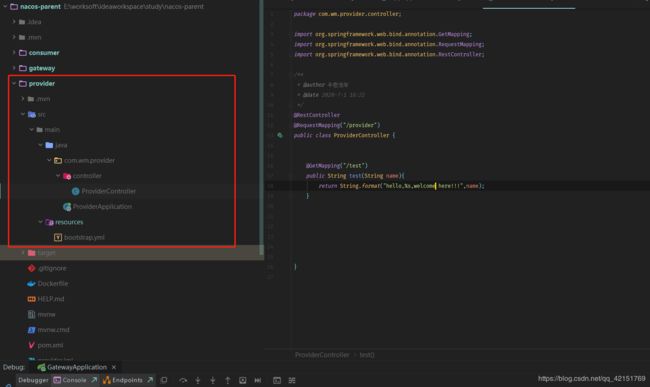
provider服务:
pom文件:
    4.0.0

        com.wm
        nacos-parent
        0.0.1-SNAPSHOT

    provider
    0.0.1-SNAPSHOT
    provider
    Demo project for Spring Boot


        1.8


            org.springframework.cloud
            spring-cloud-starter-alibaba-nacos-discovery


            org.springframework.cloud
            spring-cloud-starter-alibaba-nacos-config


            org.springframework.boot
            spring-boot-starter-web


            org.springframework.boot
            spring-boot-starter-actuator
            2.2.1.RELEASE


                org.springframework.boot
                spring-boot-maven-plugin


                com.spotify
                docker-maven-plugin
                1.0.0


                    mynacosdocker/${project.artifactId}


                        latest


                    ${project.basedir}

                    http://虚拟机ip:2375


                            /

                            ${project.build.directory}

                            ${project.build.finalName}.jar
启动类也需要服务发现:
package com.wm.provider;

import org.springframework.boot.SpringApplication;
import org.springframework.boot.autoconfigure.SpringBootApplication;
import org.springframework.cloud.client.discovery.EnableDiscoveryClient;

@SpringBootApplication
@EnableDiscoveryClient
public class ProviderApplication {

    public static void main(String[] args) {
        SpringApplication.run(ProviderApplication.class, args);
    }

}
bootstrap.yml文件:
server:
  port: 9999
spring:
  application:
    name: nacos-provider
  cloud:
    nacos:
      discovery:
        server-addr: nacosip:8848
      config:
        server-addr: nacosip:8848
        file-extension: yml

# 暴露端点
management:
  endpoints:
    web:
      exposure:
        include: '*'
  endpoint:
    health:
      show-details: always
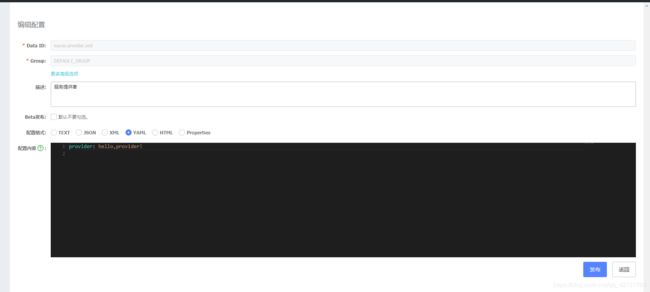
nacos的配置:
启动provider服务:
可以看到nacos中已经有两个实例了:
下面创建consumer服务:
pom文件:
    4.0.0

        com.wm
        nacos-parent
        0.0.1-SNAPSHOT

    consumer
    0.0.1-SNAPSHOT
    consumer
    Demo project for Spring Boot


        1.8


            org.springframework.cloud
            spring-cloud-starter-alibaba-nacos-config


            org.springframework.cloud
            spring-cloud-starter-alibaba-nacos-discovery


            org.springframework.boot
            spring-boot-starter-web


            org.springframework.cloud
            spring-cloud-starter-openfeign
            2.2.2.RELEASE


            org.springframework.boot
            spring-boot-starter-actuator


                org.springframework.boot
                spring-boot-maven-plugin


                com.spotify
                docker-maven-plugin
                1.0.0


                    nacosconsumer/${project.artifactId}


                        latest


                    ${project.basedir}

                    http://虚拟机ip:2375


                            /

                            ${project.build.directory}

                            ${project.build.finalName}.jar
使用到了feign,配置feign的日志:
package com.wm.consumer.config;

/***
 * @ClassName: FeignLogConfig
 * @Description: feign日志输出
 * @Author: wm_yu
 * @Create_time: 15:41 2020-3-27
 */

import feign.Logger;
import org.springframework.context.annotation.Bean;
import org.springframework.context.annotation.Configuration;

/**
 * Feign logging
 * A logger is created for each Feign client created. By default the name of the logger is the full class name of the interface used to create the Feign client. Feign logging only responds to the DEBUG level.
 *
 *   bootstrap.yml
 *
 * logging.level.project.user.UserClient: DEBUG
 *
 *
 * The Logger.Level object that you may configure per client, tells Feign how much to log. Choices are:
 *
 * 可以为每个客户端配置日志级别(Logger.Level),选项有:
 *
 * NONE, No logging (DEFAULT).
 * BASIC, Log only the request method and URL and the response status code and execution time.
 * HEADERS, Log the basic information along with request and response headers.
 * FULL, Log the headers, body, and metadata for both requests and responses.
 * For example, the following would set the Logger.Level to FULL:
 *
 * 下例将日志级别设为全部(FULL):
 *
 * @Configuration
 * public class FooConfiguration {
 *     @Bean
 *     Logger.Level feignLoggerLevel() {
 *         return Logger.Level.FULL;
 *     }
 * }
 */

@Configuration
public class FeignLogConfig {
    @Bean
    Logger.Level feignLoggerLevel() {
        return Logger.Level.FULL;
    }
}
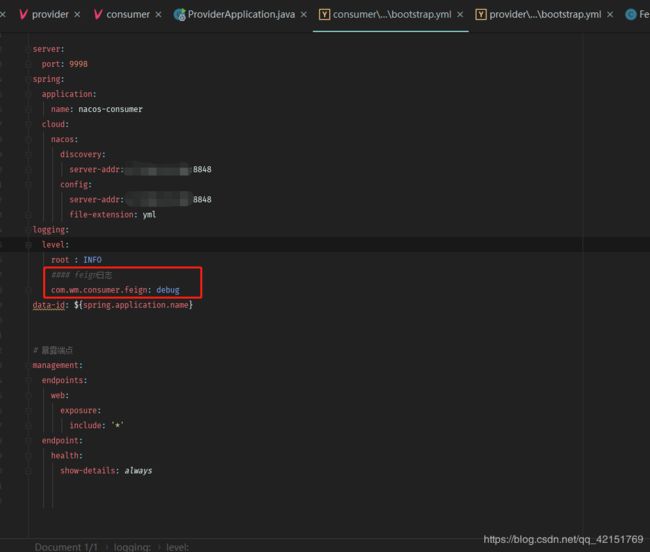
需要在yml中指定:
bootstrap.yml的配置:
server:
  port: 9998
spring:
  application:
    name: nacos-consumer
  cloud:
    nacos:
      discovery:
        server-addr: nacosip:8848
      config:
        server-addr: nacosip:8848
        file-extension: yml
logging:
  level:
    root : INFO
    #### feign日志
    com.wm.consumer.feign: debug
data-id: ${spring.application.name}


# 暴露端点
management:
  endpoints:
    web:
      exposure:
        include: '*'
  endpoint:
    health:
      show-details: always
feign接口:
package com.wm.consumer.feign;

import org.springframework.cloud.openfeign.FeignClient;
import org.springframework.web.bind.annotation.GetMapping;
import org.springframework.web.bind.annotation.RequestParam;

/**
 * @author 半卷流年
 * @date 2020-7-1 16:20
 */
@FeignClient(value = "nacos-provider")
public interface NacosFeign {

    @GetMapping(value = "/provider/test")
     String test(@RequestParam("name") String name);
}
controller:
package com.wm.consumer.controller;

import com.alibaba.nacos.api.config.ConfigService;
import com.wm.consumer.feign.NacosFeign;
import lombok.extern.slf4j.Slf4j;
import org.springframework.beans.factory.annotation.Autowired;
import org.springframework.beans.factory.annotation.Value;
import org.springframework.cloud.context.config.annotation.RefreshScope;
import org.springframework.web.bind.annotation.GetMapping;
import org.springframework.web.bind.annotation.RequestMapping;
import org.springframework.web.bind.annotation.RestController;

/**
 * @author 半卷流年
 * @date 2020-7-1 16:25
 */
@RestController
@RequestMapping("/consumer")
@Slf4j
@RefreshScope //刷新nacos配置
public class ConsumerController {


    @Value("${consumer:test}")
    private String consumer;

    @Autowired
    private NacosFeign nacosFeign;


    @GetMapping("/test")
    public String test(String name){
        log.info("请求consumer:{}",name);
        return nacosFeign.test(name);
    }


    @GetMapping("/getConfigh")
    public String getConfigh(){
        StringBuilder sb = new StringBuilder();
        return sb.append(consumer).append("-------").append("").toString();
    }


}
这里使用了@RefreshScope //刷新nacos配置 ,这个会在读取nacos配置中如果有变化,会刷新读取的配置值
启动consumer
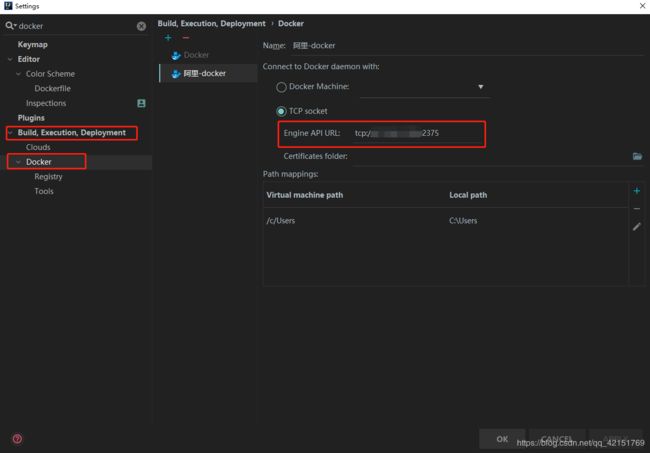
下面开始连接虚拟机的docker制作镜像,先使用idea连接远程docker,需要先下载docker插件
![]()
配置docker地址,默认端口为2375,需要先在虚拟机中开放这个端口 具体操作查看这篇博客: https://blog.csdn.net/qq_33401710/article/details/88303976
连接之后,在pom中加入docker插件,指定docker的名称,版本,连接的远程docker地址,指定dockerfile的位置:
如下:
                org.springframework.boot
                spring-boot-maven-plugin


                com.spotify
                docker-maven-plugin
                1.0.0


                    mynacosdocker/${project.artifactId}


                        latest


                    ${project.basedir}

                    http://虚拟机ip:2375


                            /

                            ${project.build.directory}

                            ${project.build.finalName}.jar
创建Dockerfile文件,名称别写错了,大小写严格哈
FROM java:8
ADD target/gateway-0.0.1-SNAPSHOT.jar gateway.jar
EXPOSE 9100
ENTRYPOINT ["java","-jar","/gateway.jar"]
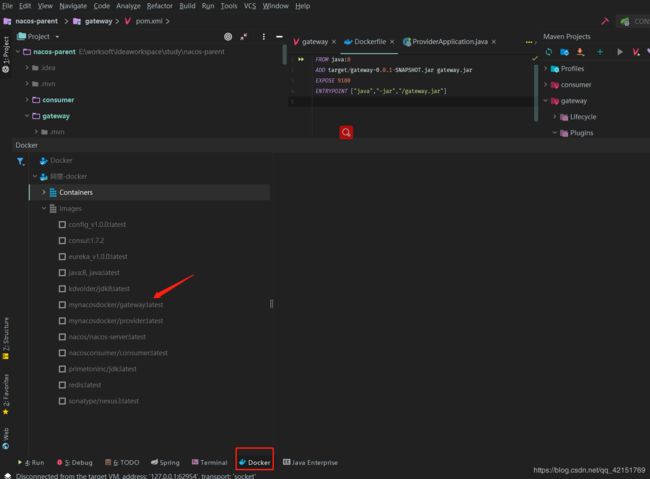
下面开始制作docker镜像:
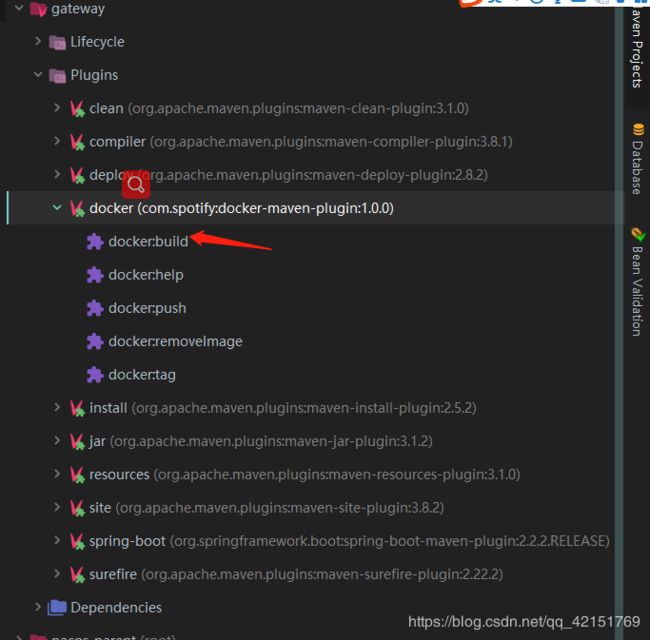
先制作打包成jar ,在使用如下:
等待制作成功就可以看到刚制作成的镜像了:
也可以使用命令查看:
依次制作consumer,provider的镜像,在生成容器启动,就可以了:
如果查看容器启动的日志,使用 : docker logs -f 容器id ,-f是动态监听日志,不使用-f是当前的日志
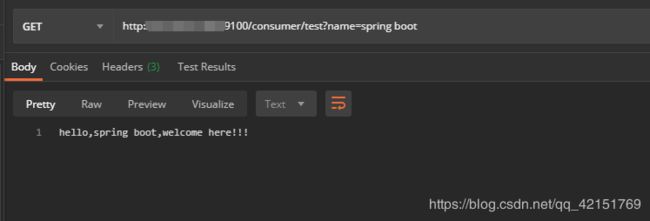
下面我们使用postman来请求下网关的服务,转发到对应的模块去:
可以看到成功了,端口9100是gateway服务的,而请求的Url是consumer的,还用到了feign请求,请求成功了;
