1.简介
快速网络安装linux操作系统的服务,支持多种的linux发行版,也可以支持网络安装windows
Cobbler是PXE的二次封装,将多种参数封装到一个菜单;是用python语言编写

1.client裸机配置了从网络启动后,开机后会广播包请求DHCP服务器(cobbler server)发送其分配好的一个ip
2.DHCP收到请求后发送responese,包括其ip
3.client拿到ip后再向cobbler server发送请求OS引导文件的请求
4.cobbler server告诉client 裸机OS引导文件的名字和TFTP server的ip和port
5.client通过上面告知的tftp server地址通信,下载引导文件
6.client执行该引导文件,确定加载的信息,选择要按住的os,期间会在想cobbler server请求kickstart文件和 os image
7.cobbler server发送请求的kickstart 和 os image
8.celient加载kickstart文件
9.client接收os image,安装该os image
2、配置pxe支持服务
首先需要安装pxe支持所需要的相关服务:
[root@server ~]# yum install -y dhcp tftp tftp-server httpd
接着配置dhcp服务,编辑创建dhcp配置文件:
[root@server ~]# vim /etc/dhcp/dhcpd.conf
#   see /usr/share/doc/dhcp*/dhcpd.conf.example
#
# DHCP Server Configuration file.
#   see /usr/share/doc/dhcp*/dhcpd.conf.example
#   see dhcpd.conf(5) man page
#
option domain-name "magedu.com";
option domain-name-servers 114.114.114.114,8.8.8.8;
default-lease-time 600;
max-lease-time 7200;
log-facility local7;
subnet 10.10.10.0 netmask 255.255.255.0 {
        range 10.10.10.100 10.10.10.200;
        option routers 10.10.10.254;
        filename "pxelinux.0";
        next-server 10.10.10.254;
}
配置完成后启动dhcp服务:
[root@server ~]# systemctl start dhcpd
接着启动httpd和tftp服务:
[root@server ~]# systemctl start tftp.socket
[root@server ~]# systemctl start httpd
3、配置cobbler
首先安装cobbler:
[root@server ~]# yum install -y epel-release
[root@server ~]# yum install -y cobbler
接着启动cobbler服务:
[root@server ~]# systemctl start cobblerd
然后执行cobbler check:
[root@server ~]# cobbler check
The following are potential configuration items that you may want to fix:

1 : The 'server' field in /etc/cobbler/settings must be set to something other than localhost, or kickstarting features will not work.  This should be a resolvable hostname or IP for the boot server as reachable by all machines that will use it.
2 : For PXE to be functional, the 'next_server' field in /etc/cobbler/settings must be set to something other than 127.0.0.1, and should match the IP of the boot server on the PXE network.
3 : SELinux is enabled. Please review the following wiki page for details on ensuring cobbler works correctly in your SELinux environment:
    https://github.com/cobbler/cobbler/wiki/Selinux
4 : change 'disable' to 'no' in /etc/xinetd.d/tftp
5 : Some network boot-loaders are missing from /var/lib/cobbler/loaders, you may run 'cobbler get-loaders' to download them, or, if you only want to handle x86/x86_64 netbooting, you may ensure that you have installed a *recent* version of the syslinux package installed and can ignore this message entirely.  Files in this directory, should you want to support all architectures, should include pxelinux.0, menu.c32, elilo.efi, and yaboot. The 'cobbler get-loaders' command is the easiest way to resolve these requirements.
6 : enable and start rsyncd.service with systemctl
7 : debmirror package is not installed, it will be required to manage debian deployments and repositories
8 : The default password used by the sample templates for newly installed machines (default_password_crypted in /etc/cobbler/settings) is still set to 'cobbler' and should be changed, try: "openssl passwd -1 -salt 'random-phrase-here' 'your-password-here'" to generate new one
9 : fencing tools were not found, and are required to use the (optional) power management features. install cman or fence-agents to use them

Restart cobblerd and then run 'cobbler sync' to apply changes.
通常来说cobbler服务在初次检查时总会有各种各样的报错,我们只需要按照对应的报错寻找解决办法即可。
首先第1,2、8点都是cobbler 的配置文件,编辑修改cobbler 的配置文件即可:
[root@cobbler ~]# openssl passwd -1 -salt '123456' 'magedu'    #创建新建系统默认登录密码的密钥串
$1$123456$QMBx42LRqK1ZWPfItmpYG0
[root@server ~]# vim /etc/cobbler/settings    #在cobbler配置文件中修改以下配置
server: 10.10.10.254
next_server: 10.10.10.254
default_password_crypted: "$1$123456$QMBx42LRqK1ZWPfItmpYG0"    #此处是指定自动安装的系统的登录密钥
接着第3点为selinux的状态,我们这里直接把selinux关闭并关掉firewalld,以免影响结果:
[root@server ~]# setenforce 0
[root@server ~]# systemctl stop firewalld
第4点,更改/etc/xinetd.d/tftp的状态为启动:
[root@server ~]# vim /etc/xinetd.d/tftp
        disable                 = no
第5点,如果当前节点可以访问互联网,执行“cobblerget-loader”命令下载pxelinux.0,menu.c32,elilo.efi, 或yaboot文件,否则,需要安装syslinux程序包,而后复制/usr/share/syslinux/中的pxelinux.0,menu.c32等文件至/var/lib/cobbler/loaders目录中,此处我们先直接复制/usr/share/syslinux目录中的文件到指定目录,看看是否能解决:
[root@server ~]# cp -a /usr/share/syslinux/* /var/lib/cobbler/loaders/
第6点,启动rsyncd服务:
[root@server ~]# systemctl start rsyncd
[root@server ~]# systemctl enable rsyncd
Created symlink from /etc/systemd/system/multi-user.target.wants/rsyncd.service to /usr/lib/systemd/system/rsyncd.service.
第7、9点,分别安装指定的程序包:
[root@server ~]# yum install -y debmirror fence-agents
执行完后重启cobblerd服务,再次执行cobbler check:
[root@server ~]# systemctl restart cobblerd
[root@server ~]# cobbler check
The following are potential configuration items that you may want to fix:

1 : SELinux is enabled. Please review the following wiki page for details on ensuring cobbler works correctly in your SELinux environment:
    https://github.com/cobbler/cobbler/wiki/Selinux
2 : Some network boot-loaders are missing from /var/lib/cobbler/loaders, you may run 'cobbler get-loaders' to download them, or, if you only want to handle x86/x86_64 netbooting, you may ensure that you have installed a *recent* version of the syslinux package installed and can ignore this message entirely.  Files in this directory, should you want to support all architectures, should include pxelinux.0, menu.c32, elilo.efi, and yaboot. The 'cobbler get-loaders' command is the easiest way to resolve these requirements.
3 : comment out 'dists' on /etc/debmirror.conf for proper debian support
4 : comment out 'arches' on /etc/debmirror.conf for proper debian support
第一点报错已经停用了,所以无关要紧;第二点依旧有报错,可根据提示执行cobbler get-loaders即可解决,但是前提是服务器能上网。
最后两点在的指定的文件中注释掉相应的配置段即可:
[root@server ~]# vim /etc/debmirror.conf
#@arches="i386";
#@dists="sid";
最后重启cobblerd服务,并执行cobbler sync:
[root@server ~]# systemctl restart cobblerd
[root@server ~]# cobbler sync
接着挂载系统光驱(这里我们挂载的是centos7的系统光盘),然后使用cobbler命令导入系统镜像:
[root@server ~]# mount /dev/cdrom /media/cdrom/
[root@server ~]# cobbler import --name=centos-7-x86_64 --path=/media/cdrom
[root@server ~]# cobbler distro list
   centos-7-x86_64
镜像会被自动导入到此路径下/var/www/cobbler/ks_mirror,方便后续通过http的方式获取安装源。
另外默认情况下,cobbler会生成一个最小化安装的kickstart文件,如果想要自定义其对应的kickstart profile,可通过下面操作进行:
- kickstart文件内容附录如下:
[root@server kickstarts]# vim centos7.cfg
#version=DEVEL
# System authorization information
auth --enableshadow --passalgo=sha512
# Use CDROM installation media
url --url="http://10.10.10.254/cblr/links/centos-7-x86_64"
# Use graphical install
selinux --disabled
reboot
# Run the Setup Agent on first boot
firstboot --disable
# System language
lang zh_CN.UTF-8

timezone Asia/Shanghai --isUtc
# Network information
network  --bootproto=dhcp --device=ens33 --onboot=on --ipv6=auto --no-activate
network  --hostname=localhost.localdomain

# Root password
# System services
services --enabled="chronyd"
# System timezone
timezone Asia/Shanghai --isUtc
# X Window System configuration information
xconfig  --startxonboot
# System bootloader configuration
bootloader --append=" crashkernel=auto" --location=mbr --boot-drive=sda
# Partition clearing information
clearpart --all --initlabel
zerombr
# Disk partitioning information
part /boot --fstype="xfs" --ondisk=sda --size=1024
part swap --fstype="swap" --ondisk=sda --size=2049
part /home --fstype="xfs" --ondisk=sda --size=10240
part pv.254 --fstype="lvmpv" --ondisk=sda --size=20484
volgroup centos --pesize=4096 pv.254
logvol /  --fstype="xfs" --size=20480 --name=root --vgname=centos

%packages

@base
@core
@dial-up
@directory-client
@fonts
@gnome-desktop
@guest-agents
@input-methods
@internet-browser
@java-platform
@multimedia
@network-file-system-client
@networkmanager-submodules
@x11
chrony
kexec-tools

%end

%addon com_redhat_kdump --enable --reserve-mb='auto'

%end

%anaconda
pwpolicy root --minlen=6 --minquality=1 --notstrict --nochanges --notempty
pwpolicy user --minlen=6 --minquality=1 --notstrict --nochanges --emptyok
pwpolicy luks --minlen=6 --minquality=1 --notstrict --nochanges --notempty
%end
[root@cobbler ~]# cp centos7.cfg /var/lib/cobbler/kickstarts/    #复制自定义的kickstart文件到指定的目录下
[root@server kickstarts]# cobbler profile add --name=centos-7.2-x86_64-custom --distro=centos-7-x86_64 --kickstart=/var/lib/cobbler/kickstarts/centos7.cfg
[root@server kickstarts]# cobbler profile list
   centos-7-x86_64
   centos-7.2-x86_64-custom
最后检查httpd和tftp服务的相关目录下是否已经创建了相应的文件:
[root@server ~]# ll /var/www/cobbler/
total 36
drwxr-xr-x. 3 root root 4096 Jan 17 15:41 images
drwxr-xr-x. 4 root root 4096 Jan 17 15:39 ks_mirror
drwxr-xr-x. 2 root root 4096 Jan 17 15:41 links
drwxr-xr-x. 2 root root 4096 Nov 27 02:51 localmirror
drwxr-xr-x. 2 root root 4096 Jan 17 15:08 misc
drwxr-xr-x. 2 root root 4096 Nov 27 02:51 pub
drwxr-xr-x. 2 root root 4096 Nov 27 02:51 rendered
drwxr-xr-x. 2 root root 4096 Nov 27 02:51 repo_mirror
drwxr-xr-x. 2 root root 4096 Jan 17 15:08 svc
[root@server ~]# ll /var/lib/tftpboot/
total 340
drwxr-xr-x. 3 root root   4096 Jan 17 15:37 boot
drwxr-xr-x. 2 root root   4096 Nov 27 02:51 etc
drwxr-xr-x. 2 root root   4096 Jan 17 15:37 grub
drwxr-xr-x. 3 root root   4096 Jan 17 15:41 images
drwxr-xr-x. 2 root root   4096 Nov 27 02:51 images2
-rw-r--r--. 1 root root  26140 Jan 17 15:37 memdisk
-rw-r--r--. 1 root root  55140 Jan 17 15:37 menu.c32
drwxr-xr-x. 2 root root   4096 Nov 27 02:51 ppc
-rw-r--r--. 1 root root  26759 Jan 17 15:37 pxelinux.0
drwxr-xr-x. 2 root root   4096 Jan 19 10:20 pxelinux.cfg
drwxr-xr-x. 2 root root   4096 Jan 17 15:37 s390x
-rw-r--r--. 1 root root 198236 Jan 17 15:37 yaboot
如果确认文件都创建无误,即可进行cobbler的自动化安装测试。
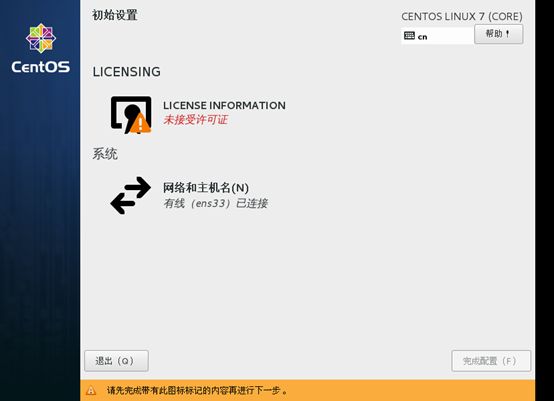
4、测试安装

5、cobbler 的web管理
配置cobbler_web的认证功能
cobbler_web支持多种认证方式,如authn_configfile、authn_ldap或authn_pam等,默认为authn_denyall,即拒绝所有用户登录。下面说明两种能认证用户登录cobbler_web的方式。
- 使用authn_pam模块认证cobbler_web用户
首先修改modules中[authentication]段的module参数的值为authn_pam。
接着添加系统用户,用户名和密码按需设定即可,例如下面的命令所示。
# useradd cblradmin
# echo 'cblrpass' | passwd --stdin cblradmin
而后将cblradmin用户添加至cobbler_web的admin组中。修改/etc/cobbler/users.conf文件,将cblradmin用户名添加为admin参数的值即可,如下所示。
[admins] admin = "cblradmin"
最后重启cobblerd服务,通过http://YOUR_COBBLERD_IP/cobbler_web访问即可。
- 使用authn_configfile模块认证cobbler_web用户
首先修改modules.conf中[authentication]段的module参数的值为
authn_configfile。
接着创建其认证文件/etc/cobbler/users.digest,并添加所需的用户即可。需要注意的是,添加第一个用户时,需要为htdigest命令使用“-c”选项,后续添加其他用户时不能再使用;另外,cobbler_web的realm只能为Cobbler。如下所示。
# htdigest -c /etc/cobbler/users.digest Cobbler cblradmin
最后重启cobblerd服务,通过http://YOUR_COBBLERD_IP/cobbler_web访问即可。