Unity Fur Shader 皮毛着色器
Github 仓库地址: github.com/Sorumi/UnityFurShader
博文原文: sorumi.xyz/posts/unity-fur-shader/
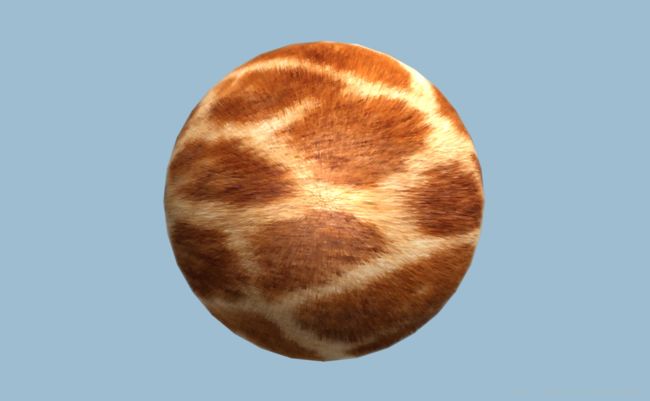
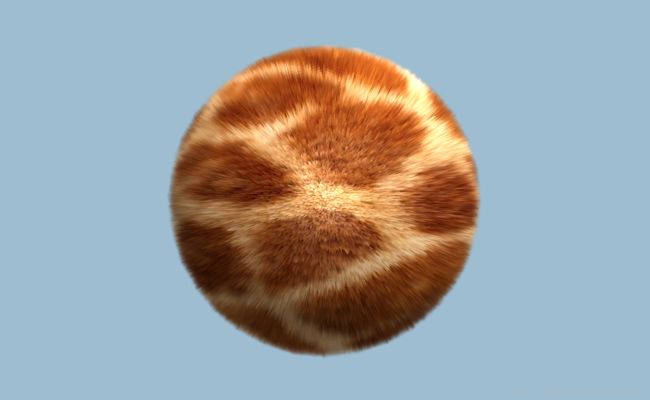
基础皮毛 0.1 Basic
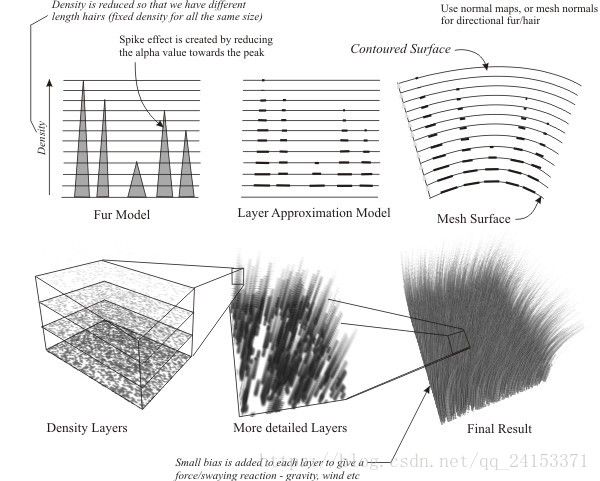
首先建立毛发的模型。
根据模型,我们使用层 (layer) 来渲染毛发长度,在 Unity Shader 中,每一个 Pass 即表示一层。
当渲染每一层时,使用法线将顶点位置”挤出“模型表面,则对应的像素点位置的公式:
float3 P = v.vertex.xyz + v.normal * _FurLength * FURSTEP;
FURSTEP 表示当前层数 / 总层数,增加层数可以创造更精细毛发。
然后使用一张噪波纹理作为每个像素点的 alpha 值,来判断该像素点是不是属于毛发的点。
光照模型则使用了环境光照 (ambient)、漫反射光照 (diffuse)、镜面光照 (specular) ,并采用逐像素着色。(如果考虑性能的话,可以改成逐顶点着色。)
如果设置 n 层,在 SubShader 中需要有不考虑毛发只渲染表面的 1 个 Pass ,和渲染毛发的 n 个 Pass,共 n + 1 个 Pass。
毛发 Pass 中的代码:
struct v2f
{
    float4 pos: SV_POSITION;
    half4 uv: TEXCOORD0;
    float3 worldNormal: TEXCOORD1;
    float3 worldPos: TEXCOORD2;
};

v2f vert_base(appdata_base v)
{
    v2f o;
    float3 P = v.vertex.xyz + v.normal * _FurLength * FURSTEP;
    o.pos = UnityObjectToClipPos(float4(P, 1.0));
    o.uv.xy = TRANSFORM_TEX(v.texcoord, _MainTex);
    o.uv.zw = TRANSFORM_TEX(v.texcoord, _FurTex);
    o.worldNormal = UnityObjectToWorldNormal(v.normal);
    o.worldPos = mul(unity_ObjectToWorld, v.vertex).xyz;
    return o;
}

fixed4 frag_base(v2f i): SV_Target
{
    fixed3 worldNormal = normalize(i.worldNormal);
    fixed3 worldLight = normalize(_WorldSpaceLightPos0.xyz);
    fixed3 worldView = normalize(_WorldSpaceCameraPos.xyz - i.worldPos.xyz);
    fixed3 worldReflect = normalize(reflect(-worldView, worldNormal));

    fixed3 albedo = tex2D(_MainTex, i.uv.xy).rgb * _Color;
    fixed3 ambient = UNITY_LIGHTMODEL_AMBIENT.xyz * albedo;
    fixed3 diffuse = _LightColor0.rgb * albedo * saturate(dot(worldNormal, worldLight));
    fixed3 specular = _LightColor0.rgb * _Specular.rgb * pow(saturate(dot(worldReflect, worldView)), _Shininess);

    fixed3 color = ambient + diffuse + specular;
    fixed alpha = tex2D(_FurTex, i.uv.zw).rgb;

    return fixed4(color, alpha);
}
皮毛属性 0.2 Attributes
增加毛发强度 (fur density)
用来表现毛发越到尾部越细,越少。根据 noise 灰度图采样调整每一层像素的透明度,修改 fragment shader 中的 alpha 计算方法
alpha = clamp(noise - (FURSTEP * FURSTEP) * _EdgeFade, 0, 1);
增加毛发细度 (fur thinness)
本质上是改变 noise texture 的 tile
fixed3 noise = tex2D(_FurTex, i.uv.zw * _FurThinnesss).rgb;
增加毛发阴影 (fur shading)
毛发越靠近根部的像素点颜色越暗
albedo -= (pow(1 - FURSTEP, 3)) * _FurShading;
或使用插值的方式
float shadow = lerp(1, FURSTEP, _FurShading);
albedo *= shadow;
对比了两种方式的效果,感觉上一种更有层次感。
增加外力 0.3 Force
分为相对于 world 的作用力 (force global) 和相对于 object 的作用力 (force local) ,在 vertex shader 中修改顶点位置 P ,使用 clamp(x, -1, 1) 函数,对偏移方向进行约束。
P += clamp(mul(unity_WorldToObject, _ForceGlobal).xyz + _ForceLocal.xyz, -1, 1) * pow(FURSTEP, 3) * _FurLength;
效果:
边缘颜色 0.4 Rim Color
考虑到毛发在边缘的颜色会略微受光的影响,增加边缘颜色 (rim color)
half rim = 1.0 - saturate(dot(worldView, worldNormal));
albedo += fixed4(_RimColor.rgb * pow(rim, _RimPower), 1.0);
效果:
参考链接
Fur Effects - Teddies, Cats, Hair ….
Fur shader - Shaders Laboratory


