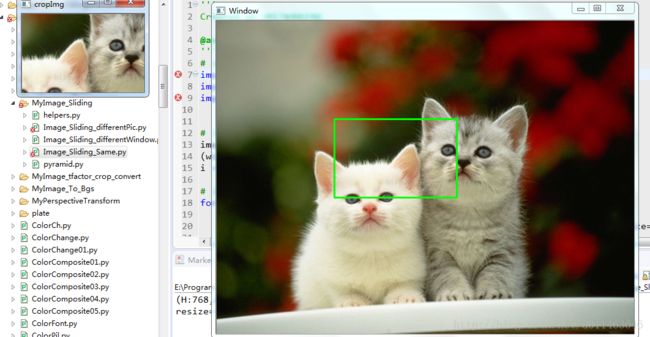
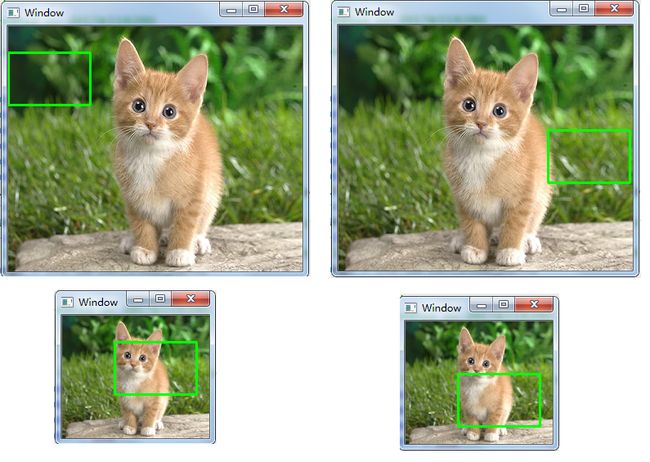
两种尺度的图像滑窗效果
1、简单示例
当给你一张随机大小的图片时,用固定的矩形框框住目标,有些目标可能很大,有些目标也可能很小,比如从下面的目标找出猫眼,如果采用固定大小的矩形框,会出现漏检的情况:

这里的固定框、固定大小图片代码为:
'''
Created on 2017年8月19日

@author: XuTing
'''
# import the necessary packages
import helpers
import time
import cv2


# load the image and define the window width and height
image = cv2.imread('../image/cat2.jpg')
(winW, winH) = (200, 128)
i = 0

# loop over the image pyramid
for resized in helpers.pyramid(image, scale=1.5,minSize=(winW, winH)):
    # loop over the sliding window for each layer of the pyramid
    for (x, y, window) in helpers.sliding_window(resized, stepSize=32, windowSize=(winW, winH)):
        # if the window does not meet our desired window size, ignore it
        if window.shape[0] != winH or window.shape[1] != winW:
            continue

        # THIS IS WHERE YOU WOULD PROCESS YOUR WINDOW, SUCH AS APPLYING A
        # MACHINE LEARNING CLASSIFIER TO CLASSIFY THE CONTENTS OF THE
        # WINDOW

        # since we do not have a classifier, we'll just draw the window
        clone = resized.copy()
        cropImg_clone = resized.copy()
        cv2.rectangle(clone, (x, y), (x + winW, y + winH), (0, 255, 0), 2)
        cropImg = cropImg_clone[y: (y + winH),x:(x + winW)]#H,W
        cv2.imshow("Window", clone)
        cv2.imshow("cropImg", cropImg)
        cv2.waitKey(1)
        #write
#         WinName = "Layer {}".format(i + 1)
#         cv2.imwrite('./'+WinName+'.jpg',clone)
#         i += 1
        time.sleep(0.025)
helpers:
'''
Created on 2017年8月19日

@author: XuTing
'''
# import the necessary packages
import imutils
from skimage.transform import pyramid_gaussian
import cv2

def pyramid(image, scale=1.5, minSize=(30, 30)):
    # yield the original image
    print('(H:{},W:{})'.format(image.shape[0], image.shape[1]))
#     yield image


    # compute the new dimensions of the image and resize it
    w = int(image.shape[1] / scale)
    image = imutils.resize(image, width=w)
    print('resize=(H:{},W:{})'.format(image.shape[0], image.shape[1]))
    # if the resized image does not meet the supplied minimum
    # size, then stop constructing the pyramid
    if image.shape[0] < minSize[1] or image.shape[1] < minSize[0]:
        print("Out of size!")
    else:
        yield image

def pyramid2(image, scale=1.5, minSize=(30, 30)):
    # yield the original image
    yield image

    # keep looping over the pyramid
    while True:
        # compute the new dimensions of the image and resize it
        w = int(image.shape[1] / scale)
        image = imutils.resize(image, width=w)
        print('(H:{},W:{})'.format(image.shape[0], image.shape[1]))

        # if the resized image does not meet the supplied minimum
        # size, then stop constructing the pyramid
        if image.shape[0] < minSize[1] or image.shape[1] < minSize[0]:
            print("Out of size!")
            break
        # yield the next image in the pyramid
        yield image
def sliding_window(image, stepSize, windowSize):
    # slide a window across the image
    for y in range(0, image.shape[0], stepSize):
        for x in range(0, image.shape[1], stepSize):
            # yield the current window
            yield (x, y, image[y:y + windowSize[1], x:x + windowSize[0]])

if __name__ == '__main__':
    image = cv2.imread('../image/cat2.jpg')
    # METHOD #2: Resizing + Gaussian smoothing.
    for (i, resized) in enumerate(pyramid_gaussian(image, downscale=2)):
        # if the image is too small, break from the loop
        if resized.shape[0] < 30 or resized.shape[1] < 30:
            break
        # show the resized image
        WinName = "Layer {}".format(i + 1)
        cv2.imshow(WinName, resized)
        cv2.waitKey(0)
        resized = resized*255
        cv2.imwrite('./'+WinName+'.jpg',resized)
为此采用了两种策略:
1)基于多尺度图片的定位;
固定的滑动窗口大小,而图像的尺寸按照一定比例缩放,而不是压缩,类似于金字塔的形状。
2)基于多尺寸滑动窗口的定位;
固定的图片大小,而滑动窗口尺寸会按照一定比例缩小,当小于设定的最小尺寸时,程序结束。
2、基于多尺度图片的定位
参考多尺度图片滑动窗口输出 - Alex_XT的博客 - CSDN博客
http://blog.csdn.net/u011463646/article/details/77417049
其实现的效果为:

代码:
'''
Created on 2017年11月20日

@author: XuTing
'''
# import the necessary packages
import helpers
import argparse
import time
import cv2
import os
import sys
BASE_DIR = os.path.dirname(os.path.dirname(os.path.abspath(__file__)))
sys.path.append(BASE_DIR)
IMAGE_PATH=os.path.join(BASE_DIR,'image','cat.jpg')
print(IMAGE_PATH)
# load the image and define the window width and height
image = cv2.imread(IMAGE_PATH)
(winW, winH) = (100, 64)
i = 0

# loop over the image pyramid
for resized in helpers.pyramid2(image, scale=2):
    # loop over the sliding window for each layer of the pyramid
    for (x, y, window) in helpers.sliding_window(resized, stepSize=32, windowSize=(winW, winH)):
        # if the window does not meet our desired window size, ignore it
        if window.shape[0] != winH or window.shape[1] != winW:
            continue

        # THIS IS WHERE YOU WOULD PROCESS YOUR WINDOW, SUCH AS APPLYING A
        # MACHINE LEARNING CLASSIFIER TO CLASSIFY THE CONTENTS OF THE
        # WINDOW

        # since we do not have a classifier, we'll just draw the window
        clone = resized.copy()
        cv2.rectangle(clone, (x, y), (x + winW, y + winH), (0, 255, 0), 2)
        cv2.imshow("Window", clone)
        cv2.waitKey(100)
        #write
#         WinName = "Layer {}".format(i + 1)
#         cv2.imwrite('./'+WinName+'.jpg',clone)
#         i += 1
#         time.sleep(0.025)
3、基于多尺寸滑动窗口的定位
在固定的图片大小中,使用不同大小的滑动窗口来实现目标的定位与检验:
(H:768,W:1024)
resize=(H:511,W:682)
minSize=windowList[-1]= (25, 16)
(winW, winH)=(200,128)
(winW, winH)=(100,64)
(winW, winH)=(50,32)
(winW, winH)=(25,16)
代码下载:http://download.csdn.net/download/u011463646/10126421
'''
Created on 2017年11月20日

@author: XuTing
'''
# import the necessary packages
import helpers
import time
import cv2


# load the image and define the window width and height
image = cv2.imread('../image/cat2.jpg')
windowList = [(200, 128),(100,64),(50,32),(25,16)]# 使用了元组
i = 0

# loop over the image pyramid
for resized in helpers.pyramid(image, scale=1.5,minSize=windowList[-1]):
    print("minSize=windowList[-1]=",windowList[-1])
    # loop over the sliding window for each layer of the pyramid
    for winSize in windowList:
        winW=winSize[0]
        winH=winSize[1]
        print("(winW, winH)=({},{})".format(winW,winH))
        for (x, y, window) in helpers.sliding_window(resized, stepSize=32, windowSize=(winW, winH)):
        # if the window does not meet our desired window size, ignore it
            if window.shape[0] != winH or window.shape[1] != winW:
                continue

            # THIS IS WHERE YOU WOULD PROCESS YOUR WINDOW, SUCH AS APPLYING A
            # MACHINE LEARNING CLASSIFIER TO CLASSIFY THE CONTENTS OF THE
            # WINDOW

            # since we do not have a classifier, we'll just draw the window
            clone = resized.copy()
            cropImg_clone = resized.copy()
            cv2.rectangle(clone, (x, y), (x + winW, y + winH), (0, 255, 0), 2)
            cropImg = cropImg_clone[y: (y + winH),x:(x + winW)]#H,W
            cv2.imshow("Window", clone)
            cv2.imshow("cropImg", cropImg)
            cv2.waitKey(1)
            #write
            #WinName = "Layer {}".format(i + 1)
            #cv2.imwrite('./'+WinName+'.jpg',clone)
            #i += 1
            time.sleep(0.025)