系统的日志管理
一、rsyslog
1.rsyslog 此服务是用来采集系统日志的,不产生日志,只是起到采集作用
2 .rsyslog的管理
/var/log/messages 采集服务信息日志
/var/log/secure 采集系统登陆日志
/var/log/cron 采集定时任务日志
/var/log/maillog 采集邮件日志
/var/log/boot.log 采集系统启动日志
3.日志的远程同步
1)在日志发送方:步骤如下
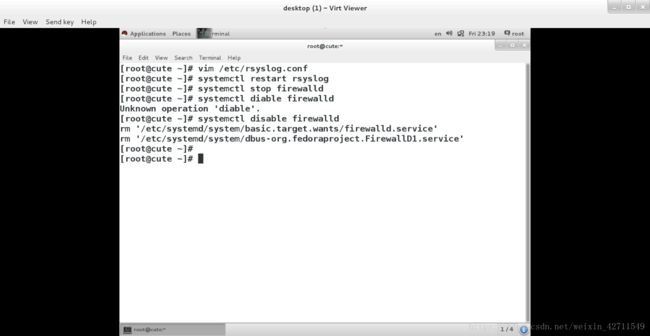
vim /etc/rsyslog.conf
*.* @ip 其中"@"表示udp协议发送,“@@”表示tcp协议发送
systemctl restart rsyslog 进行重启
2)在日志的接收方接受步骤如下
vim /etc/rsyslog.conf
15 $ModLoad imudp 日志接受模块
16$UDPServerRun 514 开启接受端口
systemctl restart rsyslog 重启
systemctl stop firewalld 关闭火墙
systemctl disable firewalld 设定火墙开机关闭
3)测试:
注:在发送方和接受方都清空日志文件(> /var/log/messages)
- 在日志的发送方
- logger test 生成日志
cat /var/log/messages 查看日志已经生成
- 在日志接收方查看
cat /var/log/messages
二、日志采集格式
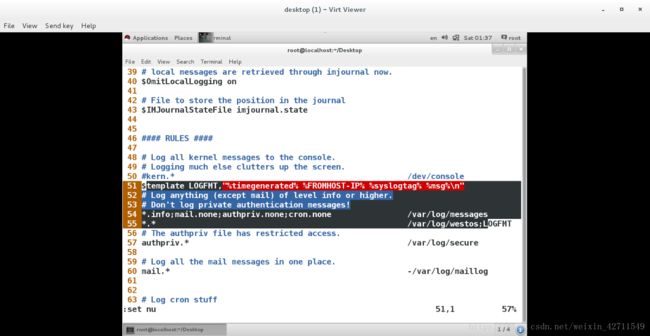
$template LOGFMT,"%timegenerated% %FROMHOST-IP% %syslogtag% %msg%\n"
%timegenerated% 显示日志时间
%FROMHOST-IP% 显示主机ip
%syslogtag% 日志记录目标
%msg% 日志内容
\n 换行
*.* /var/log/westos;LOGFMT
三、时间同步服务
1.服务名称
chronyd
2.在服务端:
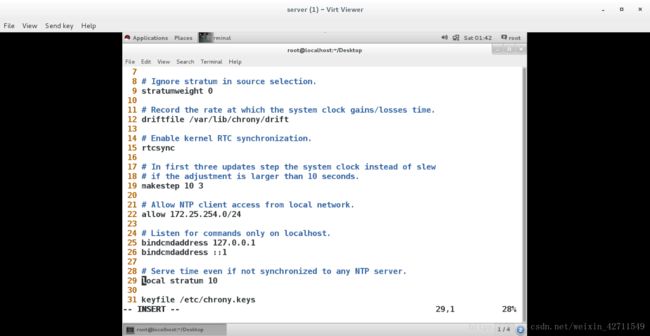
vim /etc/chrony.conf
22 allow 172.25.254.0/24 表示允许那些客户端来同步本机时间
29 local stratum 10 表示本机不同步任何主机的时间,本机作为时间源
systemctl restart chronyd 重启
timedatectl set-timezone Asia/Shanghai 更改当前时区为东8区
3.在客户端:
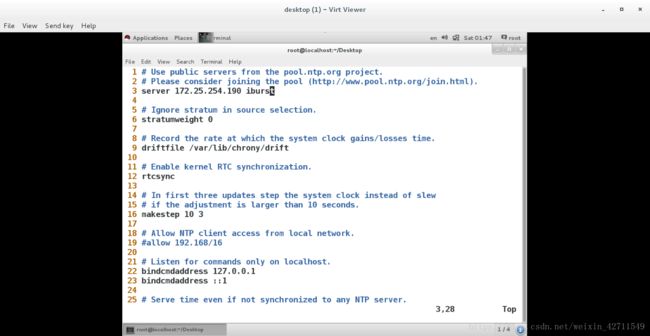
vim /etc/chrony.conf
server 172.25.254.190 iburst 表示本机立即同步190主机的时间
systemctl restart chronyd
timedatectl set-timezone Asia/Shanghai 更改当前时区为东8区
4.测试:
[root@localhost ~]# chronyc souces -v
^* 172.25.0.11 10 6 377 41 +170us[ +201us] +/- 191us
四、timedatectl 命令
timedatectl 管理系统时间
timedatevtl status 显示当前时间信息
set-time 设定当前时间
set-timezon 设定当前时区
set-local-rtc 0|1 设定是否使用utc时间
list-timezone 查看支持的所有时区
五、jouralctl 日志查看工具
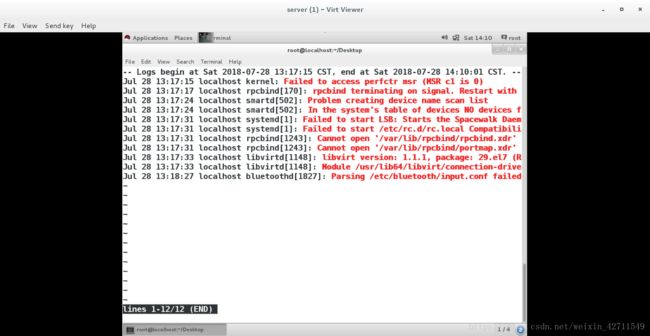
1.journalctl -n 3 查看最近3条日志
journalctl -p err 查看错误日志
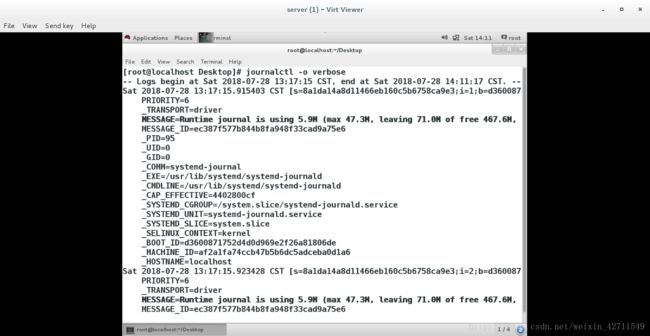
journalctl -o verbose 查看日志的详细参数
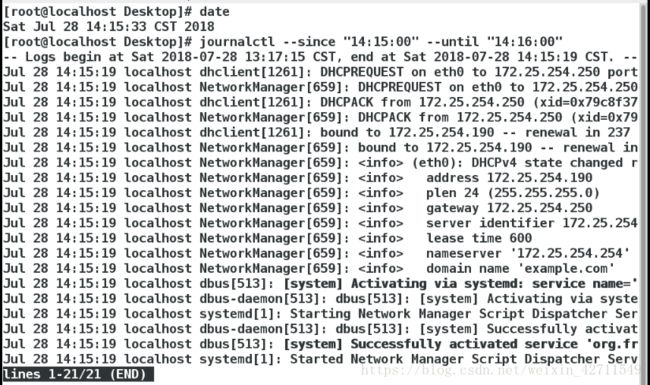
journalctl --since 查看从什么时间开始的日志
--untill 查看到什么时间为止的日志
2 如何使用 systemd-journald 保存系统日志
默认systemd-journald是不保存系统日志到硬盘的,那么关机后再次开机只能看到本次开机之后的日志, 上一次关机之前的日志是无法查看的。
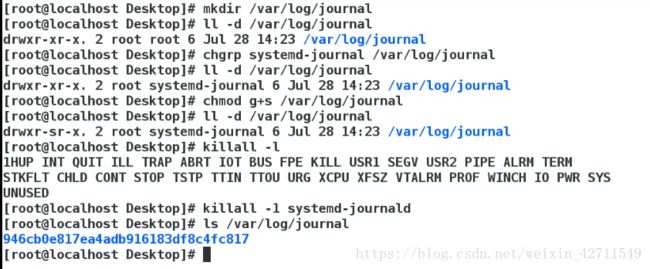
使用 systemd-journald 保存系统日志 的步骤如下:
mkdir /var/log/journal 创建 /var/log/journal
chgrp systemd-journal /var/log/journal 将 /var/log/journal 的所有组改为 systemd-journal
chmod g+s /var/log/journal 制定强制位
killall -1 systemd-journald 重新加载配置
