android---布局ConstraintLayout学习笔记
1.基本的约束条件
这个意思是: 约束当前的view的左边,在某个view的左边
layout_constraintLeft_toLeftOf
layout_constraintLeft_toRightOf
layout_constraintRight_toLeftOf
layout_constraintRight_toRightOf
layout_constraintTop_toTopOf
layout_constraintTop_toBottomOf
layout_constraintBottom_toTopOf
layout_constraintBottom_toBottomOf
layout_constraintBaseline_toBaselineOf
layout_constraintStart_toEndOf
layout_constraintStart_toStartOf
layout_constraintEnd_toStartOf
layout_constraintEnd_toEndOf
2.设置margin还是继续用以前的属性layout_margin* 。
不过需要注意,要使margin生效,必须具有对应方向的layout_constraint*,否则margin不生效.
google也提供了属性layout_goneMargin*=“xdp”,意思是比如当constrainleft的锚点gone时,layout_goneMarginLeft将生效。但是在实际的测试中并不生效。
3.layout_constraintHorizontal_bias 横向的偏向,这个主要是设置左右约束的力度。当是0.5的时候左右约束相同。
layout_constraintVertical_bias
bias即偏移量,他们的取值范围从0~1,0即挨着左边,1是挨着右边,所以要使处于1/3处,可以设置如下属性app:layout_constraintHorizontal_bias=“0.33”,
4.设置view的大小
设置view的大小除了传统的wrap_content、指定尺寸、match_parent(虽然官方不推荐使用match_parent)外,还可以设置为0dp,0dp在constraint可不是指大小是0dp,这样默认是填充整个约束的宽高。可以搭配下面的属性进行配置
layout_constraintWidth_default
layout_constraintWidth_default有三个取值,spread,percent,wrap
spread,默认值,意思是占用所有的符合约束的空间,相当于match_parent
percent:能够设置填充约束区的百分比。但是需要layout_constraintWidth_percent属性
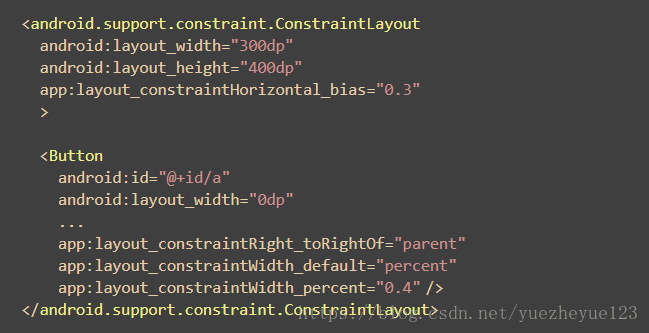
wrap,意思匹配内容大小但不超过约束限制,类似于将宽高直接设置为wrap_content。但是0dp和直接指定宽度为wrap_content的区别就是不超过约束限制.而wrap_content就是超过了约束的长度。因此设置view的大小的时候,最好是使用0dp,这样就填充了整个的约束空间,如果想居中的话,就需要设置constraintWidth_default=“wrap”

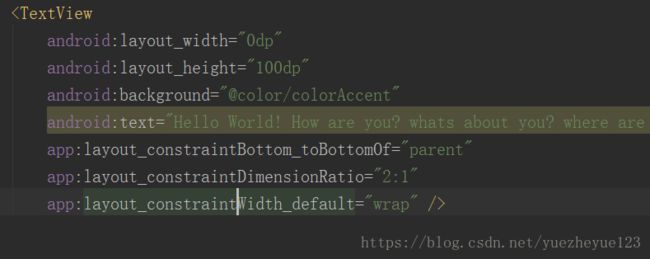
5.layout_constraintDimensionRatio,即宽和高成一定的比例,其值可以是"width:height"的形式,也可以是width/height的值。该属性生效的前提:宽和高其中有一项为0dp,有constraint。这样你可以将不为0的值设置比例为1,为0的值和1进行比较。
设置宽高比为2:1。
6.有如下属性可以设置其的最大最小值,含义如字面值一样: 但是实际测验:失效。还是使用原有的属性maxHeight等
layout_constraintWidth_min
layout_constraintWidth_max
layout_constraintHeight_max
layout_constraintHeight_min
7.如果要实现这个效果,必须设置好各个view的左右的约束。比如A必须设置左右约束,不能省略其中的一个约束。
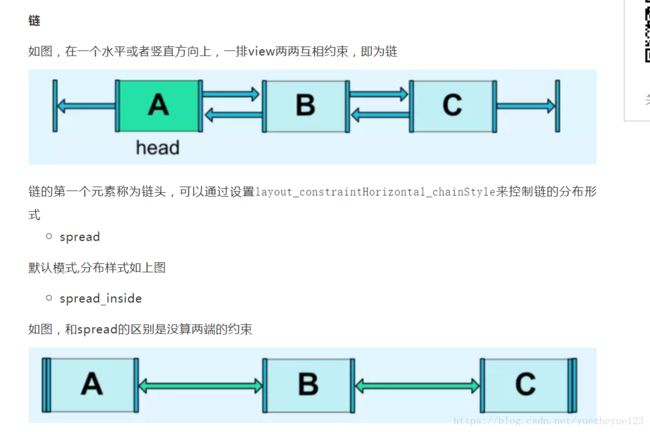
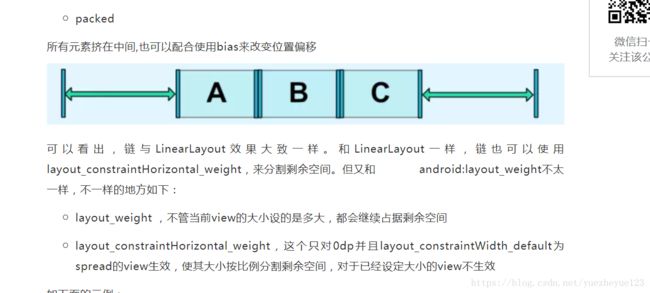
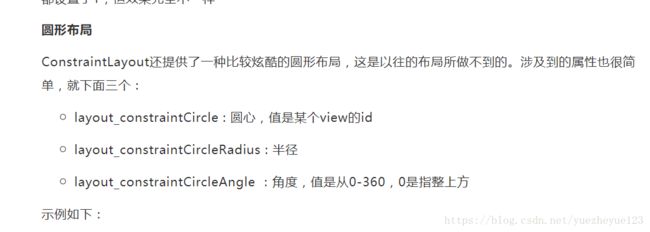
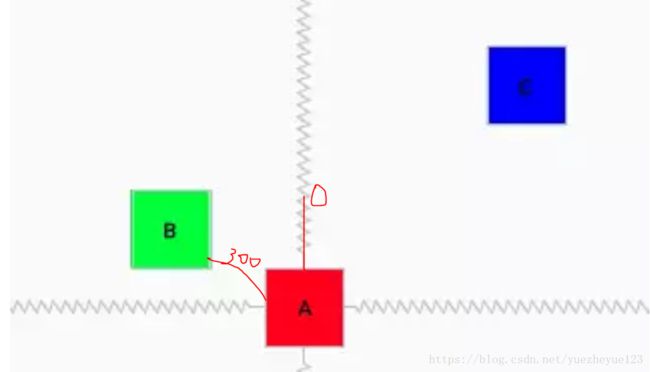
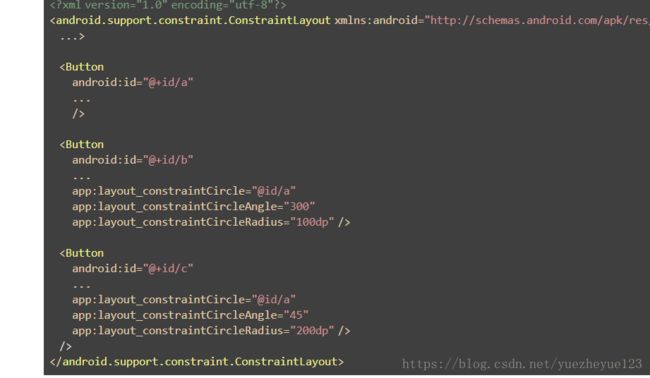
8.将其他的view按照圆形的位置进行摆放。
10.辅助组件的使用。

Guideline的大部分的属性如layout_width都是不会生效的,而他的位置的确定是由下面三个属性之一来确定的:并且可以用orientation进行控制方向,这个在design布局上才能看到。
layout_constraintGuide_begin:距离父布局的左边或者上边多大距离
layout_constraintGuide_end:距离父布局的右边或者下边多大距离
layout_constraintGuide_percent:百分比,0~1,距离父布局的左边或者上边占父布局的比例
11.Group控制集体控件的显示隐藏。这样就不用在外层再包裹线性布局等等进行控制。
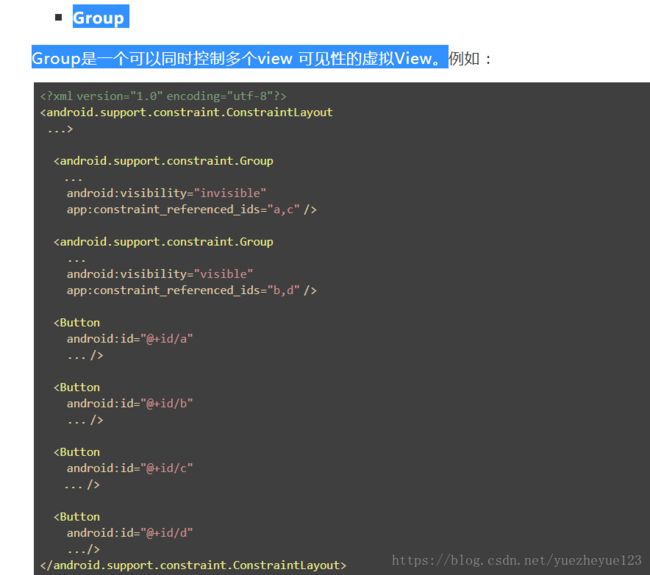
可以看到,第一个Group通过app:constraint_referenced_ids指定了a、c两个控件,这样当该Group可见性为invisible时,a、c的可见性都会变为invisible,为gone则都为gone。所以Group很适合处理有网无网之类的场景,不再需要像之前那样一个一个view控制可见性,通过Group就可以统一处理了。
Group有一些注意事项:
*
xml中,可见性配置的优先级:Group优先于View,下层Group优先于上层。
*
Group只可以引用当前ConstraintLayout下的View,子Layout 下的View不可以。
*
app:constraint_referenced_ids里直接写的是id的字符串,初始化后会通过getIdentifier来反射查找叫该名字的id。所以如果你的项目用了类似AndResGuard的混淆id名字的功能,切记不要混淆app:constraint_referenced_ids里的id,否则在release版本就会因找不到该id而失效。或者也可以通过代码setReferencedIds来设置id。
学习博客:https://www.jianshu.com/u/58b17cee654c
https://mp.weixin.qq.com/s/QIuww9b0TsNjajEUS8c2fg