基于阿里云CentOS进行WordPress安装和配置
概述
WordPress是一款个人博客系统,并逐步演化成一款内容管理系统软件,它是使用PHP语言和MySQL数据库开发的。用户可以在支持 PHP 和 MySQL数据库的服务器上使用自己的博客。WordPress有许多第三方开发的免费模板,安装方式简单易用。不过要做一个自己的模板,则需要你有一定的专业知识。比如你至少要懂的标准通用标记语言下的一个应用HTML代码、CSS、PHP等相关知识。使用WordPress平台的发行商约占全球网站的10%。而WordPress官方网站的每月独立访问用户数则达到3亿。
通俗来说,WordPress是一种快速建站工具。举个例子,关于演示PPT,多数人往往利用公司标准模版或者从网络上下载精美的PPT模板,然后往里面填充内容。WordPress就像那个精美的PPT模板,甚至它比PPT模板还好用,通过安装插件就可以拓展功能,直到使得WordPress变得有个人特色。总而言之,WordPress可以让使用者更专注于内容输出,最大程度降低建站的技术门槛。
英文主页https://wordpress.org 中文主页https://cn.wordpress.org
部署方式
WordPress以它的易于安装而出名。在大多数情况下,安装WordPress是一个很简单的事情,并且花不到5分钟就可以搞定。安装WordPress 著名的5分钟安装方式请参考官网https://codex.wordpress.org/Installing_WordPress#Famous_5-Minute_Installation。本文将介绍在linux环境中,从WordPress官网下载安装包,然后进行配置和安装。WordPress不支持其它安装方式。
软件说明
当前WordPress最新版本是Wordpress 4.9.8,官方下载地址https://wordpress.org/latest.tar.gz
前提条件
WordPress本身对服务器硬件需求很低(内存大于256M,存储大于200M即可);WordPress需要用到PHP环境和MySQL数据库,建议PHP版本是7.2或者更高,MySQL版本是5.6或者更高(MariaDB版本是10.0或者更高)。此外建议在Apache或者Nginx上运行WordPress;建议使用phpMyAdmin工具配置管理数据库。
准备环境,在CentOS(Version 7.4)下准备LAMP
安装Apache
安装Apache
yum -y install httpd
安装Apache扩展
yum -y install httpd-manual mod_ssl mod_perl mod_auth_mysql
启动Apache服务
systemctl start httpd
设置服务开机启动
systemctl enable httpd
查看服务状态
systemctl status httpd
显示如下信息:
Loaded: loaded (/usr/lib/systemd/system/httpd.service; enabled; vendor preset: disabled)
Active: active (running) since Sun 2018-11-25 15:50:31 CST; 22s ago
 Docs: man:httpd(8)

       man:apachectl(8)
Main PID: 1372 (/usr/sbin/httpd)
Status: “Total requests: 0; Current requests/sec: 0; Current traffic: 0 B/sec”
…
检测是否安装成功
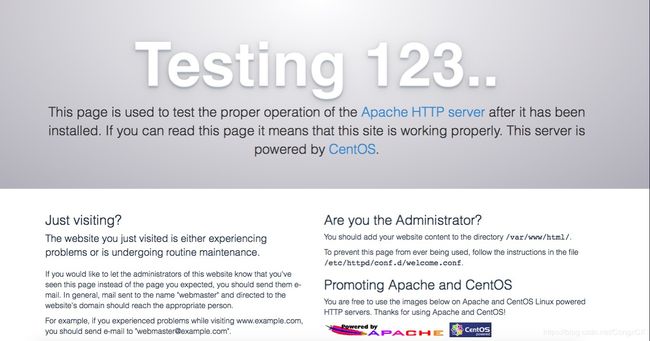
在浏览器地址栏输入该服务器的公网IP,显示下图表示安装成功。
安装数据库MariaDB
安装数据库MariaDB
yum install mariadb mariadb-server mariadb-libs mariadb-devel
启动数据库服务
systemctl start mariadb
设置服务开机启动
systemctl enable mariadb
查询数据库服务状态
systemctl status mariadb
显示如下信息:
mariadb.service - MariaDB database server
Loaded: loaded (/usr/lib/systemd/system/mariadb.service; enabled; vendor preset: disabled)
Active: active (running) since Sun 2018-11-25 15:56:25 CST; 34s ago
Main PID: 1586 (mysqld_safe)
CGroup: /system.slice/mariadb.service
       ├─1586 /bin/sh /usr/bin/mysqld_safe --basedir=/usr

       └─1748 /usr/libexec/mysqld --basedir=/usr --datadir=/var/lib/mysql --plugin-dir=/usr/lib64/mysql/plugin --log-error=/var/log/mariadb/mariadb.log --pid-file=/var/run/mariadb/mariadb.pid --socket=/var/lib/...
…
数据库安全设置
mysql_secure_installation
显示如下信息:
NOTE: RUNNING ALL PARTS OF THIS SCRIPT IS RECOMMENDED FOR ALL MariaDB
SERVERS IN PRODUCTION USE! PLEASE READ EACH STEP CAREFULLY!
In order to log into MariaDB to secure it, we’ll need the current
password for the root user. If you’ve just installed MariaDB, and
you haven’t set the root password yet, the password will be blank,
so you should just press enter here.
Enter current password for root (enter for none):
OK, successfully used password, moving on…
Setting the root password ensures that nobody can log into the MariaDB
root user without the proper authorisation.
Set root password? [Y/n] y
New password: //设置数据库root账号新密码
Re-enter new password:
Password updated successfully!
Reloading privilege tables…
… Success!
…
登陆数据库进行简单测试
mysql -uroot -p****(root账号的密码)
显示如下信息:
Welcome to the MariaDB monitor. Commands end with ; or \g.
Your MariaDB connection id is 9
Server version: 5.5.60-MariaDB MariaDB Server
Copyright © 2000, 2018, Oracle, MariaDB Corporation Ab and others.
Type ‘help;’ or ‘\h’ for help. Type ‘\c’ to clear the current input statement.
MariaDB [(none)]> show databases //显示数据库信息
-> ;
±-------------------+
| Database |
±-------------------+
| information_schema |
| mysql |
| performance_schema |
±-------------------+
3 rows in set (0.00 sec)
MariaDB [(none)]> quit //退出数据库
Bye
安装PHP环境
安装PHP
yum -y install php
将PHP与MySql关联,安装常用的PHP模块
yum install php-mysql
rpm -ql php-mysql
yum install -y php-gd php-ldap php-odbc php-pear php-xml php-xmlrpc php-mbstring php-snmp php-soap curl curl-devel php-bcmath
编辑PHP测试文件
cd /var/www/html
vim info.php //下文是info.php文件的内容
重启Apache服务
systemctl restart httpd
验证PHP环境
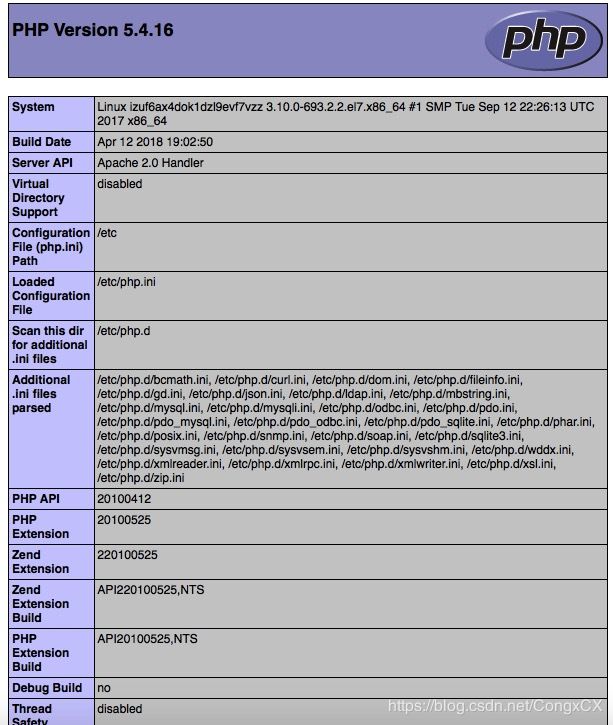
在浏览器地址栏输入该服务器的公网IP/info.php,显示下图表示安装成功。
安装phpMyAdmin
phpMyAdmin是一个以PHP为基础,以Web-Base方式架构在网站主机上的MariaDB(MySQL)的数据库管理工具,让管理者可用Web接口管理MariaDB(MySQL)数据库。
安装phpMyAdmin
yum install phpmyadmin
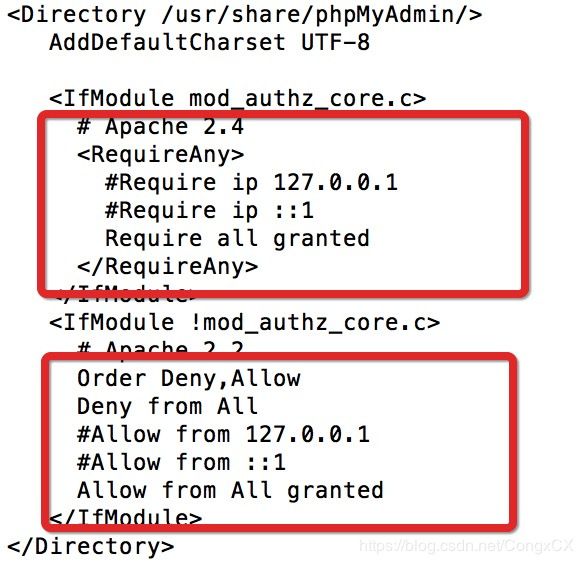
修改phpMyAdmin的访问控制文件,保证远程访问
cd /etc/httpd/conf.d/
vim phpMyAdmin.conf
重新启动Apache服务
systemctl restart httpd
使用phpMyAdmin配置管理数据库
需要在MariaDB里创建一个新的数据库给WordPress使用,通过使用phpMyAdmin可以很容易配置管理MariaDB数据库。在浏览器地址栏输入该服务器的公网IP/phpMyAdmin,出现如下数据库登陆界面:
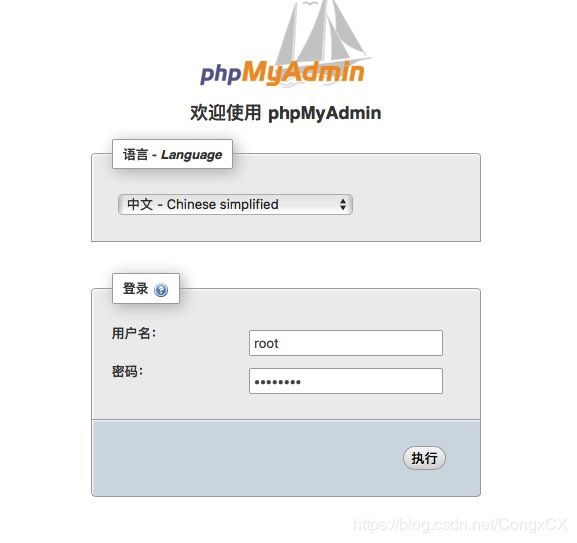
输入数据库MariaDB的账号和密码,成功登陆后,可以为WordPress新建一个数据库如下图。
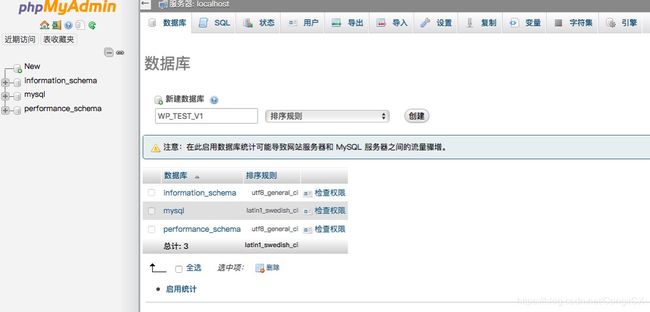
至此环境准备完毕,在后续WordPress配置安装过程中需要数据库账号&密码&数据库名称信息。
WordPress的安装和配置
从官网下载最新WordPress安装包
切换到Apache网站根目录,把WordPress下载到这里,后续WordPress的配置安装过程是基于WEB形式。
cd /var/www/html/
从官网下载最新的WordPress安装包
wget https://wordpress.org/latest.tar.gz
返回信息:
–2018-11-25 16:21:44-- https://wordpress.org/latest.tar.gz
Resolving wordpress.org (wordpress.org)… 198.143.164.252
Connecting to wordpress.org (wordpress.org)|198.143.164.252|:443… connected.
HTTP request sent, awaiting response… 200 OK
…
解压缩WordPress安装包
tar -xvf latest.tar.gz
解压之后,在当前目录下会出现wordpress文件夹,然后修改对该文件的权限为可读可写可执行,后续配置安装过程中需要在该文件夹里新建以及修改文件
chmod -R 777 wordpress
配置安装WordPress
WordPress的配置安装过程是基于WEB形式的,在浏览器中输入该服务器的公网IP/wordpress,出现如下启动界面:

点击Let’s go按钮进入下一步,需要输入已准备好的数据库名称,数据库用户名&密码;其它项可以使用缺省值。详情如下图:

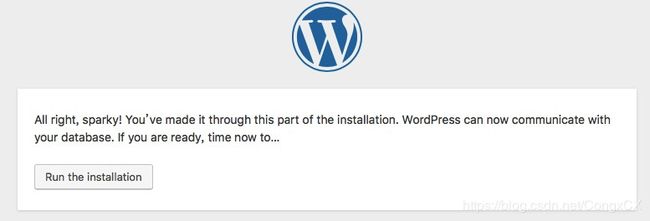
WordPress正常连接到数据库,可以开始启动安装。详情如下图:
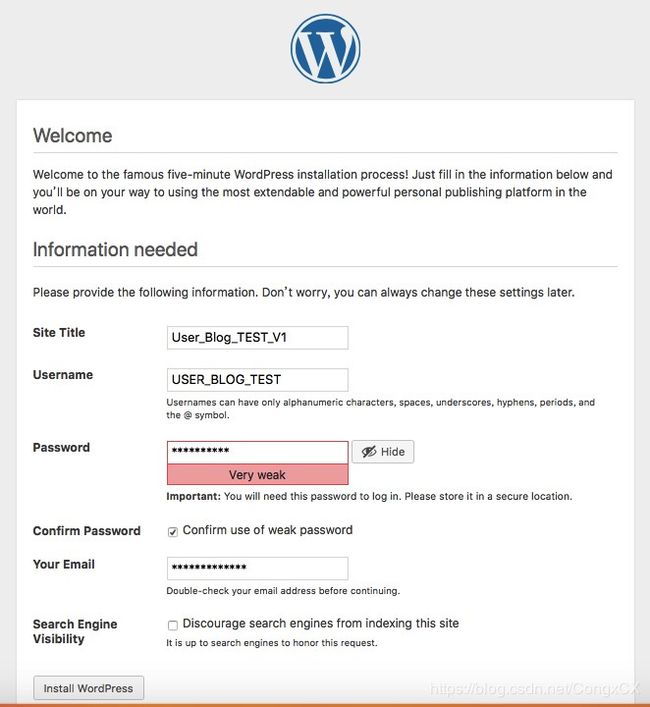
进入安装欢迎界面,并且需要设置站点标题(site Title),WordPress操作员的账号&密码&邮箱信息,以上信息后续可以随时修改,最后点击安装(installation)。详情如下图:
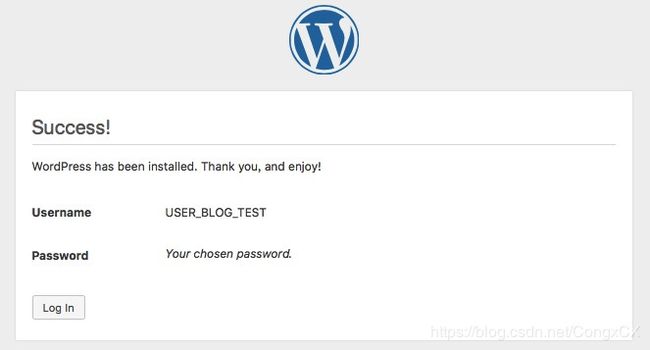
安装成功界面如下图,接下来可以点击登录(log in)按钮进行验证。
验证WordPress
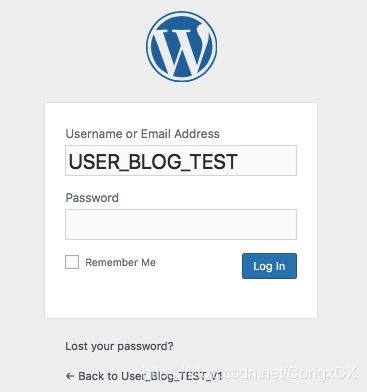
现在可以开始使用WordPress进行个人网站的搭建和设计,首先使用WordPress操作员的账号&密码进行登录,详情如下图:
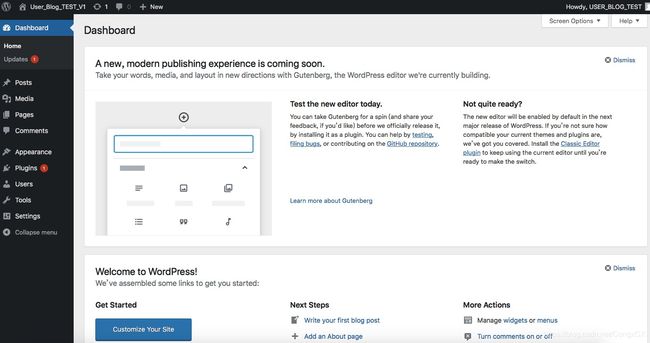
登陆成功后,WordPress主页如下图,现在可以开始进行个人网站的搭建和设计。
