wxWidgets学习笔记(3)wxWidgets程序生死因果
本文将分析wxWidgets应用程序如何开始执行、如何结束,如何创建主窗口,程序如何推动等问题。
1 三个不同版本的 Hello World
1-1 Hello World (Win32 SDK版)
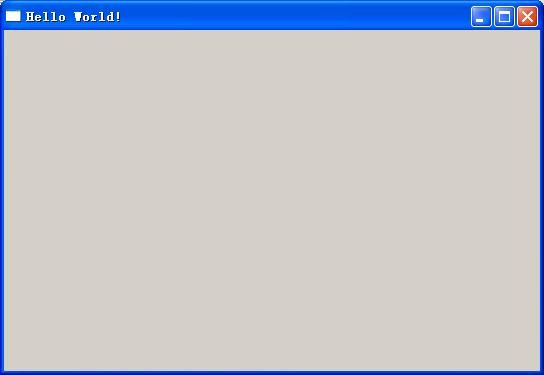
先看一下Win32 SDK简单程序,著名的Hello World。本程序由Code::Block在XP下通过向导生成,程序运行结果如图所示。
可以看出,Win32 SDK程序
1) 从WinMain(...)开始执行;
2) 通过RegisterClassEx(...)注册窗口类;
3)通过CreateWindowEx(...)创建主窗口,并通过ShowWindow(...)显示窗口;
4)通过 while (GetMessage (&messages, NULL, 0, 0)) 消息循环,等待响应用户命令;
5) 窗口处理过程为WindowProcedure(...),在注册窗口的时候绑定。
1-2 Hello World (GTK+ 版)
再看一下GTK+ 简单程序,也是著名的Hello World。本程序由Code::Block在Ubuntu下通过向导生成,程序运行结果如图所示。

与Win32 SDK程序类似,
1)从main(...)作为程序入口,开始执行;
2)gtk_init(...)初始化GTK+;
3)gtk_window_new(...)生成主窗口;
4) gtk_main () 进入消息循环,响应用户命令。
1-3 Hello World(wxWidgets版)
最后看一下wxWidgets应用程序,源代码同样通过Code::Block向导生成,在XP和Ubuntu下生成的源代码没有什么区别。在Ubuntu下编译运行的结果如图。

程序包含4个文件:
从程序代码中,我们
1)看不到WinMain或者是main,那么程序是从那里开始执行的呢?
2)看不到CreateWindowEx或者是gtk_window_new,主窗口是如何产生的呢?
3)看不到消息循环 while (GetMessage (&messages, NULL, 0, 0)) 或者是gtk_main (),程序如何推动的呢?
4)在XP下使用SDK API,在Ubuntu下使用GTK,但是wxWidgets应用程序在Window XP下的源代码和Ubuntu下的源代码几乎完全一致,wxWidgets如何实现的呢?
显然,wxWidgets在背后为我们做了大量的工作。
2 wxWidgets 程序生因死果
从1-3的程序里可以看出,这个简单的程序里有两个主要的类:HelloWorldMain和HelloWorldFrame。分别继承于wxApp和wxFrame。其中wxApp代表了程序主体,wxFrame代表一个主框窗口。从这两个类里看不出程序的入口,那么程序是从哪里开始执行的呢?
2-1 程序入口
仔细分析程序,在HelloWorld.cpp中,我们发现了一个宏IMPLEMENT_APP(HelloWorldApp),这究竟代表了什么呢?
查看wxWidgets源代码,我们可以在wx/app.h中发现IMPLEMENT_APP的定义:
其中 IMPLEMENT_WXWIN_MAIN针对不同平台有不同的定义,wxWidgets通过定义不同的宏来区分:
这样,不同的平台引用相应的文件,实现不同平台下的功能。
在GTK下,IMPLEMENT_WXWIN_MAIN的定义如下:
而Window下,定义于wx/msw/app.h中:
我们把IMPLEMENT_APP(HelloWorldApp)展开,在GTK下为:
而在Window下,为:
第一步,程序的入口 main(...)或 WinMain(...)我们找到了。
2-2 程序初始化
以MSW(Window下为例子)说明。
WinMain(...)很简单,只是调用了函数
wxEntry定义在common/init.cpp中,wxEntry又调用了函数int wxEntry(int& argc, wxChar **argv),进而又调用了函数int wxEntryReal(int& argc, wxChar **argv)。我们来看一下函数
整个程序的初始化,推动过程都在此函数中。其中初始化过程调用wxEntryStart,本节主要讨论wxEntryStart函数为我们做了些什么。
wxEntryStart为我们生成了一个application object--wxTheApp。我们可以从app.h中发现wxTheApp的定义:
#define wxTheApp wx_static_cast(wxApp*, wxApp::GetInstance())
而 wxApp::GetInstance()返回的是定义于wxApp基类wxAppConsole中的static变量:
static wxAppConsole *GetInstance() { return ms_appInstance; }
但是,wxApp(本例中为HelloWorldApp)是如何被创建的?ms_appInstance又是何时被赋值的呢?答案在 wxEntryStart函数中:
wxAppInitializerFunction fnCreate = wxApp::GetInitializerFunction();
app.Set((*fnCreate)());
通过wxApp::GetInitializerFunction返回的函数指针,创建了一个HelloWorldApp实例。wxApp::GetInitializerFunction()返回的是wxApp的静态变量ms_appInitFn(定义在基类wxAppConsole)。接下来的问题是静态变量ms_appInitFn是如何、是什么时候被赋值的呢?这要回到宏IMPLEMENT_APP(HelloWorldApp)中,在展开的结果中,可以看到一个全局变量:
wxAppInitializer wxTheAppInitializer((wxAppInitializerFunction) wxCreateApp);
wxTheAppInitializer在执行WinMain之前首先生成。而wxAppInitializer的定义很简单,就是在构造函数里为 wxApp::ms_appInitFn赋值:
当wxTheAppInitializer生成后,wxApp::ms_appInitFn赋值为wxCreateApp,而wxCreateApp是IMPLEMENT_APP(HelloWorldApp)展开的一部分,创建HelloWorldApp实例。
ms_appInstance的赋值很简单,在wxAppConsole的构造函数中完成。
至此,application object--wxTheApp创建的来龙去脉就清楚了。
application object--wxTheApp(本例中为HelloWorldApp的实例),EntryStart调用app->Initialize(argc, argv)。Initialize为虚函数,HelloWorldApp并没有改写,因此实际调用wxApp的Initialize。wxApp在msw/app.cpp(当然对于GTK平台应该在gtk/app.cpp中,参加前面的说明)实现:
在此我们可以发现窗口注册 RegisterWindowClasses()等其他初始化过程。而RegisterWindowClasses()的定义为:
呵呵,Win32SDK的东西终于露面了。程序初始化过程也显山露水了。主窗口的创建呢?下一小节接着分析。
2-3 窗口创建过程
前面说过,主窗口创建由wxFrame负责,wxFrame(本例中为HelloWorldFrame)如何实现的呢?还是回到wxEntryReal函数中。调用wxEntryStart结束后,程序接着调用了:
wxTheApp->CallOnInit()
由上面的分析,我们已经知道wxTheApp是一个application object,相当于一个HelloWorldApp的全局变量。CallOnInit()调用了OnInit。OnInit是一个虚函数,在HelloWorldApp中重写了:
绕了一圈,终于到了主窗口的创建过程了。
函数中创建了一个HelloWorldFrame实例,并调用 Show()显示。不用怀疑,wxWidgets肯定做了大量幕后工作。
HelloWorldFrame的构造函数调用了基类的构造函数:
HelloWorldFrame::HelloWorldFrame(wxFrame *frame, const wxString& title)
: wxFrame(frame, -1, title)
{}
先看一下wxFrame的类层次关系,如下图:
真正的 wxFrame(frame, -1, title)定义在wxTopLevelWindowMSW中(图中显示的是GTK下,到了Window平台下为wxTopLevelWindowMSW,至于如何实现的已经不是新鲜事,参见前面的说明):
Create(parent, id, title, pos, size, style, name)定义于msw/toplevel.cpp中(当然,对于GTK来说定义于jdk/toplevel.cpp中)。在这里我们还可以发现窗口过程的实现。
Create最终又调用wxWindowMSW中的MSWCreate
至此主窗口真正生成。主窗口生成后,在HelloWorldFrame构造函数中为主窗口增加菜单栏、状态栏等。
2-4 消息循环,程序推动
主窗口生成后,程序如何推动的呢?我们主要两个地方:
1) 回到wxEntryReal函数,可以看到:
// app execution
return wxTheApp->OnRun();
程序进入循环等待。
2)在HelloWorldFrame中,我们可以看到消息映射表
BEGIN_EVENT_TABLE(HelloWorldFrame, wxFrame)
EVT_CLOSE(HelloWorldFrame::OnClose)
EVT_MENU(idMenuQuit, HelloWorldFrame::OnQuit)
EVT_MENU(idMenuAbout, HelloWorldFrame::OnAbout)
END_EVENT_TABLE()
正是这两项推动程序运行。
具体细节将在以后分析。
3 结论:wxWidgets程序执行过程
通过以上分析,可以看出wxWidgets程序一般执行过程为:
1)根据平台不同,函数main,WinMain或类似的函数运行(这个函数是由wxWidgets提供的,并不是应用程序)。wxWidgets初始化内部数据结构,创建一个wxApp实例(本例中为HelloWorldApp)。
2)wxWidgets调用HelloWorldApp::OnInit,创建一个wxFrame实例(本例中为HelloWorldFrame)。
3)HelloWorldFrame构造函数通过wxFrame的构造函数创建主窗口,并且增加菜单栏、状态条等。
4)HelloWorldApp::OnInit显示frame.
5)wxWidgets开始消息循环,等待事件发生,并把事件分配到相应的处理函数。
当主窗口销毁时,程序也随之结束。
1 三个不同版本的 Hello World
1-1 Hello World (Win32 SDK版)
先看一下Win32 SDK简单程序,著名的Hello World。本程序由Code::Block在XP下通过向导生成,程序运行结果如图所示。
- #include
- /* Declare Windows procedure */
- LRESULT CALLBACK WindowProcedure (HWND, UINT, WPARAM, LPARAM);
- /* Make the class name into a global variable */
- char szClassName[ ] = "CodeBlocksWindowsApp";
- int WINAPI WinMain (HINSTANCE hThisInstance, // 1 程序入口 WinMain(...)
- HINSTANCE hPrevInstance,
- LPSTR lpszArgument,
- int nCmdShow)
- {
- HWND hwnd; /* This is the handle for our window */
- MSG messages; /* Here messages to the application are saved */
- WNDCLASSEX wincl; /* Data structure for the windowclass */
- /* The Window structure */
- wincl.hInstance = hThisInstance;
- wincl.lpszClassName = szClassName;
- wincl.lpfnWndProc = WindowProcedure; /* This function is called by windows */
- wincl.style = CS_DBLCLKS; /* Catch double-clicks */
- wincl.cbSize = sizeof (WNDCLASSEX);
- /* Use default icon and mouse-pointer */
- wincl.hIcon = LoadIcon (NULL, IDI_APPLICATION);
- wincl.hIconSm = LoadIcon (NULL, IDI_APPLICATION);
- wincl.hCursor = LoadCursor (NULL, IDC_ARROW);
- wincl.lpszMenuName = NULL; /* No menu */
- wincl.cbClsExtra = 0; /* No extra bytes after the window class */
- wincl.cbWndExtra = 0; /* structure or the window instance */
- /* Use Windows's default colour as the background of the window */
- wincl.hbrBackground = (HBRUSH) COLOR_BACKGROUND;
- /* Register the window class, and if it fails quit the program */
- if (!RegisterClassEx (&wincl)) // 2 注册窗口
- return 0;
- /* The class is registered, let's create the program*/
- hwnd = CreateWindowEx (
- 0, /* Extended possibilites for variation */
- szClassName, /* Classname */
- "Hello World!", /* Title Text */
- WS_OVERLAPPEDWINDOW, /* default window */
- CW_USEDEFAULT, /* Windows decides the position */
- CW_USEDEFAULT, /* where the window ends up on the screen */
- 544, /* The programs width */
- 375, /* and height in pixels */
- HWND_DESKTOP, /* The window is a child-window to desktop */
- NULL, /* No menu */
- hThisInstance, /* Program Instance handler */
- NULL /* No Window Creation data */
- );
- /* Make the window visible on the screen */
- ShowWindow (hwnd, nCmdShow); // 3 生成窗口并显示窗口
- /* Run the message loop. It will run until GetMessage() returns 0 */
- while (GetMessage (&messages, NULL, 0, 0)) // 4 消息循环,响应用户命令
- {
- /* Translate virtual-key messages into character messages */
- TranslateMessage(&messages);
- /* Send message to WindowProcedure */
- DispatchMessage(&messages);
- }
- /* The program return-value is 0 - The value that PostQuitMessage() gave */
- return messages.wParam;
- }
- // 5 窗口处理过程
- /* This function is called by the Windows function DispatchMessage() */
- LRESULT CALLBACK WindowProcedure (HWND hwnd, UINT message, WPARAM wParam, LPARAM lParam)
- {
- switch (message) /* handle the messages */
- {
- case WM_DESTROY:
- PostQuitMessage (0); /* send a WM_QUIT to the message queue */
- break;
- default: /* for messages that we don't deal with */
- return DefWindowProc (hwnd, message, wParam, lParam);
- }
- return 0;
- }
1) 从WinMain(...)开始执行;
2) 通过RegisterClassEx(...)注册窗口类;
3)通过CreateWindowEx(...)创建主窗口,并通过ShowWindow(...)显示窗口;
4)通过 while (GetMessage (&messages, NULL, 0, 0)) 消息循环,等待响应用户命令;
5) 窗口处理过程为WindowProcedure(...),在注册窗口的时候绑定。
1-2 Hello World (GTK+ 版)
再看一下GTK+ 简单程序,也是著名的Hello World。本程序由Code::Block在Ubuntu下通过向导生成,程序运行结果如图所示。
- #include
- #include
- //5 消息处理函数,通过g_signal_connect与窗口、控件绑定
- static void helloWorld (GtkWidget *wid, GtkWidget *win)
- {
- GtkWidget *dialog = NULL;
- dialog = gtk_message_dialog_new (GTK_WINDOW (win), GTK_DIALOG_MODAL, GTK_MESSAGE_INFO, GTK_BUTTONS_CLOSE, "Hello World!");
- gtk_window_set_position (GTK_WINDOW (dialog), GTK_WIN_POS_CENTER);
- gtk_dialog_run (GTK_DIALOG (dialog));
- gtk_widget_destroy (dialog);
- }
- int main (int argc, char *argv[]) // 1 程序入口 main(...)
- {
- GtkWidget *button = NULL;
- GtkWidget *win = NULL;
- GtkWidget *vbox = NULL;
- /* Initialize GTK+ */ // 2 初始化GTK+
- g_log_set_handler ("Gtk", G_LOG_LEVEL_WARNING, (GLogFunc) gtk_false, NULL);
- gtk_init (&argc, &argv);
- g_log_set_handler ("Gtk", G_LOG_LEVEL_WARNING, g_log_default_handler, NULL);
- /* Create the main window */ // 3 生成主窗口以及窗口内的控件,并通过 g_signal_connect绑定消息处理函数。
- win = gtk_window_new (GTK_WINDOW_TOPLEVEL);
- gtk_container_set_border_width (GTK_CONTAINER (win), 8);
- gtk_window_set_title (GTK_WINDOW (win), "Hello World");
- gtk_window_set_position (GTK_WINDOW (win), GTK_WIN_POS_CENTER);
- gtk_widget_realize (win);
- g_signal_connect (win, "destroy", gtk_main_quit, NULL);
- /* Create a vertical box with buttons */
- vbox = gtk_vbox_new (TRUE, 6);
- gtk_container_add (GTK_CONTAINER (win), vbox);
- button = gtk_button_new_from_stock (GTK_STOCK_DIALOG_INFO);
- g_signal_connect (G_OBJECT (button), "clicked", G_CALLBACK (helloWorld), (gpointer) win);
- gtk_box_pack_start (GTK_BOX (vbox), button, TRUE, TRUE, 0);
- button = gtk_button_new_from_stock (GTK_STOCK_CLOSE);
- g_signal_connect (button, "clicked", gtk_main_quit, NULL);
- gtk_box_pack_start (GTK_BOX (vbox), button, TRUE, TRUE, 0);
- /* Enter the main loop */ //4 进入消息循环,响应用户命令。
- gtk_widget_show_all (win);
- gtk_main ();
- return 0;
- }
与Win32 SDK程序类似,
1)从main(...)作为程序入口,开始执行;
2)gtk_init(...)初始化GTK+;
3)gtk_window_new(...)生成主窗口;
4) gtk_main () 进入消息循环,响应用户命令。
1-3 Hello World(wxWidgets版)
最后看一下wxWidgets应用程序,源代码同样通过Code::Block向导生成,在XP和Ubuntu下生成的源代码没有什么区别。在Ubuntu下编译运行的结果如图。
程序包含4个文件:
- HelloWorld.h
- #ifndef HELLOWORLDAPP_H
- #define HELLOWORLDAPP_H
- #include
- class HelloWorldApp : public wxApp
- {
- public:
- virtual bool OnInit();
- };
- #endif // HELLOWORLDAPP_H
- HelloWorld.cpp
- #ifdef WX_PRECOMP
- #include "wx_pch.h"
- #endif
- #ifdef __BORLANDC__
- #pragma hdrstop
- #endif //__BORLANDC__
- #include "HelloWorldApp.h"
- #include "HelloWorldMain.h"
- IMPLEMENT_APP(HelloWorldApp);
- bool HelloWorldApp::OnInit()
- {
- HelloWorldFrame* frame = new HelloWorldFrame(0L, _("Hello World!"));
- frame->Show();
- return true;
- }
- HelloWorldMain.h
- #ifndef HELLOWORLDMAIN_H
- #define HELLOWORLDMAIN_H
- #ifndef WX_PRECOMP
- #include
- #endif
- #include "HelloWorldApp.h"
- class HelloWorldFrame: public wxFrame
- {
- public:
- HelloWorldFrame(wxFrame *frame, const wxString& title);
- ~HelloWorldFrame();
- private:
- enum
- {
- idMenuQuit = 1000,
- idMenuAbout
- };
- void OnClose(wxCloseEvent& event);
- void OnQuit(wxCommandEvent& event);
- void OnAbout(wxCommandEvent& event);
- DECLARE_EVENT_TABLE()
- };
- #endif // HELLOWORLDMAIN_H
- HelloWorldMain.cpp
- #ifdef WX_PRECOMP
- #include "wx_pch.h"
- #endif
- #ifdef __BORLANDC__
- #pragma hdrstop
- #endif //__BORLANDC__
- #include "HelloWorldMain.h"
- //helper functions
- enum wxbuildinfoformat {
- short_f, long_f };
- wxString wxbuildinfo(wxbuildinfoformat format)
- {
- wxString wxbuild(wxVERSION_STRING);
- if (format == long_f )
- {
- #if defined(__WXMSW__)
- wxbuild << _T("-Windows");
- #elif defined(__WXMAC__)
- wxbuild << _T("-Mac");
- #elif defined(__UNIX__)
- wxbuild << _T("-Linux");
- #endif
- #if wxUSE_UNICODE
- wxbuild << _T("-Unicode build");
- #else
- wxbuild << _T("-ANSI build");
- #endif // wxUSE_UNICODE
- }
- return wxbuild;
- }
- BEGIN_EVENT_TABLE(HelloWorldFrame, wxFrame)
- EVT_CLOSE(HelloWorldFrame::OnClose)
- EVT_MENU(idMenuQuit, HelloWorldFrame::OnQuit)
- EVT_MENU(idMenuAbout, HelloWorldFrame::OnAbout)
- END_EVENT_TABLE()
- HelloWorldFrame::HelloWorldFrame(wxFrame *frame, const wxString& title)
- : wxFrame(frame, -1, title)
- {
- #if wxUSE_MENUS
- // create a menu bar
- wxMenuBar* mbar = new wxMenuBar();
- wxMenu* fileMenu = new wxMenu(_T(""));
- fileMenu->Append(idMenuQuit, _("&Quit/tAlt-F4"), _("Quit the application"));
- mbar->Append(fileMenu, _("&File"));
- wxMenu* helpMenu = new wxMenu(_T(""));
- helpMenu->Append(idMenuAbout, _("&About/tF1"), _("Show info about this application"));
- mbar->Append(helpMenu, _("&Help"));
- SetMenuBar(mbar);
- #endif // wxUSE_MENUS
- #if wxUSE_STATUSBAR
- // create a status bar with some information about the used wxWidgets version
- CreateStatusBar(2);
- SetStatusText(_("Hello World!"),0);
- SetStatusText(wxbuildinfo(short_f), 1);
- #endif // wxUSE_STATUSBAR
- }
- HelloWorldFrame::~HelloWorldFrame()
- {
- }
- void HelloWorldFrame::OnClose(wxCloseEvent &event)
- {
- Destroy();
- }
- void HelloWorldFrame::OnQuit(wxCommandEvent &event)
- {
- Destroy();
- }
- void HelloWorldFrame::OnAbout(wxCommandEvent &event)
- {
- wxString msg = wxbuildinfo(long_f);
- wxMessageBox(msg, _("Welcome to..."));
- }
1)看不到WinMain或者是main,那么程序是从那里开始执行的呢?
2)看不到CreateWindowEx或者是gtk_window_new,主窗口是如何产生的呢?
3)看不到消息循环 while (GetMessage (&messages, NULL, 0, 0)) 或者是gtk_main (),程序如何推动的呢?
4)在XP下使用SDK API,在Ubuntu下使用GTK,但是wxWidgets应用程序在Window XP下的源代码和Ubuntu下的源代码几乎完全一致,wxWidgets如何实现的呢?
显然,wxWidgets在背后为我们做了大量的工作。
2 wxWidgets 程序生因死果
从1-3的程序里可以看出,这个简单的程序里有两个主要的类:HelloWorldMain和HelloWorldFrame。分别继承于wxApp和wxFrame。其中wxApp代表了程序主体,wxFrame代表一个主框窗口。从这两个类里看不出程序的入口,那么程序是从哪里开始执行的呢?
2-1 程序入口
仔细分析程序,在HelloWorld.cpp中,我们发现了一个宏IMPLEMENT_APP(HelloWorldApp),这究竟代表了什么呢?
查看wxWidgets源代码,我们可以在wx/app.h中发现IMPLEMENT_APP的定义:
- wx/app.h
- #define wxTheApp wx_static_cast(wxApp*, wxApp::GetInstance())
- // Use this macro exactly once, the argument is the name of the wxApp-derived
- // class which is the class of your application.
- #define IMPLEMENT_APP(appname) /
- IMPLEMENT_APP_NO_THEMES(appname) /
- IMPLEMENT_WX_THEME_SUPPORT
- // Same as IMPLEMENT_APP() normally but doesn't include themes support in
- // wxUniversal builds
- #define IMPLEMENT_APP_NO_THEMES(appname) /
- IMPLEMENT_APP_NO_MAIN(appname) /
- IMPLEMENT_WXWIN_MAIN
- // Use this macro if you want to define your own main() or WinMain() function
- // and call wxEntry() from there.
- #define IMPLEMENT_APP_NO_MAIN(appname) /
- wxAppConsole *wxCreateApp() /
- { /
- wxAppConsole::CheckBuildOptions(WX_BUILD_OPTIONS_SIGNATURE, /
- "your program"); /
- return new appname; /
- } /
- wxAppInitializer /
- wxTheAppInitializer((wxAppInitializerFunction) wxCreateApp); /
- DECLARE_APP(appname) /
- appname& wxGetApp() { return *wx_static_cast(appname*, wxApp::GetInstance()); }
- // this macro can be used multiple times and just allows you to use wxGetApp()
- // function
- #define DECLARE_APP(appname) extern appname& wxGetApp();
- #if defined(__WXPALMOS__)
- #include "wx/palmos/app.h"
- #elif defined(__WXMSW__)
- #include "wx/msw/app.h"
- #elif defined(__WXMOTIF__)
- #include "wx/motif/app.h"
- #elif defined(__WXMGL__)
- #include "wx/mgl/app.h"
- #elif defined(__WXDFB__)
- #include "wx/dfb/app.h"
- #elif defined(__WXGTK20__)
- #include "wx/gtk/app.h"
- #elif defined(__WXGTK__)
- #include "wx/gtk1/app.h"
- #elif defined(__WXX11__)
- #include "wx/x11/app.h"
- #elif defined(__WXMAC__)
- #include "wx/mac/app.h"
- #elif defined(__WXCOCOA__)
- #include "wx/cocoa/app.h"
- #elif defined(__WXPM__)
- #include "wx/os2/app.h"
- #endif
在GTK下,IMPLEMENT_WXWIN_MAIN的定义如下:
- #define IMPLEMENT_WXWIN_MAIN_CONSOLE /
- int main(int argc, char **argv) { return wxEntry(argc, argv); }
- // port-specific header could have defined it already in some special way
- #ifndef IMPLEMENT_WXWIN_MAIN
- #define IMPLEMENT_WXWIN_MAIN IMPLEMENT_WXWIN_MAIN_CONSOLE
- #endif
- #define IMPLEMENT_WXWIN_MAIN /
- extern "C" int WINAPI WinMain(HINSTANCE hInstance, /
- HINSTANCE hPrevInstance, /
- wxCmdLineArgType lpCmdLine, /
- int nCmdShow) /
- { /
- return wxEntry(hInstance, hPrevInstance, lpCmdLine, nCmdShow); /
- } /
- IMPLEMENT_WXWIN_MAIN_BORLAND_NONSTANDARD
- wxAppConsole *wxCreateApp()
- {
- wxAppConsole::CheckBuildOptions(WX_BUILD_OPTIONS_SIGNATURE,
- "your program");
- return new HelloWorldApp;
- }
- wxAppInitializer
- wxTheAppInitializer((wxAppInitializerFunction) wxCreateApp);
- extern HelloWorldApp& wxGetApp();
- HelloWorldApp& wxGetApp() { return *wx_static_cast(HelloWorldApp*, wxApp::GetInstance()); }
- int main(int argc, char **argv) { return wxEntry(argc, argv); }
- extern "C" int WINAPI WinMain(HINSTANCE hInstance,
- HINSTANCE hPrevInstance,
- wxCmdLineArgType lpCmdLine,
- int nCmdShow)
- {
- return wxEntry(hInstance, hPrevInstance, lpCmdLine, nCmdShow);
- }
2-2 程序初始化
以MSW(Window下为例子)说明。
WinMain(...)很简单,只是调用了函数
- int wxEntry(HINSTANCE hInstance,
- HINSTANCE WXUNUSED(hPrevInstance),
- wxCmdLineArgType WXUNUSED(pCmdLine),
- int nCmdShow),
- int wxEntryReal(int& argc, wxChar **argv)
- {
- // library initialization
- if ( !wxEntryStart(argc, argv) )
- {
- #if wxUSE_LOG
- // flush any log messages explaining why we failed
- delete wxLog::SetActiveTarget(NULL);
- #endif
- return -1;
- }
- // if wxEntryStart succeeded, we must call wxEntryCleanup even if the code
- // below returns or throws
- wxCleanupOnExit cleanupOnExit;
- WX_SUPPRESS_UNUSED_WARN(cleanupOnExit);
- wxTRY
- {
- // app initialization
- if ( !wxTheApp->CallOnInit() )
- {
- // don't call OnExit() if OnInit() failed
- return -1;
- }
- // ensure that OnExit() is called if OnInit() had succeeded
- class CallOnExit
- {
- public:
- ~CallOnExit() { wxTheApp->OnExit(); }
- } callOnExit;
- WX_SUPPRESS_UNUSED_WARN(callOnExit);
- // app execution
- return wxTheApp->OnRun();
- }
- wxCATCH_ALL( wxTheApp->OnUnhandledException(); return -1; )
- }
- bool wxEntryStart(int& argc, wxChar **argv)
- {
- // do minimal, always necessary, initialization
- // --------------------------------------------
- // initialize wxRTTI
- if ( !DoCommonPreInit() )
- {
- return false;
- }
- // first of all, we need an application object
- // -------------------------------------------
- // the user might have already created it himself somehow
- wxAppPtr app(wxTheApp);
- if ( !app.get() )
- {
- // if not, he might have used IMPLEMENT_APP() to give us a function to
- // create it
- wxAppInitializerFunction fnCreate = wxApp::GetInitializerFunction();
- if ( fnCreate )
- {
- // he did, try to create the custom wxApp object
- app.Set((*fnCreate)());
- }
- }
- if ( !app.get() )
- {
- // either IMPLEMENT_APP() was not used at all or it failed -- in any
- // case we still need something
- app.Set(new wxDummyConsoleApp);
- }
- // wxApp initialization: this can be customized
- // --------------------------------------------
- if ( !app->Initialize(argc, argv) )
- {
- return false;
- }
- wxCallAppCleanup callAppCleanup(app.get());
- // for compatibility call the old initialization function too
- if ( !app->OnInitGui() )
- return false;
- // common initialization after wxTheApp creation
- // ---------------------------------------------
- if ( !DoCommonPostInit() )
- return false;
- // prevent the smart pointer from destroying its contents
- app.release();
- // and the cleanup object from doing cleanup
- callAppCleanup.Dismiss();
- #if wxUSE_LOG
- // now that we have a valid wxApp (wxLogGui would have crashed if we used
- // it before now), we can delete the temporary sink we had created for the
- // initialization messages -- the next time logging function is called, the
- // sink will be recreated but this time wxAppTraits will be used
- delete wxLog::SetActiveTarget(NULL);
- #endif // wxUSE_LOG
- return true;
- }
#define wxTheApp wx_static_cast(wxApp*, wxApp::GetInstance())
而 wxApp::GetInstance()返回的是定义于wxApp基类wxAppConsole中的static变量:
static wxAppConsole *GetInstance() { return ms_appInstance; }
但是,wxApp(本例中为HelloWorldApp)是如何被创建的?ms_appInstance又是何时被赋值的呢?答案在 wxEntryStart函数中:
wxAppInitializerFunction fnCreate = wxApp::GetInitializerFunction();
app.Set((*fnCreate)());
通过wxApp::GetInitializerFunction返回的函数指针,创建了一个HelloWorldApp实例。wxApp::GetInitializerFunction()返回的是wxApp的静态变量ms_appInitFn(定义在基类wxAppConsole)。接下来的问题是静态变量ms_appInitFn是如何、是什么时候被赋值的呢?这要回到宏IMPLEMENT_APP(HelloWorldApp)中,在展开的结果中,可以看到一个全局变量:
wxAppInitializer wxTheAppInitializer((wxAppInitializerFunction) wxCreateApp);
wxTheAppInitializer在执行WinMain之前首先生成。而wxAppInitializer的定义很简单,就是在构造函数里为 wxApp::ms_appInitFn赋值:
- class WXDLLIMPEXP_BASE wxAppInitializer
- {
- public:
- wxAppInitializer(wxAppInitializerFunction fn)
- { wxApp::SetInitializerFunction(fn); }
- };
ms_appInstance的赋值很简单,在wxAppConsole的构造函数中完成。
至此,application object--wxTheApp创建的来龙去脉就清楚了。
application object--wxTheApp(本例中为HelloWorldApp的实例),EntryStart调用app->Initialize(argc, argv)。Initialize为虚函数,HelloWorldApp并没有改写,因此实际调用wxApp的Initialize。wxApp在msw/app.cpp(当然对于GTK平台应该在gtk/app.cpp中,参加前面的说明)实现:
- //msw/app.cpp
- //// Initialize
- bool wxApp::Initialize(int& argc, wxChar **argv)
- {
- if ( !wxAppBase::Initialize(argc, argv) )
- return false;
- // ensure that base cleanup is done if we return too early
- wxCallBaseCleanup callBaseCleanup(this);
- #ifdef __WXWINCE__
- wxString tmp = GetAppName();
- tmp += wxT("ClassName");
- wxCanvasClassName = wxStrdup( tmp.c_str() );
- tmp += wxT("NR");
- wxCanvasClassNameNR = wxStrdup( tmp.c_str() );
- HWND hWnd = FindWindow( wxCanvasClassNameNR, NULL );
- if (hWnd)
- {
- SetForegroundWindow( (HWND)(((DWORD)hWnd)|0x01) );
- return false;
- }
- #endif
- #if !defined(__WXMICROWIN__)
- InitCommonControls();
- #endif // !defined(__WXMICROWIN__)
- #if defined(__SMARTPHONE__) || defined(__POCKETPC__)
- SHInitExtraControls();
- #endif
- #ifndef __WXWINCE__
- // Don't show a message box if a function such as SHGetFileInfo
- // fails to find a device.
- SetErrorMode(SEM_FAILCRITICALERRORS|SEM_NOOPENFILEERRORBOX);
- #endif
- wxOleInitialize();
- RegisterWindowClasses();
- wxWinHandleHash = new wxWinHashTable(wxKEY_INTEGER, 100);
- #if !defined(__WXMICROWIN__) && !defined(__WXWINCE__)
- wxSetKeyboardHook(true);
- #endif
- callBaseCleanup.Dismiss();
- return true;
- }
- bool wxApp::RegisterWindowClasses()
- {
- WNDCLASS wndclass;
- wxZeroMemory(wndclass);
- // for each class we register one with CS_(V|H)REDRAW style and one
- // without for windows created with wxNO_FULL_REDRAW_ON_REPAINT flag
- static const long styleNormal = CS_HREDRAW | CS_VREDRAW | CS_DBLCLKS;
- static const long styleNoRedraw = CS_DBLCLKS;
- // the fields which are common to all classes
- wndclass.lpfnWndProc = (WNDPROC)wxWndProc;
- wndclass.hInstance = wxhInstance;
- wndclass.hCursor = ::LoadCursor((HINSTANCE)NULL, IDC_ARROW);
- // register the class for all normal windows
- wndclass.hbrBackground = (HBRUSH)(COLOR_BTNFACE + 1);
- wndclass.lpszClassName = wxCanvasClassName;
- wndclass.style = styleNormal;
- if ( !RegisterClass(&wndclass) )
- {
- wxLogLastError(wxT("RegisterClass(frame)"));
- }
- // "no redraw" frame
- wndclass.lpszClassName = wxCanvasClassNameNR;
- wndclass.style = styleNoRedraw;
- if ( !RegisterClass(&wndclass) )
- {
- wxLogLastError(wxT("RegisterClass(no redraw frame)"));
- }
- // Register the MDI frame window class.
- wndclass.hbrBackground = (HBRUSH)NULL; // paint MDI frame ourselves
- wndclass.lpszClassName = wxMDIFrameClassName;
- wndclass.style = styleNormal;
- if ( !RegisterClass(&wndclass) )
- {
- wxLogLastError(wxT("RegisterClass(MDI parent)"));
- }
- // "no redraw" MDI frame
- wndclass.lpszClassName = wxMDIFrameClassNameNoRedraw;
- wndclass.style = styleNoRedraw;
- if ( !RegisterClass(&wndclass) )
- {
- wxLogLastError(wxT("RegisterClass(no redraw MDI parent frame)"));
- }
- // Register the MDI child frame window class.
- wndclass.hbrBackground = (HBRUSH)(COLOR_WINDOW + 1);
- wndclass.lpszClassName = wxMDIChildFrameClassName;
- wndclass.style = styleNormal;
- if ( !RegisterClass(&wndclass) )
- {
- wxLogLastError(wxT("RegisterClass(MDI child)"));
- }
- // "no redraw" MDI child frame
- wndclass.lpszClassName = wxMDIChildFrameClassNameNoRedraw;
- wndclass.style = styleNoRedraw;
- if ( !RegisterClass(&wndclass) )
- {
- wxLogLastError(wxT("RegisterClass(no redraw MDI child)"));
- }
- return true;
- }
2-3 窗口创建过程
前面说过,主窗口创建由wxFrame负责,wxFrame(本例中为HelloWorldFrame)如何实现的呢?还是回到wxEntryReal函数中。调用wxEntryStart结束后,程序接着调用了:
wxTheApp->CallOnInit()
由上面的分析,我们已经知道wxTheApp是一个application object,相当于一个HelloWorldApp的全局变量。CallOnInit()调用了OnInit。OnInit是一个虚函数,在HelloWorldApp中重写了:
- bool HelloWorldApp::OnInit()
- {
- HelloWorldFrame* frame = new HelloWorldFrame(0L, _("Hello World!"));
- frame->Show();
- return true;
- }
函数中创建了一个HelloWorldFrame实例,并调用 Show()显示。不用怀疑,wxWidgets肯定做了大量幕后工作。
HelloWorldFrame的构造函数调用了基类的构造函数:
HelloWorldFrame::HelloWorldFrame(wxFrame *frame, const wxString& title)
: wxFrame(frame, -1, title)
{}
先看一下wxFrame的类层次关系,如下图:
真正的 wxFrame(frame, -1, title)定义在wxTopLevelWindowMSW中(图中显示的是GTK下,到了Window平台下为wxTopLevelWindowMSW,至于如何实现的已经不是新鲜事,参见前面的说明):
- wxTopLevelWindowMSW(wxWindow *parent,
- wxWindowID id,
- const wxString& title,
- const wxPoint& pos = wxDefaultPosition,
- const wxSize& size = wxDefaultSize,
- long style = wxDEFAULT_FRAME_STYLE,
- const wxString& name = wxFrameNameStr)
- {
- Init();
- (void)Create(parent, id, title, pos, size, style, name);
- }
Create最终又调用wxWindowMSW中的MSWCreate
- bool wxWindowMSW::MSWCreate(const wxChar *wclass,
- const wxChar *title,
- const wxPoint& pos,
- const wxSize& size,
- WXDWORD style,
- WXDWORD extendedStyle)
- {
- // choose the position/size for the new window
- int x, y, w, h;
- (void)MSWGetCreateWindowCoords(pos, size, x, y, w, h);
- // controlId is menu handle for the top level windows, so set it to 0
- // unless we're creating a child window
- int controlId = style & WS_CHILD ? GetId() : 0;
- // for each class "Foo" we have we also have "FooNR" ("no repaint") class
- // which is the same but without CS_[HV]REDRAW class styles so using it
- // ensures that the window is not fully repainted on each resize
- wxString className(wclass);
- if ( !HasFlag(wxFULL_REPAINT_ON_RESIZE) )
- {
- className += wxT("NR");
- }
- // do create the window
- wxWindowCreationHook hook(this);
- m_hWnd = (WXHWND)::CreateWindowEx
- (
- extendedStyle,
- className,
- title ? title : m_windowName.c_str(),
- style,
- x, y, w, h,
- (HWND)MSWGetParent(),
- (HMENU)controlId,
- wxGetInstance(),
- NULL // no extra data
- );
- if ( !m_hWnd )
- {
- wxLogSysError(_("Can't create window of class %s"), className.c_str());
- return false;
- }
- SubclassWin(m_hWnd);
- return true;
- }
2-4 消息循环,程序推动
主窗口生成后,程序如何推动的呢?我们主要两个地方:
1) 回到wxEntryReal函数,可以看到:
// app execution
return wxTheApp->OnRun();
程序进入循环等待。
2)在HelloWorldFrame中,我们可以看到消息映射表
BEGIN_EVENT_TABLE(HelloWorldFrame, wxFrame)
EVT_CLOSE(HelloWorldFrame::OnClose)
EVT_MENU(idMenuQuit, HelloWorldFrame::OnQuit)
EVT_MENU(idMenuAbout, HelloWorldFrame::OnAbout)
END_EVENT_TABLE()
正是这两项推动程序运行。
具体细节将在以后分析。
3 结论:wxWidgets程序执行过程
通过以上分析,可以看出wxWidgets程序一般执行过程为:
1)根据平台不同,函数main,WinMain或类似的函数运行(这个函数是由wxWidgets提供的,并不是应用程序)。wxWidgets初始化内部数据结构,创建一个wxApp实例(本例中为HelloWorldApp)。
2)wxWidgets调用HelloWorldApp::OnInit,创建一个wxFrame实例(本例中为HelloWorldFrame)。
3)HelloWorldFrame构造函数通过wxFrame的构造函数创建主窗口,并且增加菜单栏、状态条等。
4)HelloWorldApp::OnInit显示frame.
5)wxWidgets开始消息循环,等待事件发生,并把事件分配到相应的处理函数。
当主窗口销毁时,程序也随之结束。