Matplotlib---小白级教程(1)
文章目录
- 1.画布的创建和布局--add_subplot()
- 2.X & Y 坐标的区间设置
- 3.表格名称以及X & Y坐标的备注
- 4.波动曲线的设置(颜色、线型、标注)
- 1.颜色篇
- 2.线型篇
- 3.标注篇
- 5.plot()的其他属性
1.画布的创建和布局–add_subplot()
简单理解就是,先准备一块画布,并且设定好这块画布的布局。你是准备画一个图表还是多个图表、你是准备在画布的靠左边画图,还是右边画图。
fig = plt.figure()
ax1 = fig.add_subplot(numrows, numcols, fignum)
- numrows 代表你的画布,打算分几行
- numcols代表你的画布,打算分几列
- fignum代表你的画布上的第几个图表
案例一:
import matplotlib.pyplot as plt


fig = plt.figure()
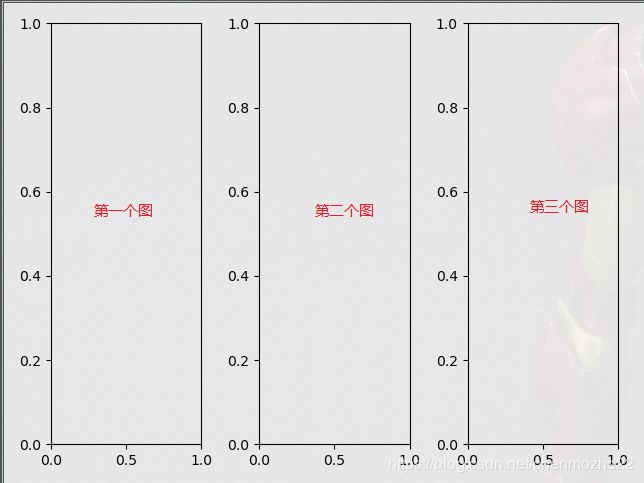
ax1 = fig.add_subplot(1, 3, 1)			# 第一个画布
ax2 = fig.add_subplot(1, 3, 2)			# 第二个画布
ax3 = fig.add_subplot(1, 3, 3)			# 第三个画布
plt.show()
- 如上add_subplot()函数的第一个参数都为1,那么整个画布设置一行的意思
- 第二个参数都为3,说明是一张画布都分3列
- 第三个参数,分别是1/2/3,是值具体的图表的第一个、第二个、第三个
案例二:
import matplotlib.pyplot as plt


fig = plt.figure()
ax1 = fig.add_subplot(1, 3, 1)
ax3 = fig.add_subplot(1, 3, 3)
plt.show()
案例三:
import matplotlib.pyplot as plt


fig = plt.figure()
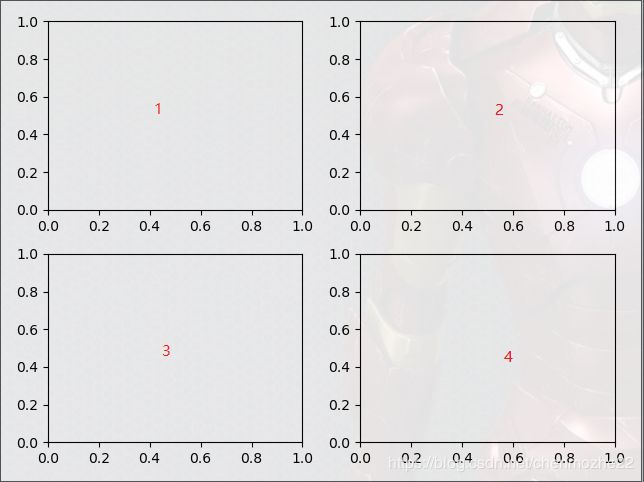
ax1 = fig.add_subplot(2, 2, 1)
ax2 = fig.add_subplot(2, 2, 2)
ax3 = fig.add_subplot(2, 2, 3)
ax4 = fig.add_subplot(2, 2, 4)
plt.show()
案例四:
import matplotlib.pyplot as plt


fig = plt.figure()
ax1 = fig.add_subplot(2, 2, 1)
ax2 = fig.add_subplot(2, 2, 2)
ax4 = fig.add_subplot(2, 2, 4)
plt.show()
2.X & Y 坐标的区间设置
    def plot(self, xs, ys, *args, zdir='z', **kwargs):
        """
        Plot 2D or 3D data.

        Parameters
        ----------
        xs : 1D array-like
            x coordinates of vertices.						# X坐标轴
        ys : 1D array-like
            y coordinates of vertices.						# y坐标轴
        zs : scalar or 1D array-like
            z coordinates of vertices; either one for all points or one for
            each point.
        zdir : {'x', 'y', 'z'}
            When plotting 2D data, the direction to use as z ('x', 'y' or 'z');
            defaults to 'z'.
        **kwargs
            Other arguments are forwarded to `matplotlib.axes.Axes.plot`.
        """
import matplotlib.pyplot as plt

fig = plt.figure()
ax1 = fig.add_subplot(1, 2, 1)
ax2 = fig.add_subplot(1, 2, 2)
ax1.plot([0, 1, 2], [1, 2, 3])
ax2.plot([0, 1, 2, 3], [1, 2, 3, 4])

plt.show()
- 如上第一个图中,x坐标用[0, 1, 2]区间表示,y坐标用[1, 2, 3]区间表示
- 同理,第二个图
3.表格名称以及X & Y坐标的备注
案例一:
import matplotlib.pyplot as plt

fig = plt.figure()
ax1 = fig.add_subplot(1, 2, 1)
ax2 = fig.add_subplot(1, 2, 2)
ax1.plot([0, 1, 2], [1, 2, 3])
ax2.plot([0, 1, 2, 3], [1, 2, 3, 4])

ax1.set_title("table title")			# 图一的标题
ax1.set_xlabel("x label")				# x坐标的含义
ax1.set_ylabel("y label")				# y坐标的含义
ax2.set_title("table title 2")
ax2.set_xlabel("x label 2")
ax2.set_ylabel("y label 2")
plt.show()
如果是一个画布上有一张图或多张图,可以用如上方式。
案例二:
import matplotlib.pyplot as plt

fig = plt.figure()

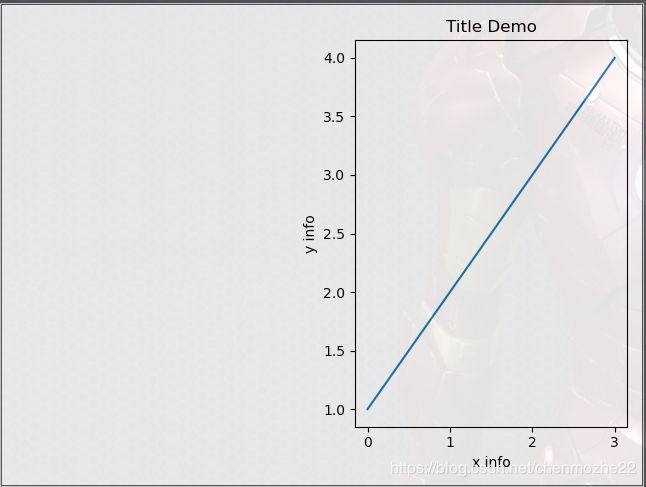
ax2 = fig.add_subplot(1, 2, 2)		# 画布显示了第二个区域的图表
ax2.plot([0, 1, 2, 3], [1, 2, 3, 4])

plt.xlabel('x info')
plt.ylabel('y info')
plt.title('Title Demo')

plt.show()
- 此部分只显示了一张图的坐标备注信息,如果是两个图表,建议还是利用案例一里面的方法设置坐标的备注信息。
4.波动曲线的设置(颜色、线型、标注)
1.颜色篇
import matplotlib.pyplot as plt

fig = plt.figure()

ax1 = fig.add_subplot(1, 2, 1)
ax2 = fig.add_subplot(1, 2, 2)
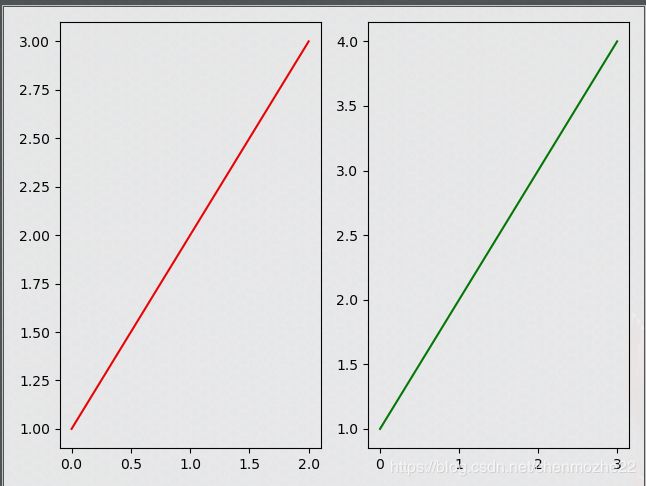
ax1.plot([0, 1, 2], [1, 2, 3], "red")				# 第三个参数,默认是颜色
ax2.plot([0, 1, 2, 3], [1, 2, 3, 4], "green")


plt.show()
| 别名 | 全名 | 颜色 |
|---|---|---|
| b | blue | 蓝色 |
| g | green | 绿色 |
| r | red | 红色 |
| y | yellow | 黄色 |
| c | Cyan | 青色 |
| k | blacK | 黑色 |
| m | Magenta | 洋红色 |
| w | waite | 白色 |
使用别名和全名,都可以实现颜色的设置
2.线型篇
import matplotlib.pyplot as plt

fig = plt.figure()

ax1 = fig.add_subplot(1, 2, 1)
ax2 = fig.add_subplot(1, 2, 2)
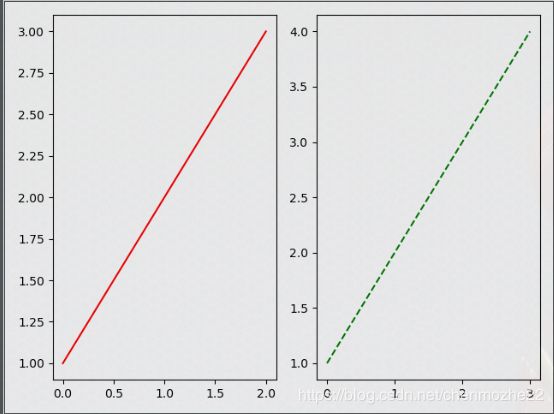
ax1.plot([0, 1, 2], [1, 2, 3], "r-")				# 使用别名的方式
ax2.plot([0, 1, 2, 3], [1, 2, 3, 4], "g--")


plt.show()
- 如果要求不多,可以使用颜色的别名 + “–” 的形式,可以实现虚线的设置,而"-"则是普通的实线
具体线型的列表如下:
| 线条风格linestyle或ls | 描述 |
|---|---|
| ‘-‘ | 实线 |
| ‘:’ | 点线 |
| ‘–’ | 破折线 |
| ‘None’,’ ‘,’’ | 什么都不画 |
| ‘-.’ | 点划线 |
| ‘--’ | 虚线 |
3.标注篇
如上部分,我们看到的都是线型图表,通过线把不同的点连接一起最终看到的效果。但有时候,我们需要的仅仅是标注所有点的情况,并不需要把所有点都连接到一起,那么只需要使用标注功能即可。
import matplotlib.pyplot as plt

fig = plt.figure()

ax1 = fig.add_subplot(1, 2, 1)
ax2 = fig.add_subplot(1, 2, 2)
ax1.plot([0, 1, 2], [1, 2, 3], "rx")		# rx对应的意思是,r 以及  x,一个表示颜色,一个表示X形状标注
ax2.plot([0, 1, 2, 3], [1, 2, 3, 4], "g^")	# g表示绿色,^表示的是上三角形状标注


plt.show()
所有标注的形状如下:
| 标记maker | 描述 |
|---|---|
| ‘o’ | 圆圈 |
| ‘.’ | 点 |
| ‘D’ | 菱形 |
| ‘s’ | 正方形 |
| ‘h’ | 六边形1 |
| ‘*’ | 星号 |
| ‘H’ | 六边形2 |
| ‘d’ | 小菱形 |
| ‘_’ | 水平线 |
| ‘v’ | 一角朝下的三角形 |
| ‘8’ | 八边形 |
| ‘<’ | 一角朝左的三角形 |
| ‘p’ | 五边形 |
| ‘>’ | 一角朝右的三角形 |
| ‘,’ | 像素 |
| ‘^’ | 一角朝上的三角形 |
| ‘+’ | 加号 |
| ‘\ ‘ | 竖线 |
| ‘None’,’’,’ ‘ | 无 |
| ‘x’ | X |
5.plot()的其他属性
| alpha | 浮点值 |
|---|---|
| animated | [True / False] |
| antialiased | [True / False] |
| clip_box | matplotlib.transform.Bbox 实例 |
| clip_on | [True / False] |
| clip_path | Path 实例, Transform,以及Patch实例 |
| color | 任何 matplotlib 颜色 |
| contains | 命中测试函数 |
| dash_capstyle | [‘butt’ / ‘round’ / ‘projecting’] |
| dash_joinstyle | [‘miter’ / ‘round’ / ‘bevel’] |
| dashes | 以点为单位的连接/断开墨水序列 |
| data | (np.array xdata, np.array ydata) |
| figure | matplotlib.figure.Figure 实例 |
| label | 任何字符串 |
| linestyle | [ ‘-’ / ‘--’ / ‘-.’ / ‘:’ / ‘steps’ / ...] |
| linewidth | 以点为单位的浮点值 |
| lod | [True / False] |
| marker | [ ‘+’ / ‘,’ / ‘.’ / ‘1’ / ‘2’ / ‘3’ / ‘4’ ] |
| markeredgecolor | 任何 matplotlib 颜色 |
| markeredgewidth | 以点为单位的浮点值 |
| markerfacecolor | 任何 matplotlib 颜色 |
| markersize | 浮点值 |
| markevery | [ None / 整数值 / (startind, stride) ] |
| picker | 用于交互式线条选择 |
| pickradius | 线条的拾取选择半径 |
| solid_capstyle | [‘butt’ / ‘round’ / ‘projecting’] |
| solid_joinstyle | [‘miter’ / ‘round’ / ‘bevel’] |
| transform | matplotlib.transforms.Transform 实例 |
| visible | [True / False] |
| xdata | np.array |
| ydata | np.array |
| zorder | 任何数值 |
