ROC曲线基于R语言-(pROC包)
R语言ROC曲线
ROC曲线简介:
很多的模型在进行分类预测时,会产生一个实际值或者概率值,然后我们将这个预测值与一个用于分类的阈值进行比较,将结果分成正类和反类。一般我们可以通过任务需求的不同来采用不同的截断点。在绘制ROC曲线前,我们根据学习期的预测结果对样例进行排序,按照该顺序计算出横纵坐标,纵轴是“真正例率”(TRP),横轴是“假正例率”(FPR),图像与x=1,y=0的直线围成的面积为AUC值。

R语言绘制ROC曲线:
调用“pROC包”中的roc()函数:
library("pROC")
data(aSAH)
在aSAH数据集中s100b是对outcome的预测实值
> head(aSAH)
   gos6 outcome gender age wfns s100b  ndka
29    5    Good Female  42    1  0.13  3.01
30    5    Good Female  37    1  0.14  8.54
31    5    Good Female  42    1  0.10  8.09
32    5    Good Female  27    1  0.04 10.42
33    1    Poor Female  42    3  0.13 17.40
34    1    Poor   Male  48    2  0.10 12.75
使用roc函数的格式大致如下,ci=T代表计算95%的置信区间,auc=T则会返回auc值
roc(aSAH$outcome, aSAH$s100b, smooth=TRUE,ci=T,auc = T)
返回的结果如下:
> roc(aSAH$outcome, aSAH$s100b, smooth=TRUE,ci=T,auc = T)
Setting levels: control = Good, case = Poor
Setting direction: controls < cases

Call:
roc.default(response = aSAH$outcome, predictor = aSAH$s100b,     smooth = TRUE, auc = T, ci = T)

Data: aSAH$s100b in 72 controls (aSAH$outcome Good) < 41 cases (aSAH$outcome Poor).
Smoothing: binormal
Area under the curve: 0.74
95% CI: 0.6396-0.8344 (2000 stratified bootstrap replicates)
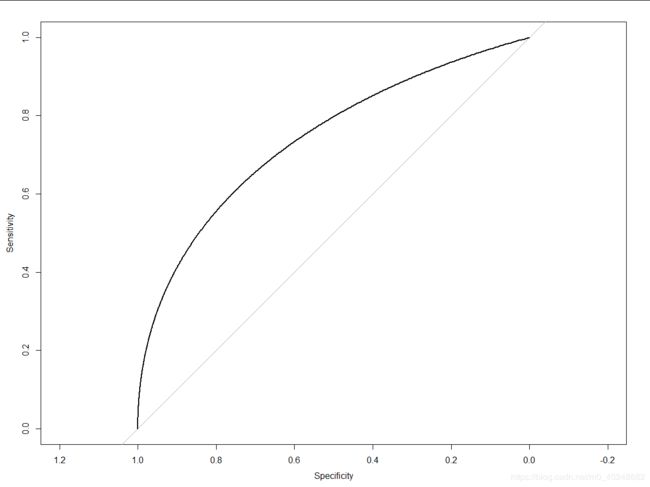
若想将ROC的曲线绘制出来,则可以将结果赋给一个变量,直接plot即可。
> R<-roc(aSAH$outcome, aSAH$s100b, smooth=TRUE)
Setting levels: control = Good, case = Poor
Setting direction: controls < cases
> plot(R)
 ROC曲线一般针对的是二分类形式的评估,如果用在连续变量的预测上,AUC值可能一直为1
添加置信区间:
在“pROC”中,plot.roc函数可以为ROC曲线上的每一个点添加其对应的置信区间并绘制出来:
plot.roc(aSAH$outcome, aSAH$s100b,
+          ci=TRUE, of="thresholds")
使用ggplot绘制ROC曲线:
在“pROC”包中,ggroc()函数可以通过ggplot2来绘制ROC曲线:
> roc.list <- roc(outcome ~ s100b + ndka + wfns, data = aSAH)
Setting levels: control = Good, case = Poor
Setting direction: controls < cases
Setting levels: control = Good, case = Poor
Setting direction: controls < cases
Setting levels: control = Good, case = Poor
Setting direction: controls < cases
> g.list <- ggroc(roc.list)
> g.list

