嵌入式软件开发QT-01-helloworld工程的几种编写方式以及详解
1.使用纯代码方式编写helloworld
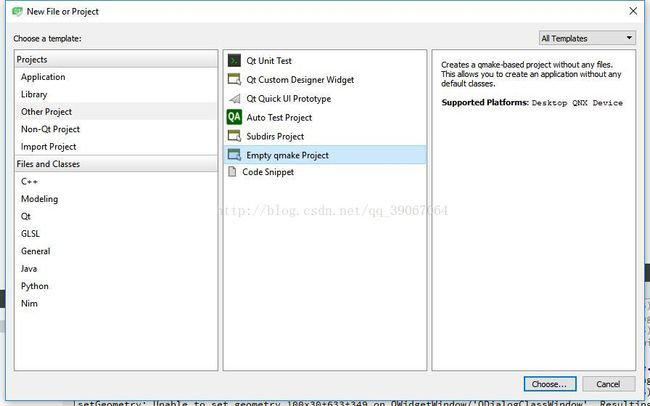
新建一个空工程
此时目录中只有一个pro文件
右键工程目录,新建c++源文件并且加入工程
此时工程目录为
在改写pro文件为
SOURCES += \
    main.cpp
#为高版本模块添加widgets模块
greaterThan(QT_MAJOR_VERSION, 4): QT += widgets
然后改写main.cpp文件为
#include
#include
#include

//主函数
int main(int argc, char *argv[]){
    //QApplication类用于管理应用程序资源,所有Qt Widgets程序必有
    QApplication a(argc, argv);
    //声明QDialog对象,生成对话框
    QDialog w;
    //设置对话框大小
    w.resize(400, 300);
    //声明QLabel对象,此对象继承自QDialog类
    QLabel label(&w);
    //设置标签位置
    label.move(120, 120);
    //设置标签内的内容,通过QObject::tr()函数实现多语言支持
    label.setText(QObject::tr("hello world!你好,世界!"));
    //显示w对象
    w.show();
    //使QApplication进入事件循环,可以接收事件,否则将会秒退
    return a.exec();
}
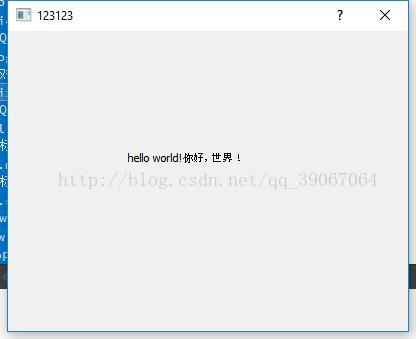
编译运行
如果使用命令行编译程序,复制刚刚的main.cpp到一个新目录
打开Qt 5.9.1 for Desktop (MinGW 5.3.0 32 bit)
cd到工程目录
qmake -project生成pro文件,在生成的pro文件中加入
greaterThan(QT_MAJOR_VERSION, 4): QT += widgets然后
qmake最后
mingw32-makedir一下看看文件名字,直接执行
2.使用ui文件
在上一个工程中,添加ui文件
这样可以生成一个ui文件,名字默认即可,也可以不默认,但是这个名字将会写入主函数中
使用qt设计师拖拽设计ui界面
然后点击构建,发现在工程文件的ddebug目录中多了一个h文件
简单解释一下
/********************************************************************************
** Form generated from reading UI file 'dialog.ui'
**
** Created by: Qt User Interface Compiler version 5.9.1
**
** WARNING! All changes made in this file will be lost when recompiling UI file!
********************************************************************************/

//预防多重包含的宏定义
#ifndef UI_DIALOG_H
#define UI_DIALOG_H

#include
#include
#include
#include
#include
#include
#include

//QT命名空间开始
QT_BEGIN_NAMESPACE

//添加Ui_前缀,实现一个模板的父类
class Ui_Dialog
{
public:
	//添加的label部件
    QLabel *label;
	//生成界面函数
    void setupUi(QDialog *Dialog)
    {
        if (Dialog->objectName().isEmpty())
            Dialog->setObjectName(QStringLiteral("Dialog"));
        //大小、位置属性设置
		Dialog->resize(400, 300);
        label = new QLabel(Dialog);
        label->setObjectName(QStringLiteral("label"));
        label->setGeometry(QRect(120, 120, 128, 32));

        retranslateUi(Dialog);

        //添加信号与槽功能
		QMetaObject::connectSlotsByName(Dialog);
    } // setupUi

    //添加编码转换功能
	void retranslateUi(QDialog *Dialog)
    {
        Dialog->setWindowTitle(QApplication::translate("Dialog", "Dialog", Q_NULLPTR));
        label->setText(QApplication::translate("Dialog", "hello, world!", Q_NULLPTR));
    } // retranslateUi

};

namespace Ui {
    //继承自父类的可用的类
	class Dialog: public Ui_Dialog {};
} // namespace Ui

QT_END_NAMESPACE

#endif // UI_DIALOG_H //头文件名为debug文件夹中自动生成的文件
#include "ui_dialog.h"
int main(int argc, char *argv[]){
QApplication a (argc, argv);
QDialog w;
//此处注意,Ui命名空间中的类,查看ui_dialog.h文件中的类名,一般与ui文件名字相同,并且首字母大写
Ui::Dialog ui;
ui.setupUi(&w);
w.show();
return a.exec();
}3.使用自定义c++类
建立空工程,然后添加c++类,以hellodialog命名,再新建ui文件,添加main.cpp
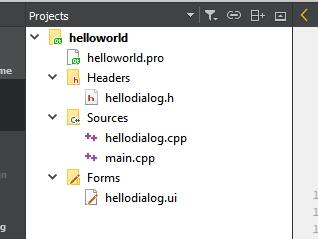
最终工程目录为
修改hellodialog.cpp文件为
#include "hellodialog.h"
#include "ui_hellodialog.h"

HelloDialog::HelloDialog(QWidget *parent) :
    QDialog(parent),
    ui(new Ui::HelloDialog)
{
    //为当前对话框创建界面
    ui->setupUi(this);
}

HelloDialog::~HelloDialog()
{
    delete ui;
}
修改h文件为
#ifndef HELLODIALOG_H
#define HELLODIALOG_H

#include

namespace Ui {
class HelloDialog;
}

class HelloDialog : public QDialog
{
    //扩展普通c++类功能
    Q_OBJECT

public:
    //显示构造函数,指定父窗口
    explicit HelloDialog(QWidget *parent = 0);
    ~HelloDialog();

private:
    Ui::HelloDialog *ui;
};

#endif // HELLODIALOG_H
最后编译,即可完成
4.使用qt设计师类
新建空工程,添加qt设计师类
这个类建立了一整套的文件
添加主函数,修改为
#include
#include "dialog.h"

int main(int argc, char* argv[]){
    QApplication a (argc, argv);
    Dialog w;
    w.show();
    return a.exec();
}
编译运行
以上就是4种编写代码的方式。


