基于servicecomb-mesher的网关认证鉴权方案
背景
Servicecomb-mesher 是 Apache servicecomb 的微服务网格项目。Mesher 实际上在应用层作为一个代理,拦截并代替业务服务发起和接收请求,为服务添加治理功能。Mesher同时可以也可以用作微服务的网关,在网关模式下,Mesher需要提供为用户实现的认证功能提供框架能力。现在比较流行的一种认证模式是:用户不用再注册账号,直接利用已有的Google,Github, QQ等账号登录,mesher作为网关应当实现第三方登录功能。提高开发者的开发效率,和用户的使用体验。
目前oauth2授权框架使用最广泛,上述过程的实质是:mesher使用oauth2协议获得第三方应用访问其用户信息(我们关注的是唯一信息,可能是用户名,也可能是OpenID、UserID等)的授权,获取该用户信息后,用该用户信息实现认证。
开发者如何使用Mesher OAuth2 认证能力
以通过Github账号认证为例:
-
注册你的应用,访问这个链接,填写相应的信息,其中callback_url填写为
http(s)://yourdomain.com/oauth2_callback。获取ClientID,和ClientSecret。 -
配置Mesher,在proxy/handler/oauth2 目录oauth2_handler文件中,添加如下代码,完成对mesher的配置:
Use(&OAuth2{
		GrantType: "authorization_code",
		UseConfig: &oauth2.Config{
			ClientID:     "",           // (required, string) your client_ID
			ClientSecret: "",           // (required, string) your client_Secret
			Scopes:       []string{""}, // (optional, string) scope specifies requested permissions
			RedirectURL:  "",           // (required, string) URL to redirect users going through the OAuth2 flow
			Endpoint: oauth2.Endpoint{ // (required, string) your auth server endpoint
				AuthURL:  "https://github.com/login/oauth/authorize",
			    TokenURL: "https://github.com/login/oauth/access_token",
			},
		},
		Authenticate: func(userinfo string, req *http.Request) error {
			return nil
		},
	})
- 添加认证鉴权功能的实现。当用户登录github.com成功并授权后,用户会rediect到mesher, mesher将获取用户在github.com的用户信息,并调用
Authenticate: func(userInfo string, req *http.Request) error回调函数。需要开发者实现该回调,利用github.com的用户信息完成自定义的认证的流程。
以上就是开发者使用mesher oauth2 认证能力的全过程。
用户认证流程如下
- 用户在浏览器中访问如下URL:
https://github.com/login/oauth/authorize?response_type=code&client_id=your_client_id&redirect_uri=http(s)://your_domain.com/oauth2_callback
response_type=code : 代表期望的请求响应类型为authorization code
client_id=clientID 为应用的客户端id,开发者步骤1获取得到的。
redirect_uri=http(s): //yourdomain.com/oauth2_callback: redirect_uri是成功获取token之后,重定向的地址
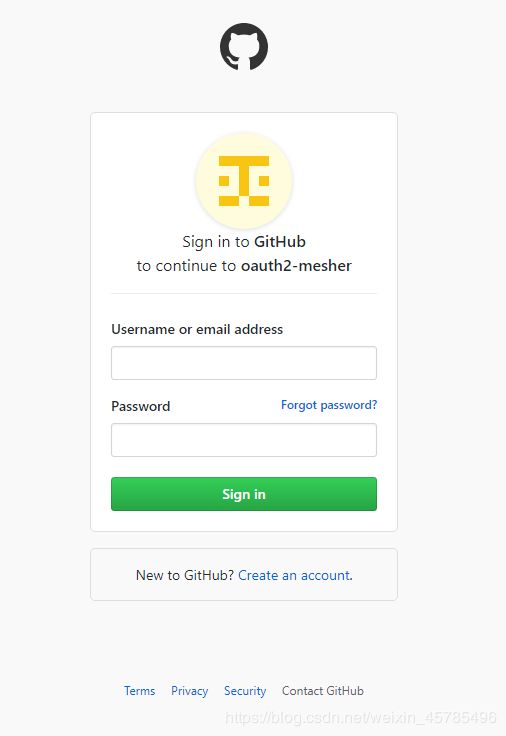
- 该URL是OAuth2配置的登录页面。如下:

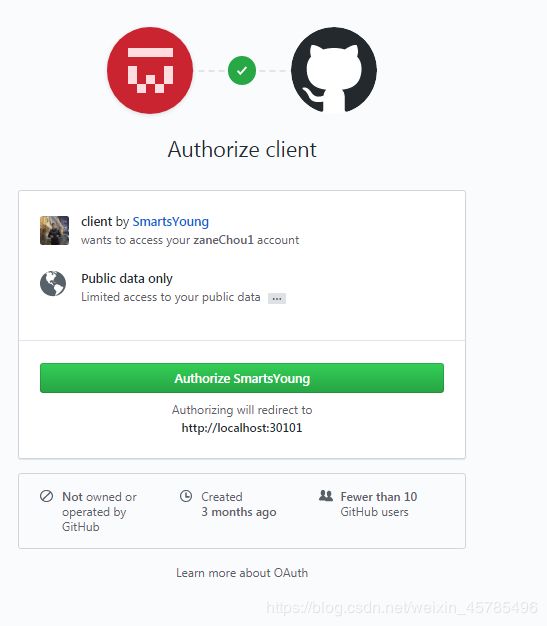
3. 输入github账户的用户名密码,然后页面跳转到授权页面:
4. 然后点击页面上的授权按钮,浏览器会返回redirect到redirect_uri配置的地址
http(s)://yourdomain.com/oauth2_callback/?code=xxxxx
这样mesher就能拿到code,并最终获取到用户在github.com用户信息,调用开发者提供的回调函数,完成最终的认证流程。
设计思路
- mesher作为可定制化的服务网关,帮助开发者轻松的获取到第三方应用的用户信息,并利用开发者实现的认证回调函数实现认证功能。
- 以handler链的形式注入mesher中,handler链注入的形式的优势是,扩展性强,可以操作response对象,修改cookies.
- 目前oauth2授权框架使用最广泛的认证方式之一,也是用户体验较好的方式。因此mesher中将使用oauth2授权来实现认证。
关键原理
oauth2授权包含四种授权模式[1],其中安全性较高使用最广泛的为授权码模式,其中用grant_type=authorization_code 表示授权类型为授权码模式,用于获取access tokens和 refresh tokens。由于这是一个基于重定向的流程,客户端必须有能力和资源拥有者的user-agent(通常为WEB浏览器)进行交互,并且有能力接收来自授权服务器的重定向请求。
授权码模式流程图如下:
 +----------+
 | Resource |
 |   Owner  |
 |          |
 +----------+
      ^
      |
     (B)
 +----|-----+          Client Identifier      +---------------+
 |         -+----(A)-- & Redirection URI ---->|               |
 |  User-   |                                 | Authorization |
 |  Agent  -+----(B)-- User authenticates --->|     Server    |
 |          |                                 |               |
 |         -+----(C)-- Authorization Code ---<|               |
 +-|----|---+                                 +---------------+
   |    |                                         ^      v
  (A)  (C)                                        |      |
   |    |                                         |      |
   ^    v                                         |      |
 +---------+                                      |      |
 |         |>---(D)-- Authorization Code ---------'      |
 |  Client |          & Redirection URI                  |
 |         |                                             |
 |         |<---(E)----- Access Token -------------------'
 +---------+       (w/ Optional Refresh Token)
(A)client通过将资源拥有者重定向到授权服务器来初始化这个流程。client需要在请求中包含client identifier, requested scope, local state, and a redirection URI,这些内容在client被赋予(或者被拒绝)权限后也会被发送回来。
(B)授权服务器通过user-agent来对资源拥有者进行身份验证,并确定资源所有者是否授予或拒绝客户端的访问请求。
(C)假设资源所有者授予访问权限,授权服务器使用先前提供的重定向URI(在请求中或在客户端注册期间)将用户代理重定向回客户端。重定向URI包含授权代码和客户端先前提供的任一本地状态。
(D)客户端通过包含在上一步骤中接收的授权代码来请求来自授权服务器的令牌端点的访问令牌。发出请求时,客户端使用授权服务器进行身份验证。客户端通过包含用于获取验证授权码的重定向URI进行 验证。
(E)授权服务器对客户端进行身份验证,验证授权代码,并确保收到的重定向URI与步骤(C)中用于重定向客户端的URI相匹配
关键代码解读
- handler 链注入
mesher提供高级别通用中间件抽象层,免于用户学习handler chain内部的复杂性,让用户只需关注与自身业务的开发。
// AuthName is a constant
const AuthName = "oauth2"
func (oa *Handler) Handle(chain *handler.Chain, inv *invocation.Invocation, cb invocation.ResponseCallBack) {
...
chain.Next(inv, func(r *invocation.Response) error {
		return cb(r)
	})
}
//Handler is is a oauth2 pre process raw data in handler
type Handler struct {
}

// Name returns router string
func (oa *Handler) Name() string {
	return AuthName
}

// NewOAuth2 returns new auth handler
func NewOAuth2() handler.Handler {
	return &Handler{}
}

func init() {
	err := handler.RegisterHandler(AuthName, NewOAuth2)
	if err != nil {
		openlogging.Error("register handler error: " + err.Error())
		return
	}
}
- 设置授权类型和配置文件
mesher中需设置oauth2的授权类型,如authorization code,然后设置配置参数
    Use(&OAuth2{
		GrantType: "authorization_code",       // Registration grand type
		                                       // The default is the authorization code model
		UseConfig: &oauth2.Config{
			ClientID:     "",                  // (required, string) your client_ID
			ClientSecret: "",                  // (required, string) your client_Secret
			Scopes:       []string{""},        // (optional, string) scope specifies requested permissions
			RedirectURL:  "",                  // (required, string) redirect url to mesher
			Endpoint: oauth2.Endpoint{         // (required, string) your auth server endpoint
				AuthURL:  "",
				TokenURL: "",
			},
		},
	})
- 从请求端获取token
oauth2授权最终的目的就是获取token,从而完成授权。首先从URL中获取code,然后用code获取token。token过期时间mesher中设置为30分钟。
code := req.FormValue("code")
	if code == "" {
		WriteBackErr(ErrInvalidCode, http.StatusUnauthorized, cb)
		return
}

func getToken(code string, cb invocation.ResponseCallBack) (accessToken string, err error) {
	if auth.UseConfig != nil {
		config := auth.UseConfig
		token, err := config.Exchange(context.Background(), code)
		if err != nil {
			openlogging.Error("get token failed, errors: " + err.Error())
			WriteBackErr(ErrInvalidCode, http.StatusUnauthorized, cb)
			return "", err
		}

		// set the expiry token in 30 minutes
		token.Expiry = time.Now().Add(30 * 60 * time.Second)
		if time.Now().After(token.Expiry) {
			return "", ErrExpiredToken
		}
		accessToken = token.AccessToken
		return accessToken, nil
	}
	return "", nil
}
参考链接
[1] 理解OAuth 2.0