.Net Core3.0使用gRPC 和IdentityServer4
gRPC是什么
gRPC是可以在任何环境中运行的现代开源高性能RPC框架。它可以通过可插拔的支持来有效地连接数据中心内和跨数据中心的服务,以实现负载平衡,跟踪,运行状况检查和身份验证。它也适用于分布式计算的最后一英里,以将设备,移动应用程序和浏览器连接到后端服务。
proto文件
用于定义gRPC服务和消息的协定;服务端和客户端共享proto文件。
使用新模板创建gRPC服务端
.NETcore 3.0创建项目提供了一个新的gRPC模板,可以轻松地使用ASP.NET Core构建gRPC服务。我们按照步骤一步一步创建AA.GrpcService 服务,当然你可以使用命令:dotnet new grpc -o GrpcGreeter
选择gRPC服务项目模板
最终生成的项目
greet.proto文件
syntax = "proto3";

option csharp_namespace = "AA.GrpcService";

package Greet;

// The greeting service definition.
service Greeter {
  // Sends a greeting
  rpc SayHello (HelloRequest) returns (HelloReply);
}

// The request message containing the user's name.
message HelloRequest {
  string name = 1;
}

// The response message containing the greetings.
message HelloReply {
  string message = 1;
}
GreeterService.cs
 public class GreeterService : Greeter.GreeterBase
    {
        private readonly ILogger _logger;
        public GreeterService(ILogger logger)
        {
            _logger = logger;
        }

        public override Task SayHello(HelloRequest request, ServerCallContext context)
        {
            return Task.FromResult(new HelloReply
            {
                Message = "Hello " + request.Name
            });
        }
    }
Startup.cs
public class Startup
    {
        // This method gets called by the runtime. Use this method to add services to the container.
        // For more information on how to configure your application, visit https://go.microsoft.com/fwlink/?LinkID=398940
        public void ConfigureServices(IServiceCollection services)
        {
            services.AddGrpc();
        }
        // This method gets called by the runtime. Use this method to configure the HTTP request pipeline.
        public void Configure(IApplicationBuilder app, IWebHostEnvironment env)
        {
            if (env.IsDevelopment())
            {
                app.UseDeveloperExceptionPage();
            }
            app.UseRouting();
            app.UseEndpoints(endpoints =>
            {
                endpoints.MapGrpcService();
                endpoints.MapGet("/", async context =>
                {
                    await context.Response.WriteAsync("Communication with gRPC endpoints must be made through a gRPC client. To learn how to create a client, visit: https://go.microsoft.com/fwlink/?linkid=2086909");
                });
            });
        }
    }
创建完成之后,自动包含了包的引用、proto文件的创建、services服务的生成,模板项目在后台执行一些操作如
- 创建一个包含所有gRPC依赖项的ASP.NET Core项目。
- 创建一个名为的gRPC服务定义文件greet.proto。
- 根据服务定义文件自动生成所有gRPC存根。
- GreeterService.cs根据自动生成的gRPC存根创建gRPC服务。
- 在Startup.cs中配置gRPC管道映射到GreeterService.cs
运行服务
创建gRPC客户端
下面,我们创建一个控制台应用程序作为客户端调用gRPC服务;
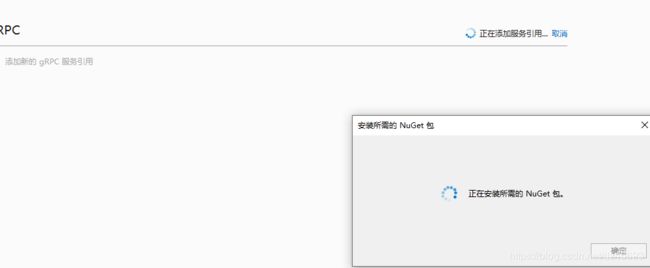
引用gRPC服务,步骤:右键项目添加=》服务引用弹出以下页面;
点击确定
我们看项目结构,他们会自动帮我们处理一下操作:
- 添加引用包:
- package Grpc.Net.ClientFactory
- package Google.Protobuf
- package Grpc.Tools
- Protos 文件(包含greet.proto)自动从AA.GrpcService项目拷贝
- 自动添加节点
Protos\greet.proto
最后,添加以下代码进行gRPC请求;
  static async System.Threading.Tasks.Task Main(string[] args)
        {
            var httpClientHandler = new HttpClientHandler();
            httpClientHandler.ServerCertificateCustomValidationCallback = HttpClientHandler.DangerousAcceptAnyServerCertificateValidator;
            var httpClient = new HttpClient(httpClientHandler);

            using var channel = GrpcChannel.ForAddress("https://localhost:5002", new GrpcChannelOptions { HttpClient = httpClient });
            var client = new Greeter.GreeterClient(channel);
            var response = await client.SayHelloAsync(new HelloRequest { Name = "gRPC" });
            Console.WriteLine("Greeting:" + response.Message);
            Console.WriteLine("Press a key to exit");
            Console.ReadKey();
        }
运行结果图:
gRPC与IdentityServer4集成认证授权
Ids4.Server
1.创建一个.net core的webapi
2.nuget引用最新的IdentityServer4的包
IdentityServer4相关配置,因为是演示所以很简单,生产场景大家根据实际情况配置。
namespace Ids4.Server
{
    public class Config
    {
        public static IEnumerable GetIdentityResources()
        {
            return new List
            {
                new IdentityResources.OpenId(),
                new IdentityResources.Profile(),
                new IdentityResources.Email(),
            };
        }
        public static IEnumerable GetApis()
        {
            return new List
            {
                new ApiResource("api", "Demo API")
                {
                    ApiSecrets = { new Secret("secret".Sha256()) }
                }
            };
        }
        public static IEnumerable GetClients()
        {
            return new List
                {
                    new Client
                    {
                        ClientId = "client",
                        ClientSecrets = { new Secret("secret".Sha256()) },

                        AllowedGrantTypes = GrantTypes.ClientCredentials,
                        AllowedScopes = { "api" },
                    },
                };
        }
    }
}
4. startup.cs 注入服务
services.AddIdentityServer().AddInMemoryApiResources(Config.GetApis())
    .AddInMemoryIdentityResources(Config.GetIdentityResources())
    .AddInMemoryClients(Config.GetClients())
    .AddDeveloperSigningCredential(persistKey: false);
5. startup.cs 配置http请求管道
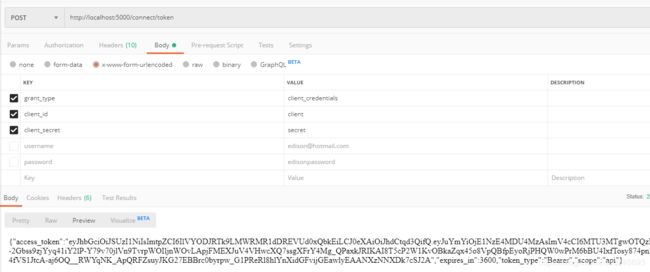
app.UseIdentityServer();6. 启动服务,使用PostMan进行调试,有返回结果表示服务创建成功
POST /connect/token HTTP/1.1
Host: localhost:5000
Content-Type: application/x-www-form-urlencoded
grant_type=client_credentials&client_id=client&client_secret=secret
{
"access_token":"eyJhbGciOiJSUzI1NiIsImtpZCI6IlVYODJRTk9LMWRMR1dDREVUd0xQbkEiLCJ0eXAiOiJhdCtqd3QifQ.eyJuYmYiOjE1NzE4MDU4MzAsImV4cCI6MTU3MTgwOTQzMCwiaXNzIjoiaHR0cDovL2xvY2FsaG9zdDo1MDAwIiwiYXVkIjoiYXBpIiwiY2xpZW50X2lkIjoiY2xpZW50Iiwic2NvcGUiOlsiYXBpIl19.DgJJqIOOSICEGa7S5R4Ok7Pp4hxPjGQP12T4LsDHD5tRsYiV58VcvooglVehKmMbydE7yA7JnYqBR--2Gbss9zjYyq41iY2lP-Y79v70jlVn9TvrpWOIljnWOvLApjFMEXJuV4VHwcXQ7ssgXFrY4Mg_QPaxkJRIKAI8T5cP2W1KvOBkaZqx45o8VpQBfpEyoRjPHQW0wPrM6bBU4IxfTosy874pn2NXVhe2DaPeAcReXYsz5AVtJ4Vt-4fVS1JtcA-aj6OQ__RWYqNK_ApQRFZsuyJKG27EBBrc0byrpw_G1PReRl8hlYnXidGFvijGEawlyEAANXzNNXDk7cSJ2A",
"expires_in":3600,
"token_type":"Bearer",
"scope":"api"
}改造Grpc.Server支持IdentityServer4
1. 引入nuget包
2. startup.cs 注入服务,和IdentityServer4一样。
services.AddGrpc(x => x.EnableDetailedErrors = false);
services.AddAuthorization();
services.AddAuthentication(IdentityServerAuthenticationDefaults.AuthenticationScheme)
    .AddIdentityServerAuthentication(options =>
    {
        options.Authority = "http://localhost:5000";
        options.RequireHttpsMetadata = false;
    });
3. startup.cs 配置http请求管道
if (env.IsDevelopment())
{
    app.UseDeveloperExceptionPage();
}
app.UseRouting();
app.UseAuthentication();
app.UseAuthorization();
app.UseEndpoints(endpoints =>
{
    endpoints.MapGrpcService();

    endpoints.MapGet("/", async context =>
    {
        await context.Response.WriteAsync("Communication with gRPC endpoints must be made through a gRPC client. To learn how to create a client, visit: https://go.microsoft.com/fwlink/?linkid=2086909");
    });
});
4. 对需要授权的服务打标签[Authorize],可以打在类上也可以打在方法上
[Authorize]
public class GreeterService : Greeter.GreeterBase
{
}
这个时候我们启动Grpc.Client访问Grpc.Server服务
发现报错401。说明此服务需要携带令牌才能访问。
改造Grpc.Client携带令牌访问(需要添加IdentityServer4引用)
 static async System.Threading.Tasks.Task Main(string[] args)
        {
            var httpClientHandler = new HttpClientHandler();
            httpClientHandler.ServerCertificateCustomValidationCallback = HttpClientHandler.DangerousAcceptAnyServerCertificateValidator;
            var httpClient = new HttpClient(httpClientHandler);

            //获取token可以直接使用HttpClient来获取,这里使用IdentityModel来获取token
            var disco = await httpClient.GetDiscoveryDocumentAsync("http://localhost:5000");
            if (!disco.IsError)
            {
                var token = await httpClient.RequestClientCredentialsTokenAsync(new ClientCredentialsTokenRequest()
                {
                    Address = disco.TokenEndpoint,
                    ClientId = "client",
                    ClientSecret = "secret"
                });
                var tokenValue = "Bearer " + token.AccessToken;
                var metadata = new Metadata
                {
                    { "Authorization", tokenValue }
                };
                var callOptions = new CallOptions(metadata);
                ////
                using var channel = GrpcChannel.ForAddress("https://localhost:5002", new GrpcChannelOptions { HttpClient = httpClient });
                var client = new Greeter.GreeterClient(channel);
                var response = await client.SayHelloAsync(new HelloRequest { Name = "gRPC" },callOptions);
                Console.WriteLine("Greeting:" + response.Message);
            }

            Console.WriteLine("Press a key to exit");
            Console.ReadKey();
        }
小结: .NETcore 3.0 使得使用gRPC是非常方便集成到项目中,希望这篇文章使你可以了解.NETcore与gRPC结合使用。那gRPC适用于以下场景
-
微服务– gRPC专为低延迟和高吞吐量通信而设计。 gRPC对于效率至关重要的轻量级微服务非常有用。
-
点对点实时通信– gRPC对双向流具有出色的支持。 gRPC服务可以实时推送消息而无需轮询。
-
多种语言环境– gRPC工具支持所有流行的开发语言,因此gRPC是多语言环境的理想选择。
-
网络受限的环境– gRPC消息使用轻量级消息格式Protobuf进行了序列化。 gRPC消息始终小于等效的JSON消息。
参考:
https://docs.microsoft.com/en-us/aspnet/core/grpc/troubleshoot?view=aspnetcore-3.0
- https://docs.microsoft.com/zh-cn/aspnet/core/grpc/?view=aspnetcore-3.0
- https://www.grpc.io/
- https://developers.google.com/protocol-buffers/docs/proto3
- https://www.cnblogs.com/stulzq/p/11581967.html


