elk部署文档
一、elasticsearch 集群安装
ELK+Filebeat流程:
Filebeat->Logstash->(Elasticsearch<->Kibana)
Elasticsearch: 能对大容量的数据进行接近实时的存储,搜索和分析操作。
Logstash: 数据收集引擎,它支持动态的的从各种数据源获取数据,并对数据进行过滤,分析,丰富,统一格式等操作,然后存储到用户指定的位置。
Kibana: 数据分析与可视化平台,对Elasticsearch存储的数据进行可视化分析,通过表格的形式展现出来。
Filebeat: 轻量级的开源日志文件数据搜集器。通常在需要采集数据的客户端安装Filebeat,并指定目录与日志格式,Filebeat就能快速收集数据,并发送给logstash进行解析,或是直接发给Elasticsearch存储
1、添加es用户&目录
root用户建议不直接启动es
useradd es
mkdir -p /data/elk/es/data
mkdir -p /data/elk/es/logs
chown es:es -R /data/elk/es
2、设置环境变量
vi /etc/security/limits.conf
* soft  nofile 65536
* hard  nofile 65536
* soft  nproc  4096
* hard  nproc  4096
vi /etc/sysctl.conf
vm.max_map_count=655360
配置生效
sysctl -p
3、jdk安装
4、上传安装包
上传安装包 elasticsearch-6.3.0.tar.gz to 到目录/opt
5、解压安装包
tar -zxvf elasticsearch-6.3.0.tar.gz
6、目录赋权
chown es:es -R elasticsearch-6.3.0
7、配置文件
cd /opt/elasticsearch-6.3.0/config
vim elasticsearch.yml
cluster.name: es-log #集群名称

node.name: "node-1" #该节点名称

path.data: /data/elk/es/data #数据存储路径

path.logs: /data/elk/es/logs #日志文件路径

network.host: 192.168.2.129  #绑定监听IP,一般为本机

http.port: 9200 #es服务端口号

discovery.zen.ping.unicast.hosts: ["192.168.2.129","192.168.2.130"] #配置自动发现

node.master: true #该节点为主节点,默认集群中第一台服务器为master,如果这台机器停止会重新选举master

node.data: true #允许该节点存储数据(默认开启)
8、启动es
su es
cd /opt/elasticsearch-6.3.0/bin
./elasticsearch -d
9、验证
10、es集群部署
重复上述步骤至相应服务器,修改相应配置文件的node.name、network.hosts。
11、查看集群健康
http://ip:9200/_cluster/health?pretty=true

二、Kibana安装
此次安装在es主服务器上
1、上传安装包
上传安装包kibana-6.3.0-linux-x86_64.tar.gz 到目录/opt
2、解压安装包
tar -xzvf kibana-6.3.0-linux-x86_64.tar.gz
3、创建elk用户&目录
useradd elk
mkdir -p /data/elk/kibana/pid
mkdir -p /data/elk/kibana/logs
chown elk:elk -R kibana-6.3.0-linux-x86_64
chown elk:elk -R /data/elk/kibana
4、配置文件
cd /opt/kibana-6.3.0-linux-x86_64/config
vim kibana.yml
server.port: 5601 #默认端口是5601,

server.host: "ip" #本机地址,访问此地址+端口显示kibana界面

server.name: "kibana" #

elasticsearch.url: "http://ip:9200"  #es集群地址和端口

pid.file: /data/elk/kibana/pid/kibana.pid

logging.dest: /data/elk/kibana/logs/stdout.log

i18n.defaultLocale: "zh-CN"
5、启动kibana
su elk
cd /opt/kibana-6.3.0-linux-x86_64/bin
nohup ./kibana &
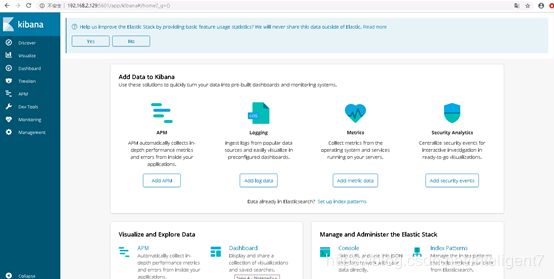
6、界面验证
三、Logstash安装
1、上传安装包
上传安装包 logstash-6.3.0.tar.gz 到目录 /opt
2、解压安装包
tar -xzvf logstash-6.3.0.tar.gz
3、创建目录&赋权
chown elk:elk -R logstash-6.3.0
cd /opt/logstash-6.3.0/config
mkdir conf.d
4、配置文件
vim logstash.yml
path.config: /opt/elk/logstash-6.3.0/config/conf.d
vim conf.d/logback-2-es.conf
input {
  beats {
    port => 5044
  }
}

output {
  elasticsearch {
    hosts => ["http://ip:9200","http://ip:9200"]
    index => "%{[@metadata][beat]}-%{[@metadata][version]}-%{+YYYY.MM.dd}"
  }
}
5、配置文件赋权
chown elk:elk -R conf.d
6、启动logstash
su elk
cd /opt/logstash-6.3.0/bin
nohup ./logstash -f …/config/conf.d/logback-2-es.conf &
7、验证
ps -ef |grep logstash
四、安装 filebeat
登陆需要拉取日志文件的服务器
1、上传安装包
上传安装包 filebeat-6.3.0-linux-x86_64.tar.gz 到目录 /opt
2、解压安装包
tar -xzvf filebeat-6.3.0-linux-x86_64.tar.gz
3、目录赋权
chown elk:elk -R filebeat-6.3.0-linux-x86_64
4、配置文件
cd /opt/filebeat-6.3.0-linux-x86_64
vim filebeat.yml
- type: log

  enabled: true

  paths:
    - /var/log/*.log #监控日志
  fields: #新增标签,用于分类展示
	hospital: clsyy
	logtype: mainlog

multiline.pattern: ^(\d{4}\d{2}\d{2})\s(\d{2}:\d{2}:\d{2}) #配置时间格式为yyyymmdd hh:mi:ss

multiline.negate: true

multiline.match: after

#output.elasticsearch:
  # Array of hosts to connect to.
  # hosts: ["localhost:9200"]

output.logstash:
  # The Logstash hosts
  hosts: ["ip:5044"] #需要配置logstash所在服务器IP
5、启动
su elk
cd /opt/filebeat-6.3.0-linux-x86_64
nohup ./filebeat -c ./filebeat.yml &
五、kibana前端使用
1、配置添加index
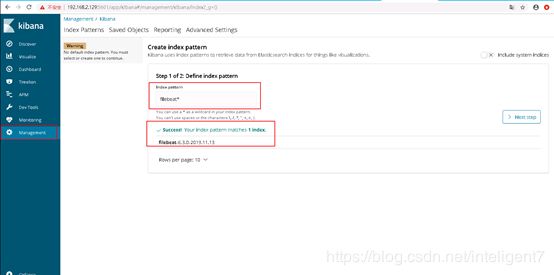
如下图在kibana的management菜单中配置index,填写索引名

2、配置时间索引
3、index配置完成
4、日志数据浏览检索
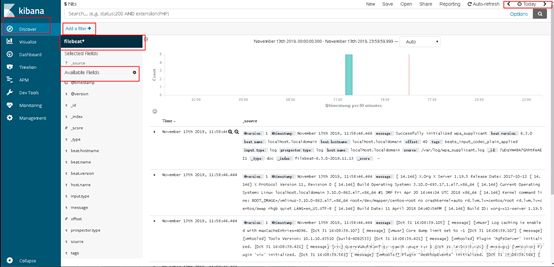
在discover菜单中,可以预览查询数据,可以通过添加过滤条件来筛选数据

五、配置说明
1、scan_frequency:1s #小于1s可能导致filebeat在频繁的循环中扫描磁盘


