在Jetson tx2安装 mmdetection环境
目录
环境:
STEP1 安装pytorch
STEP2 安装依赖库
STEP3 安装mmdetectoin、mmcv
编译mmcv
编译mmdetection
总结
相关资源下载
参考
装了好几天,终于装成功了。
环境:
1 tx2系统参数:查看命令head -n 1 /etc/nv_tegra_release

R32 (release), REVISION: 1.0, GCID: 14531094, BOARD: t186ref, EABI: aarch64, DATE: Wed Mar 13 07:41:08 UTC 2019

2 CUDA : 查看命令 nvcc -V

nvcc: NVIDIA (R) Cuda compiler driver
Copyright (c) 2005-2018 NVIDIA Corporation
Built on Sun_Sep_30_21:09:22_CDT_2018
Cuda compilation tools, release 10.0, V10.0.166

3 cudnn :查看命令

#define CUDNN_MAJOR 7
#define CUDNN_MINOR 3
#define CUDNN_PATCHLEVEL 1
--
#define CUDNN_VERSION (CUDNN_MAJOR * 1000 + CUDNN_MINOR * 100 + CUDNN_PATCHLEVEL)

#include "driver_types.h"

4 python 版本:

Python 3.6.8

5 python-opencv 版本:

'3.3.1'
准备工作:
sudo gedit ~/.bashrc
export CUDNN_LIB_DIR=/usr/lib/aarch64-linux-gnu
export CUDNN_INCLUDE_DIR=/usr/include
source ~/.bashrc
STEP1 安装pytorch
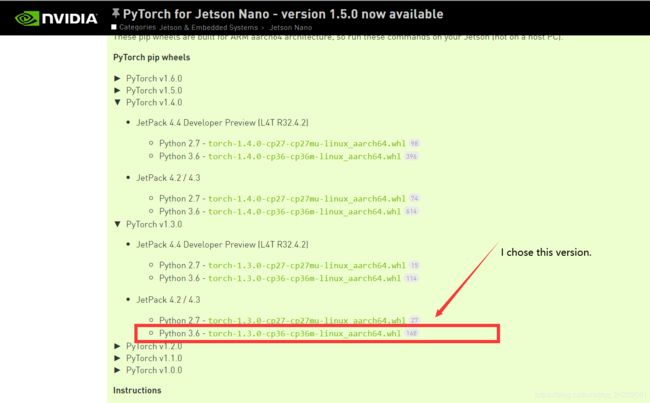
这要去NVIDIA官网下载,因为tx2是arm架构的,我最终试成功的是1.3.0的版本,其他的1.1.0,1.4.0,1.3.0都会出现一些问题,这里不再赘述。地址:https://forums.developer.nvidia.com/t/pytorch-for-jetson-nano-version-1-5-0-now-available/72048
我没有找到适用于tx2的,但适用于Nano同样适用于tx2
下载速度会很慢,这里建议下载。下载好后,安装:
sudo pip3 install torch-1.3.0-cp36-cp36m-linux_aarch64.whl
安装成功后做个测验:
Python 3.6.8 (default, Aug 20 2019, 17:12:48)
[GCC 8.3.0] on linux
Type "help", "copyright", "credits" or "license" for more information.
>>> import torch
>>> torch.__version__
'1.3.0'
>>> torch.cuda.is_available()
True
>>> torch.randn(4,4,4).cuda().mean()
tensor(-0.0479, device='cuda:0')
至此pytorch安装成功.
STEP2 安装依赖库:
sudo pip3 install pycocotools
sudo pip3 install torchvision
sudo pip3 install terminaltables
sudo pip3 install Cython
STEP3 安装mmdetectoin、mmcv
这里注意如果直接git的话,网速太慢会中断失败,因此这里建议先从Github下到gitee,再从gitee中git.
参考方法:https://blog.csdn.net/qq_39779233/article/details/104328887
sudo git clone https://gitee.com/zhangcodecloud/mmdetection.git

cd mmdetection

sudo git clone https://gitee.com/zhangcodecloud/mmcv.git

cd mmcv
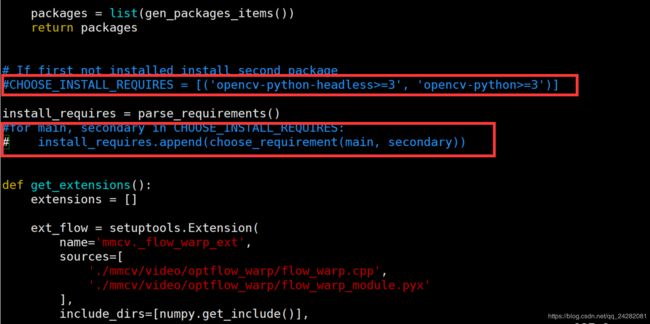
后面需要修改一下mmcv/setup.py文件
chmod 777 setup.py
vim setup.py
注释掉这三行,因为系统已装有opencv
编译mmcv
sudo pip3 install -e .编译成功后,返回上一层
编译mmdetection
cd ..
sudo pip3 install -v -e .
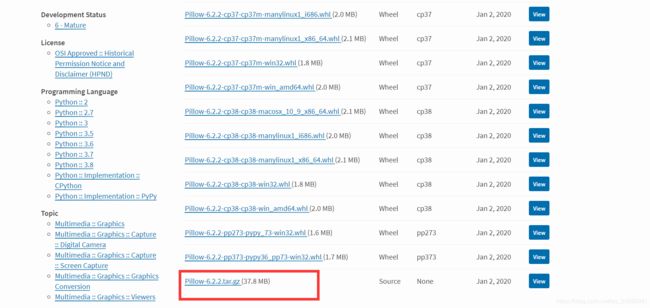
编译出错, 提示需要 Pillow<=6.2.2的库,而本机的Pillow版本是7.2.0,因此需要先卸载,再安装。
从官网找到6.2.2版本的Pillow,网址https://pypi.org/project/Pillow/6.2.2/#files
解压后
sudo pip3 uninstall Pillow

#注意这里的python软连接到了python3.6,如果你的python默认不是python3.6则用python3
cd Pillow-6.2.2/
python setup.py install
安装好后重新到mmdetection编译mmdetection
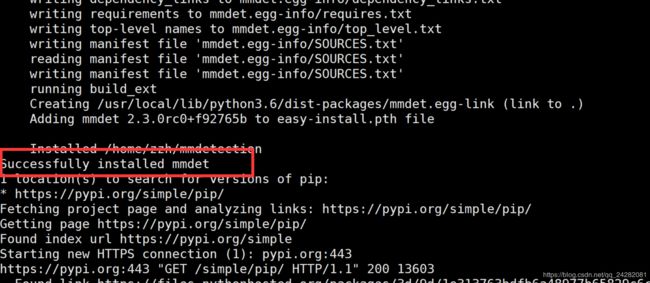
sudo pip3 install -v -e .至此mmdetection安装成功
验证一下:
Python 3.6.8 (default, Aug 20 2019, 17:12:48)
[GCC 8.3.0] on linux
Type "help", "copyright", "credits" or "license" for more information.
>>> import mmdet
>>> mmdet.__path__
['/home/zzh/mmdetection/mmdet']
总结:
1 去官网找安装包是最直接快捷的,下载可借助科学上网
2 Github网速不给力,可以考虑先搬运到码云gitee
3 若是版本不对应,根据报错去官网下载对应版本的重新安装线管下载:
相关资源下载:
链接:https://pan.baidu.com/s/1Yz56QfCL929y6bD8JGeJiQ
提取码:wlx8
参考:
https://blog.csdn.net/qq_43229471/article/details/105973982
https://blog.csdn.net/symuamua/article/details/104300250?utm_medium=distribute.pc_relevant_download.none-task-blog-BlogCommendFromBaidu-3.nonecase&depth_1-utm_source=distribute.pc_relevant_download.none-task-blog-BlogCommendFromBaidu-3.nonecas
https://oldpan.me/archives/nvidia-jetson-tx2-source-build-pytorch
https://www.jianshu.com/p/2bd0d040fcd1
https://forums.developer.nvidia.com/t/pytorch-for-jetson-nano-version-1-5-0-now-available/72048
https://blog.csdn.net/wanttifa/article/details/92845377
https://blog.csdn.net/github_38140310/article/details/100085716
https://pypi.org/project/Pillow/6.2.2/#files


