移步Android Handler机制详解
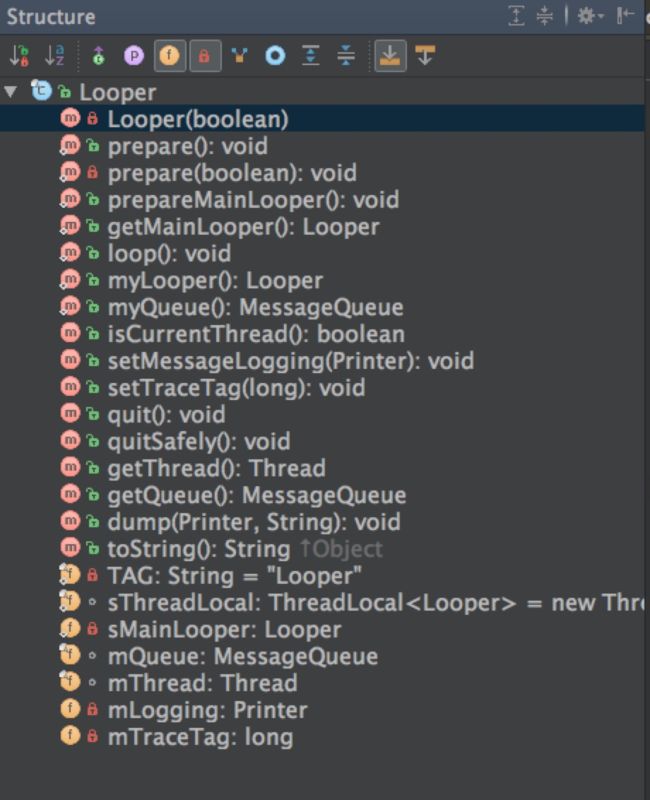
1 Looper这个类的结构
2 Looper(boolean)构造函数
private Looper(boolean quitAllowed) {
        // 创建MessageQueue对象
        mQueue = new MessageQueue(quitAllowed);
        // 记录当前线程
        mThread = Thread.currentThread();
    }
- 创建了一个MessageQueue,并且把当前线程赋值给本地变量的mThread。
- 1 这样就实现了Looper和MessageQueue的关联
- 2 这样就实现了Thread和Looper的关联
- Loop类就一个构造函数,构造函数也是private,只有在private static void prepare(boolean quitAllowed)调用**,而这个静态方法也是private的
- Looper这个类的对象不能直接创建,必须通过Looper来的两个静态方法prepare()/prepareMainLooper()来间接创建
3 Looper.prepare();
代码在Looper.java的82行
/** Initialize the current thread as a looper.
      * This gives you a chance to create handlers that then reference
      * this looper, before actually starting the loop. Be sure to call
      * {@link #loop()} after calling this method, and end it by calling
      * {@link #quit()}.
      */
    public static void prepare() {
        prepare(true);
    }
- 初始化当前线程和Looper
4 prepare(boolean)方法
代码在Looper.java的86行
- 入参boolean表示Looper是否允许退出,true就表示允许退出,对于false则表示Looper不允许退出。
private static void prepare(boolean quitAllowed) {
         //每个线程只允许执行一次该方法,第二次执行的线程的TLS已有数据,则会抛出异常。
        if (sThreadLocal.get() != null) {
            throw new RuntimeException("Only one Looper may be created per thread");
        }
        //创建Looper对象,并且保存到当前线程的TLS区域。
        sThreadLocal.set(new Looper(quitAllowed));
    }
代码在Looper.java的86行
static final ThreadLocal sThreadLocal = new ThreadLocal();
5 prepareMainLooper()方法
代码在Looper.java的99行
/**
     * Initialize the current thread as a looper, marking it as an
     * application's main looper. The main looper for your application
     * is created by the Android environment, so you should never need
     * to call this function yourself.  See also: {@link #prepare()}
     */
    public static void prepareMainLooper() {
         // 设置不允许退出的Looper
        prepare(false);
        synchronized (Looper.class) {
            //将当前的Looper保存为Looper。每个线程只允许执行一次
            if (sMainLooper != null) {
                throw new IllegalStateException("The main Looper has already been prepared.");
            }
            sMainLooper = myLooper();
        }
    }
5.1 注释
- 初始化当前当前线程的looper。并且标记为一个程序的主Looper。
- 由Android环境来创建应用程序的主Looper。因此这个方法不能由咱们来调用。
5.2 方法解析
- 首先 通过方法我们看到调用了prepare(false);注意这里的入参是false
- 其次 做了sMainLooper的非空判断,如果是有值的,直接抛异常,因为这个sMainLooper必须是空,因为主线程有且只能调用一次。prepareMainLooper(),如果sMainLooper有值,怎说说明prepareMainLooper()已经被调用了,而sMainLooper的赋值是由myLooper来执行,
5.3 sMainLooper
代码在Looper.java的 69行
private static Looper sMainLooper; // guarded by Looper.class
- Looper对象啊。但是它是静态的
- 在Java7之前,静态变量存在永久代(PermGen)。
- 在Java7之后,将变量的存储转移到了堆。
- 个sMainLooper就是主线程的Looper。所以只有通过prepareMainLooper()就可以给主线程Looper赋值了
6 myLooper()方法
代码在Looper.java的173行
/**
     * Return the Looper object associated with the current thread.  Returns
     * null if the calling thread is not associated with a Looper.
     */
    public static @Nullable Looper myLooper() {
        return sThreadLocal.get();
    }
- 这里的sThreadLocal.get()是和prepare(boolean)方法里面的sThreadLocal.set(new Looper(quitAllowed));一一对应的。
- 在prepareMainLooper里面调用myLooper(),那么myLooper()方法的返回有没有可能为null?
- 第一步就是调用prepare(false);,所以说myLooper()这个方法的返回值是一定有值的。
7 Looper.loop();
代码在Looper.java的 122行
/**
     * Run the message queue in this thread. Be sure to call
     * {@link #quit()} to end the loop.
     */
    public static void loop() {
         // 获取TLS存储的Looper对象
        final Looper me = myLooper();
        //没有Looper 对象,直接抛异常
        if (me == null) {
            throw new RuntimeException("No Looper; Looper.prepare() wasn't called on this thread.");
        }
        //获取当前Looper对应的消息队列
        final MessageQueue queue = me.mQueue;

        // Make sure the identity of this thread is that of the local process,
        // and keep track of what that identity token actually is.
        Binder.clearCallingIdentity();
        // 确保权限检查基于本地进程,而不是基于最初调用进程
        final long ident = Binder.clearCallingIdentity();
        // 进入 loop的主循环方法
       // 一个死循环,不停的处理消息队列中的消息,消息的获取是通过MessageQueue的next()方法实现
        for (;;) {
             // 可能会阻塞
            Message msg = queue.next(); // might block
             // 如果没有消息,则退出循环
            if (msg == null) {
                // No message indicates that the message queue is quitting.
                return;
            }

            // This must be in a local variable, in case a UI event sets the logger
            // 默认为null,可通过setMessageLogging()方法来指定输出,用于debug功能
            Printer logging = me.mLogging;
            if (logging != null) {
                logging.println(">>>>> Dispatching to " + msg.target + " " +
                        msg.callback + ": " + msg.what);
            }
           // 用于分发消息,调用Message的target变量(也就是Handler了)的dispatchMessage方法来处理消息
            msg.target.dispatchMessage(msg);

            if (logging != null) {
                logging.println("<<<<< Finished to " + msg.target + " " + msg.callback);
            }

            // Make sure that during the course of dispatching the
            // identity of the thread wasn't corrupted.
            // 确保分发过程中identity不会损坏
            final long newIdent = Binder.clearCallingIdentity();
            if (ident != newIdent) {
                // 打印identiy改变的log,在分发消息过程中是不希望身份被改变
                Log.wtf(TAG, "Thread identity changed from 0x"
                        + Long.toHexString(ident) + " to 0x"
                        + Long.toHexString(newIdent) + " while dispatching to "
                        + msg.target.getClass().getName() + " "
                        + msg.callback + " what=" + msg.what);
            }
            // 将Message放入消息池
            msg.recycleUnchecked();
        }
    }
- loop进入循环模式,不断重复下面的操作,直到没有消息时退出循环
- 读取MessageQueue的下一条Message
- 把Message分发给相应的target
- 再把分发后的Message回到消息池,以便重复利用
8 Looper的退出循环方法
Looper里面退出循环有两个方法分别是quit()和quitSafely()方法
8.1 Looper.quit()方法
代码在Looper.java的 227行
/**
     * Quits the looper.
     *
     * Causes the {@link #loop} method to terminate without processing any
     * more messages in the message queue.
     *
     * Any attempt to post messages to the queue after the looper is asked to quit will fail.
     * For example, the {@link Handler#sendMessage(Message)} method will return false.
     *
     * Using this method may be unsafe because some messages may not be delivered
     * before the looper terminates.  Consider using {@link #quitSafely} instead to ensure
     * that all pending work is completed in an orderly manner.
     *
     *
     * @see #quitSafely
     */
    public void quit() {
        mQueue.quit(false);
    }
- 退出循环
- 将终止(loop()方法)而不处理消息队列中的任何更多消息。在调用quit()后,任何尝试去发送消息都是失败的。
- 例如Handler.sendMessage(Message)方法将返回false。因为循环终止之后一些message可能会被无法传递,所以这个方法是不安全的。
8.2 Looper.quitSafely()方法
代码在Looper.java的 227行
/**
     * Quits the looper safely.
     *
     * Causes the {@link #loop} method to terminate as soon as all remaining messages
     * in the message queue that are already due to be delivered have been handled.
     * However pending delayed messages with due times in the future will not be
     * delivered before the loop terminates.
     *
     * Any attempt to post messages to the queue after the looper is asked to quit will fail.
     * For example, the {@link Handler#sendMessage(Message)} method will return false.
     *
     */
    public void quitSafely() {
        mQueue.quit(true);
    }
- 安全退出循环
- 调用quitSafely()方法会使循环结束,只要消息队列中已经被传递的所有消息都将被处理。然而,在循环结束之前,将来不会提交处理延迟消息。
- 调用退出后,所有尝试去发送消息都将失败。就像调用Handler.sendMessage(Message)将返回false。
9 主线程的Looper的初始化
那么主线程的Looper是什么时候初始化的那?是在系统启动的时候,初始化的。
代码在ActivityThread.java 5401行
public static void main(String[] args) {
        Trace.traceBegin(Trace.TRACE_TAG_ACTIVITY_MANAGER, "ActivityThreadMain");
        SamplingProfilerIntegration.start();

        // CloseGuard defaults to true and can be quite spammy.  We
        // disable it here, but selectively enable it later (via
        // StrictMode) on debug builds, but using DropBox, not logs.
        CloseGuard.setEnabled(false);

        Environment.initForCurrentUser();

        // Set the reporter for event logging in libcore
        EventLogger.setReporter(new EventLoggingReporter());

        AndroidKeyStoreProvider.install();

        // Make sure TrustedCertificateStore looks in the right place for CA certificates
        final File configDir = Environment.getUserConfigDirectory(UserHandle.myUserId());
        TrustedCertificateStore.setDefaultUserDirectory(configDir);

        Process.setArgV0("");

        /*** 重点 */
        Looper.prepareMainLooper();

        ActivityThread thread = new ActivityThread();
        thread.attach(false);

        if (sMainThreadHandler == null) {
            sMainThreadHandler = thread.getHandler();
        }

        if (false) {
            Looper.myLooper().setMessageLogging(new
                    LogPrinter(Log.DEBUG, "ActivityThread"));
        }


        // End of event ActivityThreadMain.
        Trace.traceEnd(Trace.TRACE_TAG_ACTIVITY_MANAGER);
        /*** 重点 */
        Looper.loop();
       throw new RuntimeException("Main thread loop unexpectedly exited");
    }
ActivityThread不是一个thread,ActivityThread是一个类
- 首先调用了Looper的静态方法prepareMainLooper()给主线程绑定一个Looper,同时设置Looper对应的MessageQueue对象的mQuitAllowed为false,则该messageQueue是不能退出的。
- 其次调用Looper.loop();开启循环
参考
Android Handler机制4之Looper与Handler简介