一、项目描述
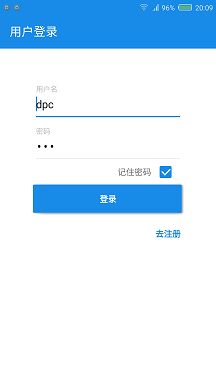
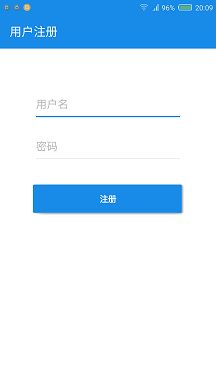
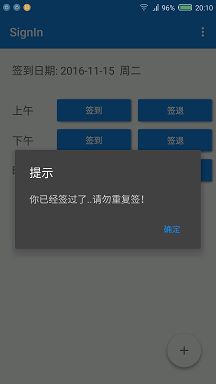
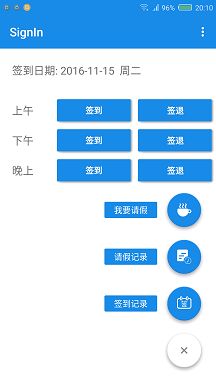
实验室小伙伴们通过APP连接实验室路由器,比对路由器Mac地址进行签到。此外小伙伴们还可通过APP进行请假,上传请假理由、日期等信息,便于实验室日常管理。
Node.js服务端介绍:http://www.jianshu.com/p/feda0083161d
二、APP截图
三、相关github开源项目
感谢开源:
/*卡片布局*/
compile 'com.android.support:cardview-v7:+'
/*meterial风格对话框*/
compile 'com.afollestad.material-dialogs:core:0.9.1.0'
/*Meterial UI控件*/
compile 'com.github.navasmdc:MaterialDesign:1.5@aar'
compile 'com.wdullaer:materialdatetimepicker:2.5.0'
/*悬浮按钮*/
compile 'com.getbase:floatingactionbutton:1.10.1'
/*输入框*/
compile 'com.rengwuxian.materialedittext:library:2.1.4'
/*访问网络工具类*/
compile 'com.lzy.net:okgo:2.0.0'
/*Gson Json转化成bean工具类*/
compile 'com.google.code.gson:gson:2.3.1'
/*andrroid工具包*/
compile 'com.blankj:utilcode:1.3.3'
四、数据库设计
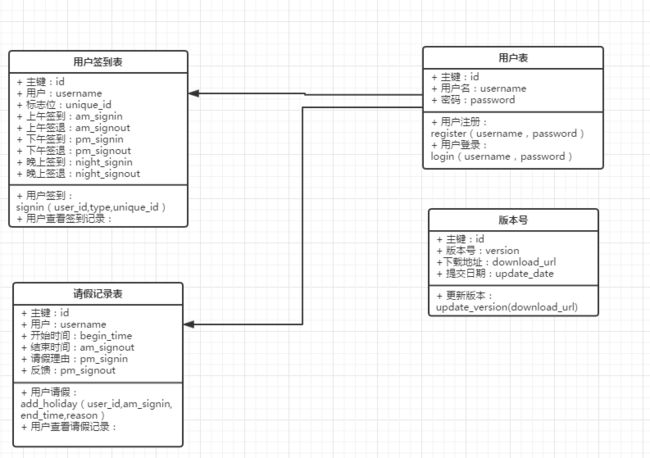
主要设计三个对象:用户、请假记录、签到记录。
约束:一个用户每天只能有一条签到记录,同时用户签到过容许再次签到。
解决方法:给每条签到记录通过用户名加日期生成一个unique_id可预见字段,用户签到时查询数据库是否存在存在此字段的记录。
其中版本更新代码目前并没有实现。
五、关键代码
5.1、比对路由器Mac地址:
 /*比对路由器的MAC地址*/
    public boolean checkLabMac(){
        //获取WiFIMac地址
        if(NetworkUtils.isWifiConnected(MainActivity.this)){
            WifiManager wifi = (WifiManager) getSystemService(Context.WIFI_SERVICE);
            WifiInfo info = wifi.getConnectionInfo();
            str_mac=info.getBSSID();
            if(!str_mac.equals(Constant.E412_MAC)){
                signSuccess("非实验室WIFI,无法签到!");
                return false;
            }else {
                return true;
            }
        }else{
            signSuccess("WIFI未连接,请先连接实验室WIFI!");
            return false;
        }
    }
5.2、访问网络与Gson解析数据:
访问网络工具类:compile 'com.lzy.net:okgo:2.0.0'Gson Json, 地址:https://github.com/jeasonlzy/okhttp-OkGo
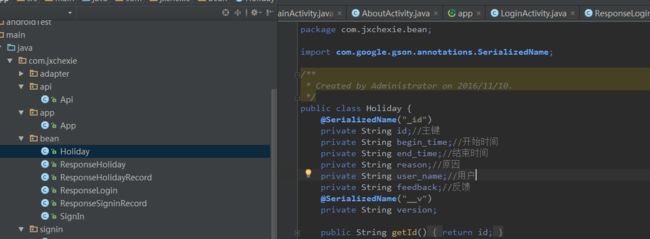
转化成bean工具类:compile 'com.google.code.gson:gson:2.3.1' Gson转换Json到Bean需要建立相应的Bean与Json字段一一对应,不然会出错。
如果Json和Bean字段对应不上,或者服务端传过来的字段命名不规范,加一个 @SerializedName,解决方案:http://blog.csdn.net/bzy601638015/article/details/32916281
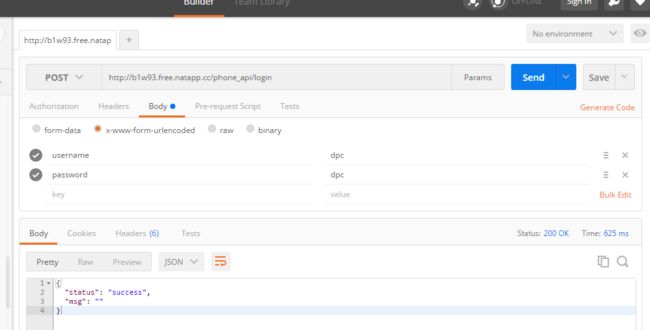
通过谷歌浏览器插件PostMan模拟登录
这里以用户登录访问网络为例:
 /*用户名密码校验*/
    public void checkUser(){
        /*构造请求体*/
        HashMap params = new HashMap<>();
        params.put("username", str_username);
        params.put("password", str_password);
        JSONObject jsonObject = new JSONObject(params);
        /*发送登录请求*/
        OkGo.post(Api.LOGIN)//
                .tag(this)//
                .upJson(jsonObject.toString())//
                .execute(new StringCallback() {
                    @Override
                    public void onSuccess(String s, Call call, Response response) {
                        /*关闭提示框*/
                        /* int code = conn.getResponseCode();//返回码200请求成功,如果请求码不是200,则提示服务器出错*/
                        login=new ResponseLogin();
                        login= JsonUtils.fromJson(s,ResponseLogin.class);
                        md.dismiss();
                        if(login.getStatus().equals(Constant.SUCCESS)){
                            /*如果勾选了记住密码,且登录成功,就保存用户名密码*/
                            if(checkBox.isCheck()){
                              /*记住用户名密码*/
                                PreferencesUtils.putString(LoginActivity.this,"username",str_username);
                                PreferencesUtils.putString(LoginActivity.this,"password",str_password);
                            }
                            toActivity(MainActivity.class);
                            Toast.makeText(LoginActivity.this,"登陆成功",Toast.LENGTH_SHORT).show();
                            LoginActivity.this.finish();
                        }else{
                            if(login.getMsg().equals(Constant.ERROR_SYSTEM)){
                                Toast.makeText(LoginActivity.this,"系统错误",Toast.LENGTH_SHORT).show();
                                return;
                            }if(login.getMsg().equals(Constant.ERROR_USERNAME)){
                                Toast.makeText(LoginActivity.this,"用户不存在",Toast.LENGTH_SHORT).show();
                                return;
                            }if(login.getMsg().equals(Constant.ERROR_PASSWORD)){
                                Toast.makeText(LoginActivity.this,"密码错误",Toast.LENGTH_SHORT).show();
                                return;
                            }
                        }
                    }
                });
    }

JSON对应Bean,服务端值放回成功或者失败信息,只有两个字段。

public class ResponseLogin implements Serializable {
    private String status;
    private String msg;
    public void setStatus(String status) {
        this.status = status;
    }
    public String getStatus() {
        return status;
    }

    public void setMsg(String msg) {
        this.msg = msg;
    }
    public String getMsg() {
        return msg;
    }
}
5.3、使用时间选择器问题:
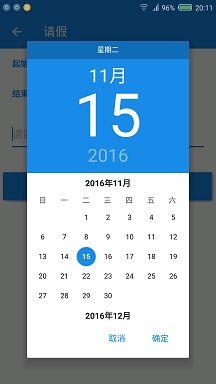
使用时间选择器是,样例代码是之间通过Activity实现结构,然后重写方法,如果用这种方式一个Activity中貌似只能用一个Dialog选择时间(不知道自己理解是不是对的,欢迎指正),而这里有两个位置需要选择时间。所以选择匿名内部类的方式实现选择时间功能。
btn_startTime.setOnClickListener(new View.OnClickListener() {
            @Override
            public void onClick(View v) {
                //弹出日期选择对话框
                Calendar now = Calendar.getInstance();
                DatePickerDialog dialog= DatePickerDialog.newInstance(new DatePickerDialog.OnDateSetListener(){
                  @Override
                  public void onDateSet(DatePickerDialog view, int year, int monthOfYear, int dayOfMonth) {
                      String date =year+"-"+(monthOfYear+1)+"-"+dayOfMonth;
                      startTime.setText(date);
                      }},now.get(Calendar.YEAR),
                        now.get(Calendar.MONTH),
                        now.get(Calendar.DAY_OF_MONTH));
                dialog.show(getFragmentManager(), "Datepickerdialog");
            }
        });
        btn_endTime.setOnClickListener(new View.OnClickListener() {
            @Override
            public void onClick(View v) {
                //弹出日期选择对话框
                Calendar now = Calendar.getInstance();
                DatePickerDialog dialog= DatePickerDialog.newInstance(new DatePickerDialog.OnDateSetListener(){
                      @Override
                      public void onDateSet(DatePickerDialog view, int year, int monthOfYear, int dayOfMonth) {
                      String date =year+"-"+(monthOfYear+1)+"-"+dayOfMonth;
                      endTime.setText(date);
                      }},now.get(Calendar.YEAR),
                        now.get(Calendar.MONTH),
                        now.get(Calendar.DAY_OF_MONTH));
                dialog.show(getFragmentManager(), "Datepickerdialog");
            }
        });
5.4、关于Toolbar菜单字体颜色背景颜色问题:
使用Toorbar的时候,它的菜单字体为白色,菜单背景为灰白色,蛮难看。
解决方案:http://www.cnblogs.com/oyjt/p/4762640.html
5.5、关于仿知乎悬浮按钮问题:
主页上仿知乎悬浮按钮,github上例子的布局是相对布局,但是自己常用的是线性布局,想着把它用在线性布局中,给它调位置一直没成功,只能将就的把主页改成相对布局吧,效果也还不错。
可给按钮添加图标以及颜色:
地址:https://github.com/futuresimple/android-floating-action-button
5.6、下拉刷新上拉加载更多:
下拉刷新再本项目中貌似并没有多大意义,因为用户每次查看自己的记录的时候,只弄了个上拉分页加载更多。注意传入当前页数出现的问题。
上拉加载更多参考代码:https://github.com/wangnaiwen/RecyclerViewRefresh
5.7、引入CheckBox时,默认选中不起作用:
发现materialdesign是代码提示自动引入的,
需要将其修改为:修改为 xmlns:app=" http://schemas.android.com/apk/res-auto" xmlns:materialdesign=" http://schemas.android.com/apk/res-auto" 这是自定义属性引入有问题造成的。
参考我的另一个小结: https://my.oschina.net/u/2480757/blog/787584
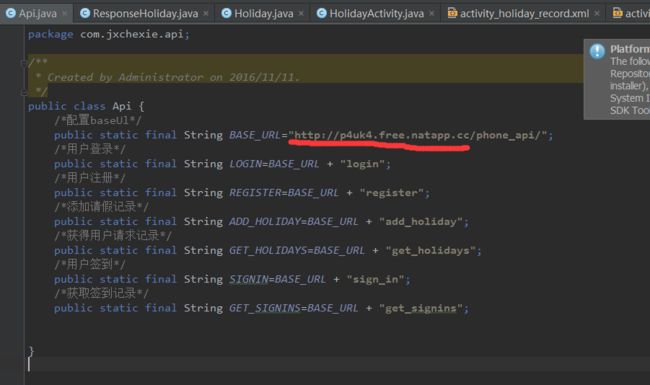
5.8、本地测试时,Natapp内外网映射工具:
开机重启后natapp映射的本地路径就变了,每天都得修改,如果你没有关机习惯倒也无所谓。注意用node.js做服务端时需要在www文件中将默认的3000端口改成80端口。
六、最后相关网址分享:
阿里狂拽酷炫的图标库:地址:http://www.iconfont.cn/plus
API测试工具PostMan:下载地址: http://chromecj.com/web-development/2014-09/60/download.html
内外网映射工具:做服务端开发时APP需访问我本地电脑,这是可以通过免费的内外网映射,不需要通过阿里云测试(微信公众号开发也可以通过此服务 )。 地址:https://natapp.cn/
项目源码: https://github.com/dpc761218914/SignIn
Node.js服务端源码: https://github.com/dpc761218914/SignIn_Server
