YOLOv3 darknet版识别图片,视频并打印终端结果
最近做的项目需要用Yolov3的视频帧识别目标并将结果输出,在网上看了很多修改detector.c源文件重定向输出文件和批量c,但试了很多都没有成功,可能是版本的问题,所以这里建议如果只是输出信息和批量测试,并不需要修改源码,而只需要调用darknet本身的python接口就可以了,如下:
这是官方给的python接口,无需修改重编译darknet原项目,只需在python代码中修改或重定向输出即可
我用的是darknet_video.py识别视频流,而在使用darknet_video.py之前,需要编译一下![]()
图中的yolo_cpp_dll.sln项目,编译方式和darknet.sln一样,先修改yolo_cpp_dll.vcxproj配置文件,然后添加opencv等目录,步骤都是和编译darknet.sln一样的。编译完后会得到一个yolo_cpp_dll.dll文件,有了这个文件,才可以运行darknet_video.py文件。
(如果是识别图片,直接看darknet.py的代码就可以了,无需编译其他东西)
接下来看代码,下面的函数YOLO()是调用darknet进行视频识别的主函数,如下:
def YOLO():

    global metaMain, netMain, altNames
    configPath = "./cfg/yolov3.cfg"
    weightPath = "./yolov3.weights"
    metaPath = "./cfg/coco.data"
    if not os.path.exists(configPath):
        raise ValueError("Invalid config path `" +
                         os.path.abspath(configPath)+"`")
    if not os.path.exists(weightPath):
        raise ValueError("Invalid weight path `" +
                         os.path.abspath(weightPath)+"`")
    if not os.path.exists(metaPath):
        raise ValueError("Invalid data file path `" +
                         os.path.abspath(metaPath)+"`")
    if netMain is None:
        netMain = darknet.load_net_custom(configPath.encode(
            "ascii"), weightPath.encode("ascii"), 0, 1)  # batch size = 1
    if metaMain is None:
        metaMain = darknet.load_meta(metaPath.encode("ascii"))
    if altNames is None:
        try:
            with open(metaPath) as metaFH:
                metaContents = metaFH.read()
                import re
                match = re.search("names *= *(.*)$", metaContents,
                                  re.IGNORECASE | re.MULTILINE)
                if match:
                    result = match.group(1)
                else:
                    result = None
                try:
                    if os.path.exists(result):
                        with open(result) as namesFH:
                            namesList = namesFH.read().strip().split("\n")
                            altNames = [x.strip() for x in namesList]
                except TypeError:
                    pass
        except Exception:
            pass

    #cap = cv2.VideoCapture(0)
    video_path="./Video/video.mp4"
    cap = cv2.VideoCapture(video_path)
    cap.set(3, 1280)
    cap.set(4, 720)
    output_path="./Video/output.avi"
    out = cv2.VideoWriter(
        output_path, cv2.VideoWriter_fourcc(*"MJPG"), 10.0,
        (darknet.network_width(netMain), darknet.network_height(netMain)))
    print("Starting the YOLO loop...")

    # Create an image we reuse for each detect
    darknet_image = darknet.make_image(darknet.network_width(netMain),
                                    darknet.network_height(netMain),3)
    while True:
        prev_time = time.time()
        ret, frame_read = cap.read()
        frame_rgb = cv2.cvtColor(frame_read, cv2.COLOR_BGR2RGB)
        frame_resized = cv2.resize(frame_rgb,
                                   (darknet.network_width(netMain),
                                    darknet.network_height(netMain)),
                                   interpolation=cv2.INTER_LINEAR)

        darknet.copy_image_from_bytes(darknet_image,frame_resized.tobytes())

        detections = darknet.detect_image(netMain, metaMain, darknet_image, thresh=0.25)
        image = cvDrawBoxes(detections, frame_resized)
        image = cv2.cvtColor(image, cv2.COLOR_BGR2RGB)
        print(1/(time.time()-prev_time))
        cv2.imshow('Demo', image)
        cv2.waitKey(3)
    cap.release()
    out.release()
可以看到,代码首先加载了cfg配置文件,weights权重文件(其实神经网络就是权重的集合,也可以理解为加载了网络),以及包含了预测目标的coco.data文件,然后接下来直接看到video_path那里,从这里利用opencv的VideoCapture加载进来了视频的path,因此,如果我们要用到自己的摄像头,改为cap=cv2.VideoCapture(0)就可以捕捉外部设备了。
然后就是一个死循环,它不断地从视频流中一帧帧读入图片,并调用darknet的接口进行识别,最后识别的结果就存在detections中,而cvDrawBoxes只是将detections中的内容画在原图像上。
那我们再来看看cvDrawBoxes函数:
def cvDrawBoxes(detections, img):
    f = open("E:\\YOLOV3\\darknet-master\\build\\darknet\\x64\\output_data\\111.txt", "a+")
    for detection in detections:
        x, y, w, h = detection[2][0],\
            detection[2][1],\
            detection[2][2],\
            detection[2][3]
        xmin, ymin, xmax, ymax = convertBack(
            float(x), float(y), float(w), float(h))
        pt1 = (xmin, ymin)
        pt2 = (xmax, ymax)
        cv2.rectangle(img, pt1, pt2, (0, 255, 0), 1)
        cv2.putText(img,
                    detection[0].decode() +
                    " [" + str(round(detection[1] * 100, 2)) + "]",
                    (pt1[0], pt1[1] - 5), cv2.FONT_HERSHEY_SIMPLEX, 0.5,
                    [0, 255, 0], 2)
        f.write(str(detection[0].decode())+" "+str(detection[1]*100))

    f.close()
    return img
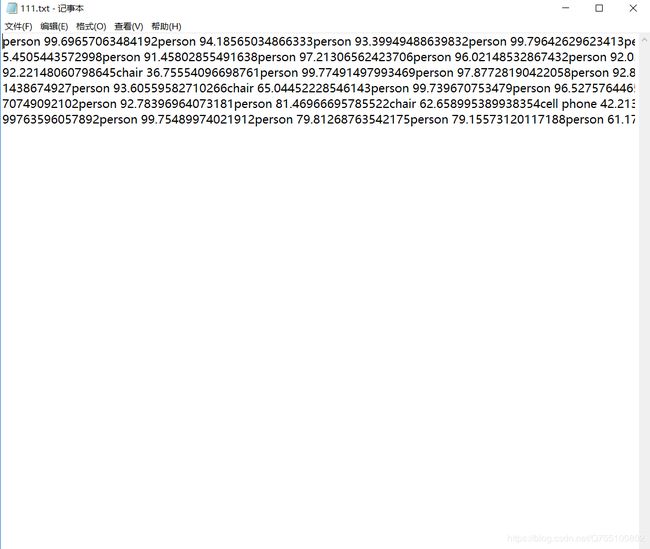
其中,重定向文件流f是我新加的内容,可以看到,最终识别出来的每个结果和它的置信度,就是detections中每个detection的第0个元素和第1个元素,所以输出的是
f.write(str(detection[0].decode())+" "+str(detection[1]*100))
识别结果如下:
输出效果不好是因为没换行,自己改改就行。


