学习用Sts做一个SpringBoot的WEB项目(1)基本框架搭建
想要做一个项目管理网站,用来管理一般应用,目标是可以实现一般java的WEB应用的自动发布、升级、回退等功能。使用网站来针对不同的面向开发人员,后端的部署功能shell脚本来实现。
先来搭WEB应用环境maven+springboot2.0+thymeleaf+mybatis+redis+mysql,因为thymeleaf是spring推荐使用,所以学习一下使用thymeleaf。另外,使用mybatis的辅助包mybatis generator来实现代码自动生成,pageHelper来实现分页管理。
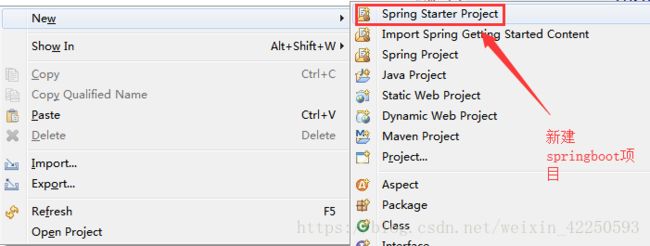
1. 创建Springboot项目
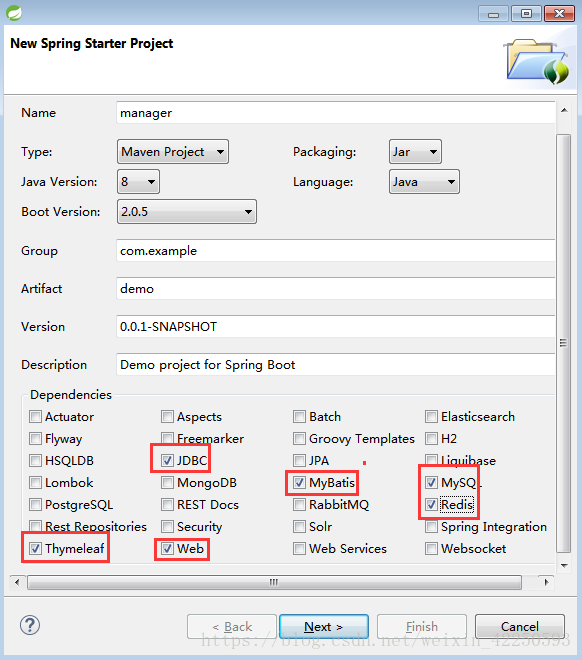
选择依赖包
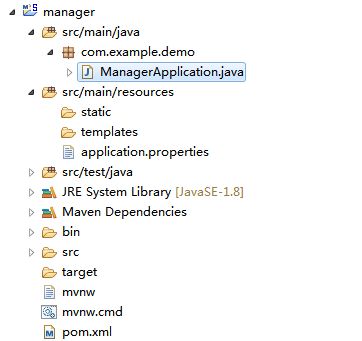
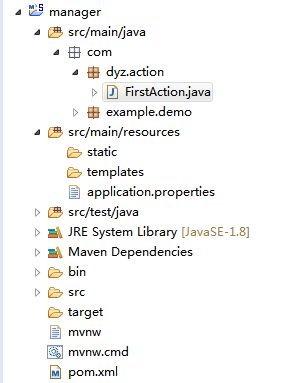
然后就一路下一步,等sts自动创建项目,完成后的结构图如下
查看pom.xml,我们要使用pagehelper,需要单独加入依赖
            com.github.pagehelper
            pagehelper
            5.0.0


            com.github.pagehelper
            pagehelper-spring-boot-autoconfigure
            1.2.3


            com.github.pagehelper
            pagehelper-spring-boot-starter
            1.2.3
OK,尝试启动项目
项目并没有启动成功,控制台报错如下:
***************************
APPLICATION FAILED TO START
***************************
Description:
Failed to configure a DataSource: 'url' attribute is not specified and no embedded datasource could be configured.
Reason: Failed to determine a suitable driver class
显然,这是没有配置数据源的缘故。
2.初始配置
打开application.properties,此时配置文件空空如也,我们先加一些基本配置进去,让项目能跑起来
#mysql-datasource-config
spring.datasource.url=jdbc:mysql://127.0.0.1:3306/project_manager
spring.datasource.username=root
spring.datasource.password=123456
spring.datasource.driver-class-name=com.mysql.jdbc.Driver

#server-name
server.servlet.context-path=/manager

#thymeleaf-禁止缓存,方便调试
spring.thymeleaf.cache=false
再次启动,显然这次就OK了。
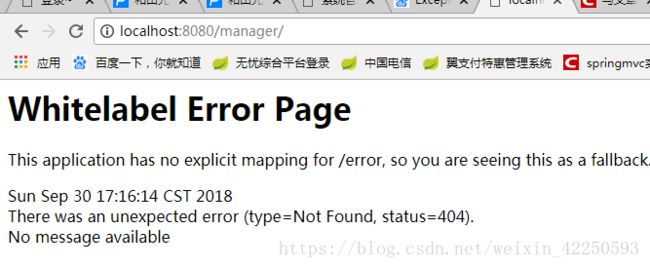
应用部署在本地的8080端口下,尝试从浏览器访问一下:
3.第一个请求
设定我们的网站叫dyz,那么按照com.dyz.xxx来组织包
com.dyz.action 用来响应url请求和处理请求
com.dyz.service 用来处理业务逻辑
com.dyz.dao 持久层操作
com.dyz.util 工具类
com.dyz.model 数据库对象
com.dyz.bean 页面对象
com.dyz.filter 过滤器
com.dyz.job 定时操作类
创建第一个action
FirstAction.java代码
package com.dyz.action;

import org.springframework.stereotype.Controller;
import org.springframework.web.bind.annotation.RequestMapping;

@Controller
@RequestMapping(value="/")
public class FirstAction {

	@RequestMapping(value="/hello")
	public String firstResponse(){
		return "hello";
	}

}
在类中的两个RequestMapping组成了url的请求路径,我们的项目名叫manager,这个类对应的路径是/,firstReponse对应的路径是/hello,那么组合起来,如果请求http://localhost:8080/manager/hello就是请求了firstResponse方法。
在方法中返回了一个字符串,这个字符串将会自动映射到一个叫hello.html的文件,这个文件放在templates下面,为了保证响应,我们新建一个hello.html页面
系统管理系统登录


	hello
这个页面并不是最终的页面,spring会将之渲染成最后的页面呈现给浏览器
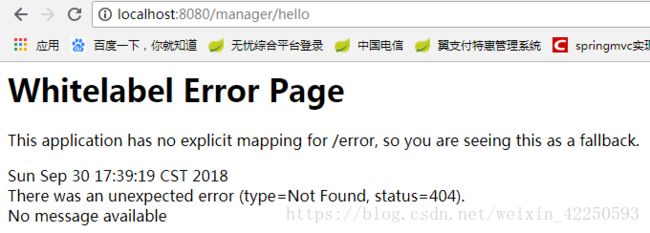
我们从浏览器验证一下
第一个坑出现了,返回了一个404错误
这是因为springboot启动时,会从main方法启动(貌似是废话,所有的java程序都是从main方法进入啊),这个main方法在
在创建springboot时,sts已经自动为我们创建好了这个类
package com.example.demo;

import org.springframework.boot.SpringApplication;
import org.springframework.boot.autoconfigure.SpringBootApplication;

@SpringBootApplication
public class ManagerApplication {

	public static void main(String[] args) {
		SpringApplication.run(ManagerApplication.class, args);
	}
}
springboot启动后,会从扫描当前路径下(包含子目录下)的所有的类,是否有被注解,需要在启动后加载的。但是springboot创建这个类的时,自动把它放在com.example.demo下了,而我们实际使用的包是com.dyz.action,所以即使我们已经给我们的类注解成Controller,但是因为路径不对,所以不会去加载我们的Controller,请求也无法解析。
解决方法很简单,要么把这个类移动到com包下面,这样它就会自动扫描com包下的所有类,要么就指定它的扫描路径。
我们使用@ComponentScan注解来指定扫描路径
package com.example.demo;

import org.springframework.boot.SpringApplication;
import org.springframework.boot.autoconfigure.SpringBootApplication;
import org.springframework.context.annotation.ComponentScan;

@SpringBootApplication
@ComponentScan({"com.*"})
public class ManagerApplication {

	public static void main(String[] args) {
		SpringApplication.run(ManagerApplication.class, args);
	}
}
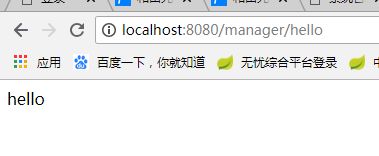
OK,再次重启应用,验证结果
搞定
