如何在QML应用中设计一个C++ Model并使用它
我们目前大多数的model是使用ListModel.它是基于QML语言的.虽然我们也可以使用QStringList来做一个简单的Model来供我们的ListView或GridView来使用.对于有些复杂的项目,数据来源于有些算法或来源于互联网,大家可能会基于C++来开发自己的引擎.我们需要把我们得到的数据展现在我们的界面中.利用QML来呈现自己的数据.在今天的例程中,我们尝试利用C++语言来设计一个通用的Model.这个Model将在我们的QML应用中被利用并呈现数据.
datalistmodel.h
#ifndef DATALISTMODEL_H
#define DATALISTMODEL_H

#include
#include

class Data
{
public:
    Data(const QString &type, const QString &size);

    QString type() const;
    QString size() const;

private:
    QString m_type;
    QString m_size;
};

class DataListModel : public QAbstractListModel
{
    Q_OBJECT
public:
    enum AnimalRoles {
        TypeRole = Qt::UserRole + 1,
        SizeRole1
    };

    DataListModel(QObject *parent = 0);
    int rowCount(const QModelIndex & parent = QModelIndex()) const;
    QVariant data(const QModelIndex & index, int role = Qt::DisplayRole) const;
    Q_INVOKABLE void insert(int index, const Data &data);
    Q_INVOKABLE void append(const Data &data);
    Q_INVOKABLE void remove(int index);
    Q_INVOKABLE void append(const QVariantMap map);

signals:
    void countChanged(int arg);

private:
    int count() const;

protected:
    QHash roleNames() const;

private:
    QList m_list;
};

#endif // DATALISTMODEL_H
在这里,我们定义了一个最基本的数据类型Data.它包含两个数据项type及size.开发者可以根据自己的数据结构来修改这个数据的格式.另外,我们也定义了我们的DataListModel.这是一个我们自己定制的一个数据Model.在这个例程中,我们尽量保持项目简洁,我们并没有利用它来获取一些数据(比如利用C++来解析一个json/xml的文件,网路发来的数据等).大家可以具体参阅文章" D-Pointer".
在这里,我们实现了一个比较完整的Model.我们实现了 QAbstractListModel它的一些基本的接口:
    int rowCount(const QModelIndex & parent = QModelIndex()) const;
    QVariant data(const QModelIndex & index, int role = Qt::DisplayRole) const;
datalistmodel.cpp
#include "datalistmodel.h"

#include

Data::Data(const QString &type, const QString &size)
    :m_type(type), m_size(size)
{
}

QString Data::type() const
{
    return m_type;
}

QString Data::size() const
{
    return m_size;
}

DataListModel::DataListModel(QObject *parent)
    : QAbstractListModel(parent)
{
}

void DataListModel::insert(int index, const Data &data)
{
    if(index < 0 || index > m_list.count()) {
        return;
    }

    emit beginInsertRows(QModelIndex(), index, index);
    m_list.insert(index, data);
    emit endInsertRows();
    emit countChanged(m_list.count());
}

void DataListModel::remove(int index)
{
    if(index < 0 || index >= m_list.count()) {
        return;
    }

    emit beginRemoveRows(QModelIndex(), index, index);
    m_list.removeAt( index );
    emit endRemoveRows();
    emit countChanged(m_list.count());
}

void DataListModel::append(const Data &data)
{
    insert(count(), data);
}

void DataListModel::append(const QVariantMap map)
{
    QString type = map["type"].toString();
    QString size = map["size"].toString();

    Data data(type, size);

    insert(count(), data);
}


int DataListModel::rowCount(const QModelIndex & parent) const {
    Q_UNUSED(parent);
    return m_list.count();
}

QVariant DataListModel::data(const QModelIndex & index, int role) const {
    if (index.row() < 0 || index.row() >= m_list.count())
        return QVariant();

    const Data &data = m_list[index.row()];
    // qDebug() << "row: " << index.row();

    if (role == TypeRole)
        return data.type();
    else if (role == SizeRole1)
        return data.size();

    return QVariant();
}

QHash DataListModel::roleNames() const {
    QHash roles;
    roles[TypeRole] = "type";
    roles[SizeRole1] = "size";
    return roles;
}

int DataListModel::count() const
{
    return rowCount(QModelIndex());
}
我们的main.cpp设计如下:
#include
#include
#include
#include

#include "datalistmodel.h"

int main(int argc, char *argv[])
{
    QGuiApplication app(argc, argv);

    DataListModel model;
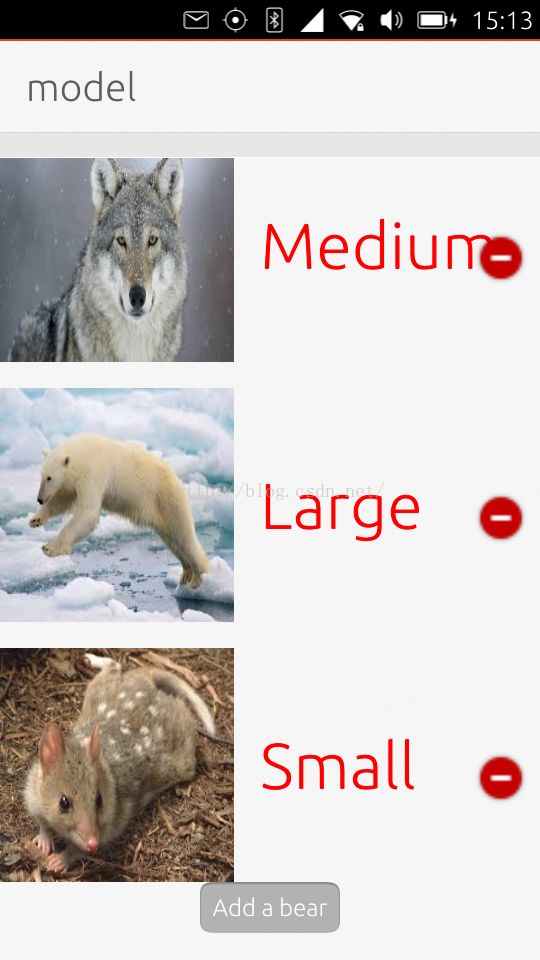
    model.append( Data("wolf.jpg", "Medium") );
    model.append( Data("polarbear.jpg", "Large") );
    model.append( Data("quoll.jpg", "Small") );

    QQuickView view;
    view.setSource(QUrl(QStringLiteral("qrc:///Main.qml")));
    view.setResizeMode(QQuickView::SizeRootObjectToView);

    view.rootContext()->setContextProperty("myModel", &model);
    view.show();
    return app.exec();
}
在这里,我们初始化一些数据到Model里去.在实际的应用中,这个数据可能来源于一些网路请求,甚至是一些socket通信里的数据,或者是解析一些数据库,json/xml等等.
Main.qml
import QtQuick 2.0
import Ubuntu.Components 1.1

/*!
    \brief MainView with a Label and Button elements.
*/

MainView {
    // objectName for functional testing purposes (autopilot-qt5)
    objectName: "mainView"

    // Note! applicationName needs to match the "name" field of the click manifest
    applicationName: "model.liu-xiao-guo"

    /*
     This property enables the application to change orientation
     when the device is rotated. The default is false.
    */
    //automaticOrientation: true

    // Removes the old toolbar and enables new features of the new header.
    useDeprecatedToolbar: false

    width: units.gu(60)
    height: units.gu(85)

    Page {
        title: i18n.tr("model")

        ListView {
            id: listview
            clip: true
            width: parent.width
            height: parent.height - button.height

            model: myModel
            delegate: Item {
                id: delegate
                width: listview.width
                height: units.gu(20)
                Row {
                    spacing: units.gu(2)
                    Image {
                        source: "images/" + type
                        height: delegate.height *.9
                        width: height
                    }

                    Text {
                        anchors.verticalCenter: parent.verticalCenter
                        text: size
                        font.pixelSize: units.gu(5)
                        color: "red"
                    }
                }

                Image  {
                    width: units.gu(4)
                    height: width
                    anchors.verticalCenter: parent.verticalCenter
                    anchors.right: parent.right
                    anchors.rightMargin: units.gu(1)
                    source: "images/remove.png"

                    MouseArea {
                        anchors.fill: parent
                        onClicked: {
                            myModel.remove(index);
                        }
                    }
                }
            }
        }

        Button {
            id: button
            anchors.bottom: parent.bottom
            anchors.bottomMargin: units.gu(2)
            anchors.horizontalCenter: parent.horizontalCenter

            text: "Add a bear"
            onClicked: {
                // We are going to add a bear to the list

                var o = {
                    "type" : "polarbear.jpg",
                    "size" :  "large"
                };

                myModel.append( o );
                listview.positionViewAtEnd()
            }
        }
    }
}
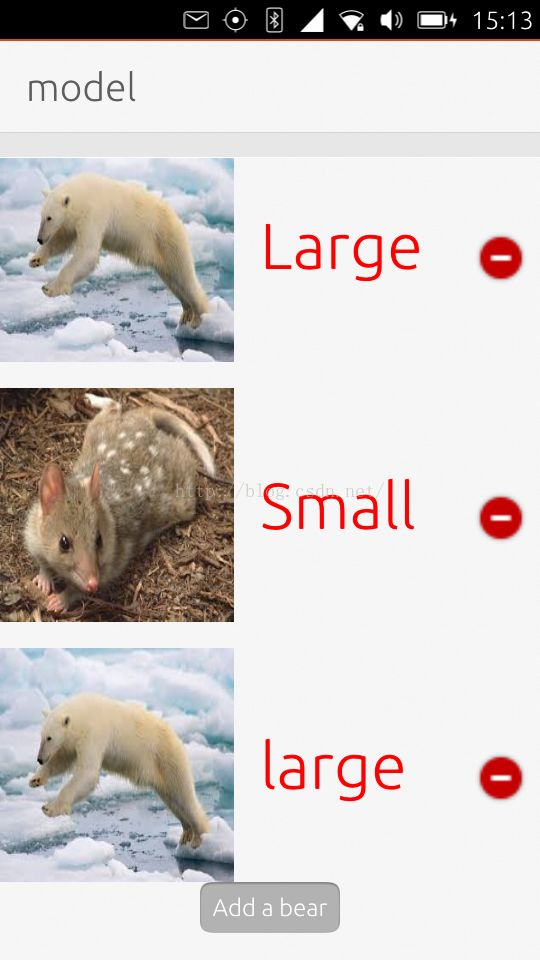
我们可以通过按钮"
Add a bear"来添加一个北极熊的图标.我们也可以点击
减法符号来删除列表中的一项.
整个项目的源码在: https://github.com/liu-xiao-guo/model


