写在前面
在 这里 可以搜索到最新的 Alamofire~本文中 demo 使用的是 Alamofire4.1.0版本~点击 这里 可以下载~
本文项目均基于 xcode 8.1 版本
本文分为两个部分:适合对 swift 的初学者
第一部分~我们一起学习怎么一步一步将 Alamofire 导入工程
第二部分~我们一起学习怎么使用 Alamofire 文章结尾作者也做了对 Alamofire 的简单封装~
第一部分,怎么导入工程
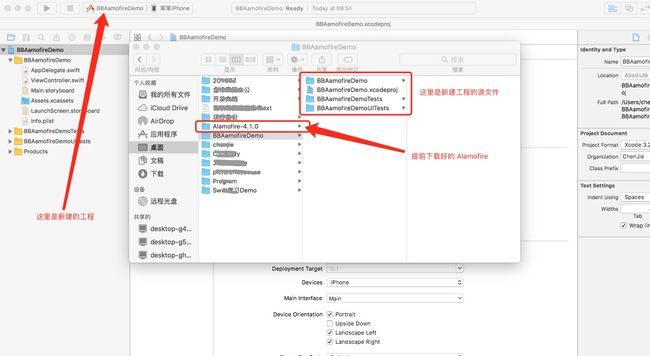
- 根据前面下载一个版本的
Alamofire文件~ -
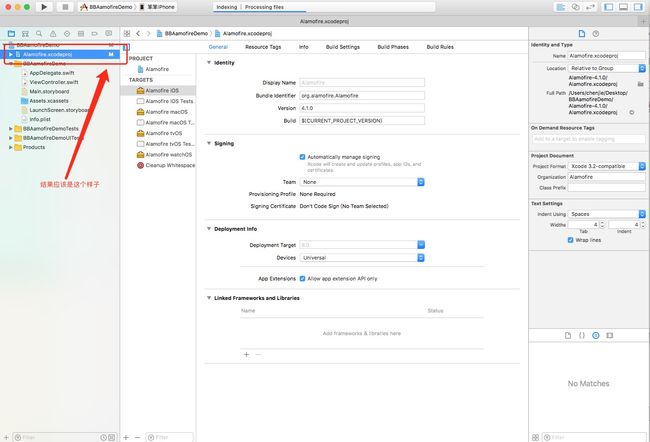
新建一个工程~
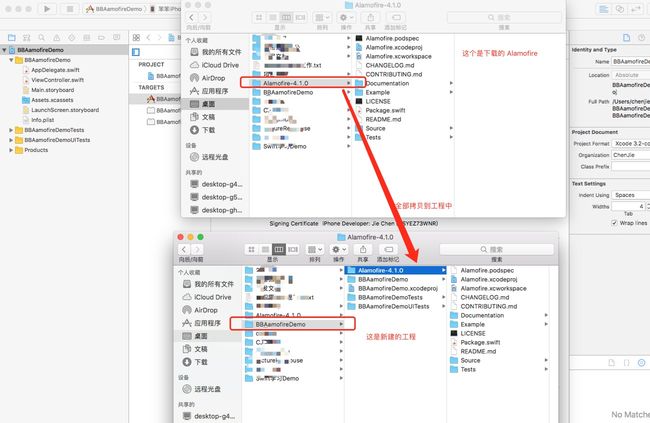
- 拷贝
Alamofire文件到我们新建的工程中~
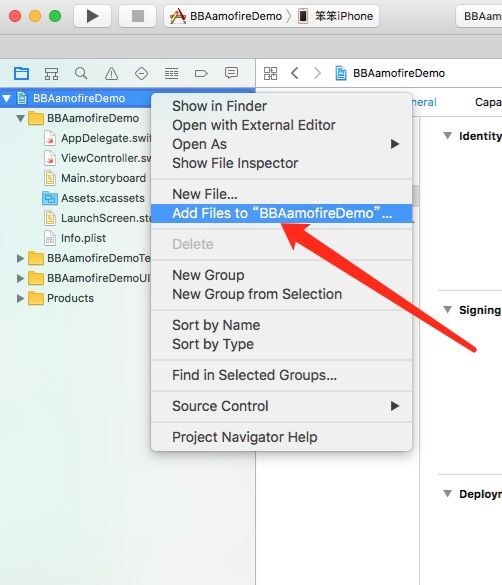
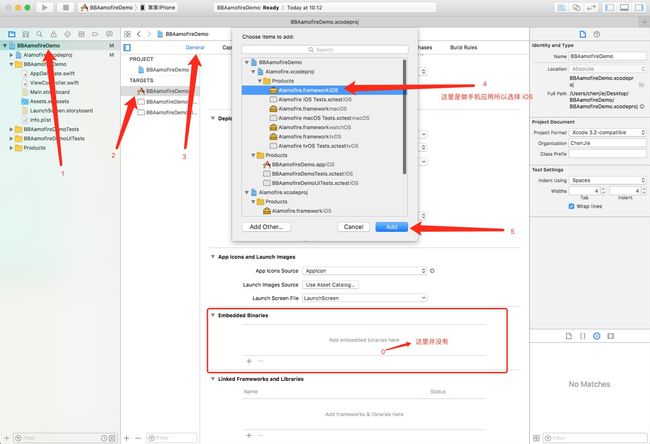
-
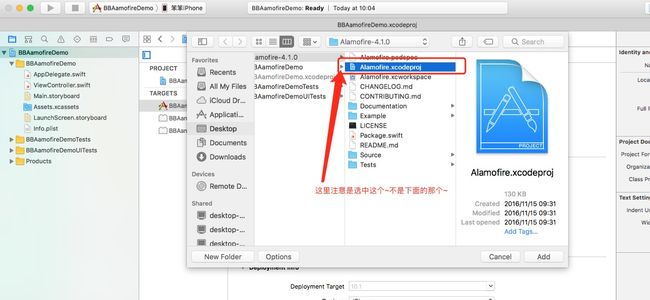
添加文件到我们自己的工程中~
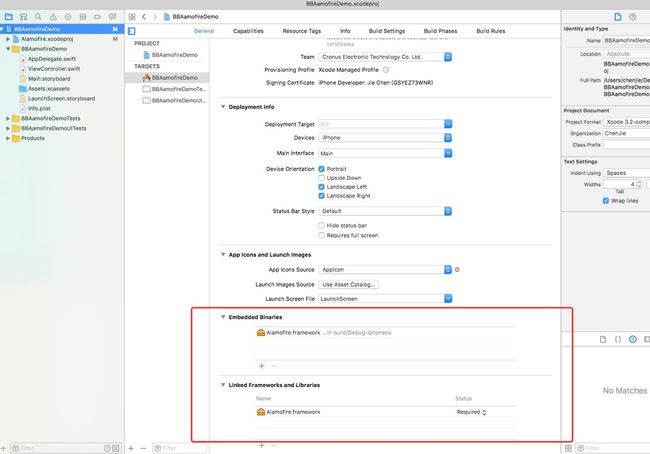
- 检查一下我们静态库有没有加到工程没有的话我们手动添加一下
结果应该是这样
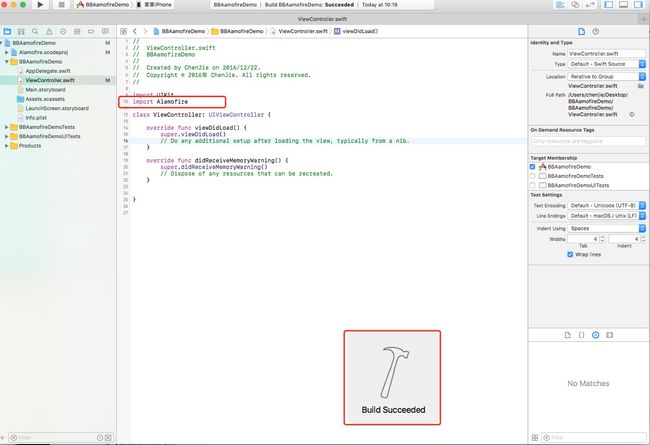
- 导入头文件
import Alamofire检查是否配置错误这里可能没有提示直接敲完编译一下就OK了
第二部分,怎么使用 Alamofire
这是作者的 demo`demo`写的很详细直接看demo就可以了~
这边我们也分四个部分来学习先来上个图
在
demo中对应的方法为如下图~
这里简单贴几行代码~
let urlStr = "\(SERVICE_URL)type=\(TOP)&key=\(APPKEY)"
    //  1. response()
    // 官方解释:The response handler does NOT evaluate any of the response data. It merely forwards on all information directly from the URL session delegate. It is the Alamofire equivalent of using cURL to execute a Request.
    Alamofire.request(urlStr).response { (returnResult) in
        if let data = returnResult.data, let utf8Text = String(data: data, encoding: .utf8) {
            print("firstMethod --> response() --> utf8Text = \(utf8Text)")
        }
    }

    //  2. responseData()
    //  官方解释:The responseData handler uses the responseDataSerializer (the object that serializes the server data into some other type) to extract the Data returned by the server. If no errors occur and Data is returned, the response Result will be a .success and the value will be of type Data.
    Alamofire.request(urlStr).responseData { (returnResult) in
        debugPrint("firstMethod --> responseData() --> returnResult = \(returnResult)")
        if let data = returnResult.data, let utf8Text = String(data: data, encoding: .utf8) {
            print("firstMethod --> responseData() --> utf8Text = \(utf8Text)")
        }
    }

    // 3. responseString()
    // 官方解释:The responseString handler uses the responseStringSerializer to convert the Data returned by the server into a String with the specified encoding. If no errors occur and the server data is successfully serialized into a String, the response Result will be a .success and the value will be of type String.
    Alamofire.request(urlStr).responseString { (returnResult) in
        debugPrint("firstMethod --> responseString() --> Sucess = \(returnResult.result.isSuccess)")
        print("firstMethod --> responseString() --> returnResult = \(returnResult)")
    }

    // 4. responseJSON()
    // 官方解释:The responseJSON handler uses the responseJSONSerializer to convert the Data returned by the server into an Any type using the specified JSONSerialization.ReadingOptions. If no errors occur and the server data is successfully serialized into a JSON object, the response Result will be a .success and the value will be of type Any.
    Alamofire.request(urlStr).responseJSON { (returnResult) in
        debugPrint("firstMethod --> responseJSON --> \(returnResult)")
        if let json = returnResult.result.value {
            print("firstMethod --> responseJSON --> \(json)")
            /*  返回请求地址、数据、和状态结果等信息
             print("firstMethod --> responseJSON() --> \(returnResult.request!)")
             print("firstMethod --> responseJSON() --> \(returnResult.data!)")
             print("firstMethod --> responseJSON() --> \(returnResult.result)")
             */
        }
    }

    // 1. GET请求
    let urlStr = "\(SERVICE_URL)type=\(YULE)&key=\(APPKEY)"
    Alamofire.request(urlStr, method: .get).responseJSON { (returnResult) in
        print("secondMethod --> GET 请求 --> returnResult = \(returnResult)")
    }

    // 2. POST请求
    Alamofire.request(urlStr, method: .post).responseJSON { (returnResult) in
        print("secondMethod --> POST 请求 --> returnResult = \(returnResult)")
    }

    // 3. 参数、编码
    // 官方解释:Alamofire supports three types of parameter encoding including: URL, JSON and PropertyList. It can also support any custom encoding that conforms to the ParameterEncoding protocol.
    let param = [
        "type": YULE,
        "key" : APPKEY
    ]
    Alamofire.request(SERVICE_URL, method: .post, parameters: param).responseJSON { (returnResult) in
        print("secondMethod --> 参数 --> returnResult = \(returnResult)")
    }
    //Alamofire.request(SERVICE_URL, method: .post, parameters: param, encoding: URLEncoding.default)
    //Alamofire.request(SERVICE_URL, method: .post, parameters: param, encoding: URLEncoding(destination: .methodDependent))

    // 4.请求头
    let headers: HTTPHeaders = [
        "Accept": "application/json"
    ]
    Alamofire.request(urlStr, headers: headers).responseJSON { (returnResult) in
        print("secondMethod --> 请求头 --> returnResult = \(returnResult)")
    }
最后附上上面代码的 demo 地址~以及笨笨自己班门弄斧基于Alamofire封装的 demo
如有问题可随时给我联系欢迎程序媛骚扰~QQ:2638006336
