【opencv学习-C++】 透视变换
透视变换
先看一下图,在牌照的过程中,由于角度问题,难免会出现一些倾斜的问题,如下图,
我们要解决的就是通过一系列的操作,将上图变为
解决的思路
用opencv中的透视变换的API,输入四个角点的坐标,完成透视变换。
看下一主要的两个opecnv的API
getPerspectiveTransform( InputArray src, InputArray dst );//获取透视变换矩阵
warpPerspective( InputArray src, OutputArray dst,
                                   InputArray M, Size dsize,
                                   int flags = INTER_LINEAR,
                                   int borderMode = BORDER_CONSTANT,
                                   const Scalar& borderValue = Scalar());//透视变换
从函数的需求上可以看出,透视变换的主要任务就是:找到原图像的角点。主要流程如下
(1)灰度处理、二值化、形态学操作形成连通区域
(2)轮廓发现、将目标的轮廓绘制出来
(3)在绘制的轮廓中进行直线检测
(4)找出四条边,求出四个交点
(5)使用透视变换函数,得到结果
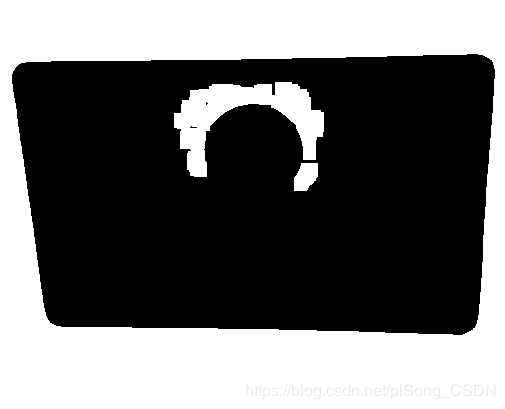
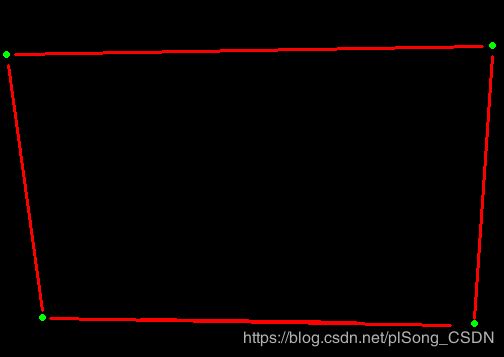
下面是主要的几个中间效果图
完全示例代码
#include
#include

using namespace cv;
using namespace std;

int main()
{
	//input image
	Mat src = imread("D:/images/shebaoka.png");
	imshow("input image", src);

	//bgr 2 gray 转为灰度图像
	Mat src_gray;
	cvtColor(src, src_gray, COLOR_BGR2GRAY);

	//binary 二值化
	Mat binary;
	threshold(src_gray, binary, 0, 255, THRESH_BINARY_INV|THRESH_OTSU); //THRESH_BINARY_INV二值化后取反
	//imshow("binary", binary);//因为有一些斑点存在

	//形态学 闭操作:可以填充小的区域
	Mat morhp_img;
	Mat kernel = getStructuringElement(MORPH_RECT, Size(5, 5), Point(-1, -1));
	morphologyEx(binary, morhp_img, MORPH_CLOSE, kernel, Point(-1, -1), 3);
	//imshow("morphology", morhp_img);

	Mat dst;
	bitwise_not(morhp_img, dst);//在取反
	imshow("dst", dst);//

	//轮廓发现
	vector> contous;
	vector hireachy;
	findContours(dst, contous, hireachy, CV_RETR_TREE, CHAIN_APPROX_SIMPLE, Point());
	cout << "contous.size:" << contous.size() << endl;


	//轮廓绘制
	int width = src.cols;
	int height = src.rows;
	Mat drawImage = Mat::zeros(src.size(), CV_8UC3);
	cout << contous.size() << endl;
	for (size_t t = 0; t < contous.size(); t++)
	{
		Rect rect = boundingRect(contous[t]);
		if (rect.width > width / 2 && rect.height > height / 2 && rect.width(t), Scalar(0, 0, 255), 2, 8, hireachy, 0, Point(0, 0));
		}
	}
	imshow("contours", drawImage);//显示找到的轮廓

	//直线检测
	vector lines;
	Mat contoursImg;
	int accu = min(width*0.5, height*0.5);
	cvtColor(drawImage, contoursImg, COLOR_BGR2GRAY);
	imshow("contours", contoursImg);

	Mat linesImage = Mat::zeros(src.size(), CV_8UC3);
	HoughLinesP(contoursImg, lines, 1, CV_PI / 180.0, accu,accu,0);
	for (size_t t = 0; t < lines.size(); t++)
	{
		Vec4i ln = lines[t];
		line(linesImage, Point(ln[0], ln[1]), Point(ln[2], ln[3]), Scalar(0, 0, 255), 2, 8, 0);//绘制直线
	}
	cout << "number of lines:"< height / 2.0 && ln[1] >height / 2.0 && deltah < accu - 1)
		{
			bottomLine = lines[i];
		}

		deltaw = abs(ln[2] - ln[0]); //计算宽度差(x2-x1)
		//leftLine
		if (ln[0] < height / 2.0 && ln[2] < height / 2.0 && deltaw < accu - 1)
		{
			leftLine = lines[i];
		}
		//rightLine
		if (ln[0] > width / 2.0 && ln[2] >width / 2.0 && deltaw < accu - 1)
		{
			rightLine = lines[i];
		}
	}

	// 打印四条线的坐标
	cout << "topLine : p1(x,y)= " << topLine[0] << "," << topLine[1] << "; p2(x,y)= " << topLine[2] <<  "," << topLine[3] << endl;
	cout << "bottomLine : p1(x,y)= " << bottomLine[0] << "," << bottomLine[1] << "; p2(x,y)= " << bottomLine[2] <<  "," << bottomLine[3] << endl;
	cout << "leftLine : p1(x,y)= " << leftLine[0] << "," << leftLine[1] << "; p2(x,y)= " << leftLine[2] <<  "," << leftLine[3] << endl;
	cout << "rightLine : p1(x,y)= " << rightLine[0] << "," << rightLine[1] << "; p2(x,y)= " << rightLine[2] << "," << rightLine[3] << endl;

	//拟合四条直线
	float k1, k2, k3, k4, c1, c2, c3, c4;
	k1 = float(topLine[3] - topLine[1]) / float(topLine[2] - topLine[0]);
	c1 = topLine[1] - k1*topLine[0];

	k2 = float(bottomLine[3] - bottomLine[1]) / float(bottomLine[2] - bottomLine[0]);
	c2 = bottomLine[1] - k2*bottomLine[0];

	k3 = float(leftLine[3] - leftLine[1]) / float(leftLine[2] - leftLine[0]);
	c3 = leftLine[1] - k3*leftLine[0];

	k4 = float(rightLine[3] - rightLine[1]) / float(rightLine[2] - rightLine[0]);
	c4 = rightLine[1] - k4*rightLine[0];

	//求四个角点,
	Point p1;//topLine  leftLine 左上角
	p1.x = static_cast(c1 - c3) / k3 - k1;
	p1.y = k1*p1.x + c1;

	Point p2;//topLine  rightLine 右上角
	p2.x = static_cast(c1 - c4) / k4 - k1;
	p2.y = k1*p2.x + c1;

	Point p3;//bottomLine  leftLine 左下角
	p3.x = static_cast(c2 - c3) / k3 - k2;
	p3.y = k2*p3.x + c2;

	Point p4;//bottomLine  rightLine 右下角
	p4.x = static_cast(c2 - c4) / k4 - k2;
	p4.y = k2*p4.x + c2;

	cout << "Point p1: (" << p1.x << "," << p1.y << ")" << endl;
	cout << "Point p2: (" << p2.x << "," << p2.y << ")" << endl;
	cout << "Point p3: (" << p3.x << "," << p3.y << ")" << endl;
	cout << "Point p4: (" << p4.x << "," << p4.y << ")" << endl;

	//显示四个点
	circle(linesImage, p1, 2, Scalar(0,255, 0), 2);
	circle(linesImage, p2, 2, Scalar(0,255, 0), 2);
	circle(linesImage, p3, 2, Scalar(0, 255, 0), 2);
	circle(linesImage, p4, 2, Scalar(0, 255, 0), 2);
	imshow("find four points", linesImage);

	//透视变换
	vector src_corners(4);
	src_corners[0] = p1;
	src_corners[1] = p2;
	src_corners[2] = p3;
	src_corners[3] = p4;

	Mat result_images = Mat::zeros(height*0.7, width*0.9, CV_8UC3);
	vector dst_corners(4);
	dst_corners[0] = Point(0, 0);
	dst_corners[1] = Point(result_images.cols, 0);
	dst_corners[2] = Point(0, result_images.rows);
	dst_corners[3] = Point(result_images.cols, result_images.rows);

	Mat warpmatrix = getPerspectiveTransform(src_corners, dst_corners); //获取透视变换矩阵
	warpPerspective(src, result_images, warpmatrix, result_images.size()); //透视变换
	imshow("final result", result_images);
	imwrite("D:/images/warpPerspective.png", result_images);
	waitKey(0);
	return 0;
}
控制台的输出
***** VIDEOINPUT LIBRARY - 0.1995 - TFW07 *****
contous.size:6
6
number of lines:5
topLine : p1(x,y)= 20,64; p2(x,y)= 487,56
bottomLine : p1(x,y)= 145,329; p2(x,y)= 361,332
leftLine : p1(x,y)= 13,75; p2(x,y)= 47,320
rightLine : p1(x,y)= 479,328; p2(x,y)= 497,66
Point p1: (11,64)
Point p2: (497,55)
Point p3: (47,327)
Point p4: (479,333)


