Neutron相关介绍
OpenStack Networking
网络:在实际的物理环境下,我们使用交换机或者集线器把多个计算机连接起来形成了网络。在Neutron的世界里,网络也是将多个不同的云主机连接起来。
子网:在实际的物理环境下,在一个网络中。我们可以将网络划分成多为逻辑子网。在Neutron的世界里,子网也是隶属于网络下的。
端口:在实际的物理环境下,每个子网或者网络,都有很多的端口,比如交换机端口来供计算机连接。在Neutron的世界端口也是隶属于子网下,云主机的网卡会对应到一个端口上。
路由器:在实际的网络环境下,不同网络或者不同逻辑子网之间如果需要进行通信,需要通过路由器进行路由。在Neutron的实际里路由也是这个作用。用来连接不同的网络或者子网。
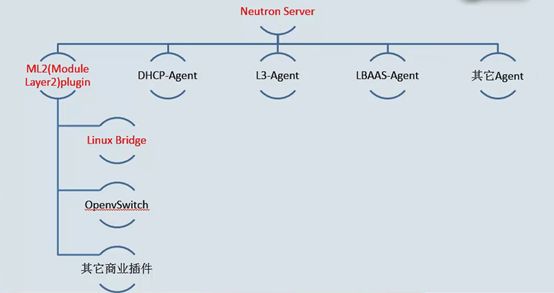
Neutron相关组件
单一平面网络的缺点:
存在单一网络瓶颈,缺乏可伸缩性。
缺乏合适的多租户隔离。
网络介绍
配置网络选项,分公共网络和私有网络
部署网络服务使用公共网络和私有网络两种架构中的一种来部署网络服务。
公共网络:采用尽可能简单的架构进行部署,只支持实例连接到公有网络(外部网络)。没有私有网络(个人网络),路由器以及浮动IP地址。
只有admin或者其他特权用户才可以管理公有网络。
私有网络:在公共网络的基础上多了layer3服务,支持实例连接到私有网络
本次实验使用公共网络
控制节点安装配置Neutron
1、 控制节点安装组件
[root@linux-node1 ~]# yum install openstack-neutron openstack-neutron-ml2   openstack-neutron-linuxbridge ebtables
Loaded plugins: fastestmirror
Loading mirror speeds from cached hostfile
 * base: mirrors.163.com
 * epel: mirror01.idc.hinet.net
 * extras: mirrors.163.com
 * updates: mirrors.163.com
Package 1:openstack-neutron-8.3.0-1.el7.noarch already installed and latest version
Package 1:openstack-neutron-ml2-8.3.0-1.el7.noarch already installed and latest version
Package 1:openstack-neutron-linuxbridge-8.3.0-1.el7.noarch already installed and latest version
Package ebtables-2.0.10-15.el7.x86_64 already installed and latest version
Nothing to do
[root@linux-node1 ~]#
编辑/etc/neutron/neutron.conf 文件并完成如下操作:
在 [database] 部分,配置数据库访问:
[database]
...
connection = mysql+pymysql://neutron:[email protected]/neutron
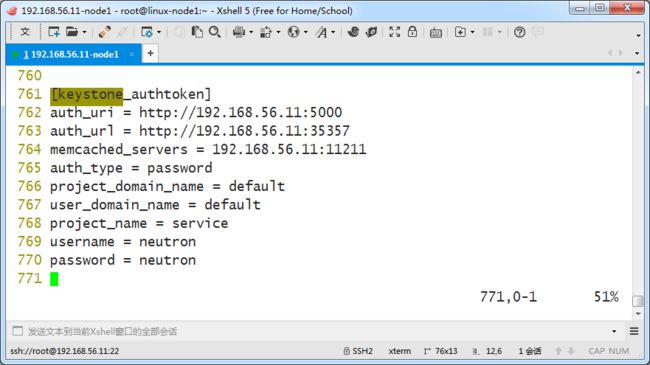
3、控制节点配置部分---keystone
在[DEFAULT]和[keystone_authtoken]部分,配置认证服务访问:
[DEFAULT]
...
auth_strategy = keystone
auth_uri = http://192.168.56.11:5000
auth_url = http://192.168.56.11:35357
memcached_servers = 192.168.56.11:11211
auth_type = password
project_domain_name = default
user_domain_name = default
project_name = service
username = neutron
password = neutron
4、控制节点配置部分---RabbitMQ
在 [DEFAULT] 和 [oslo_messaging_rabbit]部分,配置 RabbitMQ 消息队列的连接:
[DEFAULT]
...
rpc_backend = rabbit
[oslo_messaging_rabbit]
...
rabbit_host = controller
rabbit_userid = openstack
rabbit_password = openstack
5、控制节点配置部分---Neutron核心配置
在[DEFAULT]部分,启用ML2插件并禁用其他插件,等号后面不写,就表示禁用其它插件的意思
[DEFAULT]
...
core_plugin = ml2
service_plugins =
6、 控制节点配置部分---结合nova的配置
在[DEFAULT]和[nova]部分,配置网络服务来通知计算节点的网络拓扑变化
打开这两行的注释
意思是端口状态发生改变,通知nova
[DEFAULT]
...
notify_nova_on_port_status_changes = True
notify_nova_on_port_data_changes = True
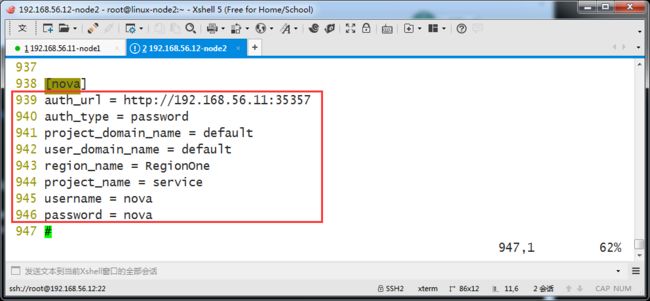
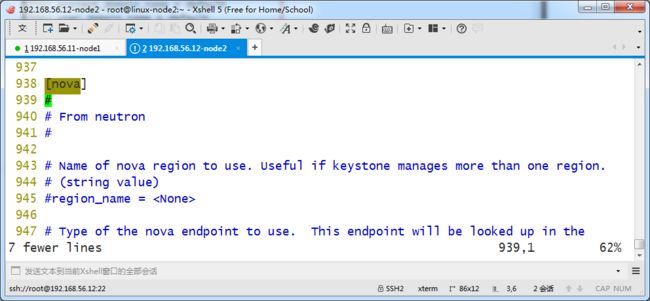
因为它需要使用nova的用户连接keystone做一些操作
auth_url = http://192.168.56.11:35357
auth_type = password
project_domain_name = default
user_domain_name = default
region_name = RegionOne
project_name = service
username = nova
password = nova
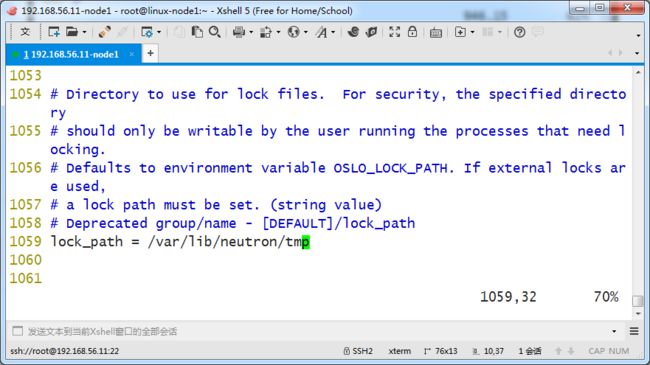
7、控制节点配置部分---结合锁路径配置
在 [oslo_concurrency] 部分,配置锁路径:
[oslo_concurrency]
...
lock_path = /var/lib/neutron/tmp
[root@linux-node1 ~]# grep -n '^[a-Z]' /etc/neutron/neutron.conf
27:auth_strategy = keystone
30:core_plugin = ml2
33:service_plugins =
137:notify_nova_on_port_status_changes = true
141:notify_nova_on_port_data_changes = true
511:rpc_backend = rabbit
684:connection = mysql+pymysql://neutron:[email protected]/neutron
762:auth_uri = http://192.168.56.11:5000
763:auth_url = http://192.168.56.11:35357
764:memcached_servers = 192.168.56.11:11211
765:auth_type = password
766:project_domain_name = default
767:user_domain_name = default
768:project_name = service
769:username = neutron
770:password = neutron
939:auth_url = http://192.168.56.11:35357
940:auth_type = password
941:project_domain_name = default
942:user_domain_name = default
943:region_name = RegionOne
944:project_name = service
945:username = nova
946:password = nova
1059:lock_path = /var/lib/neutron/tmp
1210:rabbit_host = 192.168.56.11
1216:rabbit_port = 5672
1228:rabbit_userid = openstack
1232:rabbit_password = openstack
[root@linux-node1 ~]#
9、控制节点配置 Modular Layer 2 (ML2) 插件
ML2是2层网络的配置,ML2插件使用Linuxbridge机制来为实例创建layer-2虚拟网络基础设施
编辑/etc/neutron/plugins/ml2/ml2_conf.ini文件并完成以下操作:
在[ml2]部分,启用flat和VLAN网络:
vim /etc/neutron/plugins/ml2/ml2_conf.ini
在[ml2]部分,禁用私有网络,设置为空就表示不使用
[ml2]
...
tenant_network_types =
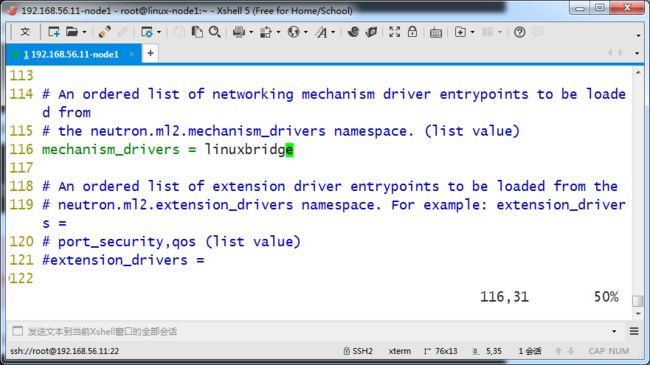
在[ml2]部分,启用Linuxbridge机制:
这个的作用是你告诉neutron使用哪几个插件创建网络,此时是linuxbridge
[ml2]
...
mechanism_drivers = linuxbridge
它是个列表,你可以写多个,比如再添加个openvswitch
在[ml2]部分,启用端口安全扩展驱动:
[ml2]
...
extension_drivers = port_security
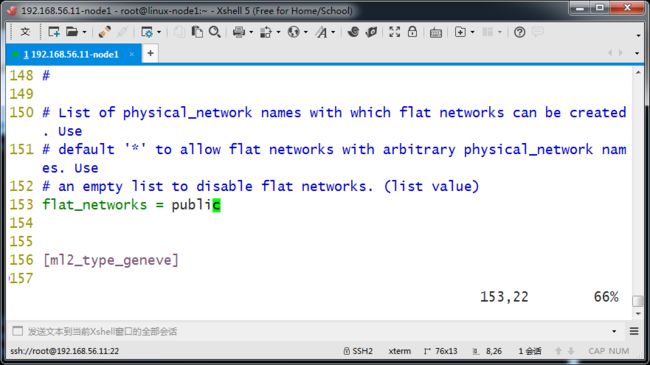
在[ml2_type_flat]部分,配置公共虚拟网络为flat网络,官方文档写的改为provider,我们改为flat_networks = public
[ml2_type_flat]
...
flat_networks = provider
在[securitygroup]部分,启用 ipset 增加安全组规则的高效性:
[securitygroup]
...
enable_ipset = True
[root@linux-node1 ~]# grep -n '^[a-Z]' /etc/neutron/plugins/ml2/ml2_conf.ini
107:type_drivers = flat,vlan,gre,vxlan,geneve
112:tenant_network_types =
116:mechanism_drivers = linuxbridge,openvswitch
121:extension_drivers = port_security
153:flat_networks = public
230:enable_ipset = true
[root@linux-node1 ~]#
11、控制节点配置Linuxbridge代理
Linuxbridge代理为实例建立layer-2虚拟网络并且处理安全组规则。
编辑/etc/neutron/plugins/ml2/linuxbridge_agent.ini文件并且完成以下操作:
在[linux_bridge]部分,将公共虚拟网络和公共物理网络接口对应起来:
将PUBLIC_INTERFACE_NAME替换为底层的物理公共网络接口
[linux_bridge]
physical_interface_mappings = provider:PROVIDER_INTERFACE_NAME
在[vxlan]部分,禁止VXLAN覆盖网络:
[vxlan]
enable_vxlan = False
在 [securitygroup]部分,启用安全组并配置 Linuxbridge iptables firewall driver:
[securitygroup]
...
enable_security_group = True
firewall_driver = neutron.agent.linux.iptables_firewall.IptablesFirewallDriver
查看更改了哪些配置
[root@linux-node1 ~]# grep -n '^[a-Z]' /etc/neutron/plugins/ml2/linuxbridge_agent.ini
138:physical_interface_mappings = public:eth0
151:firewall_driver = neutron.agent.linux.iptables_firewall.IptablesFirewallDriver
156:enable_security_group = true
171:enable_vxlan = False
[root@linux-node1 ~]#
12、控制节点配置DHCP代理
编辑/etc/neutron/dhcp_agent.ini文件并完成下面的操作:
在[DEFAULT]部分,配置Linuxbridge驱动接口,DHCP驱动并启用隔离元数据,这样在公共网络上的实例就可以通过网络来访问元数据
[DEFAULT]
...
interface_driver = neutron.agent.linux.interface.BridgeInterfaceDriver
dhcp_driver = neutron.agent.linux.dhcp.Dnsmasq
enable_isolated_metadata = True
[root@linux-node1 ~]# grep -n '^[a-Z]' /etc/neutron/dhcp_agent.ini
23:interface_driver = neutron.agent.linux.interface.BridgeInterfaceDriver
39:dhcp_driver = neutron.agent.linux.dhcp.Dnsmasq
48:enable_isolated_metadata = True
[root@linux-node1 ~]#
13、控制节点配置元数据代理
编辑/etc/neutron/metadata_agent.ini文件并完成以下操作:
在[DEFAULT] 部分,配置元数据主机以及共享密码:
[DEFAULT]
...
nova_metadata_ip = controller
metadata_proxy_shared_secret = METADATA_SECRET
用你为元数据代理设置的密码替换 METADATA_SECRET。下面的zyx是自定义的共享密钥
这个共享密钥,在nova里还要配置一遍,你要保持一致的
查看更改了哪些配置
[root@linux-node1 ~]# grep -n '^[a-Z]'  /etc/neutron/metadata_agent.ini
22:nova_metadata_ip = 192.168.56.11
34:metadata_proxy_shared_secret = zyx
[root@linux-node1 ~]#
14、在控制节点的nova上面配置neutron
下面配置的是neutron的keystone的认证地址。9696是neutron-server的端口
编辑/etc/nova/nova.conf文件并完成以下操作:
在[neutron]部分,配置访问参数,启用元数据代理并设置密码:
url = http://192.168.56.11:9696
auth_url = http://192.168.56.11:35357
auth_type = password
project_domain_name = default
user_domain_name = default
region_name = RegionOne
project_name = service
username = neutron
password = neutron
service_metadata_proxy = True
metadata_proxy_shared_secret = zyx
15、控制节点配置超链接
网络服务初始化脚本需要一个超链接 /etc/neutron/plugin.ini指向ML2插件配置文件/etc/neutron/plugins/ml2/ml2_conf.ini 如果超链接不存在,使用下面的命令创建它:
[root@linux-node1 ~]# ln -s /etc/neutron/plugins/ml2/ml2_conf.ini /etc/neutron/plugin.ini
[root@linux-node1 ~]#
su -s /bin/sh -c "neutron-db-manage --config-file /etc/neutron/neutron.conf --config-file /etc/neutron/plugins/ml2/ml2_conf.ini upgrade head" neutron
[root@linux-node1 ~]# su -s /bin/sh -c "neutron-db-manage --config-file /etc/neutron/neutron.conf  --config-file /etc/neutron/plugins/ml2/ml2_conf.ini upgrade head" neutron
No handlers could be found for logger "oslo_config.cfg"
INFO  [alembic.runtime.migration] Context impl MySQLImpl.
INFO  [alembic.runtime.migration] Will assume non-transactional DDL.
  Running upgrade for neutron ...
INFO  [alembic.runtime.migration] Context impl MySQLImpl.
INFO  [alembic.runtime.migration] Will assume non-transactional DDL.
INFO  [alembic.runtime.migration] Running upgrade  -> kilo, kilo_initial
INFO  [alembic.runtime.migration] Running upgrade kilo -> 354db87e3225, nsxv_vdr_metadata.py
INFO  [alembic.runtime.migration] Running upgrade 354db87e3225 -> 599c6a226151, neutrodb_ipam
INFO  [alembic.runtime.migration] Running upgrade 599c6a226151 -> 52c5312f6baf, Initial operations in support of address scopes
INFO  [alembic.runtime.migration] Running upgrade 52c5312f6baf -> 313373c0ffee, Flavor framework
INFO  [alembic.runtime.migration] Running upgrade 313373c0ffee -> 8675309a5c4f, network_rbac
INFO  [alembic.runtime.migration] Running upgrade 8675309a5c4f -> 45f955889773, quota_usage
INFO  [alembic.runtime.migration] Running upgrade 45f955889773 -> 26c371498592, subnetpool hash
INFO  [alembic.runtime.migration] Running upgrade 26c371498592 -> 1c844d1677f7, add order to dnsnameservers
INFO  [alembic.runtime.migration] Running upgrade 1c844d1677f7 -> 1b4c6e320f79, address scope support in subnetpool
INFO  [alembic.runtime.migration] Running upgrade 1b4c6e320f79 -> 48153cb5f051, qos db changes
INFO  [alembic.runtime.migration] Running upgrade 48153cb5f051 -> 9859ac9c136, quota_reservations
INFO  [alembic.runtime.migration] Running upgrade 9859ac9c136 -> 34af2b5c5a59, Add dns_name to Port
INFO  [alembic.runtime.migration] Running upgrade 34af2b5c5a59 -> 59cb5b6cf4d, Add availability zone
INFO  [alembic.runtime.migration] Running upgrade 59cb5b6cf4d -> 13cfb89f881a, add is_default to subnetpool
INFO  [alembic.runtime.migration] Running upgrade 13cfb89f881a -> 32e5974ada25, Add standard attribute table
INFO  [alembic.runtime.migration] Running upgrade 32e5974ada25 -> ec7fcfbf72ee, Add network availability zone
INFO  [alembic.runtime.migration] Running upgrade ec7fcfbf72ee -> dce3ec7a25c9, Add router availability zone
INFO  [alembic.runtime.migration] Running upgrade dce3ec7a25c9 -> c3a73f615e4, Add ip_version to AddressScope
INFO  [alembic.runtime.migration] Running upgrade c3a73f615e4 -> 659bf3d90664, Add tables and attributes to support external DNS integration
INFO  [alembic.runtime.migration] Running upgrade 659bf3d90664 -> 1df244e556f5, add_unique_ha_router_agent_port_bindings
INFO  [alembic.runtime.migration] Running upgrade 1df244e556f5 -> 19f26505c74f, Auto Allocated Topology - aka Get-Me-A-Network
INFO  [alembic.runtime.migration] Running upgrade 19f26505c74f -> 15be73214821, add dynamic routing model data
INFO  [alembic.runtime.migration] Running upgrade 15be73214821 -> b4caf27aae4, add_bgp_dragent_model_data
INFO  [alembic.runtime.migration] Running upgrade b4caf27aae4 -> 15e43b934f81, rbac_qos_policy
INFO  [alembic.runtime.migration] Running upgrade 15e43b934f81 -> 31ed664953e6, Add resource_versions row to agent table
INFO  [alembic.runtime.migration] Running upgrade 31ed664953e6 -> 2f9e956e7532, tag support
INFO  [alembic.runtime.migration] Running upgrade 2f9e956e7532 -> 3894bccad37f, add_timestamp_to_base_resources
INFO  [alembic.runtime.migration] Running upgrade 3894bccad37f -> 0e66c5227a8a, Add desc to standard attr table
INFO  [alembic.runtime.migration] Running upgrade kilo -> 30018084ec99, Initial no-op Liberty contract rule.
INFO  [alembic.runtime.migration] Running upgrade 30018084ec99 -> 4ffceebfada, network_rbac
INFO  [alembic.runtime.migration] Running upgrade 4ffceebfada -> 5498d17be016, Drop legacy OVS and LB plugin tables
INFO  [alembic.runtime.migration] Running upgrade 5498d17be016 -> 2a16083502f3, Metaplugin removal
INFO  [alembic.runtime.migration] Running upgrade 2a16083502f3 -> 2e5352a0ad4d, Add missing foreign keys
INFO  [alembic.runtime.migration] Running upgrade 2e5352a0ad4d -> 11926bcfe72d, add geneve ml2 type driver
INFO  [alembic.runtime.migration] Running upgrade 11926bcfe72d -> 4af11ca47297, Drop cisco monolithic tables
INFO  [alembic.runtime.migration] Running upgrade 4af11ca47297 -> 1b294093239c, Drop embrane plugin table
INFO  [alembic.runtime.migration] Running upgrade 1b294093239c -> 8a6d8bdae39, standardattributes migration
INFO  [alembic.runtime.migration] Running upgrade 8a6d8bdae39 -> 2b4c2465d44b, DVR sheduling refactoring
INFO  [alembic.runtime.migration] Running upgrade 2b4c2465d44b -> e3278ee65050, Drop NEC plugin tables
INFO  [alembic.runtime.migration] Running upgrade e3278ee65050 -> c6c112992c9, rbac_qos_policy
INFO  [alembic.runtime.migration] Running upgrade c6c112992c9 -> 5ffceebfada, network_rbac_external
INFO  [alembic.runtime.migration] Running upgrade 5ffceebfada -> 4ffceebfcdc, standard_desc
  OK
[root@linux-node1 ~]#
17、控制节点重启nova服务以及启动neutron服务
重启计算nova-api 服务,在控制节点上操作:
[root@linux-node1 ~]# systemctl restart openstack-nova-api.service
[root@linux-node1 ~]#
启动以下neutron相关服务,并设置开机启动
操作命令如下
 systemctl enable neutron-server.service \
  neutron-linuxbridge-agent.service neutron-dhcp-agent.service \
  neutron-metadata-agent.service


 systemctl start neutron-server.service \
  neutron-linuxbridge-agent.service neutron-dhcp-agent.service \
  neutron-metadata-agent.service
执行过程如下
[root@linux-node1 ~]# systemctl enable neutron-server.service  neutron-linuxbridge-agent.service neutron-dhcp-agent.service  neutron-metadata-agent.service
Created symlink from /etc/systemd/system/multi-user.target.wants/neutron-server.service to /usr/lib/systemd/system/neutron-server.service.
Created symlink from /etc/systemd/system/multi-user.target.wants/neutron-linuxbridge-agent.service to /usr/lib/systemd/system/neutron-linuxbridge-agent.service.
Created symlink from /etc/systemd/system/multi-user.target.wants/neutron-dhcp-agent.service to /usr/lib/systemd/system/neutron-dhcp-agent.service.
Created symlink from /etc/systemd/system/multi-user.target.wants/neutron-metadata-agent.service to /usr/lib/systemd/system/neutron-metadata-agent.service.
[root@linux-node1 ~]#


[root@linux-node1 ~]# systemctl start neutron-server.service  neutron-linuxbridge-agent.service neutron-dhcp-agent.service   neutron-metadata-agent.service
[root@linux-node1 ~]#
官方文档提到下面,我们用不到,不用操作,这里以删除线标识
对于网络选项2,同样启用layer-3服务并设置其随系统自启动
# systemctl enable neutron-l3-agent.service
# systemctl start neutron-l3-agent.service
[root@linux-node1 ~]# netstat -nltp
Active Internet connections (only servers)
Proto Recv-Q Send-Q Local Address           Foreign Address         State       PID/Program name
tcp        0      0 0.0.0.0:8774            0.0.0.0:*               LISTEN      21243/python2
tcp        0      0 0.0.0.0:8775            0.0.0.0:*               LISTEN      21243/python2
tcp        0      0 0.0.0.0:9191            0.0.0.0:*               LISTEN      1157/python2
tcp        0      0 0.0.0.0:25672           0.0.0.0:*               LISTEN      1154/beam.smp
tcp        0      0 0.0.0.0:5000            0.0.0.0:*               LISTEN      1175/httpd
tcp        0      0 0.0.0.0:3306            0.0.0.0:*               LISTEN      1613/mysqld
tcp        0      0 0.0.0.0:11211           0.0.0.0:*               LISTEN      1162/memcached
tcp        0      0 0.0.0.0:9292            0.0.0.0:*               LISTEN      1158/python2
tcp        0      0 0.0.0.0:80              0.0.0.0:*               LISTEN      1175/httpd
tcp        0      0 0.0.0.0:4369            0.0.0.0:*               LISTEN      1/systemd
tcp        0      0 192.168.122.1:53        0.0.0.0:*               LISTEN      1757/dnsmasq
tcp        0      0 0.0.0.0:22              0.0.0.0:*               LISTEN      1159/sshd
tcp        0      0 0.0.0.0:15672           0.0.0.0:*               LISTEN      1154/beam.smp
tcp        0      0 0.0.0.0:35357           0.0.0.0:*               LISTEN      1175/httpd
tcp        0      0 0.0.0.0:9696            0.0.0.0:*               LISTEN      21324/python2
tcp        0      0 0.0.0.0:6080            0.0.0.0:*               LISTEN      13967/python2
tcp6       0      0 :::5672                 :::*                    LISTEN      1154/beam.smp
tcp6       0      0 :::22                   :::*                    LISTEN      1159/sshd
[root@linux-node1 ~]#
18、控制节点创建服务实体和注册端点
在keystone上创建服务和注册端点
创建neutron服务实体:
[root@linux-node1 ~]# source admin-openstack.sh
[root@linux-node1 ~]# openstack service create --name neutron  --description "OpenStack Networking" network
+-------------+----------------------------------+
| Field       | Value                            |
+-------------+----------------------------------+
| description | OpenStack Networking             |
| enabled     | True                             |
| id          | bc2a5e5fbfed4d6f8d36c972438bd6d8 |
| name        | neutron                          |
| type        | network                          |
+-------------+----------------------------------+
[root@linux-node1 ~]#
[root@linux-node1 ~]# openstack endpoint create --region RegionOne network public http://192.168.56.11:9696
+--------------+----------------------------------+
| Field        | Value                            |
+--------------+----------------------------------+
| enabled      | True                             |
| id           | fed066647ffa40d1879bf438215cf0c2 |
| interface    | public                           |
| region       | RegionOne                        |
| region_id    | RegionOne                        |
| service_id   | bc2a5e5fbfed4d6f8d36c972438bd6d8 |
| service_name | neutron                          |
| service_type | network                          |
| url          | http://192.168.56.11:9696        |
+--------------+----------------------------------+
[root@linux-node1 ~]#
创建internal端点
[root@linux-node1 ~]# openstack endpoint create --region RegionOne  network internal http://192.168.56.11:9696
+--------------+----------------------------------+
| Field        | Value                            |
+--------------+----------------------------------+
| enabled      | True                             |
| id           | 1ee57aced55540929045be8bef12617b |
| interface    | internal                         |
| region       | RegionOne                        |
| region_id    | RegionOne                        |
| service_id   | bc2a5e5fbfed4d6f8d36c972438bd6d8 |
| service_name | neutron                          |
| service_type | network                          |
| url          | http://192.168.56.11:9696        |
+--------------+----------------------------------+
[root@linux-node1 ~]#
创建admin端点
[root@linux-node1 ~]# openstack endpoint create --region RegionOne  network admin http://192.168.56.11:9696
+--------------+----------------------------------+
| Field        | Value                            |
+--------------+----------------------------------+
| enabled      | True                             |
| id           | 37686201b1ec4dbd894ab4229f7aa202 |
| interface    | admin                            |
| region       | RegionOne                        |
| region_id    | RegionOne                        |
| service_id   | bc2a5e5fbfed4d6f8d36c972438bd6d8 |
| service_name | neutron                          |
| service_type | network                          |
| url          | http://192.168.56.11:9696        |
+--------------+----------------------------------+
[root@linux-node1 ~]#
[root@linux-node1 ~]# neutron agent-list
+-----------------------+--------------------+----------------------+-------------------+-------+----------------+------------------------+
| id                    | agent_type         | host                 | availability_zone | alive | admin_state_up | binary                 |
+-----------------------+--------------------+----------------------+-------------------+-------+----------------+------------------------+
| 6da34bbb-edc8-40e5-a8 | DHCP agent         | linux-node1.nmap.com | nova              | :-)   | True           | neutron-dhcp-agent     |
| 85-61c1d80937b7       |                    |                      |                   |       |                |                        |
| 92d765f2-3519-458f-93 | Linux bridge agent | linux-node1.nmap.com |                   | :-)   | True           | neutron-linuxbridge-   |
| 82-148287317e16       |                    |                      |                   |       |                | agent                  |
| bede206f-aabf-4265    | Metadata agent     | linux-node1.nmap.com |                   | :-)   | True           | neutron-metadata-agent |
| -8e4f-bb1ad53af906    |                    |                      |                   |       |                |                        |
+-----------------------+--------------------+----------------------+-------------------+-------+----------------+------------------------+
[root@linux-node1 ~]#
1、安装组件
[root@linux-node2 ~]# yum install openstack-neutron-linuxbridge ebtables ipset -y
Loaded plugins: fastestmirror
Loading mirror speeds from cached hostfile
 * base: mirrors.aliyun.com
 * epel: mirrors.tuna.tsinghua.edu.cn
 * extras: mirrors.aliyun.com
 * updates: mirrors.aliyun.com
Package 1:openstack-neutron-linuxbridge-8.3.0-1.el7.noarch already installed and latest version
Package ebtables-2.0.10-15.el7.x86_64 already installed and latest version
Package ipset-6.19-6.el7.x86_64 already installed and latest version
Nothing to do
[root@linux-node2 ~]#
配置通用组件
Networking 通用组件的配置包括认证机制、消息队列和插件。
/etc/neutron/neutron.conf
配置网络选项
配置Linuxbridge代理
/etc/neutron/plugins/ml2/linuxbridge_agent.ini
文档连接可以参照
https://docs.openstack.org/mitaka/zh_CN/install-guide-rdo/neutron-compute-install-option1.html
因为计算节点和控制节点neutron配置相似,可以在控制节点配置文件基础上完善下
[root@linux-node1 ~]# rsync -avz /etc/neutron/neutron.conf [email protected]:/etc/neutron/
[email protected]'s password:
sending incremental file list
neutron.conf

sent 86 bytes  received 487 bytes  163.71 bytes/sec
total size is 53140  speedup is 92.74
[root@linux-node1 ~]#
2、计算节点更改配置
3、查看更改后的配置
[root@linux-node2 ~]# vim /etc/neutron/neutron.conf
[root@linux-node2 ~]# grep -n '^[a-Z]' /etc/neutron/neutron.conf
27:auth_strategy = keystone
511:rpc_backend = rabbit
762:auth_uri = http://192.168.56.11:5000
763:auth_url = http://192.168.56.11:35357
764:memcached_servers = 192.168.56.11:11211
765:auth_type = password
766:project_domain_name = default
767:user_domain_name = default
768:project_name = service
769:username = neutron
770:password = neutron
1051:lock_path = /var/lib/neutron/tmp
1202:rabbit_host = 192.168.56.11
1208:rabbit_port = 5672
1220:rabbit_userid = openstack
1224:rabbit_password = openstack
[root@linux-node2 ~]#
4、计算节点更改nova主配置文件
编辑/etc/nova/nova.conf文件并完成下面的操作:
在[neutron] 部分,配置访问参数:
[neutron]
...
url = http://192.168.56.11:9696
auth_url = http://192.168.56.11:35357
auth_type = password
project_domain_name = default
user_domain_name = default
region_name = RegionOne
project_name = service
username = neutron
password = neutron
复制这些行
5、计算节点配置Linuxbridge代理
(1)Linuxbridge代理为实例建立layer-2虚拟网络并且处理安全组规则。
编辑/etc/neutron/plugins/ml2/linuxbridge_agent.ini文件并且完成以下操作:
在[linux_bridge]部分,将公共虚拟网络和公共物理网络接口对应起来:
[linux_bridge]
physical_interface_mappings = provider:PROVIDER_INTERFACE_NAME
将PUBLIC_INTERFACE_NAME 替换为底层的物理公共网络接口
(2)在[vxlan]部分,禁止VXLAN覆盖网络:
[vxlan]
enable_vxlan = False
(2)在 [securitygroup]部分,启用安全组并配置 Linuxbridge iptables firewall driver:
[securitygroup]
...
enable_security_group = True
firewall_driver = neutron.agent.linux.iptables_firewall.IptablesFirewallDriver
[root@linux-node1 ~]# rsync -avz /etc/neutron/plugins/ml2/linuxbridge_agent.ini [email protected]:/etc/neutron/plugins/ml2/
[email protected]'s password:
sending incremental file list

sent 56 bytes  received 12 bytes  27.20 bytes/sec
total size is 7924  speedup is 116.53
[root@linux-node1 ~]#
[root@linux-node2 ~]# grep -n '^[a-Z]' /etc/neutron/plugins/ml2/linuxbridge_agent.ini
138:physical_interface_mappings = public:eth0
151:firewall_driver = neutron.agent.linux.iptables_firewall.IptablesFirewallDriver
156:enable_security_group = true
171:enable_vxlan = False
[root@linux-node2 ~]#
7、重启nova服务并启动neutron服务
因为改动了nova主配置文件,需要重启nova服务
同时启动neutron服务,并设置开机启动
[root@linux-node2 ~]# systemctl restart openstack-nova-compute.service
[root@linux-node2 ~]# systemctl enable neutron-linuxbridge-agent.service
Created symlink from /etc/systemd/system/multi-user.target.wants/neutron-linuxbridge-agent.service to /usr/lib/systemd/system/neutron-linuxbridge-agent.service.
[root@linux-node2 ~]# systemctl start neutron-linuxbridge-agent.service
[root@linux-node2 ~]#
8、控制节点检查
看到多了个计算节点Linux bridge agent
[root@linux-node1 ~]# source admin-openstack.sh
[root@linux-node1 ~]# neutron agent-list
+-----------------------+--------------------+----------------------+-------------------+-------+----------------+------------------------+
| id                    | agent_type         | host                 | availability_zone | alive | admin_state_up | binary                 |
+-----------------------+--------------------+----------------------+-------------------+-------+----------------+------------------------+
| 1451fc85-d7db-4034-8f | Linux bridge agent | linux-node2.nmap.com |                   | :-)   | True           | neutron-linuxbridge-   |
| c5-38375b442826       |                    |                      |                   |       |                | agent                  |
| 6da34bbb-edc8-40e5-a8 | DHCP agent         | linux-node1.nmap.com | nova              | :-)   | True           | neutron-dhcp-agent     |
| 85-61c1d80937b7       |                    |                      |                   |       |                |                        |
| 92d765f2-3519-458f-93 | Linux bridge agent | linux-node1.nmap.com |                   | :-)   | True           | neutron-linuxbridge-   |
| 82-148287317e16       |                    |                      |                   |       |                | agent                  |
| bede206f-aabf-4265    | Metadata agent     | linux-node1.nmap.com |                   | :-)   | True           | neutron-metadata-agent |
| -8e4f-bb1ad53af906    |                    |                      |                   |       |                |                        |
+-----------------------+--------------------+----------------------+-------------------+-------+----------------+------------------------+
[root@linux-node1 ~]#
下面映射,可以理解为给网卡起个别名,便于区分用途
同时你的物理网卡名字必须是eth0,对应上配置文件。或者说配置文件对用上实际的网卡名
[root@linux-node2 ~]# grep physical_interface_mappings /etc/neutron/plugins/ml2/linuxbridge_agent.ini
physical_interface_mappings = public:eth0
[root@linux-node2 ~]#

