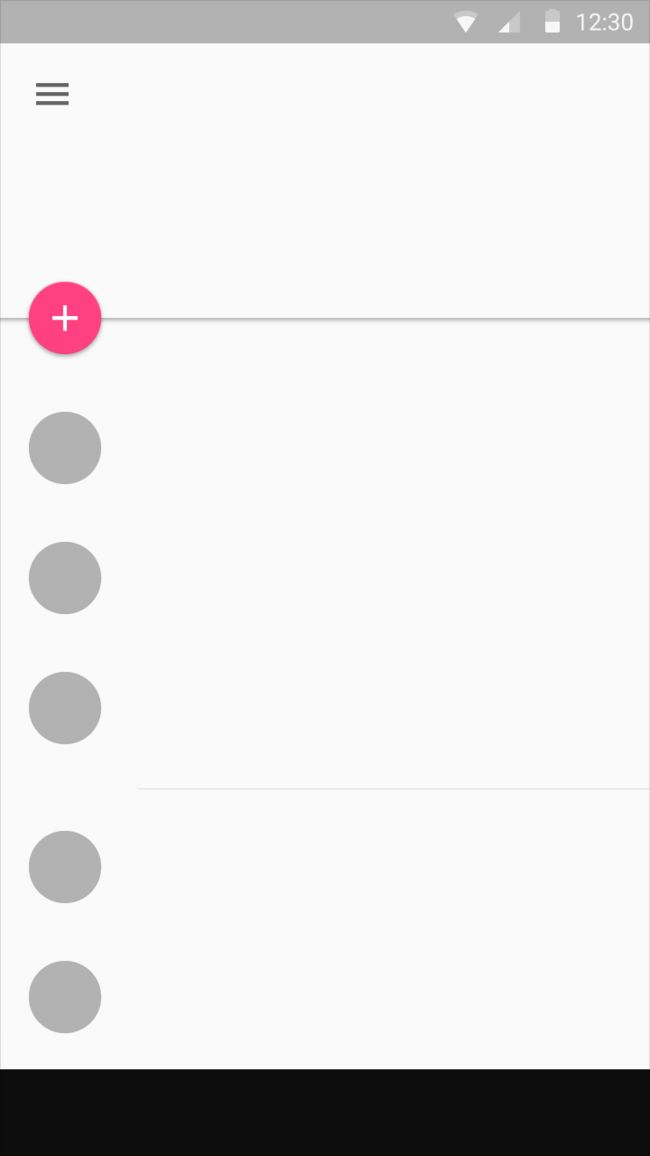
浮动操作按钮详解
http://guides.codepath.com/android/Floating-Action-Buttons
http://www.jcodecraeer.com/a/anzhuokaifa/androidkaifa/2015/0718/3197.html
原文:Floating Action Buttons
概览
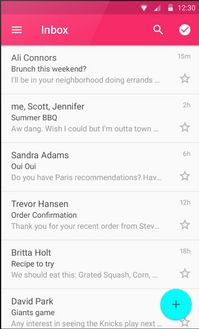
浮动操作按钮 (简称 FAB) 是: “一个特殊的promoted操作案例。因为一个浮动在UI之上的圆形图标而显得格外突出,同时它还具有特殊的手势行为”
比如,如果我们在使用email app,在列出收件箱邮件列表的时候,promoted操作可能就是新建一封邮件。
浮动操作按钮代表一个屏幕之内最基本的额操作。关于FAB按钮的更多信息和使用案例请参考谷歌的官方设计规范。
用法
谷歌在2015年的 I/O大会上公布了可以创建浮动操作按钮的支持库,但是在这之前,则须使用诸如makovkastar/FloatingActionButton 和 futuresimple/android-floating-action-button 这样的第三方库。
Design Support Library
首先确保你按照Design Support Library中的指导来配置。
现在你可以把android.support.design.widget.FloatingActionButton添加到布局中了。其中src属性指的是浮动按钮所要的图标。
|
1
2
3
4
5
|
android:src=
"@drawable/ic_done"
app:fabSize=
"normal"
android:layout_width=
"wrap_content"
android:layout_height=
"wrap_content"
/>
|
另外,如果在布局的最顶部声明了xmlns:app="http://schemas.android.com/apk/res-auto命名空间,你还可以定义一个fabSize属性,该属性决定按钮是正常大小还是小号。
放置浮动操作按钮需要使用CoordinatorLayout。CoordinatorLayout帮助我们协调它所包含的子view之间的交互,这一点在我们后面讲如何根据滚动的变化让按钮动画隐藏与显示的时候有用。但是目前我们能从CoordinatorLayout得到的好处是它可以让一个元素浮动在另一个元素之上。我们只需让FloatingActionButton和ListView被包含在CoordinatorLayout中,然后使用layout_anchor 与 layout_anchorGravity 属性就可以了。
|
1
2
3
4
5
6
7
8
9
10
11
12
13
14
15
16
17
18
19
20
21
|
android:id=
"@+id/main_content"
xmlns:android=
"http://schemas.android.com/apk/res/android"
xmlns:app=
"http://schemas.android.com/apk/res-auto"
android:layout_width=
"match_parent"
android:layout_height=
"match_parent"
>
android:id=
"@+id/lvToDoList"
android:layout_width=
"match_parent"
android:layout_height=
"match_parent"
>
android:layout_width=
"wrap_content"
android:layout_height=
"wrap_content"
android:layout_gravity=
"bottom|right"
android:layout_margin=
"16dp"
android:src=
"@drawable/ic_done"
app:layout_anchor=
"@id/lvToDoList"
app:layout_anchorGravity=
"bottom|right|end"
/>
|
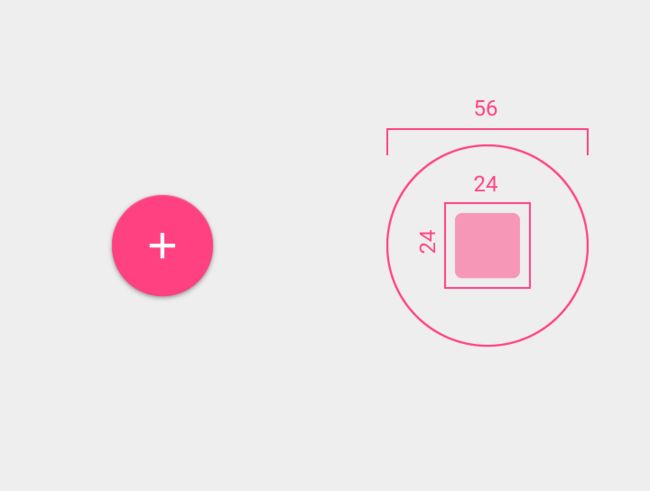
按钮应该处于屏幕的右下角。建议在手机上下方的margin设置为16dp而平板上设置为24dp。上面的例子中,使用的是16dp。
而根据谷歌的设计规范,drawable的尺寸应该是24dp。
浮动操作按钮的动画
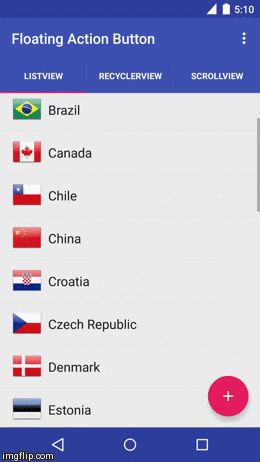
当用户往下滚动一个页面,浮动操作按钮应该消失,一旦向上滚动,则重现。
要让这个过程有动画效果,你需要利用好CoordinatorLayout,CoordinatorLayout帮助协调定义在里面的view之间的动画。
用RecyclerView替换ListViews
目前,你需要用RecyclerView来替换ListViews。就如这节所描述的,RecyclerView是ListViews的继承者。根据谷歌的这篇文章所讲的,不支持CoordinatorLayout和ListView一起使用。你可以查看这篇指南,它帮助你过渡到RecyclerView。
|
1
2
3
4
5
|
android:id=
"@+id/lvToDoList"
android:layout_width=
"match_parent"
android:layout_height=
"match_parent"
|
同时你还必须把RecyclerView升级到v22版本,之前的v21不支持与CoordinatorLayout一起工作,确保你的build.gradle 文件是这样的:
|
1
|
compile
'com.android.support:recyclerview-v7:22.2.0'
|
使用CoordinatorLayout
接下来,你需要现为浮动操作按钮实现CoordinatorLayout Behavior。这个类用于定义按钮该如何响应包含在同一CoordinatorLayout之内的其它view。
创建一个继承自 FloatingActionButton.Behavior 名叫ScrollAwareFABBehavior.java的类。目前浮动操作按钮默认的behavior是为Snackbar让出空间,就如这个视频中的效果。
我们想继承这个behavior,暗示我们希望处理垂直方向上的滚动事件:
|
1
2
3
4
5
6
7
8
9
|
public class ScrollAwareFABBehavior extends FloatingActionButton.Behavior {
@Override
public boolean onStartNestedScroll(CoordinatorLayout coordinatorLayout,
FloatingActionButton child, View directTargetChild, View target, int nestedScrollAxes) {
return
nestedScrollAxes == ViewCompat.SCROLL_AXIS_VERTICAL ||
super
.onStartNestedScroll(coordinatorLayout, child, directTargetChild, target,
nestedScrollAxes);
}}
|
因为这个类要处理滚动,另外一个onNestedScroll() 方法将被调用,我们可以检查Y的位置,并决定按钮是否动画进入或退出:
|
1
2
3
4
5
6
7
8
9
10
11
12
13
14
15
16
17
|
public class ScrollAwareFABBehavior extends FloatingActionButton.Behavior {
// ...
@Override
public void onNestedScroll(CoordinatorLayout coordinatorLayout, FloatingActionButton child,
View target, int dxConsumed, int dyConsumed, int dxUnconsumed, int dyUnconsumed) {
super
.onNestedScroll(coordinatorLayout, child, target, dxConsumed, dyConsumed, dxUnconsumed,
dyUnconsumed);
if
(dyConsumed > 0 && !
this
.mIsAnimatingOut && child.getVisibility() == View.VISIBLE) {
animateOut(child);
}
else
if
(dyConsumed < 0 && child.getVisibility() != View.VISIBLE) {
animateIn(child);
}
}
// ...}
|
因为FloatingActionButton.Behavior的基类已经有了animateIn() 和 animateOut()方法,同时它也设置了一个私有变量mIsAnimatingOut,这些方法和变量都是私有的,所以现在我们需要重新实现这些动画方法。
|
1
2
3
4
5
6
7
8
9
10
11
12
13
14
15
16
17
18
19
20
21
22
23
24
25
26
27
28
29
30
31
32
33
34
35
36
37
38
39
40
41
42
43
44
45
46
47
48
49
50
51
52
53
54
55
56
57
58
59
60
61
62
63
64
|
public class ScrollAwareFABBehavior extends FloatingActionButton.Behavior {
private static final android.view.animation.Interpolator INTERPOLATOR =
new
FastOutSlowInInterpolator();
private boolean mIsAnimatingOut =
false
;
// Same animation that FloatingActionButton.Behavior uses to
// hide the FAB when the AppBarLayout exits
private void animateOut(final FloatingActionButton button) {
if
(Build.VERSION.SDK_INT >= 14) {
ViewCompat.animate(button).scaleX(0.0F).scaleY(0.0F).alpha(0.0F)
.setInterpolator(INTERPOLATOR).withLayer()
.setListener(
new
ViewPropertyAnimatorListener() {
public void onAnimationStart(View view) {
ScrollAwareFABBehavior.
this
.mIsAnimatingOut =
true
;
}
public void onAnimationCancel(View view) {
ScrollAwareFABBehavior.
this
.mIsAnimatingOut =
false
;
}
public void onAnimationEnd(View view) {
ScrollAwareFABBehavior.
this
.mIsAnimatingOut =
false
;
view.setVisibility(View.GONE);
}
}).start();
}
else
{
Animation anim = AnimationUtils.loadAnimation(button.getContext(), R.anim.fab_out);
anim.setInterpolator(INTERPOLATOR);
anim.setDuration(200L);
anim.setAnimationListener(
new
Animation.AnimationListener() {
public void onAnimationStart(Animation animation) {
ScrollAwareFABBehavior.
this
.mIsAnimatingOut =
true
;
}
public void onAnimationEnd(Animation animation) {
ScrollAwareFABBehavior.
this
.mIsAnimatingOut =
false
;
button.setVisibility(View.GONE);
}
@Override
public void onAnimationRepeat(final Animation animation) {
}
});
button.startAnimation(anim);
}
}
// Same animation that FloatingActionButton.Behavior
// uses to show the FAB when the AppBarLayout enters
private void animateIn(FloatingActionButton button) {
button.setVisibility(View.VISIBLE);
if
(Build.VERSION.SDK_INT >= 14) {
ViewCompat.animate(button).scaleX(1.0F).scaleY(1.0F).alpha(1.0F)
.setInterpolator(INTERPOLATOR).withLayer().setListener(
null
)
.start();
}
else
{
Animation anim = AnimationUtils.loadAnimation(button.getContext(), R.anim.fab_in);
anim.setDuration(200L);
anim.setInterpolator(INTERPOLATOR);
button.startAnimation(anim);
}
}
}
|
最后一步就是把这个CoordinatorLayout Behavior与浮动操作按钮联系起来。我们可以在xml的自定义属性pp:layout_behavior中定义它:
|
1
2
|
app:layout_behavior=
"com.codepath.floatingactionbuttontest.ScrollAwareFABBehavior"
/>
|
因为我们是在xml中静态的定义这个behavior,为了让 layout inflation顺利进行,我们必须实现一个构造函数。
|
1
2
3
4
5
6
7
8
|
public class ScrollAwareFABBehavior extends FloatingActionButton.Behavior {
// ...
public ScrollAwareFABBehavior(Context context, AttributeSet attrs) {
super
();
}
// ...}
|
如果你忘记实现这个方法,你会看到“Could not inflate Behavior subclass”错误信息。完整的用法可以看看这个example code 。
注:通常,当我们实现CoordinatorLayout behavior的时候,我们需要实现ayoutDependsOn() 和 onDependentViewChanged(),它们用于跟踪CoordinatorLayout中其他view的变化。不过既然我们只需要监控滚动变化,我们就直接使用为浮动操作按钮定义的现成behavior,就如这篇博客讨论的,这个behavior现在被实现来跟踪Snackbar和AppBarLayout的变化。
注意这里有一个已知的bug :在和RecyclerView使用的时候,如果滚动过快,会触发NullPointerException,文档在这里。该问题会在这个库的下一版本被修复。
使用FloatingActionButton (第三方)
使用makovkastar/FloatingActionButton 库可以让浮动操作按钮的设置变的非常简单。可以参考library 文档 以及例子源码 。
First, add as a dependency to your app/build.gradle:
首先,在app/build.gradle:中添加一个依赖:
|
1
2
3
|
dependencies {
compile
'com.melnykov:floatingactionbutton:1.2.0'
}
|
接下来,在布局中添加com.melnykov.fab.FloatingActionButton 。记得在根布局中属性中添加xmlns:fab
|
1
2
3
4
5
6
7
8
9
10
11
12
13
14
15
16
17
18
19
20
21
22
23
|
xmlns:fab=
"http://schemas.android.com/apk/res-auto"
android:layout_width=
"match_parent"
android:layout_height=
"match_parent"
>
android:id=
"@android:id/list"
android:layout_width=
"match_parent"
android:layout_height=
"match_parent"
/>
android:id=
"@+id/fab"
android:layout_width=
"wrap_content"
android:layout_height=
"wrap_content"
android:layout_gravity=
"bottom|right"
android:layout_margin=
"16dp"
android:src=
"@drawable/ic_action_content_new"
fab:fab_type=
"normal"
fab:fab_shadow=
"true"
fab:fab_colorNormal=
"@color/primary"
fab:fab_colorPressed=
"@color/primary_pressed"
fab:fab_colorRipple=
"@color/ripple"
/>
|
依附到list
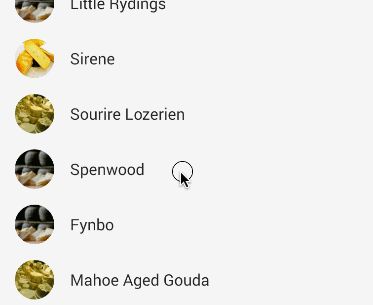
接下来,我们可以选择将FAB和一个ListView, ScrollView 或者 RecyclerView 关联起来,这样按钮就会随着list的向下滚动而隐藏,向上滚动而重现:
|
1
2
3
|
ListView listView = (ListView) findViewById(android.R.id.list);
FloatingActionButton fab = (FloatingActionButton) findViewById(R.id.fab);
fab.attachToListView(listView);
// or attachToRecyclerView
|
我们可以使用fab.attachToRecyclerView(recyclerView)来依附到一个RecyclerView,或者使用fab.attachToScrollView(scrollView)来依附到一个ScrollView。
调整按钮类型
浮动操作按钮有两种大小:默认的,这应该是最常用的情况,以及mini的,这应该只用于衔接屏幕上的其他元素。
注:我认为下图这种使用实在是太鸡肋了。
我可以把FAB的按钮类型调整为“正常”或者“mini”
|
1
2
3
|
...
fab:fab_type=
"mini"
/>
|
FAB的显示和隐藏
分别显示和隐藏按钮:
|
1
2
3
4
5
6
|
// 带动画的显示和隐藏
fab.show();
fab.hide();
// 不带动画的
fab.show(
false
);
fab.hide(
false
);
|
监听滚动事件
我们可以监听所关联的list的滚动事件,以管理FAB的状态:
|
1
2
3
4
5
6
7
8
9
10
11
12
13
14
15
16
17
18
19
20
21
22
23
|
FloatingActionButton fab = (FloatingActionButton) root.findViewById(R.id.fab);
fab.attachToListView(list,
new
ScrollDirectionListener() {
@Override
public void onScrollDown() {
Log.d(
"ListViewFragment"
,
"onScrollDown()"
);
}
@Override
public void onScrollUp() {
Log.d(
"ListViewFragment"
,
"onScrollUp()"
);
}
},
new
AbsListView.OnScrollListener() {
@Override
public void onScrollStateChanged(AbsListView view, int scrollState) {
Log.d(
"ListViewFragment"
,
"onScrollStateChanged()"
);
}
@Override
public void onScroll(AbsListView view, int firstVisibleItem, int visibleItemCount,
int totalItemCount) {
Log.d(
"ListViewFragment"
,
"onScroll()"
);
}
});
|
手动实现
除了使用库之外,我们还可以自己开发动操作按钮。关于手动实现浮动操作按钮,可以查看big nerd ranch guide 以及 survivingwithandroid walkthrough。
