UR5+robotiq_85_gripper GAZEBO模拟视觉抓取平台仿真-1
由于疫情原因不能进入实验室,遂学习在仿真环境gazebo下利用UR5机械臂搭建模拟平台,此模拟平台可以用于UR5机械臂通用视觉抓取平台。以下是个人总结一些观点,仅供参考。
1. 环境搭建
-
世界环境
参考网址:http://gazebosim.org/tutorials?cat=build_world
作为视觉抓取环境,我选了一个桌子作为抓取平台和三个带颜色的方形物块作为抓取对象,同时我给UR5机械臂加了一个基座。其实我们可以根据根据自己需求搭建自己的环境,但是这些模型又是怎么产生的呢,可以参照上面参考网址进行了解。当然本身官网已经有了大量模型,我们直接拿来用。
gazebo模型数据集网址:https://github.com/osrf/gazebo_models
世界环境的搭建,主要是在ur_icam_gazebo的worlds文件下进行,它本身语言的含义可以通过简单字面意思去知道模型位置,大小,摩擦力特性等,这里说一下这些模型的默认搜索位置应该是在/home/×××/.gazebo/models下,默认是一个隐藏文件,需要在home目录下,同时按ctrl+h来显示隐藏文件.gazebo。
由于程序太长,这里我不会贴出来,后面会有相关的链接。 -
模型环境
首先我们需要准备好的UR5本身的官方包。相机这里我选用了kinect_V2作为深度相机用于视觉采集,然后手抓方面我选择了robotiq_85_gripper二指手抓,这里的深度相机和手抓是可以去更换的,当然需要重新编写URDF或xacro文件来进行配置。
这里我可能会疑问我怎么把UR5机械臂设置成如下默认位置,以及相机位置的选择,怎么把手抓和相机,机械臂三者结合到一块。
1,首先设置UR5机械臂的位置,我是在gazebo启动的ur5.launch文件下,首先设置了暂停模式
然后利用gazebo_ros的spawn_gazebo_model节点获取了关节位置,这样可以修改UR5的其实位置和姿态
最后启动暂停的gazebo文件,便可以获得如下的初始位姿。
![]()
2,我是先在ur5_single_arm.urdf.xacro文件下,确定了世界坐标与UR5基座标的关系后,然后在相机的urdf文件中,又确立了相机坐标与世界坐标的关系,引入到模型中。
ur5_single_arm.urdf.xacro
ur5_single_arm.urdf.xacro中
3,第三个问题主要是在robotiq_85_gripper.urdf.xacro文件下
我将三个urdf文件进行了声明,然后我找的包本身已经把手抓和机械臂在这个文件中结合到一块,相机的话我第二个问题有提到
根据上面所说的我搭建了自己的模拟环境如下:
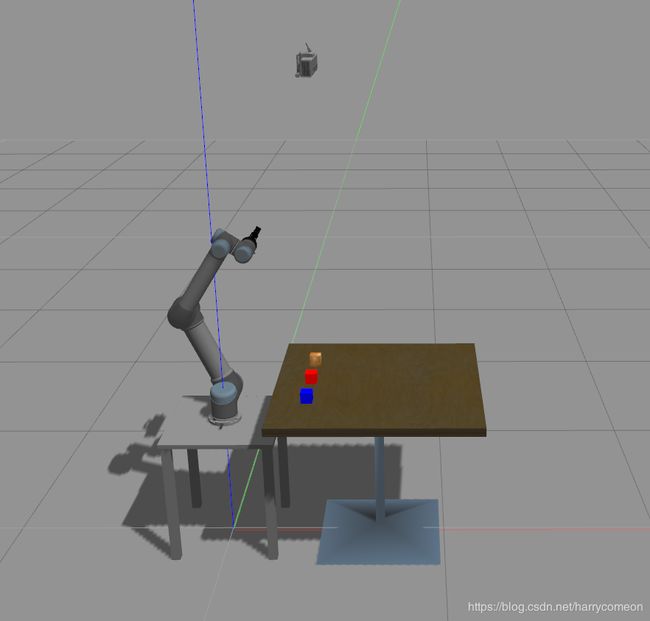
2,gazebo ros控制
ros-control包含两个控制,一个对UR5机械臂的控制,另一个是对二指手抓的控制。
分别是在加载gazebo的同时启动相应的控制。
在ur5.launch下,利用下面的语句查找了控制器
其中对ur5的控制器是查找了ur5官方提供包的arm_controller_ur5.yaml
利用了position_controllers/JointTrajectoryController,关节轨迹控制器
对手抓的控制是查找了gripper_controller_robotiq.yaml
gripper:
  type: position_controllers/JointTrajectoryController
  joints:
     - gripper_finger1_joint
  constraints:
      goal_time: 0.6
      stopped_velocity_tolerance: 0.05
      gripper_finger1_joint: {trajectory: 0.1, goal: 0.1}
  stop_trajectory_duration: 0.5
  state_publish_rate:  25
  action_monitor_rate: 10
利用了 position_controllers/JointTrajectoryController,手抓action控制

上述两者的消息类型,可以在这里查找到
http://docs.ros.org/api/control_msgs/html/index-msg.html
只有这里对ros-control进行声明,才可以对手臂和手抓进行驱动,类似于驱动的协议。
3,moveit
MoveIt Setup Assistant
moveit配置:
大致配置思路如下:
Step 1: Start
roslaunch moveit_setup_assistant setup_assistant.launch

Click on the Create New MoveIt Configuration Package button to bring up the following screen:
选择/ur_icam_description/urdf/ur5_robot.urdf.xacro,进行加载
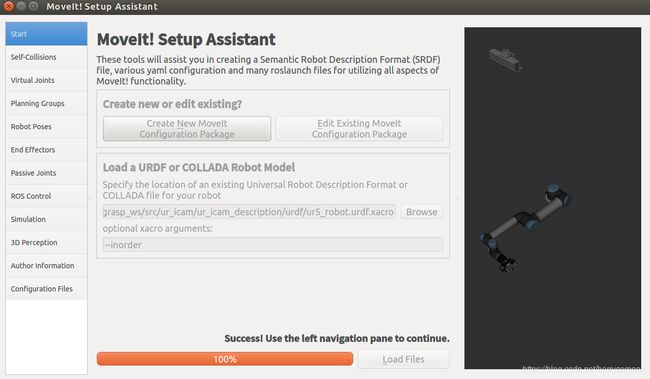
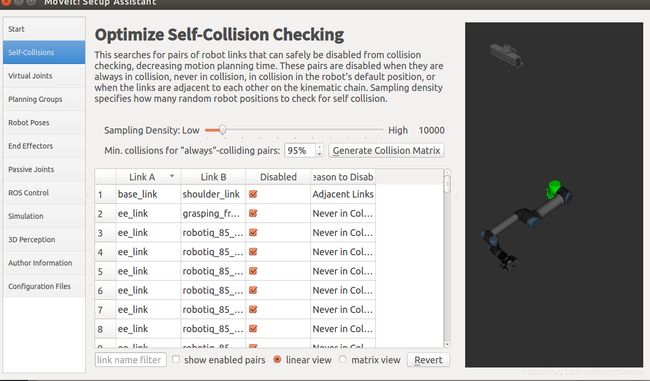
Step 2: Generate Self-Collision Matrix
点击产生碰撞矩阵
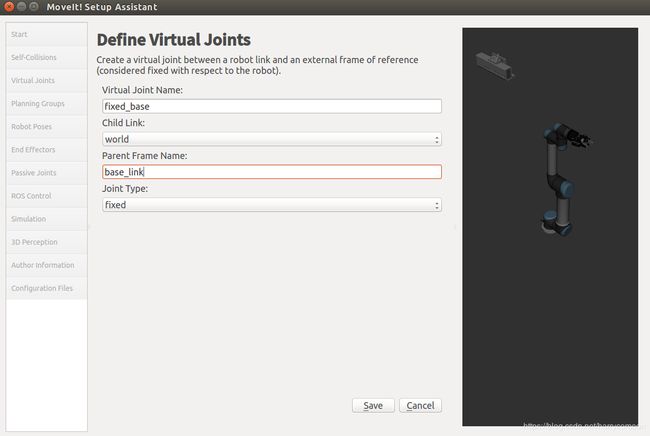
Step 3: Add Virtual Joints
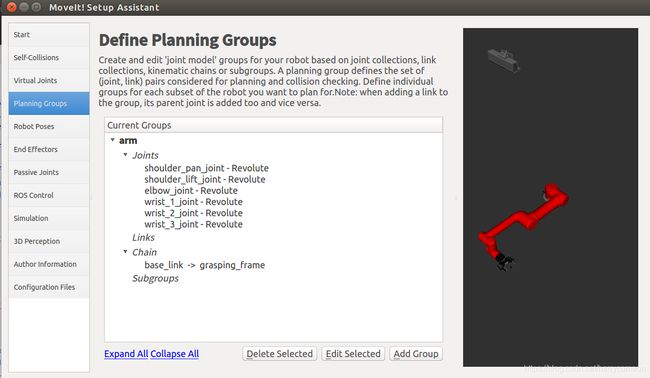
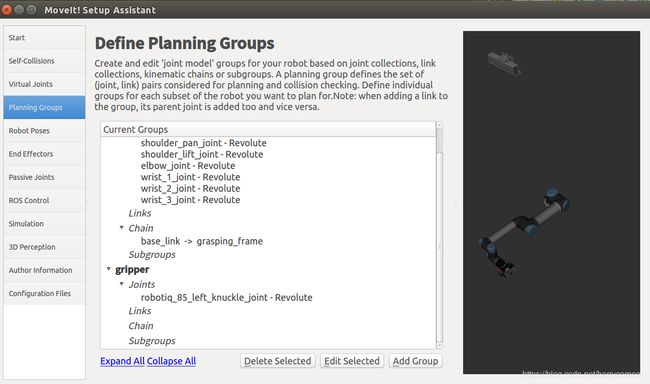
Step 4: Add Planning Groups
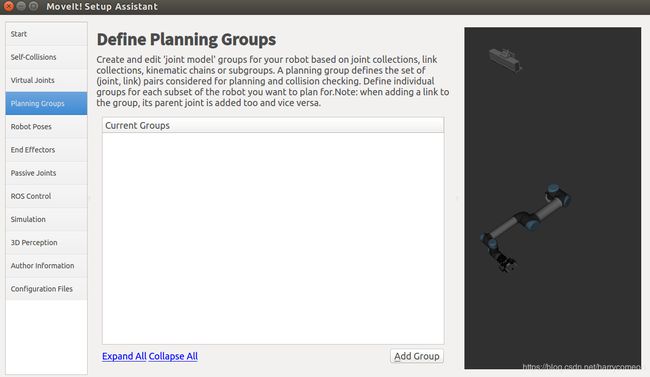
添加手臂运动规划组arm
添加手抓运动规划组gripper:
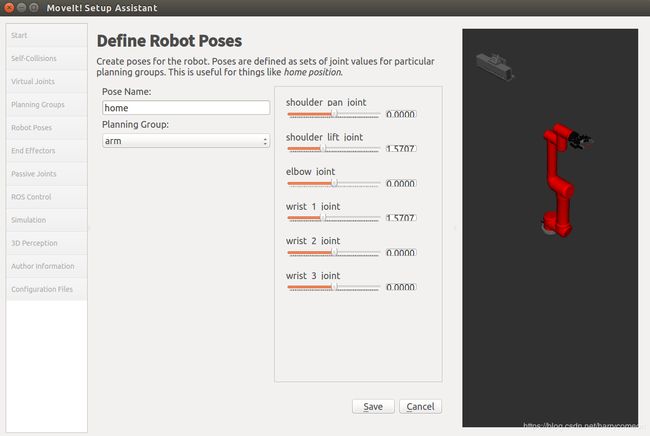
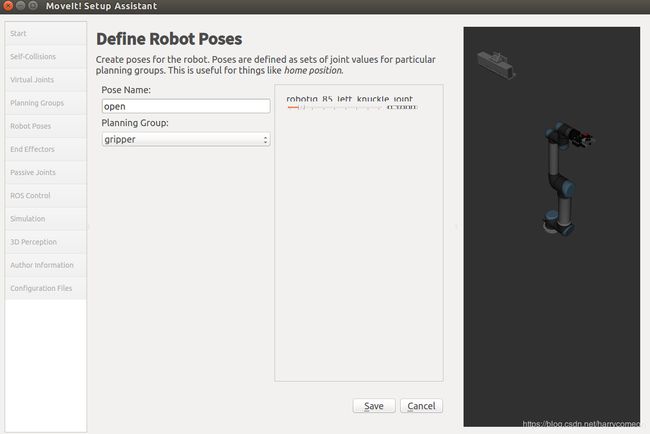
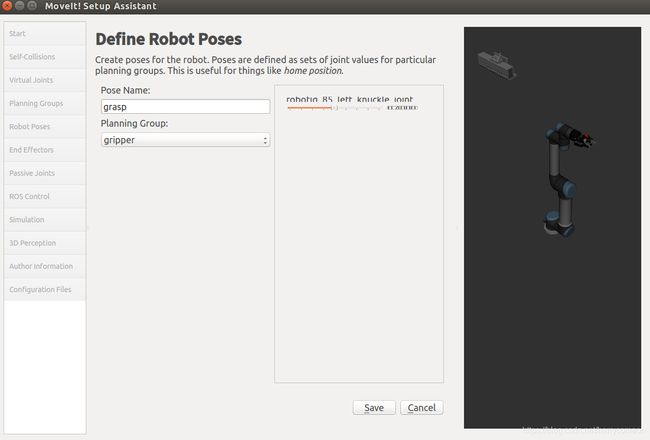
Step 5: Add Robot Poses
home
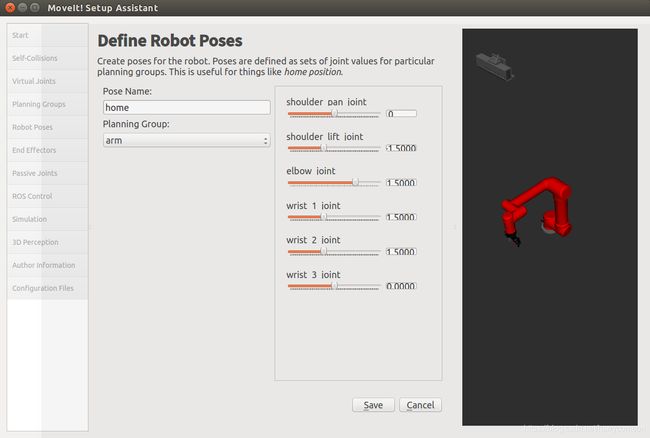
up
open
grasp
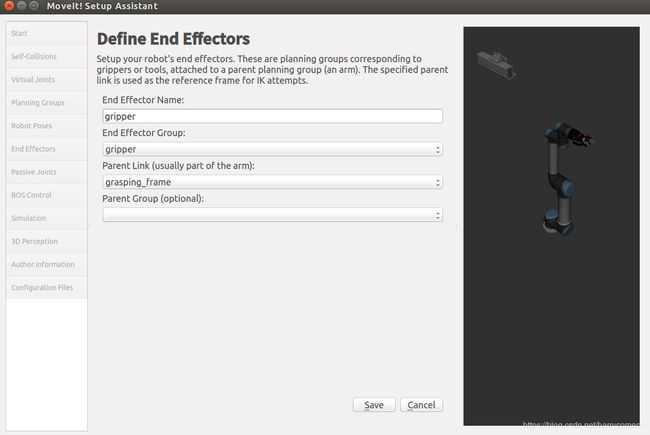
Step 6: Label End Effectors
最后加载输出,新建一个ur_icam_moveit_config文件夹,点击产生包
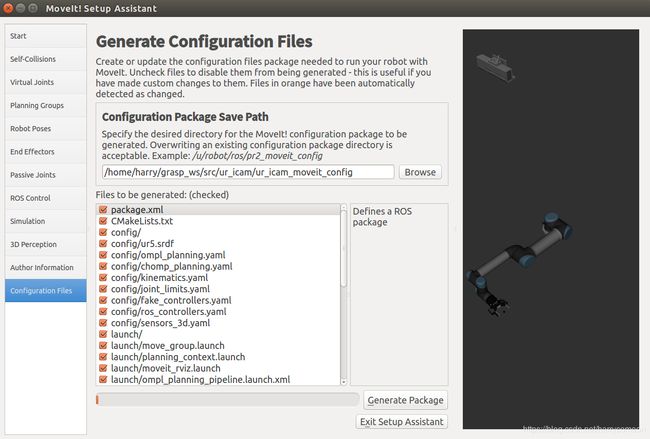
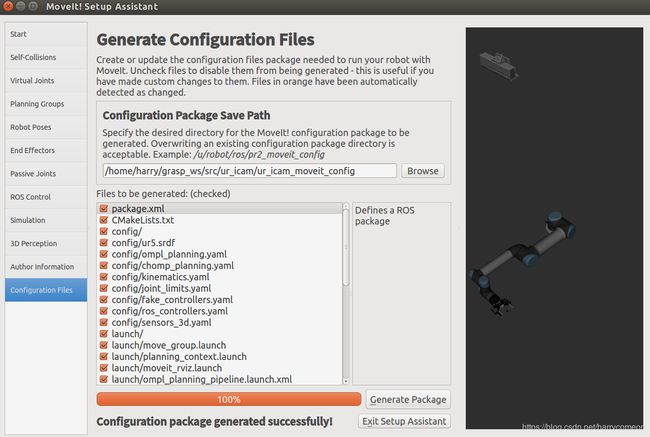
上述过程可以在ur5.srdf找到对应的配置结果
上述完成后,在~/src/ur_icam/ur_icam_moveit_config/config下新建一个controllers.yaml
内容:
controller_list:
  - name: "arm_controller"
    action_ns: follow_joint_trajectory
    type: FollowJointTrajectory
    default: true
    joints:
      - shoulder_pan_joint
      - shoulder_lift_joint
      - elbow_joint
      - wrist_1_joint
      - wrist_2_joint
      - wrist_3_joint
  - name: "gripper"
    action_ns: follow_joint_trajectory
    type: FollowJointTrajectory
    default: true
    joints:
      - gripper_finger1_joint
新建一个在ur5_moveit_planning_execution.launch文件(在ur5_single_arm_moveit_config)/launch下)
到这里我们将moveit的启动加入到launch文件中。
运行
roslaunch ur5_single_arm_tufts ur5_single_arm_gazebo.launch
其中手抓张合可以直接在这里修改

配置完成后,启动moveit和rviz,并打开点云,改变订阅话题

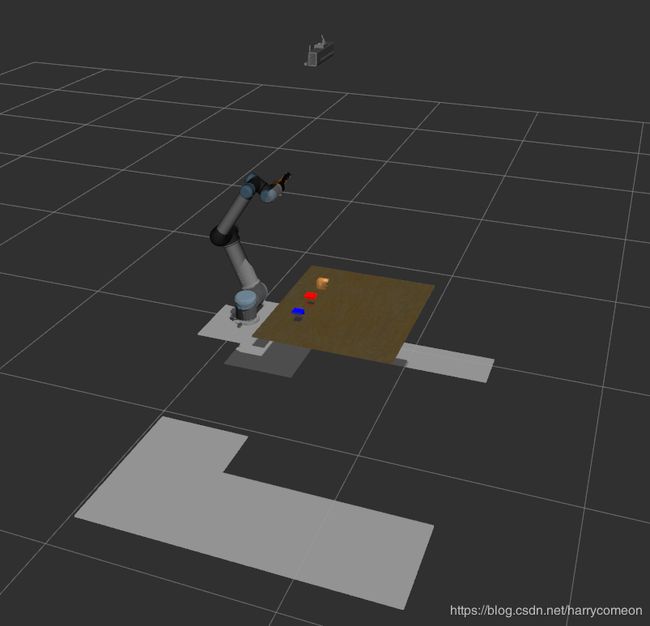
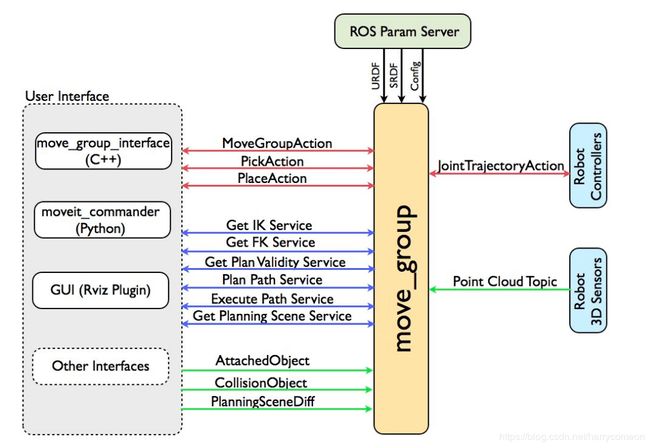
到这里我们可以利用movegroup进行机械臂和手抓的控制。
4,move-group 控制
move_group
move_group python接口:
这里我用了moveit_commander(python)接口写了控制路径规划。机器人控制器之前说了用到了JointTrajectory控制。
这里演示了抓取红色物块的过程。
具体控制逻辑:
路点1:运行到预抓取位置
路点2:手抓张开
路点3:运行到抓取物体上方
路点4:运行到抓取点
路点5:手抓闭合
路点6:运行到抓取物体上方
路点7:运行到放置点
路点8:手抓张开
控制程序grasping_demo.py
#! /usr/bin/env python
import sys
import rospy
import moveit_commander
import geometry_msgs
import tf


moveit_commander.roscpp_initializer.roscpp_initialize(sys.argv)
rospy.init_node('move_group_grasp', anonymous=True)
robot = moveit_commander.robot.RobotCommander()

arm_group = moveit_commander.move_group.MoveGroupCommander("manipulator")
hand_group = moveit_commander.move_group.MoveGroupCommander("gripper")

#hand_group.set_named_target("close")
#plan = hand_group.go()


arm_group.set_named_target("home_j")
plan = arm_group.go()

print("Point 1")

# Open
#hand_group.set_joint_value_target([9.800441184282249e-05, -9.800441184282249e-05, 9.800441184282249e-05, 9.800441184282249e-05, -9.800441184282249e-05, 9.800441184282249e-05])
#hand_group.go(wait=True)
#print("Point 2")
hand_group.set_named_target("open")
plan = hand_group.go()
print("Point 2")


pose_target = arm_group.get_current_pose().pose

# Block point
pose_target.position.x = 0.4
pose_target.position.y = 0.0
pose_target.position.z = pose_target.position.z+0.06


arm_group.set_pose_target(pose_target)
arm_group.go(wait=True)
print("Point 3")

# Block point
pose_target.position.x = 0.4
pose_target.position.y = 0.0
pose_target.position.z = pose_target.position.z-0.07


arm_group.set_pose_target(pose_target)
arm_group.go(wait=True)
print("Point 4")


hand_group.set_named_target("close")
plan = hand_group.go()
print("Point 5")

pose_target.position.z = pose_target.position.z+0.05
arm_group.set_pose_target(pose_target)
plan = arm_group.go()
print("Point 6")


pose_target.position.z = pose_target.position.z+0.05
pose_target.position.x = 0.5
arm_group.set_pose_target(pose_target)
plan = arm_group.go()
print("Point 7")


hand_group.set_named_target("open")
plan = hand_group.go()
print("Point 8")

rospy.sleep(5)
moveit_commander.roscpp_initializer.roscpp_shutdown()
运行语句:
roslaunch ur5_single_arm_tufts ur5_single_arm_gazebo.launch
rosrun ur5_single_arm_manipulation grasping_demo.py
问题:
由于手抓和物快摩擦存在问题,导致张开手抓时物体会崩开。
手抓控制:
也可以直接发送关节角度来控制:
#hand_group.set_joint_value_target([9.800441184282249e-05, -9.800441184282249e-05, 9.800441184282249e-05, 9.800441184282249e-05, -9.800441184282249e-05, 9.800441184282249e-05])
演示效果:
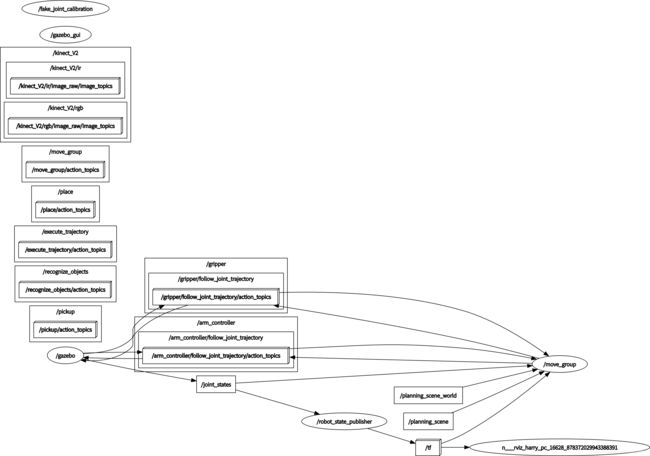
节点图:
rqt_graph
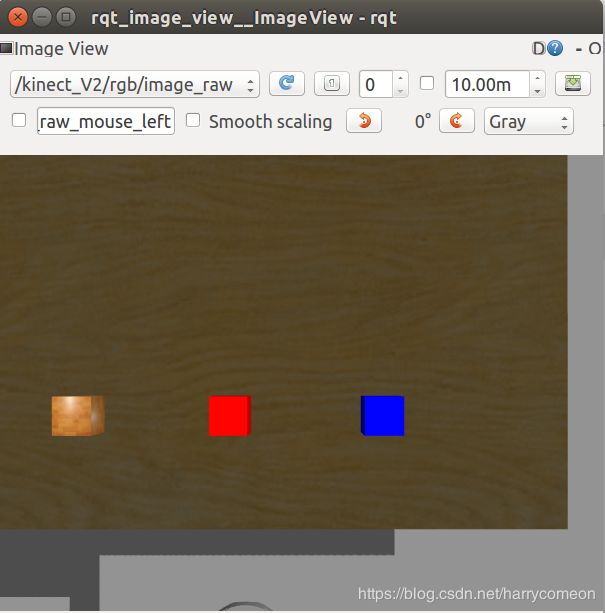
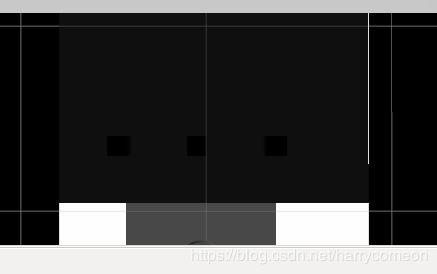
rqt_image_view
结合视觉算法,可以完成视觉抓取操作。
有精力再补充。
程序下载地址:
https://github.com/harrycomeon/ur5-gazebo-grasping
程序包中还缺少UR5机械臂的驱动包,通过git下载
git clone https://github.com/ros-industrial/universal_robot.git
一些参考网址:
1,http://gazebosim.org/tutorials?tut=ros_roslaunch&cat=connect_ros
There are two ways to launch your URDF-based robot into Gazebo using roslaunch:
ROS Service Call Spawn Method
The first method keeps your robot’s ROS packages more portable between computers and repository check outs. It allows you to keep your robot’s location relative to a ROS package path, but also requires you to make a ROS service call using a small (python) script.
Model Database Method
The second method allows you to include your robot within the .world file, which seems cleaner and more convenient but requires you to add your robot to the Gazebo model database by setting an environment variable.
We will go over both methods. Overall our recommended method is using the ‘’‘ROS Service Call Spawn Method’’’
2, 相机插件
http://gazebosim.org/tutorials?tut=ros_gzplugins&cat=connect_ros
http://gazebosim.org/tutorials?tut=ros_depth_camera&cat=connect_ros
3,Rigidly Fixing A Model to the World(添加世界坐标)
http://gazebosim.org/tutorials?tut=ros_urdf&cat=connect_ros

