布局与控件(三)-TextView那些事儿
| 更新时间 | 修改意见 |
|---|---|
| 2016-08-02 | 陈敏 |
第3节 TextView
这是界面设计最为常用的控件,也是很多别的控件的父类,例如Button。
3.1 文字常用属性
最常使用到的属性,通过它们的名字就可以判断出它们的作用:
android:text:为TextView设置显示的文字内容;
<TextView
    ......
    --直接设置要显示的文字-->
    android:text="Hello world!"/>

<TextView
    ......
    --使用引用设置要显示的文字-->
android:text="@string/hello_world"/>android:textColor:设置文字的颜色;
<TextView
    ......
    --直接设置文字的颜色-->
    android:textColor="#FFFF0000"/>

<TextView
    ......
    --使用引用设置文字的颜色-->
android:text="@color/color_red"/>android:textSize:设置文字的大小,文字大小最好使用sp为单位;
<TextView
    ......
    --直接设置文字的大小-->
    android:textSize="12sp"/>

<TextView
    ......
    --使用引用设置文字的大小-->
android:textSize="@dimen/text_size"/>android:textAllCaps:显示的字符都是大写,
<TextView
    ......
    --直接设置文字的大小-->
    android:textAllCaps="true"/>
3.2 文字字体
android:textStyle:设置文字的样式,粗体bold、斜体italic等等,默认情况下是normal;
<TextView
    ......
    --字体设置成了粗体-->
android:textStyle="bold"/>android:fontFamily:设置文字显示用的的特定字体家族,可用的字体家族可以参考安卓系统源码的system_fonts.xml文件,里面fileset标签中的名字,就可以用作android:fontFamily的参数,
<TextView
    ......
    --字体系统内置的一种字体家族-->
android:fontFamily="sans-serif-light"/>android:typeface:设置文字的字型,有normal sans serif monospace四种字型设置;它会与font family对应的字体家族合作,查找合适的字体用来显示文字;
<TextView
    ......
    --字体设置成了等宽字体-->
android:typeface="monospace"/>如果你使用了fontFamily,那么系统会优先从该fontFamily中,结合typeface和textStyle查找合适的字体;假如没有找到,就会在默认的fontFamily中,结合typeface和textStyle查找合适的字体。
3.3 文字空间利用
android:singleLine:即使文字内容很长,也不要换行显示;
<TextView
    ......
    --只能单行显示-->
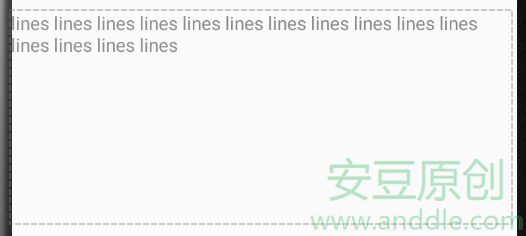
android:singleLine="true"/>android:lines:如果文字内容很长,会换行显示,并且显示行数为设置的行数;如果你的文字没有设定的行数(例如10行)那么多,那么整个TextView也会占据10行文字的高度;
<TextView
    ......
    --显示内容的高度为10行的高度-->
android:lines="10"/>android:maxLines:如果文字内容很长,会换行显示,但是行数不能超过设置的行数;如果你的文字没有设定的行数那么长,那么整个TextView的高度也就是文字实际占用的高度;
<TextView
    ......
    --显示内容不超过2行-->
android:maxLines="2"/>android:maxLength:指定要显示的字符数量,一个中文汉字也认为是一个字符;
<TextView
    ......
    --显示内容不超过4个字符-->
android:maxLength="4"/>android:ellipsize:如果文字内容很长,可以通过这个属性设定它的显示效果,
end:显示文字内容的前面部分,后面显示不下的内容用...表示;<TextView ...... --设置end效果--> android:ellipsize="end" android:singleLine="true"/>start:显示文字内容的后面部分,前面显示不下的内容用...表示;还有其它的条件需要满足:文字必须只有一行;<TextView ...... --设置start效果--> android:ellipsize="start" android:singleLine="true"/>middle:显示文字的中间部分:两头显示不下的内容用...表示;还有其它的条件需要满足:文字必须只有一行;<TextView ...... --设置middle效果--> android:ellipsize="middle" android:singleLine="true"/>marquee:以走马灯的方式(文字从右到左滚动)显示;不过要显示这个效果,还有其它的条件需要满足:文字必须只有一行,TextView可以获取焦点,并处于被选中的状态;<TextView ...... --设置走马灯效果--> android:ellipsize="marquee" android:singleLine="true" android:focusableInTouchMode="true" android:focusable="true" />
3.4 文字显示效果
android:textAppearance用来指定TextView显示文字时的风格-style。这种style的定义如下,设置了字体的大小、颜色等属性
使用的时候,可以使用上面那种自己定义的style,
<TextView
    ......
    android:textAppearance="style/TextAppearance"/>
也可以使用系统预设好的style,
android:textAppearance="?android:attr/textAppearanceSmall
android:textAppearance="?android:attr/textAppearanceMedium
android:textAppearance="?android:attr/textAppearanceLarge
android:textAppearance="?android:attr/textAppearanceLarge等等,是最经常使用的系统提供的style,
<TextView
    ......
    android:textAppearance="?android:attr/textAppearanceSmall"/>
文字阴影
给文字添加阴影效果需要使用android:shadowRadius android:shadowDy android:shadowDx属性。
<TextView
    ......
    android:shadowDx="5"
    android:shadowDy="5"
    android:shadowRadius="10"/>
3.5 文字内容修饰
android:autoLink:如果文字中包含了特定格式的字符串,那么会高亮这个字符串,并且让用户可以点击进行进一步的操作;这个属性有none web email phone map all等多个值选用,
<TextView
    ......
    <!--网址 邮件地址 电话号码 地理位置都可以被高亮显示-->
    android:autoLink="all"/>
3.6 配图的使用
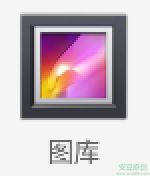
android:drawableTop android:drawableBottom android:drawableLeft android:drawableRight属性可以在文字的上下左右位置设置一个Drawable(例如图片)。
--在文字上方设置图片-->
    android:drawableTop="@mipmap/icon"
android:text="图库"/> /*******************************************************************/
* 版权声明
* 本教程只在CSDN和安豆网发布,其他网站出现本教程均属侵权。
*另外,我们还推出了Arduino智能硬件相关的教程,您可以在我们的网店跟我学Arduino编程中购买相关硬件。同时也感谢大家对我们这些码农的支持。
*最后再次感谢各位读者对安豆的支持,谢谢:)
/*******************************************************************/


