BindsNET 安装过程
最近在看《Unsupervised Learning of Digit Recognition Using Spike-Timing-Dependent Plasticity 》这篇论文,想自己跑一下,加深理解。看了作者GitHub上面的代码,基于Brian写的,没捋顺代码,然后发现有基于pytorch写的,emm,代码量少很多。先装个环境,然后在抢救一下代码。下面记录了一下BindsNET安装过程。
1. 使用conda,新建python3.6环境
# 新建环境
conda create -n BindNET python=3.6
# 激活环境
activate BindNET
2. 安装pytorch
进入pytorch官网,按照自己的需求进行选择,博主这边使用pip进行按照
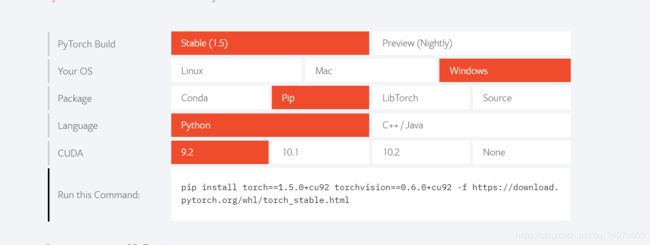
# 安装pytorch
pip install torch==1.5.0+cu92 torchvision==0.6.0+cu92 -f https://download.pytorch.org/whl/torch_stable.html
3. 安装BindsNET,使用Jupyter开发
尝试使用官网给的pip install git+https://github.com/BindsNET/bindsnet.git命令,半天没反应,果断放弃。
**采用如下安装方式!!!!!**
# 安装bindsnet pip install bindsnet -i https://mirrors.aliyun.com/pypi/simple/ bindsnet# 安装可视化包 matplotlib pip install matplotlib -i https://mirrors.aliyun.com/pypi/simple/ bindsnet # 将其加入jupyter核中 pip install ipykernel python -m ipykernel install --name BindNET --display-name "BindNET"
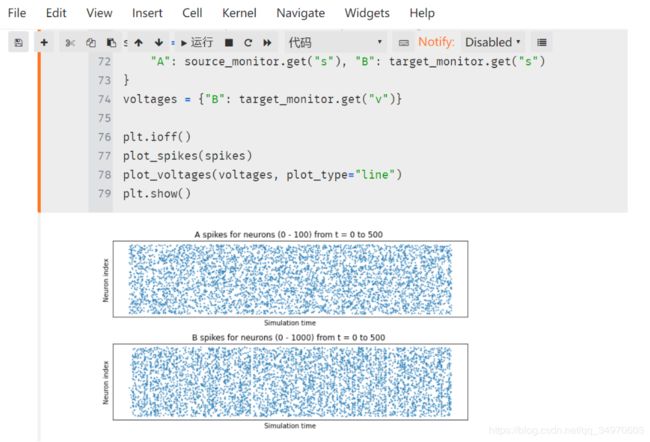
4. 测试
跑一下BindsNET官网上面给的代码,OK,安装成功。
BindsNET官网
原文链接:https://blog.csdn.net/qq_34970603/article/details/106504271