PyTorch 04: 用PyTorch实现Fashion-MNIST
好了,我们来实战演练。你将使用 Fashion-MNIST 数据集。对于神经网络来说,MNIST 的规模很小,可以轻松地达到 97% 的准确率。Fashion-MNIST 包括很多 28x28 灰色服饰图像。它比 MNIST 更复杂,也更贴近实际现实需求。
你要在这个 notebook 里构建神经网络。其实你可以用 Part 3 notebook 里的代码,但是这样就学不到任何知识了。只有自己编写代码并确保代码能运行,才能实现最佳学习效果。当然,你可以参考 Part 3 notebook。
首先,通过 torchvision 加载数据集。
import torch
from torchvision import datasets, transforms
import helper

# Define a transform to normalize the data
transform = transforms.Compose([transforms.ToTensor(),
                                transforms.Normalize((0.5,), (0.5,))])
# Download and load the training data
trainset = datasets.FashionMNIST('~/.pytorch/F_MNIST_data/', download=True, train=True, transform=transform)
trainloader = torch.utils.data.DataLoader(trainset, batch_size=64, shuffle=True)

# Download and load the test data
testset = datasets.FashionMNIST('~/.pytorch/F_MNIST_data/', download=True, train=False, transform=transform)
testloader = torch.utils.data.DataLoader(testset, batch_size=64, shuffle=True)
Downloading http://fashion-mnist.s3-website.eu-central-1.amazonaws.com/train-images-idx3-ubyte.gz
Downloading http://fashion-mnist.s3-website.eu-central-1.amazonaws.com/train-labels-idx1-ubyte.gz
Downloading http://fashion-mnist.s3-website.eu-central-1.amazonaws.com/t10k-images-idx3-ubyte.gz
Downloading http://fashion-mnist.s3-website.eu-central-1.amazonaws.com/t10k-labels-idx1-ubyte.gz
Processing…
Done!
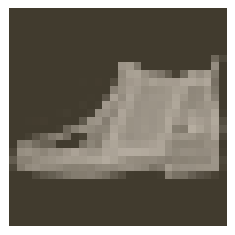
下面是一个图像示例。
image, label = next(iter(trainloader))
helper.imshow(image[0,:]);
构建网络
你要先定义网络。和 MNIST 一样,每个图像是 28x28 = 784 像素,并且有 10 个类别。你应该至少包含一个隐藏层。建议对层级使用 ReLU 激活函数,并返回前向传播的对数或 log-softmax。你可以决定添加多少个层级以及这些层级的大小。
# TODO: Define your network architecture here
from torch import nn, optim
import torch.nn.functional as F

class Classifier_fashion(nn.Module):
    def __init__(self):
        super().__init__()
        self.layer1 = nn.Linear(784,256)
        self.layer2 = nn.Linear(256,128)
        self.layer3 = nn.Linear(128,64)
        self.layer4 = nn.Linear(64,10)
    def forward(self, x):
        x = x.view(x.shape[0],-1)

        x = F.relu(self.layer1(x))
        x = F.relu(self.layer2(x))
        x = F.relu(self.layer3(x))
        x = F.log_softmax(self.layer4(x), dim=1)

        return x
训练网络
现在,来试试创建并训练网络。首先,你需要定义条件(例如 nn.CrossEntropyLoss)和优化器(通常是 optim.SGD 或 optim.Adam)。
然后编写训练代码。你可以参考这个流程:
*通过网络进行正向传递以获取logits
*使用 logits 计算损失
- 通过
loss.backward()在网络中反向传播以计算梯度 - 使用优化器更新权重
通过调整参数(隐藏单元、学习速率等),你应该能够使训练损失低于 0.4。
# TODO: Create the network, define the criterion and optimizer
model = Classifier_fashion()
criterion = nn.NLLLoss()
optimizer = optim.Adam(model.parameters(),lr=0.003)
# TODO: Train the network here
epochs = 5

for e in range(epochs):
    running_loss = 0
    for images, labels in trainloader:
        log_ps = model(images)
        loss = criterion(log_ps, labels)

        optimizer.zero_grad()
        loss.backward()
        optimizer.step()

        running_loss += loss.item()
    print("Trainning loss:{}".format(running_loss/len(trainloader)))
Trainning loss:0.521082957575062
Trainning loss:0.3933480036442976
Trainning loss:0.358206258828579
Trainning loss:0.3316666531219665
Trainning loss:0.31710777687492653
%matplotlib inline
%config InlineBackend.figure_format = 'retina'

import helper

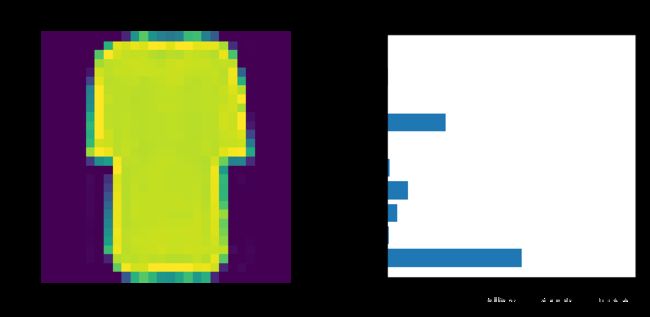
# Test out your network!

dataiter = iter(testloader)
images, labels = dataiter.next()
img = images[0]
# Convert 2D image to 1D vector
img = img.resize_(1, 784)

# TODO: Calculate the class probabilities (softmax) for img
ps = torch.exp(model(img))

# Plot the image and probabilities
helper.view_classify(img.resize_(1, 28, 28), ps, version='Fashion')

