Qt开发 之 模仿Windows文件夹缩略图(QWidget、Qt Quick(QML)、以及QGraph)
文章目录
- 1、简介
- 2、效果图
- 3、三种实现方式
- 3.1、QWidget的mask遮罩
- 3.1.1、bb叨
- 3.1.2、核心源码
- 3.2、QML的QtGraphicalEffects遮罩
- 3.2.1、bb小叨
- 3.2.2、核心源码
- 3.3、QGraph的三板斧
- 3.3.1、bb一小会儿
- 3.3.2、核心源码
1、简介
放纵了自己一个月没写博客,如今又提起战刀杀回战场,奈何这硝烟已淡去了你的味道……
言归正传,本文讲的不是简单的model/view或者widget的或者QML的基础框架实现,而是在这些框架之上的肉(文件夹缩略图)的效果实现。本文将以QWidget、Qt Quick(QML)、以及QGraph三种实现方式来讲解,如何做出和Windows类似的缩略图……
2、效果图

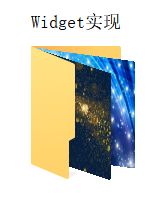
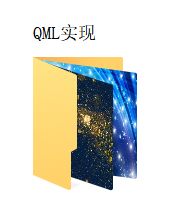
乍一看,好像把两个图片立起来,然后做成一个类似Windows文件夹有点难。一步一步拆开来分解,貌似就不难了,无非就是4个透明图层(底层、图片1、图片2、上层)的组合。
3、三种实现方式
QWidget最简单,但缺点也很明显,mask形成QBitmap遮罩没有办法去锯齿,我们会看到明显的锯齿,在追求完美的coder中是不可取的,不过你做着玩当我没说……
3.1、QWidget的mask遮罩
3.1.1、bb叨
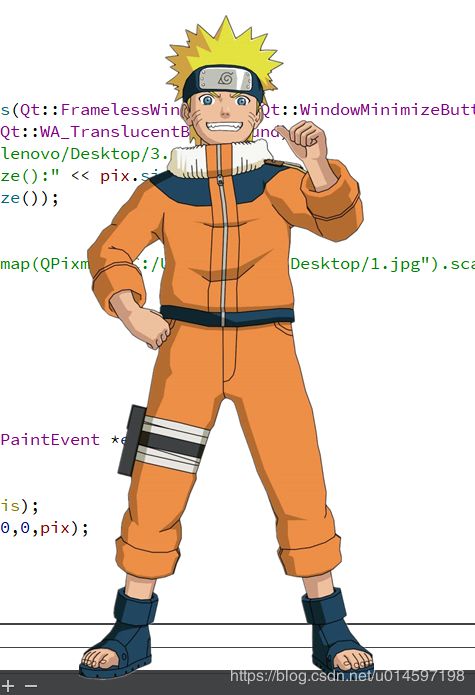
初学者可能有点懵,怎么讲着讲着讲到了遮罩,那是什么,和实现这个东西又有什么关联呢?遮罩这个东西,用途比较广泛,但犹豫无法去锯齿,也很少有完美主义者选择mask。mask可以用来做QWidget组件或者窗体的遮罩,有啥用?比如说想实现一个漩涡鸣人的窗体(ps:作者关注火影和海贼),很简单就能实现。

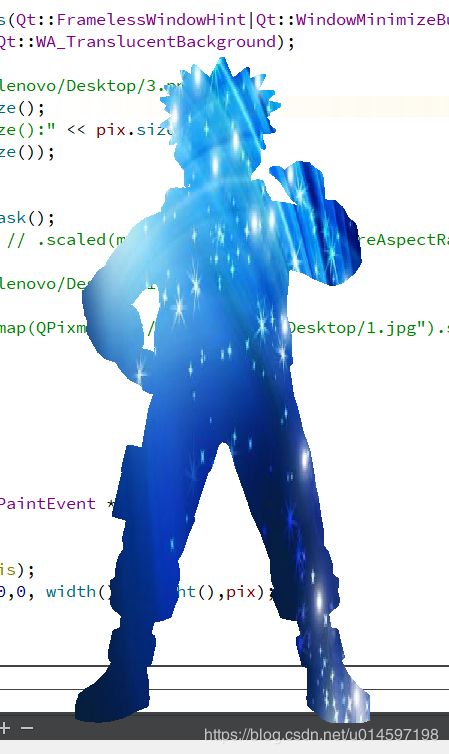
那么除了漩涡鸣人本身,其他都是透明的,因为你有一个这样的图片,所以能很快就实现出来。如果需求反过来,想把漩涡鸣人的这个图的轮廓作为背景图,里面的内容是你想的用图案来填充呢?那就会用到mask遮罩。可以看到有明显的锯齿,那我们模仿windows文件夹缩略图也一样会出现这个问题,这个问题源于mask本身是qbitmap,qbitmap的锯齿目前版本的Qt是没解决方案的。

3.1.2、核心源码
void SMaskWidget::updatePixmap(QPixmap sourcePix, QPixmap maskPix)
{
    m_pixCurrent = sourcePix;
    QBitmap bit = maskPix.mask();
    this->setMask(bit);// 效果不好,QBitmap本身是有锯齿的,机制问题
    update();
}

void SMaskWidget::paintEvent(QPaintEvent *event)
{
    Q_UNUSED(event)
    QPainter painter(this);
    painter.setRenderHint(QPainter::Antialiasing, true);
    painter.setRenderHint(QPainter::SmoothPixmapTransform, true);
    painter.setPen(QPen(Qt::transparent));
    painter.drawPixmap(0, 0, width(), height(), m_pixCurrent);
}
SPixmapWidget
SPixmapWidget::SPixmapWidget(QWidget *parent) : QWidget(parent)
{
    m_down = new QLabel(this);
    m_pixMask1 = new SMaskWidget(this);
    m_pixMask2 = new SMaskWidget(this);
    m_up = new QLabel(this);
    m_down->setStyleSheet("border:0px solid red;background-color:transparent;");
    m_up->setStyleSheet("border:0px solid red;background-color:transparent;");
}

void SPixmapWidget::updatePixmap(QPixmap pix1, QPixmap pix2)
{
    QString str_mask_down = "E:/MyPro/TillDream/application/TillDream/sqrc/png/down__2x.png";
    QString str_mask_up = "E:/MyPro/TillDream/application/TillDream/sqrc/png/up__2x.png";

    QString str_bg_down = "E:/MyPro/TillDream/application/TillDream/sqrc/png/back2x.png";
    QString str_bg_up = "E:/MyPro/TillDream/application/TillDream/sqrc/png/pre2x.png";

    m_down->resize(QPixmap(str_bg_down).size());
    m_up->resize(QPixmap(str_bg_up).size());
    m_pixMask1->resize(QPixmap(str_mask_down).size());
    m_pixMask2->resize(QPixmap(str_mask_up).size());

    m_down->setPixmap(QPixmap(str_bg_down));

    QPixmap mask1;
    mask1.load(str_mask_down);
    m_pixMask1->updatePixmap(pix1, mask1.scaled(QPixmap(str_mask_down).size(), Qt::IgnoreAspectRatio, Qt::SmoothTransformation));

    QPixmap mask2;
    mask2.load(str_mask_up);
    m_pixMask2->updatePixmap(pix2, mask2.scaled(QPixmap(str_mask_up).size(), Qt::IgnoreAspectRatio, Qt::SmoothTransformation));
    m_up->setPixmap(QPixmap(str_bg_up));
}
3.2、QML的QtGraphicalEffects遮罩
3.2.1、bb小叨
QML的发展一直是近几年来Qt发展的趋势,QML也发展的越来越好了,QML本身提供了对应的QtGraphicalEffects包,效果非常nice,而且代码简单。
3.2.2、核心源码
import QtQuick 2.3
import QtQuick.Window 2.2
import QtGraphicalEffects 1.0

Item {
    visible: true
    Item{
        width: 104
        height: 116
        Image {
            source: "file:///E:/MyPro/TillDream/application/TillDream/sqrc/png/back2x.png"
            anchors.fill: parent
        }
    }

    Item{
        width: 104
        height: 122
        Image {
            id: person
            source: "file:///C:/Users/lenovo/Desktop/1.jpg"
            anchors.fill: parent
            visible: false

        }
        Image {
            id: mask
            source: "file:///E:/MyPro/TillDream/application/TillDream/sqrc/png/down__2x.png"
            anchors.fill: parent
            visible: false
        }
        OpacityMask {
            id:om
            anchors.fill: person
            source: person
            maskSource: mask
        }
    }

    Item{
        width: 80
        height: 134
        Image {
            id: person2
            source: "file:///C:/Users/lenovo/Desktop/2.jpg"
            anchors.fill: parent
            visible: false

        }
        Image {
            id: mask2
            source: "file:///E:/MyPro/TillDream/application/TillDream/sqrc/png/up__2x.png"
            anchors.fill: parent
            visible: false
        }
        OpacityMask {
            anchors.fill: person2
            source: person2
            maskSource: mask2
        }
    }

    Item{
        width: 48
        height: 134
        Image {
            source: "file:///E:/MyPro/TillDream/application/TillDream/sqrc/png/pre2x.png"
            anchors.fill: parent
        }
    }
}
3.3、QGraph的三板斧
3.3.1、bb一小会儿
这里提了QWidget和QML的实现,其实都不满足我的需要。怎么说呢,QWidget的效果不是很好,显而易见的锯齿。QML效果虽好,但是整体的代码都是用QWidget框架去写的,如果要动态打包的话,再额外引用QML的动态链接库,没必要给程序总大小增加负担。所以这里尝试用QGraph的三板斧来实现,具体不会QGraph的可以参考我的示例,也可以踩着搜索引擎去学习。
3.3.2、核心源码
QRectF SGraphicsItem::boundingRect() const
{
    QRectF rf;
    if (Type_down == m_type) {
        rf = QRectF(0, 0, 104, 122);
    } else if (Type_bg == m_type) {
        rf = QRectF(0, 0, 104, 116);
    } else if (Type_up == m_type) {
        rf = QRectF(0, 0, 80, 134);
    } else if (Type_pre == m_type) {
        rf = QRectF(0, 0, 48, 134);
    } else {
        rf = QRectF(0, 0, 104, 134);
    }
    return rf;
}

void SGraphicsItem::paint(QPainter *painter, const QStyleOptionGraphicsItem *option, QWidget *widget)
{
    Q_UNUSED(option)
    Q_UNUSED(widget)

    painter->setRenderHint(QPainter::Antialiasing, true);
    painter->setRenderHint(QPainter::SmoothPixmapTransform, true);
    painter->setPen(QPen(Qt::transparent));
    painter->setBrush(QBrush(m_color));
    QPainterPath path;
    QPolygonF ffl;
    if (m_type == Type_down) {
        ffl << QPointF(2.0, 2.0) << QPointF(boundingRect().width(), 16.0) << QPointF(boundingRect().width(), boundingRect().height()) << QPointF(2.0, 108.0);
        path.addPolygon(ffl);
        painter->setClipPath(path);
        painter->drawImage(QRectF(0,0, boundingRect().width(), boundingRect().height()),QImage(m_pix));
    } else if (Type_bg == m_type) {
        painter->drawImage(QRectF(0,0, boundingRect().width(), boundingRect().height()),QImage(m_pix));
    } else if (Type_up == m_type) {
        ffl << QPointF(2.0, 2.0) << QPointF(boundingRect().width(), 28.0) << QPointF(boundingRect().width(), boundingRect().height()) << QPointF(2.0, 108.0);
        path.addPolygon(ffl);
        painter->setClipPath(path);
        painter->drawImage(QRectF(0,0, boundingRect().width(), boundingRect().height()),QImage(m_pix));
    } else if (Type_pre == m_type) {
        painter->drawImage(QRectF(0,0, boundingRect().width(), boundingRect().height()),QImage(m_pix));
    } else {
        painter->drawRect(this->boundingRect());
    }
}
control
    QGraphicsScene* m_scene = new QGraphicsScene(ui->graphicsView);
    SGraphicsItem *item1 = new SGraphicsItem(SGraphicsItem::Type_bg, str_bg_down);
    SGraphicsItem *item2 = new SGraphicsItem(SGraphicsItem::Type_down, str_d1);
    SGraphicsItem *item3 = new SGraphicsItem(SGraphicsItem::Type_up, str_d2);
    SGraphicsItem *item4 = new SGraphicsItem(SGraphicsItem::Type_pre, str_bg_up);

    m_scene->addItem(item1);
    m_scene->addItem(item2);
    m_scene->addItem(item3);
    m_scene->addItem(item4);
    ui->graphicsView->setSceneRect(0,0,104,134);
    ui->graphicsView->setScene(m_scene);
    ui->graphicsView->setStyleSheet("QGraphicsView{border:0px;background-color: rgba(255, 255, 255, 0);}");
    QPixmap pix(QSize(104, 134));
    pix.fill(Qt::transparent);
    QPainter painter(&pix);
    m_scene->render(&painter);   //关键函数
    pix.save("123.png", "PNG");
    ui->label_new->setStyleSheet("background-color:rgb(123,123,123);");
    ui->label_new->setPixmap(pix);
    ui->label_new->setAlignment(Qt::AlignCenter);


