一.apache的安装
yum install httpd -y 安装服务
systemctl start httpd 启动服务
systemctl stop firewalld 关闭防火墙
systemctl enable httpd 开机自动启动
systemctl disable firewalld 开机不启动防火墙
二.apache相关配置信息
1.apache的默认发布目录文件
/var/www/html/index.html
2.apache的配置文件
/etc/httpd/conf/httpd.conf
/etc/httpd/conf.d/*.conf
3.apache的默认端口 80
三. apache的基本配置
1.修改默认发布文件
(1)vim /etc/httpd/conf/httpd.conf
164 DirectoryIndex westos.html index.html
vim westos
hello ,westos!
默认优先读取写在前面的发布文件,westos.html文件损坏后,读取index.html文件
重启apache服务systemctl restart httpd,访问主页面为westos.html
(2)删除westos发布页面,index成为默认发布文件
vim westos
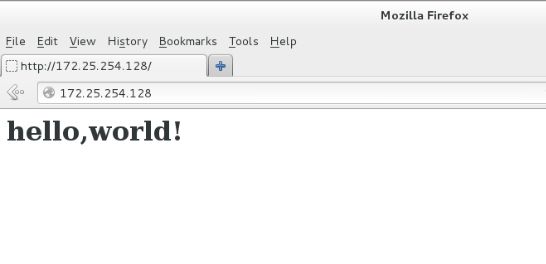
hello ,world!
端口显示正常
重启apache服务,访问主页面为index.html
2.修改默认发布目录
(1)当selinux是disable状态
vim /etc/httpd/conf/httpd.conf
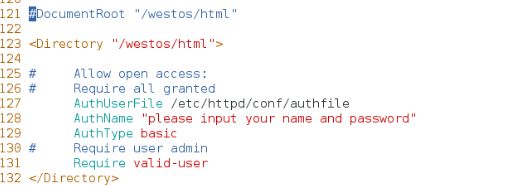
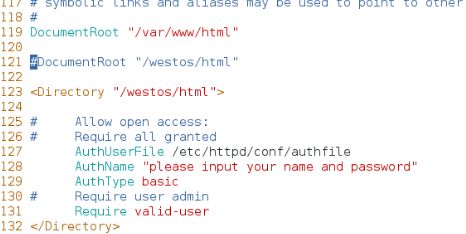
120 DocumentRoot "/westos/html" 修改默认发布目录为/westos/html
Require all granted 所有人能访问
![]()
systemctl restart httpd
创建新的发布目录/westos/html
编写westos发布文件
vim /westos/html/index.html
重启服务,访问为新建目录下的文件正常
(2)当selinux是enforcing状态
vim /etc/httpd/conf/httpd.conf
120 DocumentRoot "/westos/html" 修改默认发布目录为/westos/html
Require all granted 所有人能访问
![]()
systemctl restart httpd
创建新的发布目录/westos/html
编写westos发布文件
查看默认发布目录及新建目录的上下文,设置新建目录westos的上下文为httpd_sys_content_t
修改完成后,更新上下文 restorecon -RvvF /westos
重启服务,访问为新建目录下的文件正常
3.apache的访问控制
(1)设定ip的访问(其中Order 按顺序执行)
vim /etc/httpd/conf/httpd.conf
Order Allow,Deny
Allow from All
Deny from 172.25.254.250
Order Deny,Allow
Allow from 172.25.254.250
Deny from All
(2)设定用户的访问
htpasswd -m /etc/httpd/accessuser admin 创建访问的用户认证文件 (-c create -m 指定名称)
注意:第一个创建的用户需要加c ,以后创建的用户不需要加c,直接指定-m
创建访问用户admin admin1 指定名称为authfile
配置认证配置
vim /etc/httpd/conf/httpd.conf
AuthUserFile /etc/httpd/conf/authfile 用户认证文件
AuthName "Please input your name and password !!" 用户认证提示信息
AuthType basic 认证类型 基础认证
Require valid-user 认证用户,认证文件中所有用户都可以通过
Require user admin 只允许认证文件中admin用户访问
将认证文件放到/etc/httpd/conf,重启服务
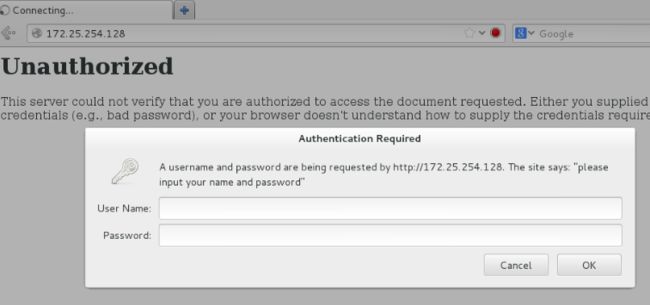
再次访问172.25.254.128,需要输入认证帐号和密码
输入帐号密码后进入到访问页面

四.apache的虚拟主机
1.定义
可以让我们的一台apache服务器在被访问不同域名的时候显示不同的主页
2.建立测试页
创建目录测试发布文件并将默认目录改为/var/www/html/
创建news.westos.com和sport.westos.com目录
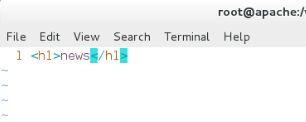
创建news下的发布文件
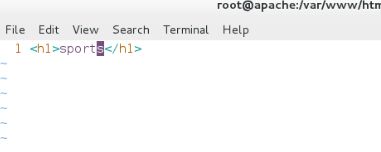
创建sports下的发布文件
3.配置
cd 到/etc/httpd/conf.d/
(1)新建未指定域名的访问配置文件
vim /etc/httpd/conf.d/default.conf 未指定域名的访问都访问default
DocumentRoot "/var/www/html" 虚拟主机的默认发布目录
CustomLog "logs/default.log" combined 虚拟主机日志
(2)新建news.westos.com域名的访问文件
vim /etc/httpd/conf.d/news.conf 指定域名news.westos.com的访问到指定默认发布目录中
ServerName news.westos.com
DocumentRoot /var/www/westos/news.westos.com
CustomLog "logs/news.log" combined
Require all granted
(3)新建sports.westos.com域名的访问文件
vim /etc/httpd/conf.d/sports.conf 指定域名sports.westos.com的访问到指定默认发布目录中
ServerName sports.westos.com
DocumentRoot /var/www/westos/sports.westos.com
CustomLog "logs/sports.log" combined
Require all granted
4.测试
在172.25.254.28上进行测试
在浏览器所在主机中配置本地解析文件 vim /etc/hosts
172.25.254.128 www.westos.com news.westos.com sports.westos.com
在浏览器打开www.westos.com,访问到默认文件上
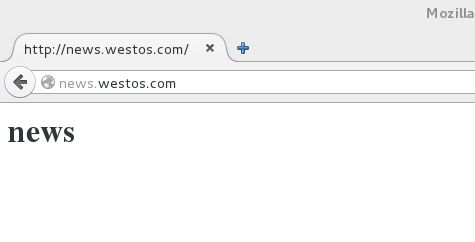
在浏览器打开news.westos.com,访问到news文件上
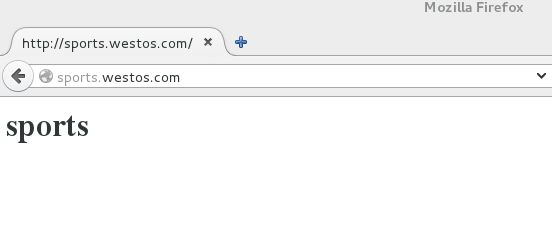
在浏览器打开sports.westos.com,访问到sports文件上
五.html语言默认支持
1.php语言
yum install php -y 安装php功能模块
vim index.php
编辑配置文件,index.php优先
systemctl restart httpd 重启apache服务
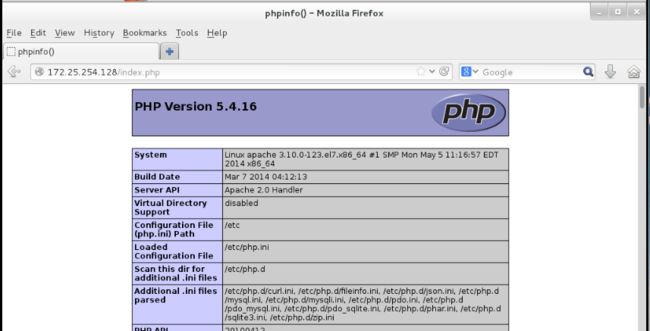
在浏览器输入172.25.254.128/index.php访问php成功
2.cgi语言
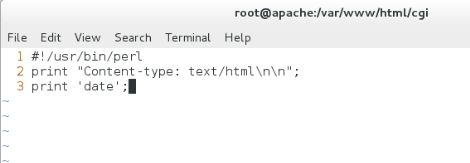
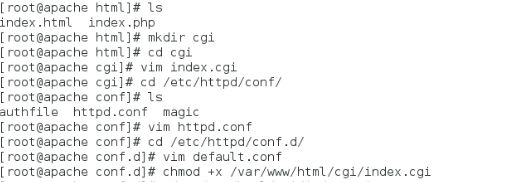
编写cgi发布文件
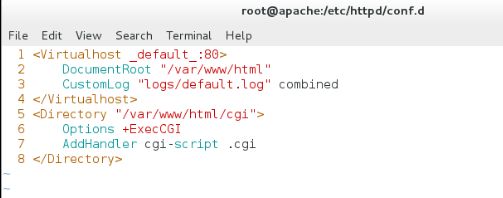
修改 /etc/httpd/conf.d/default.conf 默认文件,给index.cgi加上可执行权限
在SElinux开启的情况下修改/var/www/html/cgi的上下文
![]()
systemctl restart httpd 重启apache服务
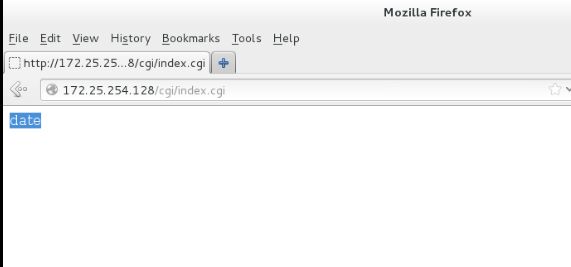
在浏览器输入172.25.254.128/cgi/index.cgi访问cgi成功,
六.网页加密访问https
1.https定义
HTTPS(全称:Hyper Text Transfer Protocol over Secure Socket Layer),是以安全为目标的HTTP通道,简单讲是HTTP的安全版。即HTTP下加入SSL层,HTTPS的安全基础是SSL,因此加密的详细内容就需要SSL。 它是一个URI scheme(抽象标识符体系),句法类同http:体系。用于安全的HTTP数据传
输。https:URL表明它使用了HTTP,但HTTPS存在不同于HTTP的默认端口及一个加密/身份验证层(在HTTP与TCP之间)。这个系统的最初研发由网景公司(Netscape)进行,并内置于其浏览器Netscape Navigator中,提供了身份验证与加密通讯方法。现在它被广泛用于万维网上安全敏感的通讯,例如交易支付方面。
2.签名证书
3.配置
yum install mod_ssl -y 安装ssl模块
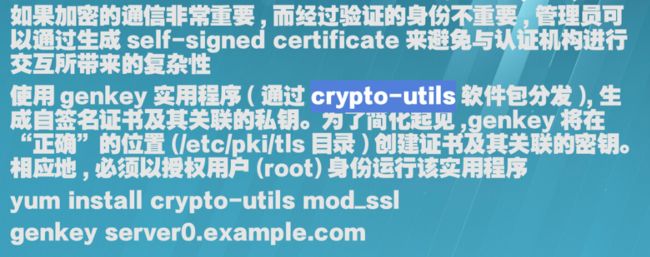
yum install crypto-utils -y 安装加密工具
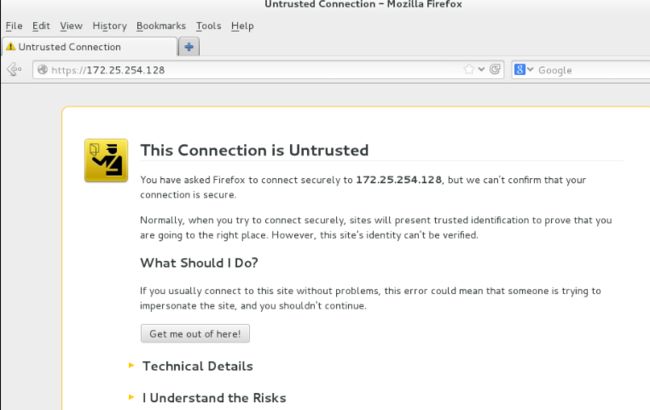
安装完成后进入到浏览器输入https://172.25.254.128
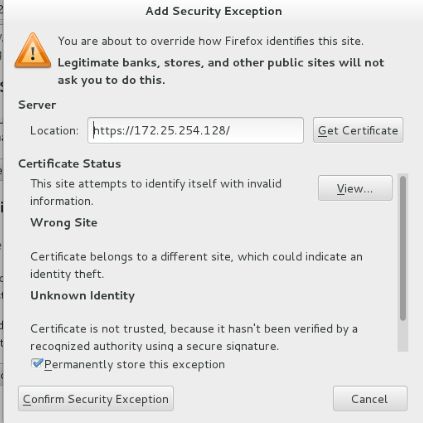
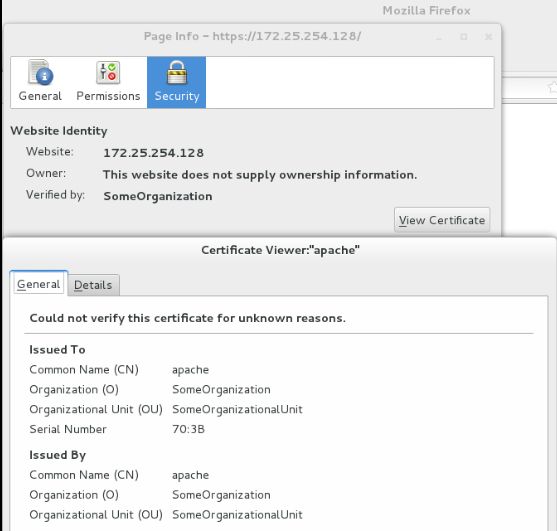
点击 I Undeerstand the Risks ,点击Get Certificate
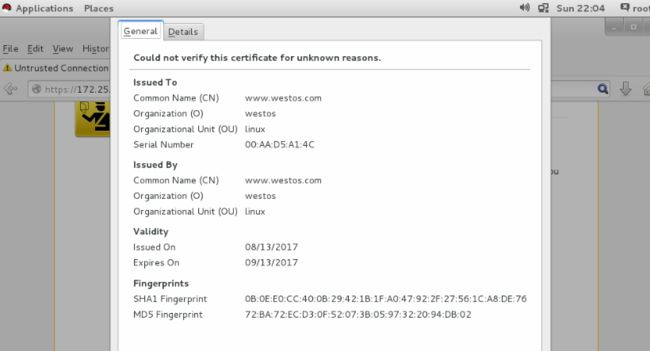
点击View Certificate
上图显示的证书是一个默认的认证
下面我们来介绍以下做一个自己的认证证书的步骤
cd /etc/httpd/conf.d
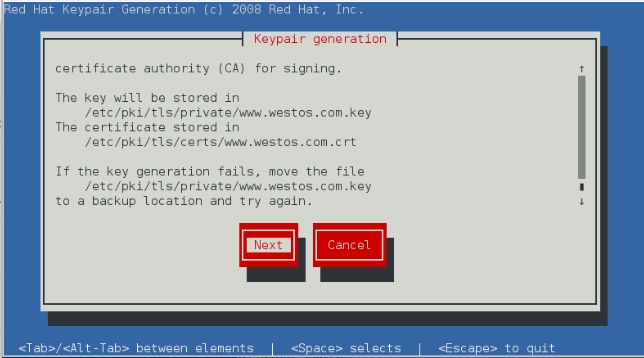
genkey www.westos.com 生成证书,Next
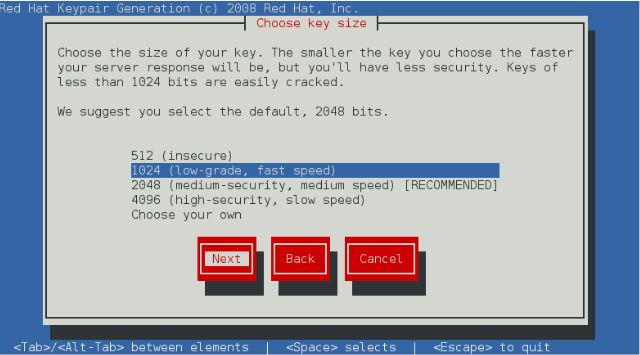
密钥字节大小,选择加密1024,速度快的
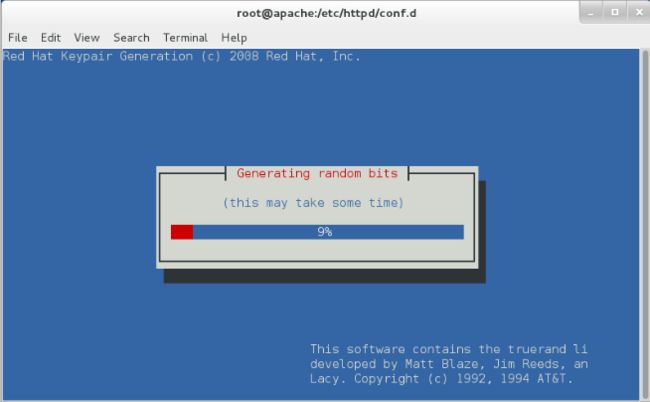
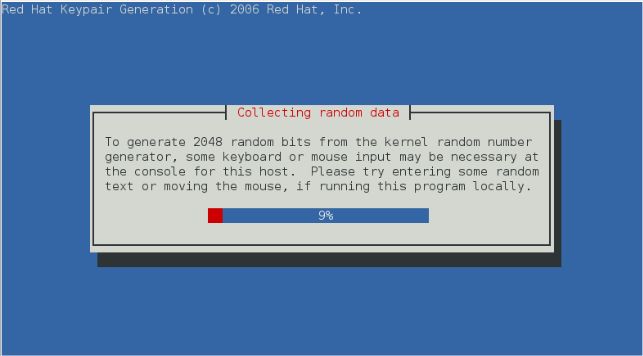
等待
生成密码(敲键盘或移动鼠标生成)
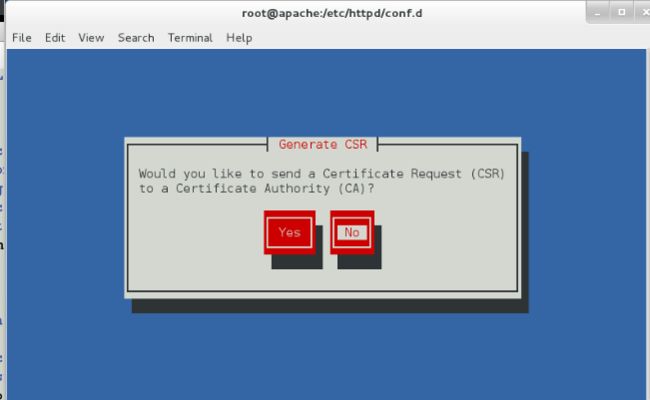
选择不向CA发送请求
不加密密钥
设置证书
完成后输出一个westos的证书和一个westos的密钥
编辑vim /etc/httpd/conf.d/ssl.conf配置文件,将自己生成的证书和密钥添加到配置文件当中
添加完整后重启服务
检查https使用端口443,确定防火墙可以通过443端口
4.测试
再次进入浏览器测试时,检查证书为自己设定的www.westos.com
七.网页重写实现自动访问https
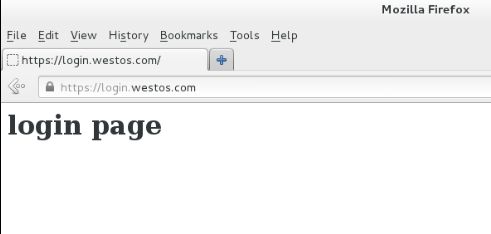
1.创建新的发布文件,内容为login page
2.编辑 /etc/httpd/conf.d/default.conf默认配置文件
配置解释
SSLEngine on 开始https功能
SSLCertificateFile /etc/pki/tls/certs/www.westos.com.crt 证书
SSLCertificateKeyFile /etc/pki/tls/private/westos.com.key 密钥
^(/.*) 客户主机在地址栏中写入的所有字符,不包含换行符
https:// 定向成为的访问协议
%{HTTP_HOST} 客户请求主机
$1 $1的值就表示^(/.*)$的值
[redirect=301] 临时重定向 302永久重定向
systemctl restart httpd 重启服务
3.测试
(1)在真机里中添加解析实验
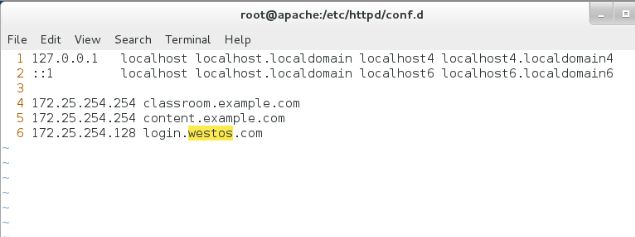
vim /etc/hosts
172.25.254.128 login.westos.com
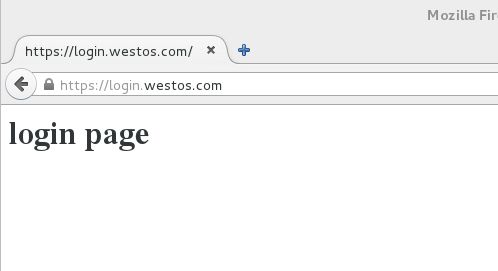
访问http://login.westos.com 会自动跳转到https://login.westos.com 实现网页数据加密传输
,
(2)在本机server 172.25.254.128里中添加解析实验
vim /etc/hosts
172.25.254.128 login.westos.com
访问http://login.westos.com 会自动跳转到https://login.westos.com 实现网页数据加密传输
八.利用Linux+mysq+php+apache搭建简单论坛
1.安装环境
安装mariadb数据库
安装php功能插件
安装apache服务
安装php-mysql功能插件
2.架设过程
解压Discuz_x3.2_SC_UTF8.zip论坛模版
解压论坛模版,查看里面的readme.txt文档
安装readme.txt文档要求修改/upload/data/及/upload/config/目录下的所有文件权限为777
将SElinux调整为警告模式,修改/upload/uc_*及目录下的所有文件权限为777
![]()
重启服务 systemctl restart httpd
![]()
3.安装向导
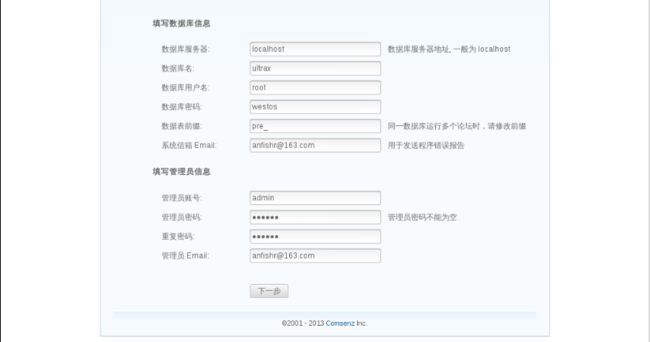
配置好服务,在浏览器输入172.25.254.128/upload/install进入安装向导
论坛架设完成,可以用root帐号登陆论坛进行建设。


