ClipView拍照截图(支持图片放大缩小移动)
这个截图的功能已经使用很久了,一直没有找到合适的时间来写一下。遇到最多的场景是版本1的时候产品说,这个功能很重要,然后被逼着写出来了。然后到了版本2,产品又说,现在有新的想法了,之前的功能不需要了。有种吐血的冲动。。。让我更加觉得有写出来的必要了,也算是纪念一下,那些年,被逼着造轮子的日子。
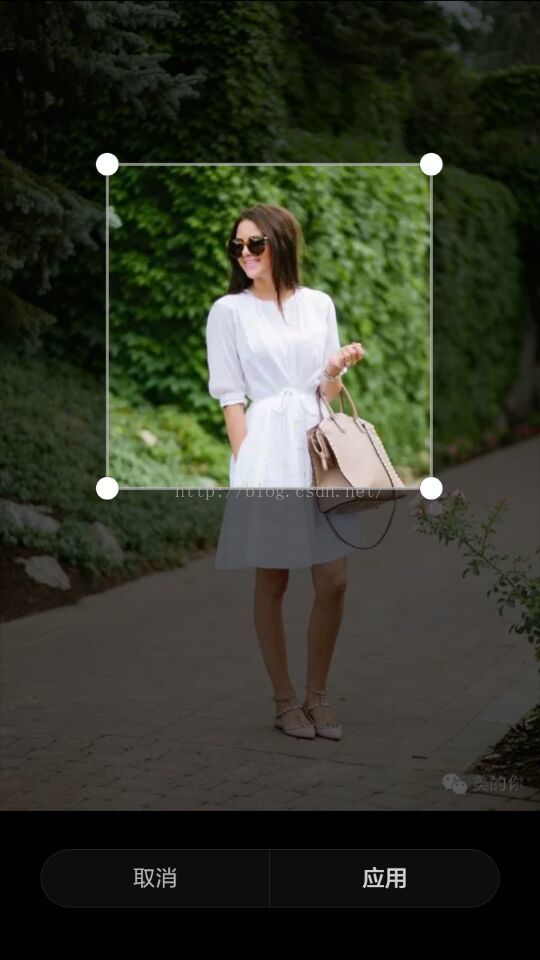
先说一下写这个功能的原因,写这个功能以前,遇到拍照截图的功能,直接调用的系统源生功能,而且基本上也够用,对于要求严格的可能就不合适了,因为源生的有一个最大的问题是,三星手机拍照后,截图时图片被翻转了90度(或许可以拍照后保存时就先翻转90度也可以解决,没有尝试过)。另外如果你也遇到了我这样的需求,产品想要自定义截图的UI,并且截图区域不动,可以拖动下面的图片来放大缩小移动等等。用过源生的都知道,android的是图片不动,截图框可以拖动。
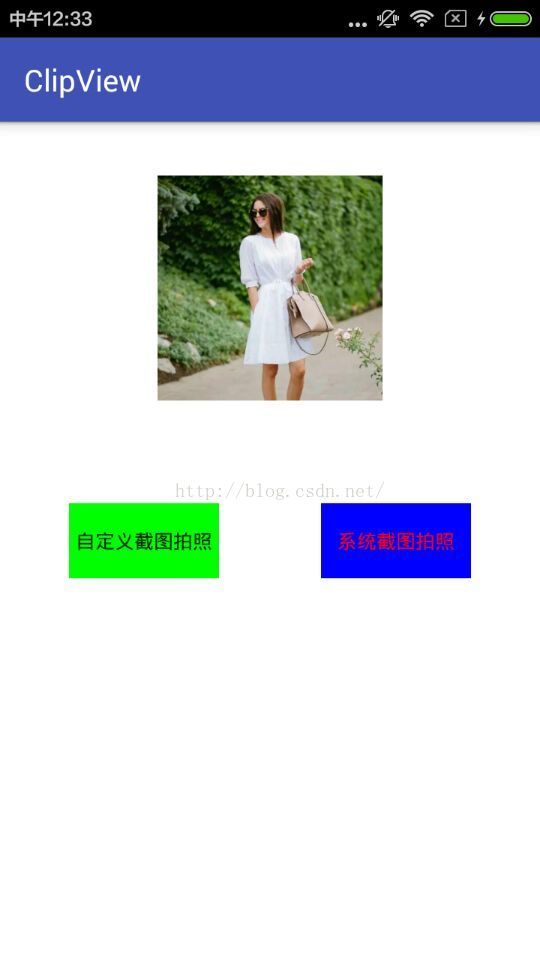
自定义效果图以及源生的效果:
自定义效果:
系统自带效果:
截图后效果:
实现思路:
1.拍照后图片的读取以及压缩
2.截图分为上下两层
下面是图片(图片可以被放大缩小移动)
上面是一个自定义View蒙板,可以通过画笔绘制出截图区域。
3.图片拖动时,边界限制
如果图片在边框内,则图片不能被拖出截图区域。
如果图片被放大后,则图片的边缘不能拖进截图区域(为了保证截图不留白)
4.截图区域的图片扣取
a.截屏
b.计算状态栏及标题栏高度,进而计算出选框位置
c.从截屏上抠出想要的区域。
代码分析:
1.对于图片的保存及读取,写了一个Util类,里面的方法很多,足够写一篇压缩文章了,就不细说了。
2.截图UI
a. ClipView
ClipView是一个自定义View,作用是绘制遮罩及选择框。
主要是onDraw方法,绘制四周的黑色透明遮罩,然后绘制选框的边框。(画笔的使用请自行google)
	@Override
	protected void onDraw(Canvas canvas)
	{
		super.onDraw(canvas);
		int width = this.getWidth();
		int height = this.getHeight();

		Paint paint = new Paint();
		paint.setColor(Util.ClipOutColor);

		float x = Util.getClipX(getContext());//截图区域距离左边的距离
		float y = Util.getClipY(getContext());//截图区域距离顶部的距离
		float a = Util.getClipWidth(getContext()); //截图区域的边长


		canvas.drawRect(0, 0, width, y, paint);
		canvas.drawRect(0, y, x, height, paint);
		canvas.drawRect(x, a+y, width, height, paint);
		canvas.drawRect(x+a, y, width, a+y, paint);

		paint.setColor(Util.ClipColor);

		int m = 4;
		canvas.drawRect(x-m,y-m,x+m+a,y,paint);
		canvas.drawRect(x-m,y,x,y+m+a,paint);
		canvas.drawRect(x,y+a,x+a,y+a+m,paint);
		canvas.drawRect(x+a,y,x+a+m,y+a+m,paint);
	}
b. 图片的缩放及位移。
实现方案有两种:
* 矩阵变换:http://www.cnblogs.com/plokmju/p/android_Matrix.html
* layout方法:主要是通过设置View的左上右下四个位置来控制View的大小及位置,本文也是采用的这种方法。
其源码如下:
    /**
     * Assign a size and position to a view and all of its
     * descendants
     *
     * This is the second phase of the layout mechanism.
     * (The first is measuring). In this phase, each parent calls
     * layout on all of its children to position them.
     * This is typically done using the child measurements
     * that were stored in the measure pass().
     *
     * Derived classes should not override this method.
     * Derived classes with children should override
     * onLayout. In that method, they should
     * call layout on each of their children.
     *
     * @param l Left position, relative to parent
     * @param t Top position, relative to parent
     * @param r Right position, relative to parent
     * @param b Bottom position, relative to parent
     */
    @SuppressWarnings({"unchecked"})
    public void layout(int l, int t, int r, int b) {
        if ((mPrivateFlags3 & PFLAG3_MEASURE_NEEDED_BEFORE_LAYOUT) != 0) {
            onMeasure(mOldWidthMeasureSpec, mOldHeightMeasureSpec);
            mPrivateFlags3 &= ~PFLAG3_MEASURE_NEEDED_BEFORE_LAYOUT;
        }

        int oldL = mLeft;
        int oldT = mTop;
        int oldB = mBottom;
        int oldR = mRight;

        boolean changed = isLayoutModeOptical(mParent) ?
                setOpticalFrame(l, t, r, b) : setFrame(l, t, r, b);

        if (changed || (mPrivateFlags & PFLAG_LAYOUT_REQUIRED) == PFLAG_LAYOUT_REQUIRED) {
            onLayout(changed, l, t, r, b);
            mPrivateFlags &= ~PFLAG_LAYOUT_REQUIRED;

            ListenerInfo li = mListenerInfo;
            if (li != null && li.mOnLayoutChangeListeners != null) {
                ArrayList listenersCopy =
                        (ArrayList)li.mOnLayoutChangeListeners.clone();
                int numListeners = listenersCopy.size();
                for (int i = 0; i < numListeners; ++i) {
                    listenersCopy.get(i).onLayoutChange(this, l, t, r, b, oldL, oldT, oldR, oldB);
                }
            }
        }

        mPrivateFlags &= ~PFLAG_FORCE_LAYOUT;
        mPrivateFlags3 |= PFLAG3_IS_LAID_OUT;
} 然后就是监听手势来做相应改变即可。
手势监听方法:onTouch
	public boolean onTouch(View v, MotionEvent event) {
		switch (v.getId()){
			case R.id.iv_photo:
				switch (event.getActionMasked()){
					case MotionEvent.ACTION_DOWN:
						currentStatus = STATUS_MOVE;
						// 得到imageView最开始的各顶点的坐标
						l = iv_photo.getLeft();
						r = iv_photo.getRight();
						t = iv_photo.getTop();
						b = iv_photo.getBottom();

						width = r - l;
						height = b - t;
						Log.i("w_h","l:"+l+" t:"+t);
						if(widthStart == -1 && heightStart == -1){
							widthStart = width;
							heightStart = height;
							Log.i("w_h", "widthStart:"+widthStart+"  heightStart:"+heightStart);
							Log.i("w_h", "a:"+a+"  x:"+x);
						}

						startx = event.getRawX();
						starty = event.getRawY();
						Log.i("move", "startx:"+startx+"   starty:"+starty);
						break;
					case MotionEvent.ACTION_POINTER_DOWN:
						if(event.getPointerCount() == 1){
							currentStatus = STATUS_MOVE;
						}else if (event.getPointerCount() == 2) {
							currentStatus = STATUS_ZOOM;
							disStart = distanceBetweenFingers(event);
						}
						break;
					case MotionEvent.ACTION_MOVE:
						Log.i("state", "" + currentStatus);
						if (currentStatus == STATUS_MOVE && event.getPointerCount() == 1) {
							actionMove(event);
						} else if (currentStatus == STATUS_ZOOM && event.getPointerCount() == 2) {
							actionZoom(event);
						}
						break;
					case MotionEvent.ACTION_UP:
						if(currentStatus == STATUS_ZOOM) {
							// 得到imageView最开始的各顶点的坐标
							l = iv_photo.getLeft();
							r = iv_photo.getRight();
							t = iv_photo.getTop();
							b = iv_photo.getBottom();

							width = r - l;
							height = b - t;
							if (width <= a || height <= a) {
								l = (int)(x+(a-width)/2);
								t = (int)(y+(a-height)/2);
								r = (int)(x+(a+width)/2);
								b = (int)(y+(a+height)/2);
								iv_photo.layout(l,t,r,b);

							}
						}
						currentStatus = STATUS_INIT;
						break;
					default:
						break;
				}
				break;
		}
		return true;
}其中return true比较重要,只有返回true才能实现连续监听( 这个就涉及到事件的监听机制了,有兴趣的可以了解一下)。
两个手指的位移计算:
	/**
	 * 计算两个手指之间的距离。
	 *
	 * @param event
	 * @return 两个手指之间的距离
	 */
	private double distanceBetweenFingers(MotionEvent event) {
		float disX = Math.abs(event.getX(0) - event.getX(1));
		float disY = Math.abs(event.getY(0) - event.getY(1));
		return Math.sqrt(disX * disX + disY * disY);
	}
缩放的方法:
通过判断两个手指之间的距离与原始距离的比例,来计算图片需要缩放的大小。
	/**
	 * 缩放
	 * @param event
	 */
	private void actionZoom(MotionEvent event) {
		disMove = distanceBetweenFingers(event);

		double scale = disMove/disStart;

		double scaleTemp = (width * scale)/widthStart;

		double minScale = 0.5;
		if(a < heightStart) {
			minScale = a / heightStart;
		}else{
			minScale = 1;
		}

		Log.i("zoom", "scaleTemp:"+scaleTemp);
		if(scaleTemp > 2){
			scale = 2*widthStart/(width);
		}else if(scaleTemp < minScale){
			scale = minScale*widthStart/(width);
		}

		Log.i("scale", ""+scale);
		double dw = width*(scale -1);
		double dh = height*(scale -1);


		int lm = (int)(l - dw/2);
		int rm = (int)(r + dw/2);
		int tm = (int)(t - dh/2);
		int bm = (int)(b + dh/2);

if(heightStart > a && bm - tm 位置的移动比较简单,难点在于如何限制移动的边界。
边界判断可以根据坐标来判断,首先判断图片比选框小,还是比选框大。
如果比选框小,则只需要保证图片的左侧大于x,右侧小于x + a即可。y轴方法同x。
如果比选框大,则只需要保证图片的左侧小于x,右侧大于x + a即可。y同x。
	/**
	 * 移动
	 * @param event
	 */
	private void actionMove(MotionEvent event) {
		int x1 = (int) event.getRawX();
		int y1 = (int) event.getRawY();
		Log.i("move", "x1:"+x1+"    y1:"+y1);

		// 获取手指移动的距离
		int dx = (int) (x1 - startx);
		int dy = (int) (y1 - starty);

		if(width > a){
			if(l+dx >= x){
				dx = x - l;
			}

			if(r+dx <= x +a){
				dx = x + a - r;
			}
		}else{
			if(l+dx <= x){
				dx = x - l;
			}

			if(r+dx >= x +a){
				dx = x + a - r;
			}
		}

		if(height >a){
			if(t+dy >= y){
				dy = y - t;
			}

			if(b+dy <= y + a){
				dy = y + a - b;
			}
		}else{
			if(t+dy <= y){
				dy = y - t;
			}

			if(b+dy >= y + a){
				dy = y + a - b;
			}
		}
		iv_photo.layout(l+dx, t+dy, r+dx, b+dy);
}3.缩放和位移搞定了,下面就是获取选框区域的图片了。
我的思路是首选把整个屏幕的图片获取到,然后计算选框的位置,截取相应的位置图片即可。
a.获取屏幕截图:
	// 获取Activity的截屏
	private Bitmap takeScreenShot() {
		View view = this.getWindow().getDecorView();
		view.setDrawingCacheEnabled(true);
		view.buildDrawingCache();
		return view.getDrawingCache();
	}
b.计算截图区域
需要使用createBitmap方法:
    /**
     * Returns an immutable bitmap from the specified subset of the source
     * bitmap. The new bitmap may be the same object as source, or a copy may
     * have been made. It is initialized with the same density as the original
     * bitmap.
     *
     * @param source   The bitmap we are subsetting
     * @param x        The x coordinate of the first pixel in source
     * @param y        The y coordinate of the first pixel in source
     * @param width    The number of pixels in each row
     * @param height   The number of rows
     * @return A copy of a subset of the source bitmap or the source bitmap itself.
     * @throws IllegalArgumentException if the x, y, width, height values are
     *         outside of the dimensions of the source bitmap, or width is <= 0,
     *         or height is <= 0
     */
    public static Bitmap createBitmap(Bitmap source, int x, int y, int width, int height) {
        return createBitmap(source, x, y, width, height, null, false);
}状态栏和标题栏获取:
	int statusBarHeight = 0;
	int titleBarHeight = 0;

	private void getBarHeight() {
		// 获取状态栏高度
		Rect frame = new Rect();
		getWindow().getDecorView().getWindowVisibleDisplayFrame(frame);
		statusBarHeight = frame.top;

		int contenttop = this.getWindow().findViewById(Window.ID_ANDROID_CONTENT).getTop();
		// statusBarHeight是上面所求的状态栏的高度
		titleBarHeight = contenttop - statusBarHeight;
		if(titleBarHeight < 0) titleBarHeight = 0;

		Log.v("bar", "statusBarHeight = " + statusBarHeight + ", titleBarHeight = " + titleBarHeight);
}注:这里有一个问题,获取到的titleBarHeight不准确(具体原因不清楚),所以此demo只支持全屏或者只有状态栏的情况,否则会导致截图区域计算错误。(这个需要各位大神来指点了)
4.截屏及压缩图片:
	/* 获取矩形区域内的截图 */
	private Bitmap getBitmap() {
		getBarHeight();
		Bitmap screenShoot = null;
		screenShoot = takeScreenShot();
		Bitmap finalBitmap = Bitmap.createBitmap(
				screenShoot,
				x  + 1 , //x轴方向起点
				y  + 1 + titleBarHeight + statusBarHeight,//y轴方向起点
				a  - 1, //截取的宽度
				a  - 1  //截取的高度
		);
		return imageZoom(finalBitmap, 200);
	}

	private Bitmap imageZoom(Bitmap bitMap, double size) {
		//图片允许最大空间   单位:KB
		//将bitmap放至数组中,意在bitmap的大小(与实际读取的原文件要大)
		ByteArrayOutputStream baos = new ByteArrayOutputStream();
		bitMap.compress(Bitmap.CompressFormat.JPEG, 100, baos);
		byte[] b = baos.toByteArray();
		//将字节换成KB
		double mid = b.length/1024;
		//判断bitmap占用空间是否大于允许最大空间  如果大于则压缩 小于则不压缩
		if (mid > size) {
			//获取bitmap大小 是允许最大大小的多少倍
			double i = mid / size;
			//开始压缩  此处用到平方根 将宽带和高度压缩掉对应的平方根倍 (1.保持刻度和高度和原bitmap比率一致,压缩后也达到了最大大小占用空间的大小)
//			bitMap = zoomImage(bitMap, bitMap.getWidth() / Math.sqrt(i),
//					bitMap.getHeight() / Math.sqrt(i));
			bitMap = zoomImage(bitMap, 800, 800);
		}
		return bitMap;
	}

	/***
	 * 图片的缩放方法
	 *
	 * @param bgimage
	 *            :源图片资源
	 * @param newWidth
	 *            :缩放后宽度
	 * @param newHeight
	 *            :缩放后高度
	 * @return
	 */
	public static Bitmap zoomImage(Bitmap bgimage, double newWidth,
								   double newHeight) {
		// 获取这个图片的宽和高
		float width = bgimage.getWidth();
		float height = bgimage.getHeight();
		// 创建操作图片用的matrix对象
		Matrix matrix = new Matrix();
		// 计算宽高缩放率
		float scaleWidth = ((float) newWidth) / width;
		float scaleHeight = ((float) newHeight) / height;
		// 缩放图片动作
		matrix.postScale(scaleWidth, scaleHeight);
		Bitmap bitmap = Bitmap.createBitmap(bgimage, 0, 0, (int) width,
				(int) height, matrix, true);
		int w = bitmap.getWidth();
		int h = bitmap.getHeight();
		Log.i("wh", "w"+w+" h"+h);

		return bitmap;
	}
配置信息:写在了Util类中(懒的写了,应该写一个自定义属性的ClipView的,这个可以参考上一篇文章)
    public static final int x = 15;//截图区域左上角x坐标
    public static final int y = 138;//截图区域左上角y坐标
    public static final int ClipOutColor = 0xb3000000;//截图外围颜色
    public static final int ClipColor = 0xb32d3a60;//截图区域颜色

    public static int getClipX(Context context){
        return dip2px(x, context);
    }

    public static int getClipY(Context context){
        return dip2px(y, context);
    }

    public static int getClipWidth(Context context){
        return getWidthPx(context) - dip2px(x, context) * 2;
    }
里面的细节确实太多,所以只是写了一个大概的思路,详细的源码可以从下面下载。
源码地址:https://github.com/736791050/ClipView


