【Android】App首页上下滚动快报控件 通知控件 类似京东快报控件(二)
前言
上一篇实现后,我就发现自己深深的受到了伤害,嗯,明明有这么好用的一个空间为什么不用呢?然后那么不服的我,马上开撸!
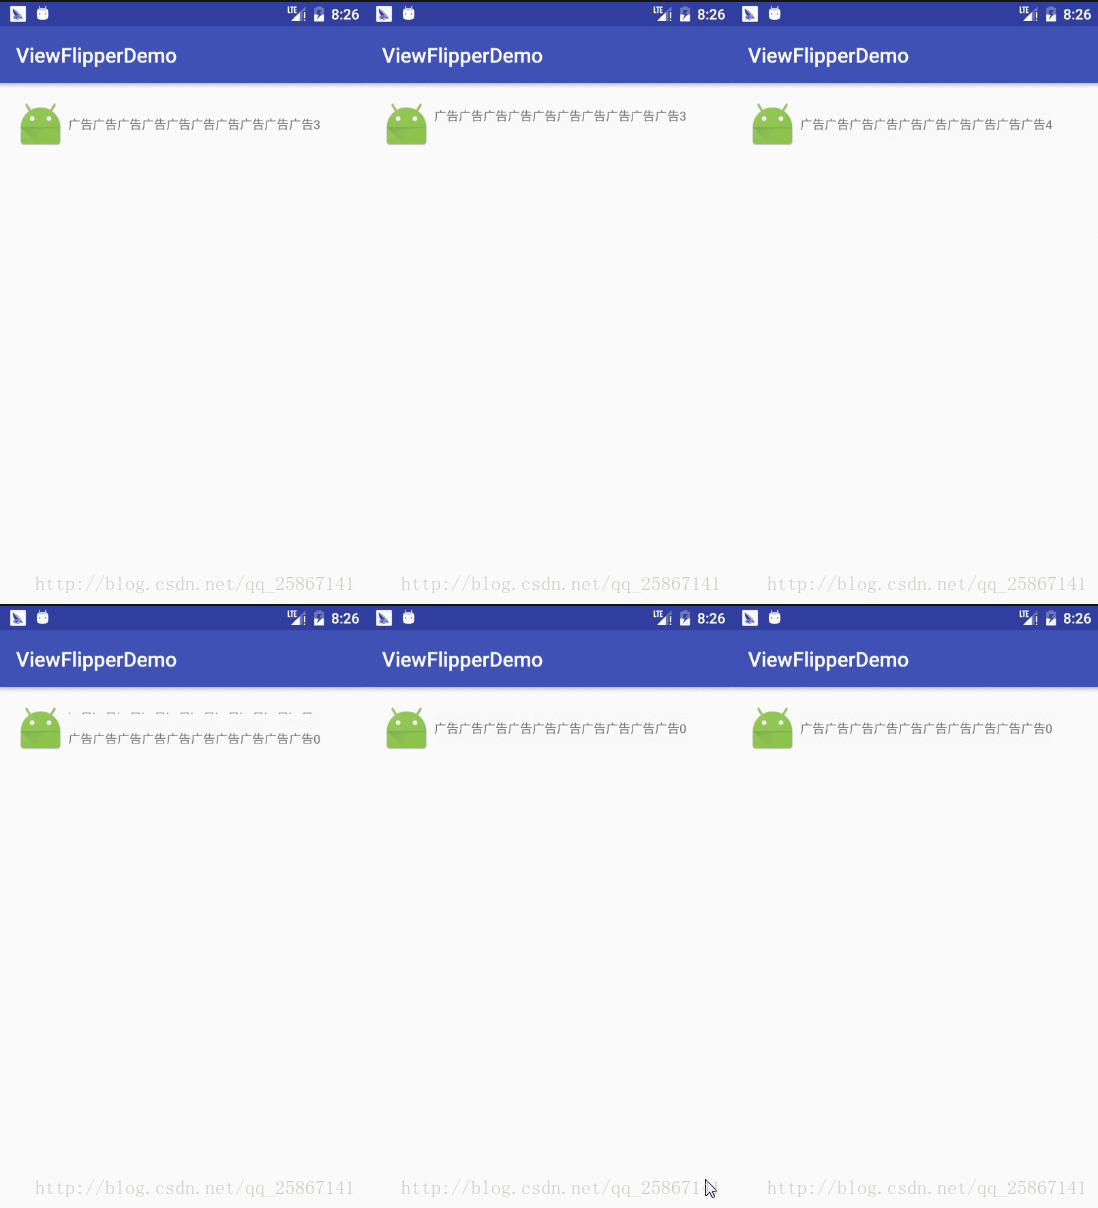
无图无真相
实现思路
这次实现的思路是主要运用ViewFlipper来实现我们的快报功能,首先介绍一下这个控件。
public class ViewFlipper extends ViewAnimator {
    public ViewFlipper(Context context) {
        super((Context)null, (AttributeSet)null);
        throw new RuntimeException("Stub!");
    }

    public ViewFlipper(Context context, AttributeSet attrs) {
        super((Context)null, (AttributeSet)null);
        throw new RuntimeException("Stub!");
    }
    ...//省略
    -------------------------------------------------
public class ViewAnimator extends FrameLayout {
    public ViewAnimator(Context context) {
       super((Context)null, (AttributeSet)null, 0, 0);
       throw new RuntimeException("Stub!");
    }

    public ViewAnimator(Context context, AttributeSet attrs) {
       super((Context)null, (AttributeSet)null, 0, 0);
       throw new RuntimeException("Stub!");
    }

    public void setDisplayedChild(int whichChild) {
       throw new RuntimeException("Stub!");
    }
    ...//省略
先看一下关系,其实ViewFlipper是继续FrameLayout的。

然后看看官方的说明,这就是一个简单的ViewAnimator,每次只显示一个字布局,既然是继承ViewAnimator的话那肯定可以添加一些动画,在子视图显示和消失的时候。
实现移入和移出动画
很棒的是ViewFlipper自带两个方法setInAnimation()和setOutAnimation(),那么既然如此,我们就很容易的做到了我们快报所需要的移入和移出动画,看代码:
/**
     * 定义从下侧进入的动画效果
     * @return
     */
    protected Animation inFromBottomAnimation() {
        Animation inFromBottomAnimation = new TranslateAnimation(
                Animation.RELATIVE_TO_PARENT, 0.0f,
                Animation.RELATIVE_TO_PARENT, 0.0f,
                Animation.RELATIVE_TO_PARENT, 1.0f,
                Animation.RELATIVE_TO_PARENT, 0.0f);
        inFromBottomAnimation.setDuration(durationTime);
        inFromBottomAnimation.setInterpolator(new AccelerateInterpolator());
        return inFromBottomAnimation;
    }

    /**
     * 定义从上侧退出的动画效果
     * @return
     */
    protected Animation outToTopAnimation() {
        Animation outToTopAnimation = new TranslateAnimation(
                Animation.RELATIVE_TO_PARENT, 0.0f,
                Animation.RELATIVE_TO_PARENT, 0.0f,
                Animation.RELATIVE_TO_PARENT, 0.0f,
                Animation.RELATIVE_TO_PARENT, -1.0f);
        outToTopAnimation.setDuration(durationTime);
        outToTopAnimation.setInterpolator(new AccelerateInterpolator());
        return outToTopAnimation;
    }
实现3秒自动切换
很棒的是,这个借口ViewFlipper就提供了这个借口,那么大大降低我们实现的成本,直接调用如下接口即可设置我们翻页的时间(其实就是子布局切换的时间间隔):
setFlipInterval(flipIntervalTime);然后开启自动切换
setAutoStart(true);是不是很简单,这个真是棒极了,我们用到的所有东西都有了,那就开始封装吧。
封装
我就直接贴代码了,这样的:
public class ENoticeView extends ViewFlipper {
    /**
     * 切换的时间间隔
     * */
    private int flipIntervalTime = 3000;
    /**
     * 切换的动画的时间
     * */
    private int durationTime = 500;
    private NoticeAdapter mAdapter;
    private OnItemClickListener listener;

    public ENoticeView(Context context) {
        super(context);
        init();
    }

    public ENoticeView(Context context, AttributeSet attrs) {
        super(context, attrs);
        init();
    }
    private void init(){
        setFlipInterval(flipIntervalTime);
        setInAnimation(inFromBottomAnimation());
        setOutAnimation(outToTopAnimation());
        setAutoStart(false);
    }
    private void start(){
        if(this.mAdapter == null||this.mAdapter.getCount() <= 0){
            return;
        }
        removeAllViews();
        //只有数据源大于2条的时候才会开启自动切换
        if(this.mAdapter.getCount() >1)
            setAutoStart(true);
        else
            setAutoStart(false);
        for(int i =0;i<this.mAdapter.getCount();i++){
            View view = this.mAdapter.getView(getContext(),i);
            addView(view);
            if(listener != null){
                view.setTag(i);
                view.setOnClickListener(new OnClickListener() {
                    @Override
                    public void onClick(View view) {
                        listener.onClick((Integer) view.getTag());
                    }
                });
            }
        }
    }

    @Override
    public void setOnTouchListener(OnTouchListener l) {
    }

    /**
     * 定义从下侧进入的动画效果
     * @return
     */
    protected Animation inFromBottomAnimation() {
        Animation inFromBottomAnimation = new TranslateAnimation(
                Animation.RELATIVE_TO_PARENT, 0.0f,
                Animation.RELATIVE_TO_PARENT, 0.0f,
                Animation.RELATIVE_TO_PARENT, 1.0f,
                Animation.RELATIVE_TO_PARENT, 0.0f);
        inFromBottomAnimation.setDuration(durationTime);
        inFromBottomAnimation.setInterpolator(new AccelerateInterpolator());
        return inFromBottomAnimation;
    }

    /**
     * 定义从上侧退出的动画效果
     * @return
     */
    protected Animation outToTopAnimation() {
        Animation outToTopAnimation = new TranslateAnimation(
                Animation.RELATIVE_TO_PARENT, 0.0f,
                Animation.RELATIVE_TO_PARENT, 0.0f,
                Animation.RELATIVE_TO_PARENT, 0.0f,
                Animation.RELATIVE_TO_PARENT, -1.0f);
        outToTopAnimation.setDuration(durationTime);
        outToTopAnimation.setInterpolator(new AccelerateInterpolator());
        return outToTopAnimation;
    }
    /**
     * 设置切换的时间间隔
     * */
    public void setFlipIntervalTime(int flipIntervalTime) {
        this.flipIntervalTime = flipIntervalTime;
    }
    /**
     * 设置切换的动画的时间
     * */
    public void setDurationTime(int durationTime) {
        this.durationTime = durationTime;
    }
    /**
     * 设置适配器
     * */
    public void setAdapter(NoticeAdapter mAdapter){
        this.mAdapter = mAdapter;
        start();
    }
    /**
     * 设置Item点击事件
     * */
    public void setOnItemClickListener(OnItemClickListener listener){
        this.listener  = listener;
        start();
    }
    interface OnItemClickListener{
        void onClick(int position);
    }
}
abstract class NoticeAdapter{
    public abstract int getCount();
    public abstract View getView(Context context,int position);
}
然后我思考了一下,到底通过什么样的方式来绑定数据和视图呢,每个需求轮播的视图极大可能是不一样的,所以吧,索性就一次性做好,咱们用Adapter来绑定如何,然后看看使用方法:
ENoticeView noticeView = (ENoticeView) findViewById(R.id.noticeView);
noticeView.setOnItemClickListener(new ENoticeView.OnItemClickListener() {
    @Override
    public void onClick(int position) {
        Toast.makeText(MainActivity.this,"item 被点击"+position,Toast.LENGTH_SHORT).show();
     }
    });
noticeView.setAdapter(new NoticeAdapter() {
       @Override
       public int getCount() {
           return data.size();
       }

       @Override
       public View getView(Context context, int position) {
           View view = View.inflate(context,R.layout.item,null);
     ((TextView)view.findViewById(R.id.textView1)).setText(data.get(position).getNoticeName1());
           return view;
       }
    });
索性就直接把全部用法都丢出来啦,嗯找到控件后,该干嘛干嘛,然后通过设置NoticeAdapter来绑定特定的视图和数据,这样就妈妈再也不用担心不通用的问题了。
最后就是传送门
然后就是传送门了,https://github.com/Blincheng/ENoticeViewDemo/blob/master/README.md
