在macOS下启用CGO_ENABLED的交叉编译Go语言项目生成Windows EXE文件
Goland 编写项目完成,开发环境运行正确
比如如下工程:
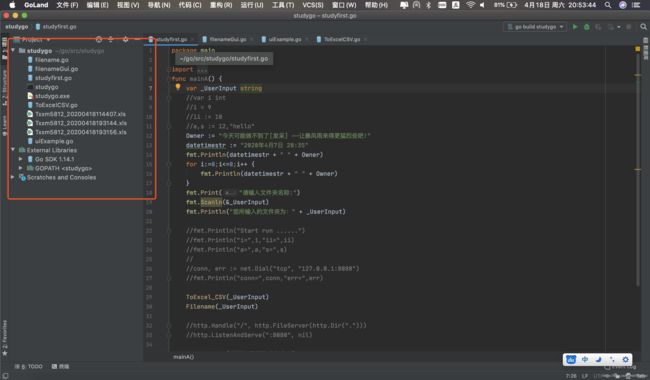
项目中引用了Go开源Gui: github.com/andlabs/ui
package main

import (
	"github.com/andlabs/ui"
	_ "github.com/andlabs/ui/winmanifest"
)

func main() {

	err := ui.Main(func() {
		// 生成:文本框
		name := ui.NewEntry()
		// 生成:标签
		greeting := ui.NewLabel(``)
		// 生成:按钮
		button := ui.NewButton(`输入完成文件夹名称请点击此处`)
		// 设置:按钮点击事件
		button.OnClicked(func(*ui.Button) {
			greeting.SetText(`输入文件夹:[` + name.Text() + `]`)
			ToExcel_CSV(name.Text())
			greeting.SetText(greeting.Text() + "\n生成数据完成.")
			greeting.SetText(greeting.Text() + "\n请检查该文件夹下文件名开头为 Txxm5812_ 的Excel文件.")
		})
		// 生成:垂直容器
		box := ui.NewVerticalBox()
		// 控件间生成间隔
		box.SetPadded(true)
		// 往 垂直容器 中添加 控件
		box.Append(ui.NewLabel(`请输入文件夹的名字【请检查文件夹名称的正确性】`), false)
		box.Append(name, false)
		box.Append(button, false)
		box.Append(greeting, false)

		// 生成:窗口(标题,宽度,高度,是否有 菜单 控件)
		window := ui.NewWindow(`文件夹目录生成Excel for Go 2020-04-18`, 600, 300, true)
		window.SetMargined(true)

		// 窗口容器绑定
		window.SetChild(box)

		// 设置:窗口关闭时
		window.OnClosing(func(*ui.Window) bool {
			// 窗体关闭
			ui.Quit()
			return true
		})

		// 窗体显示
		window.Show()
	})
	if err != nil {
		panic(err)
	}
}
环境运行结果:
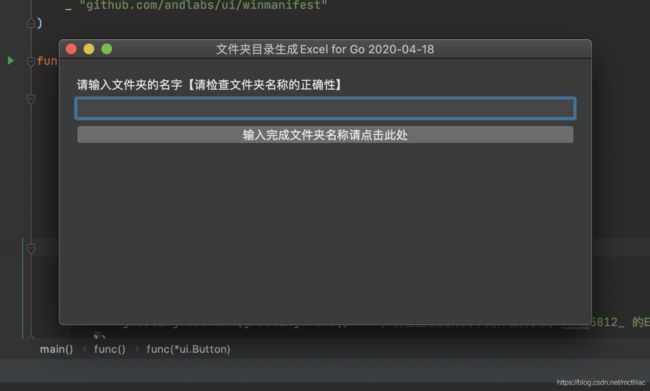
但是这是在MacOS下编译的,也可以使用命令行进行编译

可是这个小工具如果要在windows下运行,如何生成windows下的exe可执行文件呢?
通过网上检索资料知道,可以使用如下命令
lizhongsu@lizhongdeMacBook-Pro studygo % CGO_ENABLED=1 GOOS=windows GOARCH=amd64  go build
# runtime/cgo
gcc_libinit_windows.c:7:10: fatal error: 'windows.h' file not found
lizhongsu@lizhongdeMacBook-Pro studygo %
但是产生了错误
于是查找资料的工作开始了,检索到需要安装mingw-w64
什么是mingw-w64
MinGW-w64简介
MinGW存在的问题:
MinGW只能编译为Win32程序,不能编译为Win64程序。
MinGW更新速度及其慢,不能很好的支持较新的Windows API。
为了解决这些问题,一些人fork了MinGW, 新项目被命名为MinGW-w64。
MinGW-w64不仅能编译为Win64程序,也能编译为Win32程序。
MinGW-w64同样是跨平台软件,可以运行在Windows、GNU/Linux、macOS中。
MinGW-w64官网:http://mingw-w64.org
MacOS下安装mingw-w64
brew install mingw-w64
可是直接使用这个命令安装,太慢了,慢的无法承受,本人整整安装了一下午,也没有成功。
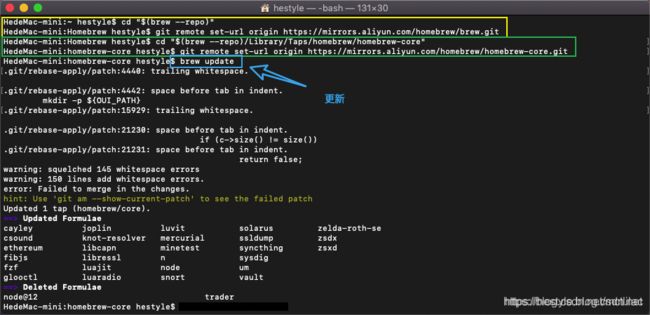
后来查找网上说换源可以解决速度慢的问题,于是换源
阿里云
# 替换brew.git
cd "$(brew --repo)"
git remote set-url origin https://mirrors.aliyun.com/homebrew/brew.git
# 替换homebrew-core.git
cd "$(brew --repo)/Library/Taps/homebrew/homebrew-core"
git remote set-url origin https://mirrors.aliyun.com/homebrew/homebrew-core.git
# 刷新源
brew update
清华源
# 替换brew.git
cd "$(brew --repo)"
git remote set-url origin https://mirrors.tuna.tsinghua.edu.cn/git/homebrew/brew.git
# 替换homebrew-core.git
cd "$(brew --repo)/Library/Taps/homebrew/homebrew-core"
git remote set-url origin https://mirrors.tuna.tsinghua.edu.cn/git/homebrew/homebrew-core.git
# 刷新源
brew update
中科大源
# 替换brew.git
cd "$(brew --repo)"
git remote set-url origin https://mirrors.ustc.edu.cn/brew.git
# 替换homebrew-core.git
cd "$(brew --repo)/Library/Taps/homebrew/homebrew-core"
git remote set-url origin https://mirrors.ustc.edu.cn/homebrew-core.git
# 刷新源
brew update
homebrew的基本使用
1、安装软件命令
python3为安装软件的名称
brew install python3
2、搜索软件命令
python3为需要搜索的软件名称
brew search python3
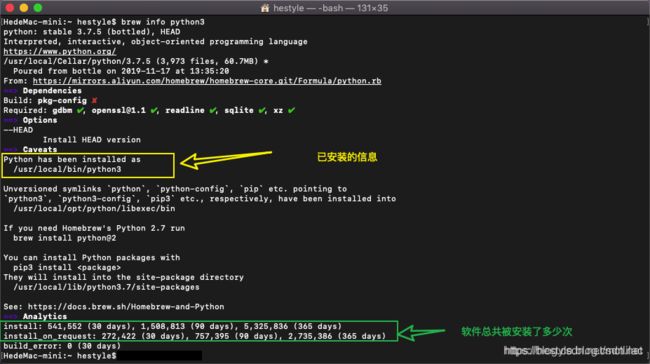
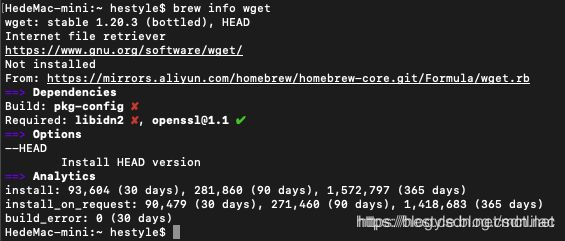
3、查看软件信息
已安装的、未安装的软件都可以查看。
python3为需要查看的软件名称
brew info python3
4、卸载软件
卸载通过brew安装的软件
wget为需要卸载的软件名称
brew uninstall wget
安装完成mingw-w64
再次尝试编译Go项目
使用命令
CGO_ENABLED=1 CC=x86_64-w64-mingw32-gcc CXX=x86_64-w64-mingw32-g++ GOOS=windows GOARCH=amd64 go build -x -v -ldflags "-s -w"
编译结果
lizhongsu@lizhongdeMacBook-Pro studygo % CGO_ENABLED=1 CC=x86_64-w64-mingw32-gcc CXX=x86_64-w64-mingw32-g++ GOOS=windows GOARCH=amd64 go build -x -v -ldflags "-s -w"
WORK=/var/folders/xm/jdps35rs4h38kvtl10sl9q840000gn/T/go-build658172393
mkdir -p $WORK/b001/
cat >$WORK/b001/importcfg.link << 'EOF' # internal
packagefile studygo=/Users/lizhongsu/Library/Caches/go-build/00/00ac2a764f93fcf6878f1b1b7e075fd6cc5fd08a67edc180fa858122a18a42a9-d
packagefile encoding/csv=/Users/lizhongsu/Library/Caches/go-build/73/738fe06f162f422f868f01fa56c1834390daf38596757cbd1a4244631ad9967f-d
packagefile fmt=/Users/lizhongsu/Library/Caches/go-build/13/131f327e5a6edc74345a0f850446e740373e2828135e224b06b196e012a9f617-d
packagefile github.com/andlabs/ui=/Users/lizhongsu/Library/Caches/go-build/ff/ffc9199430498d6375e6c429b365ecde8e759e962df8123bf1b2ede2f0fcca9a-d
packagefile github.com/andlabs/ui/winmanifest=/Users/lizhongsu/Library/Caches/go-build/71/7189a8581db4175640b034a62b159e81fb8f5ed47da1b0d1b3fb5eee6501e523-d
packagefile internal/race=/Users/lizhongsu/Library/Caches/go-build/34/3428f198b873770e7f31b88d6a16b66a73226501ac91b0569adfe9b6c2ac0bce-d
packagefile image/color=/Users/lizhongsu/Library/Caches/go-build/46/46adb9b85fcedcbdff29362f13febd9762ce291d8db978b130b0f01a6239edfd-d
packagefile internal/syscall/windows/sysdll=/Users/lizhongsu/Library/Caches/go-build/fc/fc3a81c4945173524050854b5c699ee2c254d43e6850e0a6c898616022805ef2-d
EOF
mkdir -p $WORK/b001/exe/
cd .
/usr/local/go/pkg/tool/darwin_amd64/link -o $WORK/b001/exe/a.out.exe -importcfg $WORK/b001/importcfg.link -buildmode=exe -buildid=FKuCRU2bJwAmhCz6QJQ_/UAthG7sM5y9aeKY--9x6/uMPk9jSAwH5OnXs5D1Xy/FKuCRU2bJwAmhCz6QJQ_ -s -w -extld=x86_64-w64-mingw32-g++ /Users/lizhongsu/Library/Caches/go-build/00/00ac2a764f93fcf6878f1b1b7e075fd6cc5fd08a67edc180fa858122a18a42a9-d
/usr/local/go/pkg/tool/darwin_amd64/buildid -w $WORK/b001/exe/a.out.exe # internal
mv $WORK/b001/exe/a.out.exe studygo.exe
rm -r $WORK/b001/
lizhongsu@lizhongdeMacBook-Pro studygo %
生成了studygo.exe 文件
验证一下该文件
lizhongsu@lizhongdeMacBook-Pro studygo % file studygo.exe
studygo.exe: PE32+ executable (console) x86-64 (stripped to external PDB), for MS Windows
lizhongsu@lizhongdeMacBook-Pro studygo %
编译成功!
