Directx11教程四十五之MotionBlur(运用VelocityBuffer)上
本节介绍有关 motionBlur 移动模糊实现的算法,程序结构如下所示:
motionBlur(移动模糊)算法概述:
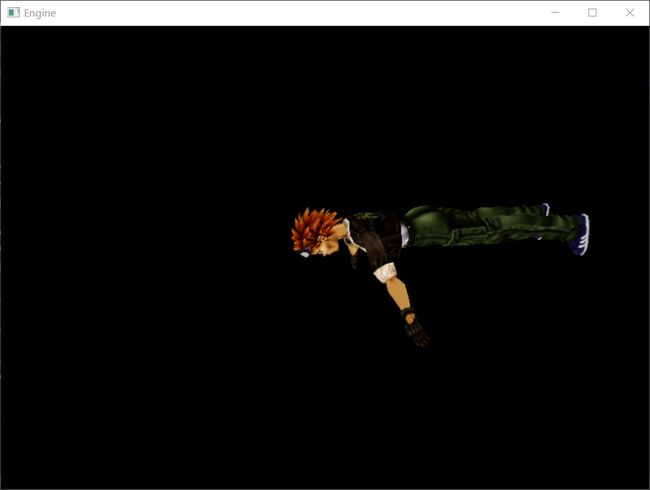
移动模糊也就是物体移动时会产生模糊的现象,可以说是相对观察相机快速变动的物体(与其说是物体,还不如说是相应的片元fragment)产生的残影与物体本体叠加在一个范围,产生的模糊现象。如下所示:
移动模糊在什么时候发生,我总结为两种情况:
(1)物体位置不动而相机位置动
(2)物体位置动而相机位置不动
总结为:物体(片元)位置相对于相机位置(在前后两帧)发生明显变动时,motionBlur就可能发生。
motionBlur(移动模糊)算法实现:
依据上面有关motionBlur的概述,物体(片元)位置相对于相机位置(在前后两帧)发生明显变动时,motionBlur就可能发生。
我们引入了velocityBuffer来计算移动模糊,velocityBuffer其实就是片元在NDC空间在前后两帧位置偏移量(用于后面计算屏幕空间的纹理采样偏移产生blur)
步骤如下:
RenderGBufferPass:
1.第一步,进行延迟渲染(DefferedRender),获取屏幕空间的colorBufferRT以及相应片元在前后两帧位置偏移量(velocity)
得说下我们这次的物体是上下进行运动的
Texture2D ShaderTexture:register(t0);  //纹理资源
SamplerState SampleType:register(s0);   //采样方式

//VertexShader
cbuffer CBCurMatrix:register(b0)
{
	matrix curWorld;
	matrix curView;
	matrix Proj;
	matrix WorldInvTranspose;
};

cbuffer CBPreMatrix:register(b1)
{
	matrix preWorld;
	matrix preView;
};


struct VertexIn
{
	float3 Pos:POSITION;
	float3 Normal:NORMAL;
	float2 Tex:TEXCOORD;  //多重纹理可以用其它数字
};


struct VertexOut
{
	float4 Pos:SV_POSITION;
	float2 Tex:TEXCOORD1;
	float4 curClipSpacePos:TEXCOORD2;
	float4 preClipSpacePos:TEXCOORD3;
};


struct PixelOut
{
	float4 color:SV_Target0;
	float4 velocity:SV_Target1;
};


VertexOut VS(VertexIn ina)
{
	VertexOut outa;

	//将坐标变换到齐次裁剪空间
	float4 curClipSpacePos = mul(float4(ina.Pos, 1.0f), curWorld);
	curClipSpacePos = mul(curClipSpacePos, curView);
	curClipSpacePos = mul(curClipSpacePos, Proj);
	outa.Pos = curClipSpacePos;

	//目前帧的齐次裁剪空间位置
	outa.curClipSpacePos = curClipSpacePos;

	//前一帧的齐次裁剪空间位置
	float4 preClipSpacePos = mul(float4(ina.Pos, 1.0f), preWorld);
	preClipSpacePos = mul(preClipSpacePos, preView);
	preClipSpacePos = mul(preClipSpacePos, Proj);
	outa.preClipSpacePos = preClipSpacePos;

	outa.Tex= ina.Tex;
	return outa;
}


/*延迟渲染的PixelShader输出的为屏幕上的未经处理的渲染到屏幕的像素和像素对应的法线*/
PixelOut PS(VertexOut outa) : SV_Target
{
	PixelOut pout;

	//第一,获取像素的采样颜色
    pout.color = ShaderTexture.Sample(SampleType, outa.Tex);

	float3 curNDCPos = outa.curClipSpacePos.xyz / outa.curClipSpacePos.w;
	float3 preNDCPos = outa.preClipSpacePos.xyz / outa.preClipSpacePos.w;

	float2 veclocity = (curNDCPos - preNDCPos).xy / 2.0f;

	//第二,获取像素的法线量
	pout.velocity = float4(veclocity.x, veclocity.y,0.0f, 1.0f);

	return pout;
}
colorBufferRT:
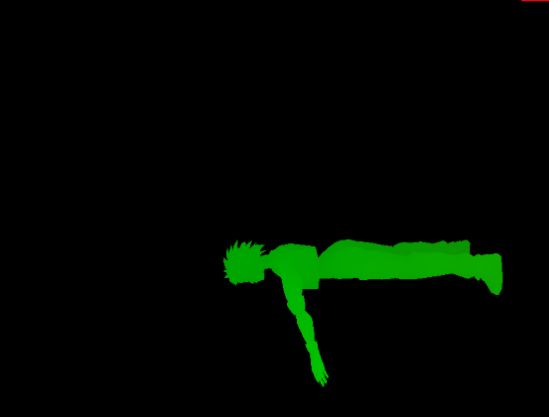
VelocityBufferRT:(VelocityBuffer 速度缓存其实就是片元在前后两帧NDC空间的偏移量,用于后面对ColorBufferRT采样的坐标进行偏移,模拟残影的效果):
RenderMotionBlurPass:
2. 第二步,进行后处理,对VelocityBufferRT进行采样,获取片元前后两帧在NDC空间的偏移量,然后用该偏移量对纹理采样坐标进行多次偏移,模拟前后n帧残影的效果,然后叠加在一起,形成残影模糊的效果,也就是motionBlur。
Texture2D colorRT:register(t0);  //纹理资源
Texture2D velocityRT:register(t1);  //纹理资源
SamplerState SampleType:register(s0);   //采样方式

struct VertexIn
{
	float3 Pos:POSITION;
	float2 Tex:TEXCOORD;  //多重纹理可以用其它数字
};


struct VertexOut
{
	float4 Pos:SV_POSITION;
	float2 Tex:TEXCOORD0;
};


VertexOut VS(VertexIn ina)
{
	VertexOut outa;
	outa.Pos = float4(ina.Pos, 1.0f);
	outa.Tex= ina.Tex;
	return outa;
}


float4 PS(VertexOut outa) : SV_Target
{
	float2 velocityVec = velocityRT.Sample(SampleType, outa.Tex).xy;


	float4 color = float4(0.0f,0.0f,0.0f,0.0f);

	float2 TexCoord = outa.Tex;

	float motionScale = 4.0f;

	//利用位移向量对采样地点进行平移
	color += colorRT.Sample(SampleType, TexCoord)*0.5f;

	TexCoord -= velocityVec *motionScale;
	color += colorRT.Sample(SampleType, TexCoord)*0.15f;

	TexCoord -= velocityVec *motionScale;
	color += colorRT.Sample(SampleType, TexCoord)*0.15f;

	TexCoord -= velocityVec *motionScale;
	color += colorRT.Sample(SampleType, TexCoord)*0.1f;

	TexCoord -= velocityVec *motionScale;
	color += colorRT.Sample(SampleType, TexCoord)*0.1f;

	color.a = 1.0f;

	return color;
}
本motionBlur(移动模糊)算法的缺陷:
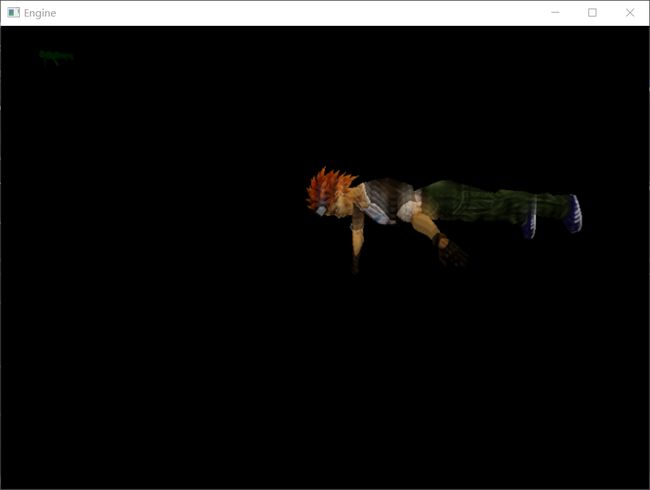
本博客的demo实现是建立在一个物体以及背景是黑色的情况下的,假设存在其他物体或者背景不为黑色的情况下,在renderMotionBlurPass时,偏移的坐标就很有可能采样到其他物体或者背景的颜色来叠加,进而造成异常的motionBlur效果, 如下图所示:
而且这种移动模糊像素的轮廓突兀性很高,过于明显,不够自然,也是其中一个问题。
所以这种motionBlur算法不够健壮,实用性低。下一篇博客准备介绍一种实用性和健壮性很高的motionBlur算法。
参考文献和源码链接
[1].http://ogldev.atspace.co.uk/www/tutorial41/tutorial41.html
[2]《real time rendering 3rd》10.14章节的motionBlur
源码链接:http://download.csdn.net/download/qq_29523119/10268208


