springMVC3.0(文件上传,@RequestMapping加参数,@SessionAttributes,@ModelAttribute,转发,重定向,数值获取,传参,ajax,拦截器)
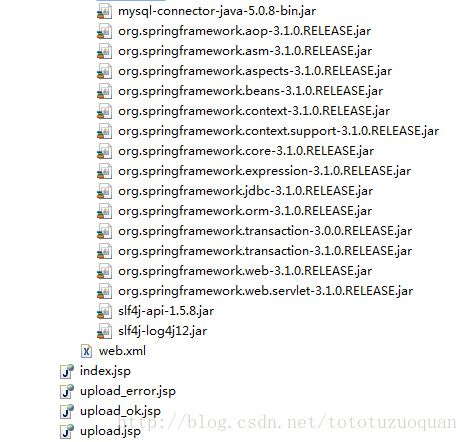
1.项目包结构如下:


2. spring配置文件springMVC.xml修改如下:
|
|
3. spring配置文件beans.xml内容修改如下:
|
|
4. web.xml文件不变
xmlns:xsi="http://www.w3.org/2001/XMLSchema-instance"
xsi:schemaLocation="http://java.sun.com/xml/ns/j2ee
http://java.sun.com/xml/ns/j2ee/web-app_2_4.xsd">
5. 类的代码不变。
6. 运行,测试。跟上一个项目保持一致。
Spring MVC 3.0 深入
核心原理
1. 用户发送请求给服务器。url:user.do
2. 服务器收到请求。发现DispatchServlet可以处理。于是调用DispatchServlet。
3. DispatchServlet内部,通过HandleMapping检查这个url有没有对应的Controller。如果有,则调用Controller。
4. Controller开始执行。
5. Controller执行完毕后,如果返回字符串,则ViewResolver将字符串转化成相应的视图对象;如果返回ModelAndView对象,该对象本身就包含了视图对象信息。
6. DispatchServlet将执视图对象中的数据,输出给服务器。
7. 服务器将数据输出给客户端。
spring3.0中相关jar包的含义
| org.springframework.aop-3.0.3.RELEASE.jar |
spring的aop面向切面编程 |
| org.springframework.asm-3.0.3.RELEASE.jar |
spring独立的asm字节码生成程序 |
| org.springframework.beans-3.0.3.RELEASE.jar |
IOC的基础实现 |
| org.springframework.context-3.0.3.RELEASE.jar |
IOC基础上的扩展服务 |
| org.springframework.core-3.0.3.RELEASE.jar |
spring的核心包 |
| org.springframework.expression-3.0.3.RELEASE.jar |
spring的表达式语言 |
| org.springframework.web-3.0.3.RELEASE.jar |
web工具包 |
| org.springframework.web.servlet-3.0.3.RELEASE.jar |
mvc工具包 |
@Controller控制器定义
和Struts1一样,Spring的Controller是Singleton的。这就意味着会被多个请求线程共享。因此,我们将控制器设计成无状态类。
在spring 3.0中,通过@controller标注即可将class定义为一个controller类。为使spring能找到定义为controller的bean,需要在spring-context配置文件中增加如下定义:
| |
注:实际上,使用@component,也可以起到@Controller同样的作用。
@RequestMapping
在类前面定义,则将url和类绑定。
在方法前面定义,则将url和类的方法绑定,如下所示:
| package com.sxt.web;
import javax.annotation.Resource; import org.springframework.stereotype.Controller; import org.springframework.web.bind.annotation.RequestMapping; import com.sxt.service.UserService;
@Controller @RequestMapping("/user.do") publicclass UserController {
@Resource private UserServiceuserService;
//http://localhost:8080/springmvc02/user.do?method=reg&uname=zzzz @RequestMapping(params="method=reg") public String reg(String uname) { System.out.println("HelloController.handleRequest()"); userService.add(uname); return"index"; }
public UserService getUserService() { returnuserService; } publicvoid setUserService(UserService userService) { this.userService = userService; }
} |
@RequestParam
一般用于将指定的请求参数赋给方法中形参。示例代码如下:
| @RequestMapping(params="method=reg5") public String reg5(@RequestParam("name")String uname,ModelMap map) { System.out.println("HelloController.handleRequest()"); System.out.println(uname); //通过ModelMap传参 map.put("name", uname); return"index"; } |
这样,就会将name参数的值付给uname。当然,如果请求参数名称和形参名称保持一致,则不需要这种写法。
@SessionAttributes
将ModelMap中指定的属性放到session中。示例代码如下:
| @Controller @RequestMapping("/user.do") @SessionAttributes({"u","a"}) //将ModelMap中属性名字为u、a的再放入session中。这样,request和session中都有了。 publicclass UserController { @RequestMapping(params="method=reg4") public String reg4(ModelMap map) { System.out.println("HelloController.handleRequest()"); map.addAttribute("u","uuuu"); //将u放入request作用域中,这样转发页面也可以取到这个数据。 return"index"; } } |
| <body> <h1>**********${requestScope.u.uname}h1> <h1>**********${sessionScope.u.uname}h1> body> |
注:名字为”user”的属性再结合使用注解@SessionAttributes可能会报错。
@ModelAttribute
这个注解可以跟@SessionAttributes配合在一起用。可以将ModelMap中属性的值通过该注解自动赋给指定变量。
示例代码如下:
| package com.sxt.web; import javax.annotation.Resource; import org.springframework.stereotype.Controller; import org.springframework.ui.ModelMap; import org.springframework.web.bind.annotation.ModelAttribute; import org.springframework.web.bind.annotation.RequestMapping; import org.springframework.web.bind.annotation.SessionAttributes; @Controller @RequestMapping("/user.do") @SessionAttributes({"u","a"}) publicclass UserController {
@RequestMapping(params="method=reg4") public String reg4(ModelMap map) { System.out.println("HelloController.handleRequest()"); map.addAttribute("u","尚学堂高淇"); return"index"; }
@RequestMapping(params="method=reg5") public String reg5(@ModelAttribute("u")String uname ,ModelMap map) { System.out.println("HelloController.handleRequest()"); System.out.println(uname); return"index"; }
} |
先调用reg4方法,再调用reg5方法。我们发现控制台打印出来:尚学堂高淇
Controller类中方法参数的处理
Controller类中方法返回值的处理
1. 返回string(建议)
a) 根据返回值找对应的显示页面。路径规则为:prefix前缀+返回值+suffix后缀组成
b) 代码如下:
| @RequestMapping(params="method=reg4") public String reg4(ModelMap map) { System.out.println("HelloController.handleRequest()"); return"index"; } |
| 前缀为:/WEB-INF/jsp/ 后缀是:.jsp 在转发到:/WEB-INF/jsp/index.jsp |
2. 也可以返回ModelMap、ModelAndView、map、List、Set、Object、无返回值。一般建议返回字符串!
请求转发和重定向
代码示例:
| package com.sxt.web;
import javax.annotation.Resource; import org.springframework.stereotype.Controller; import org.springframework.ui.ModelMap; import org.springframework.web.bind.annotation.ModelAttribute; import org.springframework.web.bind.annotation.RequestMapping; import org.springframework.web.bind.annotation.SessionAttributes;
@Controller @RequestMapping("/user.do") publicclass UserController {
@RequestMapping(params="method=reg4") public String reg4(ModelMap map) { System.out.println("HelloController.handleRequest()"); // return "forward:index.jsp"; // return "forward:user.do?method=reg5"; //转发 // return "redirect:user.do?method=reg5"; //重定向 return"redirect:http://www.baidu.com"; //重定向 }
@RequestMapping(params="method=reg5") public String reg5(String uname,ModelMap map) { System.out.println("HelloController.handleRequest()"); System.out.println(uname); return"index"; }
} |
访问reg4方法,既可以看到效果。
获得request对象、session对象
普通的Controller类,示例代码如下:
| @Controller @RequestMapping("/user.do") publicclass UserController {
@RequestMapping(params="method=reg2") public String reg2(String uname,HttpServletRequest req,ModelMap map){ req.setAttribute("a","aa"); req.getSession().setAttribute("b","bb"); return"index"; } } |
ModelMap
是map的实现,可以在其中存放属性,作用域同request。下面这个示例,我们可以在modelMap中放入数据,然后在forward的页面上显示这些数据。通过el表达式、JSTL、java代码均可。代码如下:
| package com.sxt.web;
import org.springframework.stereotype.Controller; import org.springframework.ui.ModelMap; import org.springframework.web.bind.annotation.RequestMapping; import org.springframework.web.servlet.mvc.multiaction.MultiActionController;
@Controller @RequestMapping("/user.do") publicclass UserControllerextends MultiActionController {
@RequestMapping(params="method=reg") public String reg(String uname,ModelMap map){ map.put("a","aaa"); return"index"; } } |
| <%@ page language="java"import="java.util.*"pageEncoding="utf-8"%> <%@ taglib prefix="c"uri="http://java.sun.com/jsp/jstl/core"%> DOCTYPEHTMLPUBLIC "-//W3C//DTD HTML 4.01 Transitional//EN"> <html> <head>head> <body> <h1>${requestScope.a}h1> <c:out value="${requestScope.a}">c:out> body> html> |
ModelAndView模型视图类
见名知意,从名字上我们可以知道ModelAndView中的Model代表模型,View代表视图。即,这个类把要显示的数据存储到了Model属性中,要跳转的视图信息存储到了view属性。我们看一下ModelAndView的部分源码,即可知其中关系:
| publicclassModelAndView {
/** View instance or view name String */ private Objectview;
/** Model Map */ private ModelMapmodel;
/** * Indicates whether or not this instance has been cleared with a call to{@link #clear()}. */ privatebooleancleared =false;
/** * Default constructor for bean-style usage: populating bean * properties instead of passing in constructor arguments. * @see #setView(View) * @see #setViewName(String) */ public ModelAndView() { }
/** * Convenient constructor when there is no model data to expose. * Can also be used in conjunction with * @param viewName name of the View to render, to be resolved * by the DispatcherServlet's ViewResolver * @see #addObject */ public ModelAndView(String viewName) { this.view = viewName; }
/** * Convenient constructor when there is no model data to expose. * Can also be used in conjunction with * @param view View object to render * @see #addObject */ public ModelAndView(View view) { this.view = view; }
/** * Creates new ModelAndView given a view name and a model. * @param viewName name of the View to render, to be resolved * by the DispatcherServlet's ViewResolver * @param model Map of model names (Strings) to model objects * (Objects). Model entries may not be * model Map may be */ public ModelAndView(String viewName, Map this.view = viewName; if (model !=null) { getModelMap().addAllAttributes(model); } }
/** * Creates new ModelAndView given a View object and a model. * * storage of this class. You should not consider to modify the supplied * Map after supplying it to this class * @param view View object to render * @param model Map of model names (Strings) to model objects * (Objects). Model entries may not be * model Map may be */ public ModelAndView(View view, Map this.view = view; if (model !=null) { getModelMap().addAllAttributes(model); } }
/** * Convenient constructor to take a single model object. * @param viewName name of the View to render, to be resolved * by the DispatcherServlet's ViewResolver * @param modelName name of the single entry in the model * @param modelObject the single model object */ public ModelAndView(String viewName, String modelName, Object modelObject) { this.view = viewName; addObject(modelName, modelObject); }
/** * Convenient constructor to take a single model object. * @param view View object to render * @param modelName name of the single entry in the model * @param modelObject the single model object */ public ModelAndView(View view, String modelName, Object modelObject) { this.view = view; addObject(modelName, modelObject); }
/** * Set a view name for this ModelAndView, to be resolved by the * DispatcherServlet via a ViewResolver. Will override any * pre-existing view name or View. */ publicvoid setViewName(String viewName) { this.view = viewName; }
/** * Return the view name to be resolved by the DispatcherServlet * via a ViewResolver, or */ public String getViewName() { return (this.viewinstanceof String ? (String) this.view :null); }
/** * Set a View object for this ModelAndView. Will override any * pre-existing view name or View. */ publicvoid setView(View view) { this.view = view; }
/** * Return the View object, or * to be resolved by the DispatcherServlet via a ViewResolver. */ public View getView() { return (this.viewinstanceof View ? (View) this.view :null); }
/** * Indicate whether or not this * as a view name or as a direct{@link View} instance. */ publicboolean hasView() { return (this.view != null); }
/** * Return whether we use a view reference, i.e. * if the view has been specified via a name to be resolved by the * DispatcherServlet via a ViewResolver. */ publicboolean isReference() { return (this.viewinstanceof String); }
/** * Return the model map. May return * Called by DispatcherServlet for evaluation of the model. */ protected Map returnthis.model; }
/** * Return the underlying */ public ModelMap getModelMap() { if (this.model == null) { this.model =new ModelMap(); } returnthis.model; }
/** * Return the model map. Never returns * To be called by application code for modifying the model. */ public Map return getModelMap(); }
/** * Add an attribute to the model. * @param attributeName name of the object to add to the model * @param attributeValue object to add to the model (never * @see ModelMap#addAttribute(String, Object) * @see #getModelMap() */ publicModelAndView addObject(String attributeName, Object attributeValue) { getModelMap().addAttribute(attributeName, attributeValue); returnthis; }
/** * Add an attribute to the model using parameter name generation. * @param attributeValue the object to add to the model (never * @see ModelMap#addAttribute(Object) * @see #getModelMap() */ publicModelAndView addObject(Object attributeValue) { getModelMap().addAttribute(attributeValue); returnthis; }
/** * Add all attributes contained in the provided Map to the model. * @param modelMap a Map of attributeName-> attributeValue pairs * @see ModelMap#addAllAttributes(Map) * @see #getModelMap() */ publicModelAndView addAllObjects(Map getModelMap().addAllAttributes(modelMap); returnthis; }
/** * Clear the state of this ModelAndView object. * The object will be empty afterwards. * Can be used to suppress rendering of a given ModelAndView object * in the * @see #isEmpty() * @see HandlerInterceptor#postHandle */ publicvoid clear() { this.view =null; this.model =null; this.cleared =true; }
/** * Return whether this ModelAndView object is empty, * i.e. whether it does not hold any view and does not contain a model. */ publicboolean isEmpty() { return (this.view == null && CollectionUtils.isEmpty(this.model)); }
/** * Return whether this ModelAndView object is empty as a result of a call to{@link #clear} * i.e. whether it does not hold any view and does not contain a model. * Returns * after the call to{@link #clear}. * @see #clear() */ publicboolean wasCleared() { return (this.cleared && isEmpty()); }
/** * Return diagnostic information about this model and view. */ @Override public String toString() { StringBuilder sb = new StringBuilder("ModelAndView: "); if (isReference()) { sb.append("reference to view with name '").append(this.view).append("'"); } else { sb.append("materialized View is [").append(this.view).append(']'); } sb.append("; model is ").append(this.model); return sb.toString(); } } |
测试代码如下:
| package com.sxt.web;
import org.springframework.stereotype.Controller; import org.springframework.web.bind.annotation.RequestMapping; import org.springframework.web.servlet.ModelAndView; import org.springframework.web.servlet.mvc.multiaction.MultiActionController;
import com.sxt.po.User;
@Controller @RequestMapping("/user.do") publicclass UserControllerextends MultiActionController {
@RequestMapping(params="method=reg") public ModelAndView reg(String uname){ ModelAndView mv = new ModelAndView(); mv.setViewName("index"); // mv.setView(new RedirectView("index"));
User u = new User(); u.setUname("高淇"); mv.addObject(u); //查看源代码,得知,直接放入对象。属性名为”首字母小写的类名”。一般建议手动增加属性名称。 mv.addObject("a","aaaa"); returnmv; }
} |
| <%@ page language="java"import="java.util.*"pageEncoding="gbk"%> <%@ taglib prefix="c"uri="http://java.sun.com/jsp/jstl/core"%> DOCTYPEHTMLPUBLIC "-//W3C//DTD HTML 4.01 Transitional//EN"> <html> <head> head> <body> <h1>${requestScope.a}h1> <h1>${requestScope.user.uname}h1> body> html> |
| 地址栏输入:http://localhost:8080/springmvc03/user.do?method=reg 结果为: |
基于spring 3.0mvc 框架的文件上传实现
1. spring使用了apache-commons下得上传组件,因此,我们需要引入两个jar包:
1. apache-commons-fileupload.jar
2. apache-commons-io.jar
2. 在springmvc-servlet.xml配置文件中,增加CommonsMultipartResoler配置:
|
<beanid="multipartResolver" class="org.springframework.web.multipart.commons.CommonsMultipartResolver"> <propertyname="defaultEncoding"value="gbk"/> <propertyname="maxInMemorySize"value="10240"/> <propertyname="uploadTempDir"value="/upload/"/> <propertyname="maxUploadSize"value="-1"/> bean> |
3. 建立upload.jsp页面,内容如下:
| <%@ page language="java"import="java.util.*"pageEncoding="gbk"%> DOCTYPEHTMLPUBLIC "-//W3C//DTD HTML 4.01 Transitional//EN"> <html> <head> <title>测试springmvc中上传的实现title> head> <body> <formaction="upload.do" method="post"enctype="multipart/form-data"> <inputtype="text"name="name"/> <inputtype="file"name="file"/> <inputtype="submit"/> form> body> html> |
4. 建立控制器,代码如下:
| package com.sxt.web;
import java.io.File; import java.util.Date;
import javax.servlet.ServletContext;
import org.springframework.stereotype.Controller; import org.springframework.web.bind.annotation.RequestMapping; import org.springframework.web.bind.annotation.RequestMethod; import org.springframework.web.bind.annotation.RequestParam; import org.springframework.web.context.ServletContextAware; import org.springframework.web.multipart.commons.CommonsMultipartFile;
@Controller public class FileUploadController implements ServletContextAware {
private ServletContext servletContext;
@Override public void setServletContext(ServletContext context) { this.servletContext = context; }
@RequestMapping(value="/upload.do", method = RequestMethod.POST) public String handleUploadData(String name,@RequestParam("file")[微软用户2] CommonsMultipartFile file){ if (!file.isEmpty()) { String path = this.servletContext.getRealPath("/tmp/"); //获取本地存储路径 System.out.println(path); String fileName = file.getOriginalFilename(); String fileType = fileName.substring(fileName.lastIndexOf(".")); System.out.println(fileType); File file2 = new File(path,new Date().getTime() + fileType); //新建一个文件 try { file.getFileItem().write(file2); //将上传的文件写入新建的文件中 } catch (Exception e) { e.printStackTrace(); } return "redirect:upload_ok.jsp"; }else{ return "redirect:upload_error.jsp"; } } } |
5. 建立upload_ok.jsp页面
| <%@ page language="java"import="java.util.*"pageEncoding="gbk"%> DOCTYPEHTMLPUBLIC "-//W3C//DTD HTML 4.01 Transitional//EN"> <html> <head> head> <body> <h1>上传成功!h1> body> html> |
6. 建立upload_error.jsp页面
| <%@pagelanguage="java"import="java.util.*"pageEncoding="gbk"%> DOCTYPEHTMLPUBLIC "-//W3C//DTD HTML 4.01 Transitional//EN"> <html> <head> head> <body> <h1>上传失败!h1> body> html> |
7. 发布项目,运行测试:http://localhost:8080/springmvc03/upload.jsp
进入项目发布后的目录,发现文件上传成功:
处理ajax请求
spring使用了jackson类库,帮助我们在java对象和json、xml数据之间的互相转换。他可以将控制器返回的对象直接转换成json数据,供客户端使用。客户端也可以传送json数据到服务器进行直接转换。使用步骤如下:
1. 项目中需要引入如下两个jar包:
jackson-core-asl-1.7.2jar
jackson-mapper-asl-1.7.2jar
2. spring配置文件中修改:
| <mvc:annotation-driven/>
<beanclass="org.springframework.web.servlet.mvc.annotation.AnnotationMethodHandlerAdapter"> <propertyname="cacheSeconds"value="0"/> <propertyname="messageConverters"> <list> <beanclass="org.springframework.http.converter.json.MappingJacksonHttpMessageConverter">bean> list> property> bean> |
3. 客户端代码a.jsp如下:
| <%@pagelanguage="java"import="java.util.*"pageEncoding="gbk"%> <% String path = request.getContextPath(); String basePath = request.getScheme()+"://"+request.getServerName()+":"+request.getServerPort()+path+"/"; %>
DOCTYPEHTMLPUBLIC "-//W3C//DTD HTML 4.01 Transitional//EN"> <html> <head> <basehref="<%=basePath%>">
<title>My JSP 'index.jsp' starting pagetitle> <metahttp-equiv="pragma"content="no-cache"> <metahttp-equiv="cache-control"content="no-cache"> <metahttp-equiv="expires"content="0"> <metahttp-equiv="keywords"content="keyword1,keyword2,keyword3"> <metahttp-equiv="description"content="This is my page"> <script> function createAjaxObj(){ var req; if(window.XMLHttpRequest){ req = new XMLHttpRequest(); }else{ req = new ActiveXObject("Msxml2.XMLHTTP"); //ie } return req; }
function sendAjaxReq(){ var req = createAjaxObj(); req.open("get","myajax.do?method=test2&uname=张三"); req.setRequestHeader("accept","application/json"); req.onreadystatechange =function(){ eval("var result="+req.responseText); document.getElementById("div1").innerHTML=result[0].uname; } req.send(null); } script> head>
<body> <ahref="javascript:void(0);"onclick="sendAjaxReq();">测试a> <divid="div1">div> body> html>
|
4. 服务器端代码如下:
| package com.sxt.web;
import java.io.UnsupportedEncodingException; import java.util.ArrayList; import java.util.List;
import org.springframework.stereotype.Controller; import org.springframework.web.bind.annotation.RequestBody; import org.springframework.web.bind.annotation.RequestMapping; import org.springframework.web.bind.annotation.RequestMethod; import org.springframework.web.bind.annotation.ResponseBody;
import com.sxt.po.User;
@Controller @RequestMapping("myajax.do") public class MyAjaxController {
@RequestMapping(params="method=test1",method=RequestMethod.GET) public @ResponseBody List String uname2 = new String(uname.getBytes("iso8859-1"),"gbk"); System.out.println(uname2); System.out.println("MyAjaxController.test1()"); List list.add(new User("高淇","123")); list.add(new User("马士兵","456"));
return list; }
} |
5. 测试。
a) 启动服务器。输入:http://localhost:8080/springmvc03/a.jsp
Spring中的拦截器
定义spring拦截器两种基本方式
1. 实现接口:org.springframework.web.servlet.HandlerInterceptor。
接口中有如下方法需要重写:
注意:参数中的Object handler是下一个拦截器。
a) publicboolean preHandle
(HttpServletRequest request,HttpServletResponse response,
Object handler) throws Exception
该方法在action执行前执行,可以实现对数据的预处理,比如:编码、安全控制等。
如果方法返回true,则继续执行action。
b) publicvoid postHandle
(HttpServletRequest request,HttpServletResponse response,
Object handler, ModelAndView modelAndView) throws Exception
该方法在action执行后,生成视图前执行。在这里,我们有机会修改视图层数据。
c) publicvoid afterCompletion(HttpServletRequest request,HttpServletResponse response, Object handler, Exception ex) throws Exception
最后执行,通常用于释放资源,处理异常。我们可以根据ex是否为空,来进行相关的异常处理。因为我们在平时处理异常时,都是从底层向上抛出异常,最后到了spring框架从而到了这个方法中。
2. 继承适配器:
org.springframework.web.servlet.handler.HandlerInterceptorAdapter
这个适配器实现了HandlerInterceptor接口。提供了这个接口中所有方法的空实现。
如下我们写出两个拦截器的示例代码,仅供大家参考:
| package com.sxt.interceptor;
importjavax.interceptor.Interceptors; import javax.servlet.http.HttpServletRequest; import javax.servlet.http.HttpServletResponse;
import org.springframework.web.servlet.HandlerInterceptor; import org.springframework.web.servlet.ModelAndView;
publicclass MyInterceptorimplements HandlerInterceptor {
@Override publicvoid afterCompletion(HttpServletRequest request, HttpServletResponse response, Object handler, Exception ex) throws Exception { System.out.println("最后执行!!!一般用于释放资源!!");
}
@Override publicvoid postHandle(HttpServletRequest request,HttpServletResponse response, Object handler, ModelAndView modelAndView) throws Exception { System.out.println("Action执行之后,生成视图之前执行!!"); }
@Override publicboolean preHandle(HttpServletRequest request,HttpServletResponse response, Object handler)throws Exception { System.out.println("action之前执行!!!"); returntrue; //继续执行action }
}
|
| package com.sxt.interceptor;
import javax.servlet.http.HttpServletRequest; import javax.servlet.http.HttpServletResponse;
import org.springframework.web.servlet.handler.HandlerInterceptorAdapter;
publicclass MyInterceptor2extends HandlerInterceptorAdapter {
@Override publicboolean preHandle(HttpServletRequest request,HttpServletResponse response, Object handler)throws Exception { System.out.println("MyInterceptor2.preHandle()"); returntrue; //继续执行action } } |
3. XML中如何配置。如下为示例代码:
| <mvc:interceptors> <beanclass="com.sxt.interceptor.MyInterceptor">bean> <mvc:interceptor> <mvc:mappingpath="/user.do"/>
<beanclass="com.sxt.interceptor.MyInterceptor2">bean> mvc:interceptor> mvc:interceptors> |