NIO学习笔记
文章目录
- 一、通道(Channel)与缓冲区(Buffer)
- 缓冲区(Buffer)
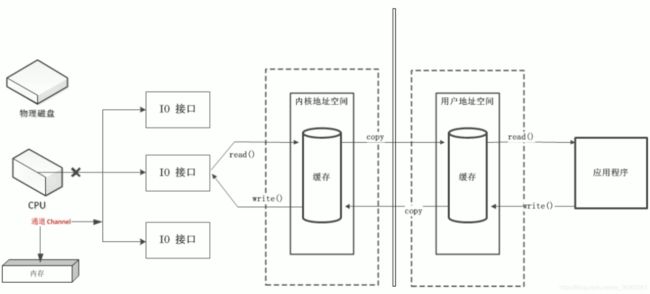
- 直接缓冲区和非直接缓冲区
- 通道(Channel)
- 利用通道完成文件复制(非直接缓冲区)
- 使用直接缓冲区完成文件的复制(内存映射文件)
- 通道之间的数据传输
- 分散(Scatter)与聚集(Gather)
- 字符集(Charset)
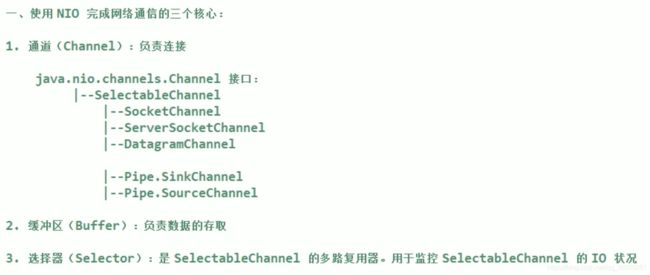
- 二、NIO的非阻塞式网络通信
- 阻塞式IO实现网络通信
- 非阻塞式IO实现网络通信
- DatagramChannel
- 三、管道


一、通道(Channel)与缓冲区(Buffer)

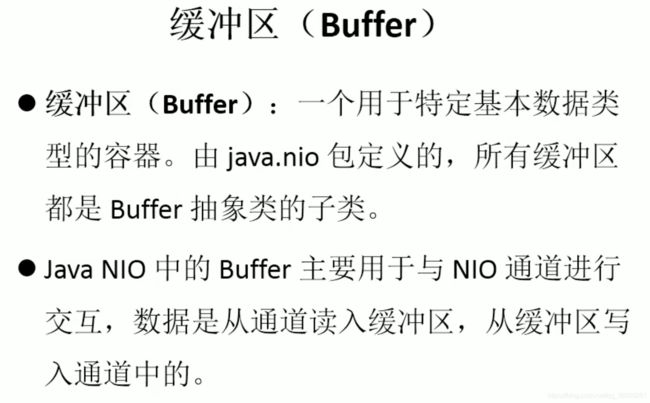
缓冲区(Buffer)


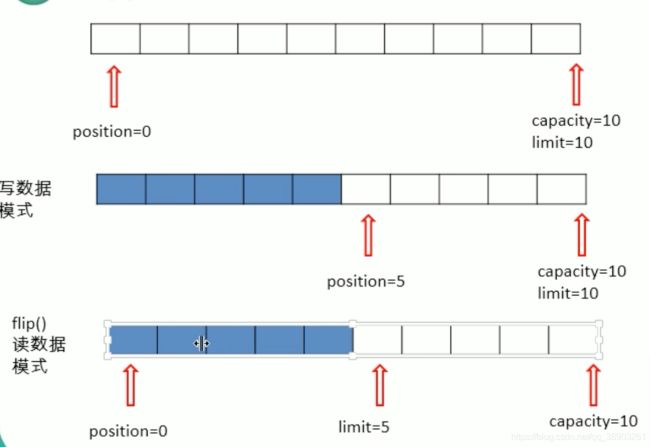
- capacity:缓冲区的大小。
- limit:规定可操作的大小,在写数据模式下,和capacity相同,在读数据模式下,变为和写数据模式下的position相同。
- position:类似数组的index,在写数据模式下,指向当前空闲的位置,当position等于limit代表缓冲区可操作的空间已满,在读数据模式下,变为0,当position等于limit代表已读完全部数据。
public class TestBuffer {
    public static void main(String[] args) {
        String str = "abcde";

        //1. ByteBuffer.allocate(int):分配一个指定大小的缓冲区
        ByteBuffer buf = ByteBuffer.allocate(10);

        System.out.println("----------allocate()----------");
        System.out.println("缓冲区总大小capacity:" + buf.capacity());
        System.out.println("limit的位置:" + buf.limit());
        System.out.println("position目前的位置:" + buf.position());

        //2.put():存数据
        buf.put(str.getBytes());

        System.out.println("----------put()----------");
        System.out.println("缓冲区总大小capacity:" + buf.capacity());
        System.out.println("limit的位置:" + buf.limit());
        System.out.println("position目前的位置:" + buf.position());

        //3.flip():切换成读数据模式
        buf.flip();

        System.out.println("----------flip()----------");
        System.out.println("缓冲区总大小capacity:" + buf.capacity());
        System.out.println("limit的位置:" + buf.limit());
        System.out.println("position目前的位置:" + buf.position());

        //4.get():读数据
        byte[] dst = new byte[buf.limit()];
        buf.get(dst);

        System.out.println("----------get()----------");
        System.out.println(new String(dst));
        System.out.println("缓冲区总大小capacity:" + buf.capacity());
        System.out.println("limit的位置:" + buf.limit());
        System.out.println("position目前的位置:" + buf.position());

        //5.rewind():把position变为0,从头开始再读数据
        buf.rewind();

        System.out.println("----------rewind()----------");
        System.out.println("缓冲区总大小capacity:" + buf.capacity());
        System.out.println("limit的位置:" + buf.limit());
        System.out.println("position目前的位置:" + buf.position());


        //6.clear():清空缓冲区,limit和position初始化,但缓冲区的数据还在,只是处于"被遗忘"状态,可以被读取到
        buf.clear();

        System.out.println("----------clear()----------");
        System.out.println("缓冲区总大小capacity:" + buf.capacity());
        System.out.println("limit的位置:" + buf.limit());
        System.out.println("position目前的位置:" + buf.position());

        //因为clear()会影响mark标记,所以放到另一个方法
        show();
    }

    public static void show(){
        String str = "abcde";

        ByteBuffer buf = ByteBuffer.allocate(10);

        buf.put(str.getBytes());

        buf.flip();

        System.out.println("缓冲区总大小capacity:" + buf.capacity());
        System.out.println("limit的位置:" + buf.limit());
        System.out.println("position目前的位置:" + buf.position());

        //从0开始,读两位
        byte[] bs = new byte[2];
        buf.get(bs);

        System.out.println("第一次读取:");
        System.out.println(new String(bs));
        System.out.println("缓冲区总大小capacity:" + buf.capacity());
        System.out.println("limit的位置:" + buf.limit());
        System.out.println("position目前的位置:" + buf.position());

        //7.mark:标记,记录position当前的位置
        buf.mark();
        System.out.println("----------mark()标记----------");

        //从2开始,读两位
        buf.get(bs);
        System.out.println(new String(bs));

        System.out.println("第二次读取:");
        System.out.println("缓冲区总大小capacity:" + buf.capacity());
        System.out.println("limit的位置:" + buf.limit());
        System.out.println("position目前的位置:" + buf.position());

        //buf.clear();  //标记会被clear()清除,清除后如果reset()会有 InvalidMarkException 异常

        //8.reset():恢复position到标记的位置
        buf.reset();

        System.out.println("----------reset()----------");
        System.out.println("缓冲区总大小capacity:" + buf.capacity());
        System.out.println("limit的位置:" + buf.limit());
        System.out.println("position目前的位置:" + buf.position());

        //9.hasRemaining():position到limit之间是否还有位置,即是否有剩余的数据,有为true
        if(buf.hasRemaining()){

            //10.remaining():position到limit之间的位置差,即获取缓冲区中剩余可操作的数据的数量
            System.out.println("剩余三个type数据没读取:" + buf.remaining());
        }
    }
}
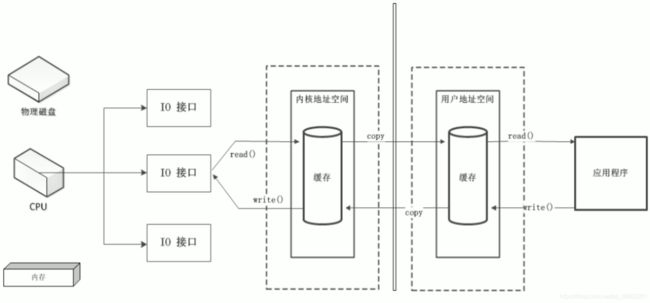
直接缓冲区和非直接缓冲区


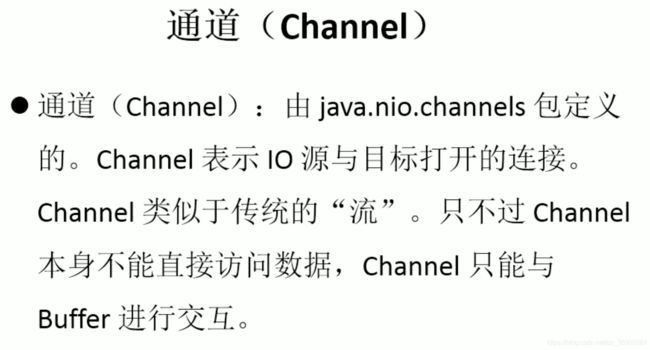
通道(Channel)


利用通道完成文件复制(非直接缓冲区)
//利用通道完成文件复制(非直接缓冲区)
public static void main(String[] args)  {

    //try-with-resource语法糖,在try()里new的对象会调用close()自动关闭
    try (FileInputStream fis = new FileInputStream("1.jpg");
         FileOutputStream fos = new FileOutputStream("2.jpg");
         //获取通道
         FileChannel inChannel = fis.getChannel();
         FileChannel outChannel = fos.getChannel()) {

        ByteBuffer buf = ByteBuffer.allocate(1024);

        //将inChannel通道中的数据写到buf缓冲区中,如果返回-1表示写入失败,inChannel通道中已没有数据
        while (inChannel.read(buf) != -1){
            //切换为读模式
            buf.flip();
            //将buf缓冲区数据写入outChannel通道中
            outChannel.write(buf);
            //清空(初始化)缓冲区
            buf.clear();
        }
    } catch (Exception e) {
        e.printStackTrace();
    }
}
使用直接缓冲区完成文件的复制(内存映射文件)
//使用直接缓冲区完成文件的复制(内存映射文件)
public static void main(String[] args) {
    try (
        //StandardOpenOption.READ:读
        FileChannel inChannel = FileChannel.open(Paths.get("1.jpg"), StandardOpenOption.READ);
        //StandardOpenOption.WRITE:写
        FileChannel outChannel = FileChannel.open(Paths.get("2.jpg"), StandardOpenOption.WRITE,
                                        //因为下面outMappedBuf只有读写模式,没有读模式,所以需要加上READ
                                        StandardOpenOption.READ,
                                        //StandardOpenOption.CREATE:不存在就创建,存在就覆盖
                                        //StandardOpenOption.CREATE_NEW:不存在就创建,存在就报错
                                        StandardOpenOption.CREATE_NEW)) {

        //内存映射文件
        //FileChannel.MapMode.READ_ONLY:只读模式
        //FileChannel.MapMode.READ_WRITE:读写模式
        MappedByteBuffer inMappedBuf = inChannel.map(FileChannel.MapMode.READ_ONLY, 0, inChannel.size());
        MappedByteBuffer outMappedBuf = outChannel.map(FileChannel.MapMode.READ_WRITE, 0, inChannel.size());

        //直接对缓冲区进行数据的读写操作
        byte[] dst = new byte[inMappedBuf.limit()];
        //数据放到dst数组中
        inMappedBuf.get(dst);
        //数据放到outMappedBuf中
        outMappedBuf.put(dst);

    } catch (Exception e){
        e.printStackTrace();
    }
}
通道之间的数据传输

//通道间的数据传输(直接缓冲区)
public static void main(String[] args) {
    try (
        //StandardOpenOption.READ:读
        FileChannel inChannel = FileChannel.open(Paths.get("1.jpg"), StandardOpenOption.READ);
        //StandardOpenOption.WRITE:写
        FileChannel outChannel = FileChannel.open(Paths.get("2.jpg"), StandardOpenOption.WRITE,
                                        //StandardOpenOption.CREATE:不存在就创建,存在就覆盖
                                        //StandardOpenOption.CREATE_NEW:不存在就创建,存在就报错FileAlreadyExistsException
                                        StandardOpenOption.CREATE)) {

        //inChannel到outChannel
        //下面两个写法,作用一样
//            inChannel.transferTo(0, inChannel.size(), outChannel);
        outChannel.transferFrom(inChannel, 0 ,inChannel.size());

    }catch (Exception e){
        e.printStackTrace();
    }
}
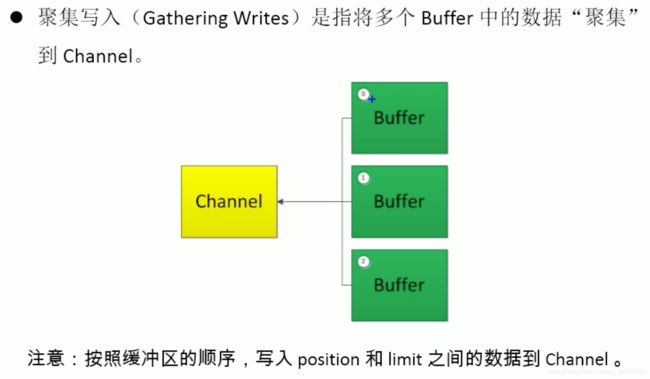
分散(Scatter)与聚集(Gather)


public static void main(String[] args) throws Exception {
    RandomAccessFile raf1 = new RandomAccessFile("1.txt", "rw");

    //1.获取通道
    FileChannel channel1 = raf1.getChannel();

    //2.分配指定大小的缓冲区
    ByteBuffer buf1 = ByteBuffer.allocate(100);
    ByteBuffer buf2 = ByteBuffer.allocate(1024);
    ByteBuffer[] bufs = {buf1, buf2};

    //3.分散读取
    channel1.read(bufs);

    for (ByteBuffer buf : bufs) {
        //把bufs中的缓冲区都变为写模式
        buf.flip();
    }

    //前100个type
    System.out.println(new String(bufs[0].array(), 0, bufs[0].limit()));
    System.out.println("-------------------------");
    //后1024个type
    System.out.println(new String(bufs[1].array(), 0, bufs[1].limit()));
}

    //4.聚集写入
    RandomAccessFile raf2 = new RandomAccessFile("2.txt", "rw");
    FileChannel channel2 = raf2.getChannel();

    channel2.write(bufs);
字符集(Charset)

public static void main(String[] args) throws CharacterCodingException {
    Charset cs1 = Charset.forName("GBK");

    //获取编码器
    CharsetEncoder ce = cs1.newEncoder();

    //获取解码器
    CharsetDecoder cd = cs1.newDecoder();

    CharBuffer cBuf = CharBuffer.allocate(1024);
    cBuf.put("你好世界!");
    cBuf.flip();

    //编码
    ByteBuffer bBuf = ce.encode(cBuf);

    System.out.println(" v v v GBK编码后的数据 v v v");
    for (int i = 0; i < 10; i++) {
        System.out.println(bBuf.get());
    }

    //解码
    bBuf.flip();
    CharBuffer cBuf2 = cd.decode(bBuf);
    System.out.println(" v v v GBK解码后的数据 v v v");
    System.out.println(cBuf2.toString());

    System.out.println("-------------------------------");

    Charset cs2 = Charset.forName("UTF-8");
    bBuf.flip();
    CharBuffer cBuf3 = cs2.decode(bBuf);
    System.out.println(" v v v UTF-8解码后的数据 v v v");
    System.out.println(cBuf3.toString());
}
二、NIO的非阻塞式网络通信


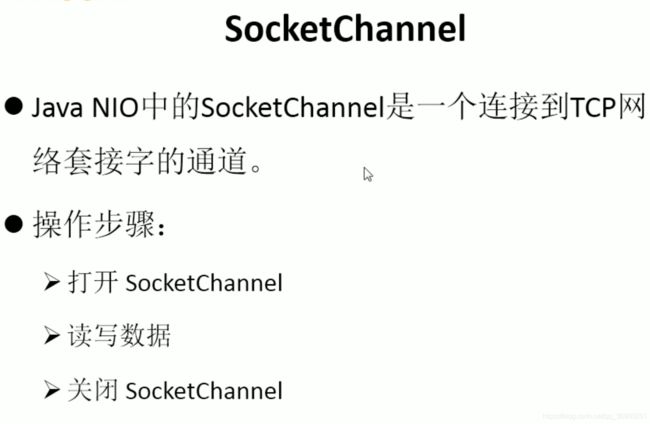
阻塞式IO实现网络通信
//服务端
public class Server {
    public static void main(String[] args) throws IOException {
        //1.获取通道
        ServerSocketChannel ssChannel = ServerSocketChannel.open();
        FileChannel outChannel = FileChannel.open(Paths.get("2.jpg"), StandardOpenOption.WRITE,
                                                                            StandardOpenOption.CREATE);

        //2.绑定连接
        ssChannel.bind(new InetSocketAddress(8848));

        //3.获取客户端连接的通道
        SocketChannel sChannel = ssChannel.accept();

        //4.分配指定大小的缓冲区
        ByteBuffer buf = ByteBuffer.allocate(1024);

        //5.接收客户端的数据,并保持到本地
        while(sChannel.read(buf) != -1){
            buf.flip();
            outChannel.write(buf);
            buf.clear();
        }

        //6.接收成功后,发送反馈给客户端
        buf.put("服务端成功接收数据!".getBytes());
        buf.flip();
        sChannel.write(buf);

        //7.关闭通道
        sChannel.close();
        outChannel.close();
        ssChannel.close();
    }
}
//客户端
public class Client {
    public static void main(String[] args) throws IOException {
        //1.获取通道
        SocketChannel sChannel = SocketChannel.open(new InetSocketAddress("127.0.0.1", 8848));
        FileChannel inChannel = FileChannel.open(Paths.get("1.jpg"), StandardOpenOption.READ);

        //2.分配指定大小的缓冲区
        ByteBuffer buf = ByteBuffer.allocate(1024);

        //3.读取本地文件,并发送到服务端
        while (inChannel.read(buf) != -1){
            buf.flip();
            sChannel.write(buf);
            buf.clear();
        }

        //4.告诉服务端发送完成(不然服务端不知道客户端是否已经发送完成,服务端会一直处于等待状态)
        sChannel.shutdownOutput();

        //5.接收服务端的反馈
        int len = 0;
        while ((len = sChannel.read(buf)) != -1){
            buf.flip();
            System.out.println(new String(buf.array(), 0, len));
            buf.clear();
        }

        //6.关闭通道
        inChannel.close();
        sChannel.close();
    }
}
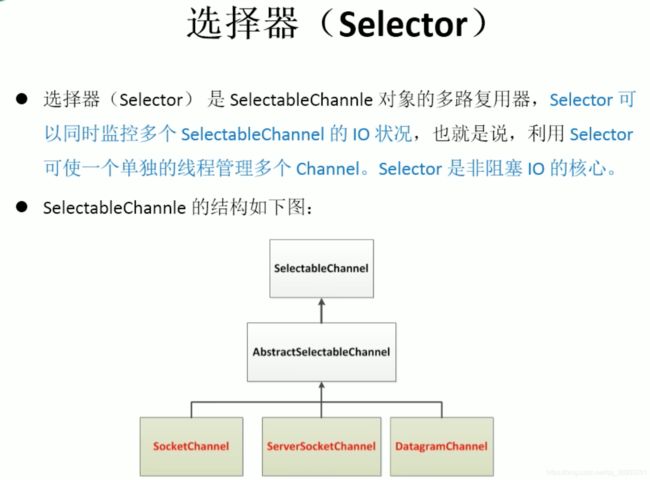
非阻塞式IO实现网络通信
//服务端
public class Server {
public static void main(String[] args) throws IOException {
//1.获取通道
ServerSocketChannel ssChannel = ServerSocketChannel.open();
//2.切换为非阻塞模式
ssChannel.configureBlocking(false);
//3.绑定连接
ssChannel.bind(new InetSocketAddress(8848));
//4.获取选择器
Selector selector = Selector.open();
//5.将通道注册到选择器上,并指定监听"接收事件"
//OP_ACCEPT:接收事件
//OP_CONNECT:连接事件
//OP_READ:读事件
//OP_WRITE:写事件
ssChannel.register(selector, SelectionKey.OP_ACCEPT);
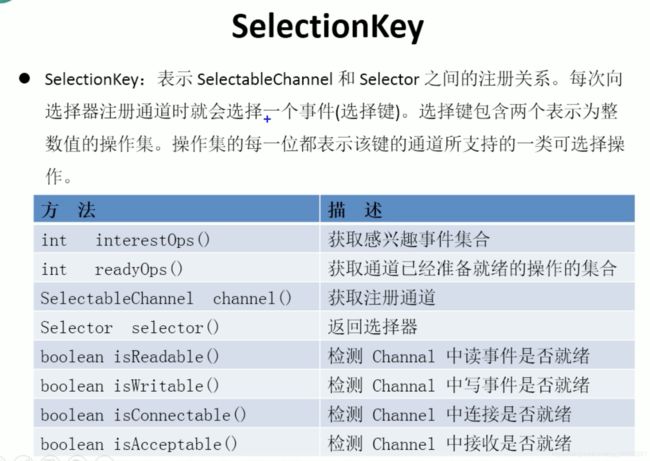
//6.轮询式的获取选择器上已经"准备就绪"的事件,大于0表示选择器上已经有"准备就绪"的事件
while (selector.select() > 0){
//7.获取当前选择器中所有注册的"选择键(已就绪的监听事件)"
Iterator<SelectionKey> it = selector.selectedKeys().iterator();
//迭代
while (it.hasNext()){
//8.获取准备"就绪"的事件
SelectionKey sk = it.next();
//9.判断具体是什么事件准备就绪
//isAcceptable:接收就绪
//isConnectable:连接就绪
//isReadable:读就绪
//isWritable:写就绪
if(sk.isAcceptable()){
//10.若"接收就绪",获取客户端连接
SocketChannel sChannel = ssChannel.accept();
//11.切换为非阻塞模式
sChannel.configureBlocking(false);
//12.将该通道注册到选择器上
sChannel.register(selector, SelectionKey.OP_READ);
}else if (sk.isReadable()){
//13.获取当前选择器上"读就绪"状态的通道
SocketChannel sChannel = (SocketChannel) sk.channel();
//14.读取数据
ByteBuffer buf = ByteBuffer.allocate(1024);
int len = 0;
while ((len = sChannel.read(buf)) != -1){
buf.flip();
System.out.println(new String(buf.array(), 0, len));
buf.clear();
}
}
//15.操作完成后,取消选择键SelectionKey
it.remove();
}
}
}
}
//客户端
public class Client {
    public static void main(String[] args) throws IOException {
        //1.获取通道
        SocketChannel sChannel = SocketChannel.open(new InetSocketAddress("127.0.0.1", 8848));

        //2.切换为非阻塞模式
        sChannel.configureBlocking(false);

        //3.分配指定大小的缓冲区
        ByteBuffer buf = ByteBuffer.allocate(1024);

        //4.发送数据(当前时间)给服务端
        Scanner sc = new Scanner(System.in);

        while (sc.hasNext()){
            String str = sc.next();
            buf.put((str + "【" + LocalDateTime.now().toString() + "").getBytes());
            buf.flip();
            sChannel.write(buf);
            buf.clear();
        }

        //5.关闭通道
        sChannel.close();
    }
}
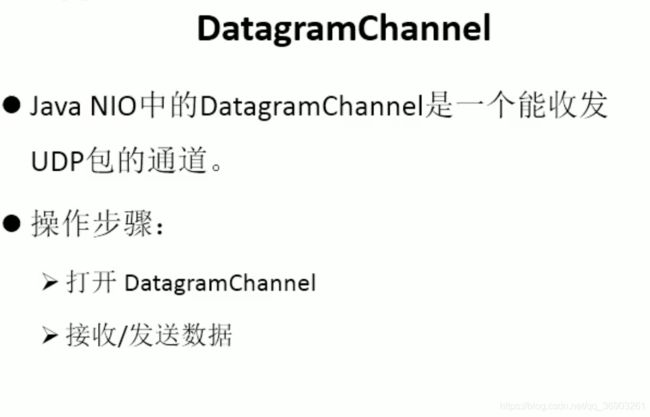
DatagramChannel
//服务端
public class Server {
    public static void main(String[] args) throws IOException {
        DatagramChannel dc = DatagramChannel.open();

        dc.configureBlocking(false);

        dc.bind(new InetSocketAddress(8848));

        Selector selector = Selector.open();

        dc.register(selector, SelectionKey.OP_READ);

        while (selector.select() > 0){
            Iterator<SelectionKey> it = selector.selectedKeys().iterator();

            while (it.hasNext()){
                SelectionKey sk = it.next();

                if (sk.isReadable()){
                    ByteBuffer buf = ByteBuffer.allocate(1024);
                    //接收
                    dc.receive(buf);
                    buf.flip();
                    System.out.println(new String(buf.array(), 0, buf.limit()));
                    buf.clear();
                }
            }
            it.remove();
        }
    }
}
//客户端
public class Client {
    public static void main(String[] args) throws IOException {
        DatagramChannel dc = DatagramChannel.open();

        dc.configureBlocking(false);

        ByteBuffer buf = ByteBuffer.allocate(1024);

        buf.put(LocalDateTime.now().toString().getBytes());
        buf.flip();
        //发送
        dc.send(buf, new InetSocketAddress("127.0.0.1", 8848));
        buf.clear();

        dc.close();
    }
}
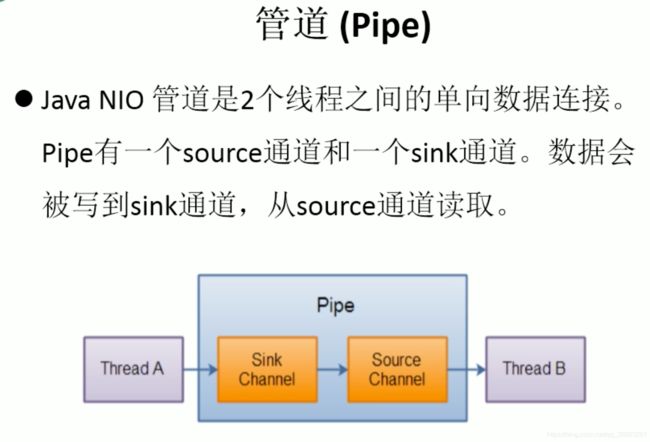
三、管道
public class TestPipe {

    public static void main(String[] args) throws IOException {
        //1.获取管道
        Pipe pipe = Pipe.open();

        //2.将缓冲区中的数据写入管道
        ByteBuffer buf = ByteBuffer.allocate(1024);

        Pipe.SinkChannel sinkChannel = pipe.sink();
        buf.put("通道单向管道发送数据".getBytes());
        buf.flip();
        sinkChannel.write(buf);

        //3.读取缓冲区中的数据(节省时间,发送和接收写在一起,可以参照前面的代码拆分成两个)
        Pipe.SourceChannel sourceChannel = pipe.source();
        buf.flip();
        sourceChannel.read(buf);
        System.out.println(new String(buf.array(), 0, buf.limit()));

        //4.关闭
        sourceChannel.close();
        sinkChannel.close();
    }

}
学习视频:https://www.bilibili.com/video/BV14W411u7ro?p=1