matplotlib绘图实例
实例1:
需求: 一元线性回归+描点绘制+方程输出
效果:
code:
# encoding = utf-8
import numpy as np
import matplotlib.pyplot as plt
from sklearn import linear_model

plt.rcParams['font.sans-serif'] = ['SimHei']  # 用来正常显示中文标签
plt.rcParams['axes.unicode_minus'] = False  # 用来正常显示负号

#n=int(input())

x = [[8.214], [7.408], [6.879], [5.490], [5.196]]
y = [[-1.756], [-1.442], [-1.194], [-0.606], [-0.476]]

# for i in range (1, n):
#     print('x' ,i, " = ")
#     tmp = float(input())
#     x.append(tmp)

# for i in range (1, n):
#     print('x\y' ,i, " = ")
#     tmp = float(input())
#     y.append(tmp)

plt.title('$U_0-v$')
plt.xlabel(r'频率$v/10^{14} HZ$')
plt.ylabel(r'截止电压$U_0/1 Volt$')
plt.grid(True)
plt.plot(x, y, 'r^')
regr = linear_model.LinearRegression();
regr.fit(x, y)
print(type(float(regr.coef_)))
#plt.text(7.5, 1.2, r'y='.join(str(float(regr.coef_))).join('x+').join(str(float(regr.intercept_))).join('$'))
plt.plot(x, regr.predict(x), 'g--', label = '$y = '+ str(float(regr.coef_))+"x +" +str(float(regr.intercept_))+'$')
plt.legend()
plt.show()
print(x), print(y)
实例2:
需求: 曲线描点
效果:
code:
# encoding = utf-8
import numpy as np
import matplotlib.pyplot as plt
from sklearn import linear_model

plt.rcParams['font.sans-serif'] = ['SimHei']  # 用来正常显示中文标签
plt.rcParams['axes.unicode_minus'] = False  # 用来正常显示负号

#n=int(input())

x = [list(range(-1, 49, 2))]
x = np.array(x);
x = x.reshape(25, 1)
print(x)
y = [0.1, 5.1, 10.5, 14.6, 17.1, 19.2, 20.9, 22.4, 23.6, 24.7, 25.5, 26.3, 26.8, 27.2, 27.6, 27.9, 28.3, 28.9, 29.2, 29.6, 29.9, 30.2, 30.7, 31.2, 31.5]
y = np.array(y);

#y = y.reshape(25, 1)

# for i in range (1, n):
#     print('x' ,i, " = ")
#     tmp = float(input())
#     x.append(tmp)

# for i in range (1, n):
#     print('x\y' ,i, " = ")
#     tmp = float(input())
#     y.append(tmp)

plt.title('伏安特性数据')
plt.xlabel(r'$U_{AK} / V$')
plt.ylabel(r'$I / 10^{-10} A$')
plt.grid(True)
plt.plot(x, y, 'r--',label = r'伏安特性曲线')
plt.plot(x, y, 'k^')
# regr = linear_model.LinearRegression();
# regr.fit(x, y)
# print(type(float(regr.coef_)))
#plt.text(7.5, 1.2, r'y='.join(str(float(regr.coef_))).join('x+').join(str(float(regr.intercept_))).join('$'))
#plt.plot(x, regr.predict(x), 'g--', label = '$y = '+ str(float(regr.coef_))+"x +" +str(float(regr.intercept_))+'$')
plt.legend()
plt.show()
#print(x), print(y)
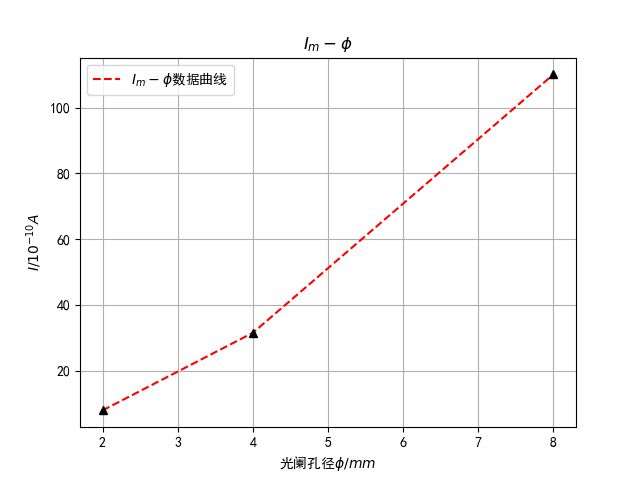
实例3 简单描点:
效果:
两个差不多的,放第一个代码
# encoding = utf-8
import numpy as np
import matplotlib.pyplot as plt
from sklearn import linear_model

plt.rcParams['font.sans-serif'] = ['SimHei']  # 用来正常显示中文标签
plt.rcParams['axes.unicode_minus'] = False  # 用来正常显示负号

#n=int(input())

x = [2, 4, 8]
x = np.array(x);

print(x)
y = [7.9, 31.5, 110.1]
y = np.array(y);

#y = y.reshape(25, 1)

# for i in range (1, n):
#     print('x' ,i, " = ")
#     tmp = float(input())
#     x.append(tmp)

# for i in range (1, n):
#     print('x\y' ,i, " = ")
#     tmp = float(input())
#     y.append(tmp)

plt.title('$I_m - \phi$')
plt.xlabel(r'光阑孔径$\phi / mm$')
plt.ylabel(r'$I / 10^{-10} A$')
plt.grid(True)
plt.plot(x, y, 'r--',label = r'$I_m - \phi$数据曲线')
plt.plot(x, y, 'k^')
# regr = linear_model.LinearRegression();
# regr.fit(x, y)
# print(type(float(regr.coef_)))
#plt.text(7.5, 1.2, r'y='.join(str(float(regr.coef_))).join('x+').join(str(float(regr.intercept_))).join('$'))
#plt.plot(x, regr.predict(x), 'g--', label = '$y = '+ str(float(regr.coef_))+"x +" +str(float(regr.intercept_))+'$')
plt.legend()
plt.show()
#print(x), print(y)
egr.predict(x), 'g--', label = '$y = '+ str(float(regr.coef_))+"x +" +str(float(regr.intercept_))+'$')
plt.legend()
plt.show()
#print(x), print(y)


