iOS 13 Data Source 新特性:基于 Diffable 实现局部刷新
点击上方“iOSTps”,选择“星标”
在看 真爱
作者: 老峰
本文是老峰 6 月贡献在《WWDC19 内参》的文章,上周 iOS 13 正式发布,专栏也免费开放,所以同步分享到个人公众号,还没订阅的读者朋友可以点击 阅读原文 免费订阅,干货多多!
引言
在 iOS 开发中,UITableView 和 UICollectionView 是很常用的 UI 控件,在过去我们通常需要实现 Data Sources 来配置数据源,虽然在简单的业务中我们可以愉快的实现各种需求,可是一旦业务复杂起来,比如数据源实时的增删改,我们经常会一不小心就遇到 NSInternalInconsistencyException(Data Source 和当前 UI 状态不一致)等奇奇怪怪的异常,本文基于 WWDC 2019 Session 220:Advances in UI Data Sources 将从以下三部分分享此 Session 及老峰的实践心得:
Data Source 使用现状
iOS 13 Diffable Data Source 新 API
Diffable Data Source 实践
1、Data Source 使用现状
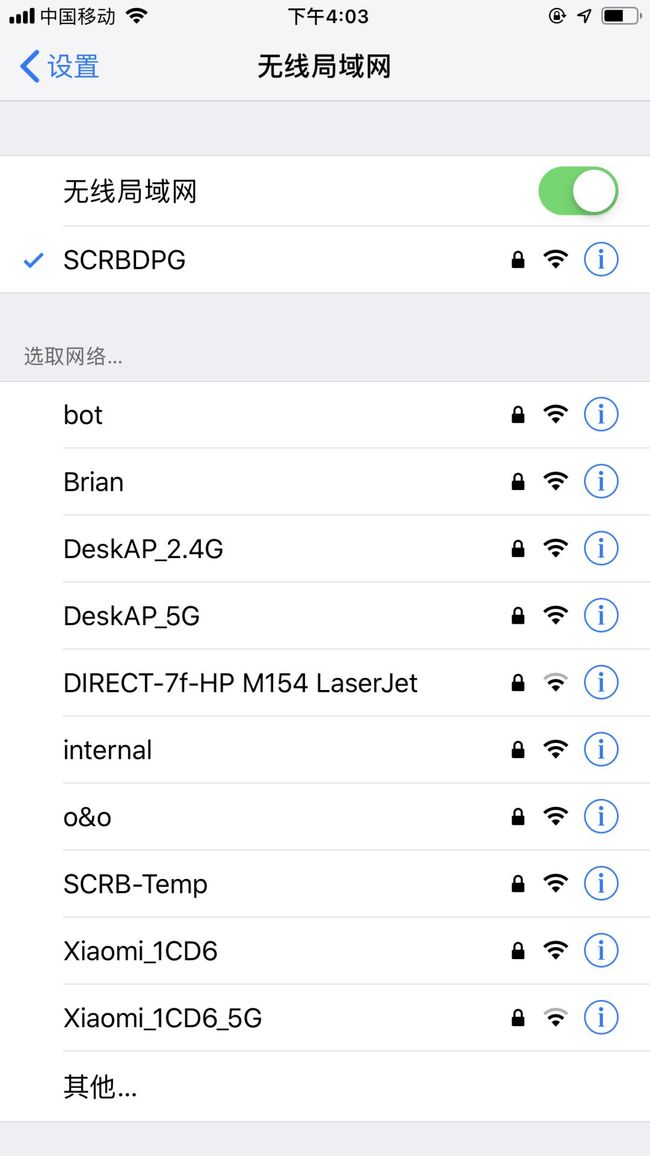
这里以 Session 中 WiFi 设置为例,我们实现一个无线局域网列表页面如下图所示:
按照通常实现方式我们首先需要实现 UITableView 的 Data Source 方法
func numberOfSections(in tableView: UITableView) -> Int {

return models.count

}

// Return the number of rows for the table.

func tableView(_ tableView: UITableView, numberOfRowsInSection p: Int) -> Int {

return models[p].count

}

// Provide a cell object for each row.

func tableView(_ tableView: UITableView, cellForRowAt indexPath: IndexPath) -> UITableViewCell {

// Fetch a cell of the appropriate type.

let cell = tableView.dequeueReusableCell(withIdentifier: "cellTypeIdentifier", for: indexPath)

// Configure the cell’s contents.

cell.textLabel!.text = "WiFi text"

return cell

}
由于每个网络可用网络的状态都在实时变化如网络 abert 路由器重启,新的网络 internal 被发现,这时我们需要移除 abert cell 这一行,加入 internal cell 这一行,最终实时状态如上图,那么我们按照以往的思路如何实现更新数据刷新 UI 状态呢?可能绝大多数同学会简单粗暴地 reloadData,事实上我们只有 2 条数据变更,如果在 TableView 较为复杂的时候可能全量刷新还会产生性能的问题,所以并不希望对 TableView 全量刷新,那么局部刷新又如何实现呢?
tableView.beginUpdates()

tableView.insertRows(at: indexPaths, with: .fade)

tableView.deleteRows(at: indexPaths, with: .fade)

self.tableView.endUpdates()
尽管如上代码可以实现需求,可是我们不得不计算需要插入或者删除的的 indexPaths ,而且稍有不慎我们将会遇到如下这个熟悉的异常:
*** Terminating app due to uncaught exception

'NSInternalInconsistencyException',

reason: 'Invalid update: invalid number of ps. The number of ps contained in the tableView view after the update (1) must be equal to the number of ps contained in the tableView view before the update (1), plus or minus the number of ps inserted or deleted (0 inserted, 1 deleted).'

***
事实上不管是 UITableView 还是 UICollectionView在我们调用 reloadSections 进行局部刷新时非常容易遇到 「NSInternalInconsistencyException(数据不一致)」的崩溃,如由于某些业务需要对 TableView 进行延时刷新极有可能出现 Data Source 和 TableView 中的 IndexPath 不一致出现异常,那么除了在业务代码中小心谨慎的 work around 规避此类问题,还有其他方式吗?有的接下来将介绍本文核心内容 Diffable Data Source 新 API。
2、Diffable Data Source 新 API
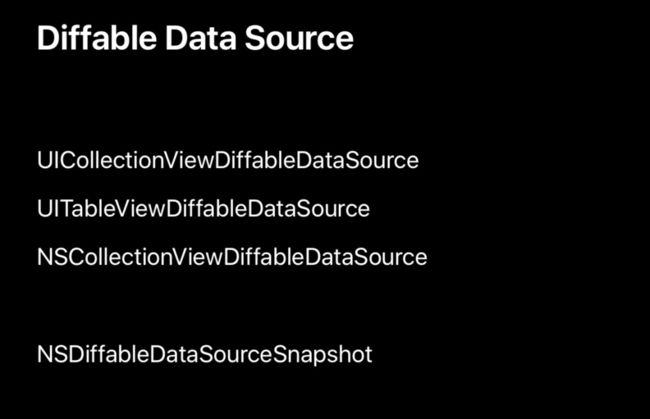
如上图所示在 iOS 13 中 Apple 引入了新的 API Diffable Data Source ,让开发者可以更简单高效的实现 UITableView、UICollectionView 的局部数据刷新。可能使用过 IGListKit 、RxCocoa 或者 DeepDiff 的读者对于 Diff 概念并不陌生,本文并不准备对 Diff 算法本身展开详细讨论,感兴趣的读者可自行查阅学习。
Note:在软件开发中 Diff 是一个很重要的概念,有很多应用场景,如 git 版本管理中文件变更应用;React 中虚拟 DOM 用 Diff 算法更新 UI 状态;IGListKit 通过 IGListDiff 自动计算前后两次数据源的差值,实现局部数据刷新。
由于 UITableView 和 UICollectionView 的 API 大同小异,笔者 以 UITableView 为例讲解 Diffable Data Source,首先介绍 TableView 中 一个关键类 UITableViewDiffableDataSource, 其定义如下:
class UITableViewDiffableDataSource : NSObject where SectionIdentifierType : Hashable, ItemIdentifierType : Hashable
它是用来维护 TableView 的数据源,Section 和 Item 遵循 IdentifierType,从而确保每条数据的唯一性,初始化方法如下:
init(tableView: UITableView, cellProvider: @escaping UITableViewDiffableDataSource.CellProvider)

typealias UITableViewDiffableDataSource.CellProvider = (UITableView, IndexPath, ItemIdentifierType) -> UITableViewCell?
使用过 RxCocoa 的读者可能对 CellProvider 很眼熟,没错以后我们可以在初始化方法中配置 Cell,如果这里没看懂也没关系,我在下一小节将以实例具体介绍使用方法,在我们配置好 DiffableDataSource 后会通过本地缓存或网络请求刷新数据,如果涉及增删改则会有多次刷新,我们将使用如下代码对 TableView 进行刷新:
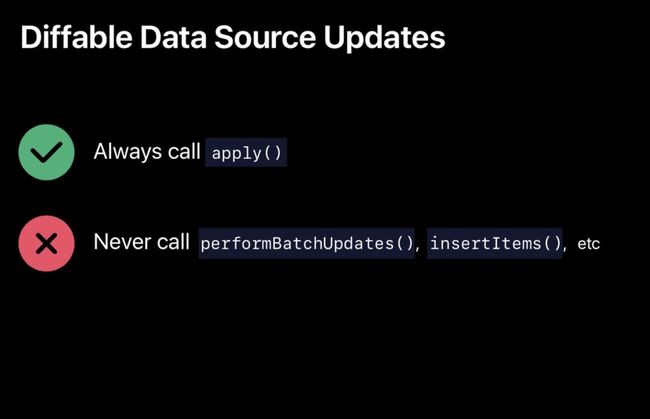
func apply(_ snapshot: NSDiffableDataSourceSnapshot, animatingDifferences: Bool = true)
通过使用 apply 我们无需计算变更的 indexPaths,也无需调用 reloadSections,即可安全在在主线程或后台线程更新 UI, 仅需简单的将需要变更后的数据通过 NSDiffableDataSourceSnapshot 计算出来,NSDiffableDataSourceSnapshot 的定义如下:
class NSDiffableDataSourceSnapshot where SectionIdentifierType : Hashable, ItemIdentifierType : Hashable
DataSourceSnapshot 和 DiffableDataSource 定义类似,如其名字一样用来表示变更后的数据源,其有 append、delete、move、insert 等实现数据源的变更。
介绍到在这里 Diffable Data Source 关键概念差不多介绍完了,这里稍微理一下思路,DiffableDataSource 负责当前数据源配置,DataSourceSnapshot 负责变更后的数据源处理 ,DiffableDataSource 通过调用自身 apply 方法将 DataSourceSnapshot 变更后的数据更新同步到 UITableView 或 UICollectionView 的 UI,值得注意的是为了确保 Diff 生效,所以数据必须具有唯一 Identifier,且遵循 Hashable 协议,那么接下来我将以简易聊天室实例展示 DiffableDataSource 具体如何使用。
3、Diffable Data Source 实践
Talk is cheap, Show me the code.
首先定义数据模型,ChatSection 为枚举类型是 TableView Section 的数据模型,ChatMessage 是遵循 Hashable 的结构体为 TableView Cell 的数据模型,值得注意的是这里通过 UUID() 为每条数据生成惟一的识别符。
enum ChatSection: CaseIterable {

case history, socket

}

struct ChatMessage: Hashable {

let userName: String

let msgContent: String

let identifier = UUID()

var isME: Bool {

return userName == myUserName

}

func hash(into hasher: inout Hasher) {

hasher.combine(identifier)

}

static func == (lhs: ChatMessage, rhs: ChatMessage) -> Bool {

return lhs.identifier == rhs.identifier

}

}
接下来声明 TableView 的 DiffableDataSource 数据源,我们可以在 CellProvider 设置 Cell 数据,类似 TableView 的 cellForRowAt 方法。
var dataSource: UITableViewDiffableDataSource?

self.dataSource = UITableViewDiffableDataSource

(tableView: tableView) {

(tableView: UITableView, indexPath: IndexPath, item: ChatMessage) -> UITableViewCell? in

let cell = tableView.dequeueReusableCell(

withIdentifier: ChatViewController.reuseIdentifier,

for: indexPath)

let name = item.isME ? item.userName : "\(item.userName)\(indexPath.row)"

cell.textLabel?.text = "\(name): \(item.msgContent)"

cell.textLabel?.numberOfLines = 0

return cell

}

self.dataSource?.defaultRowAnimation = .fade
声明数据变更快照 NSDiffableDataSourceSnapshot,在 updateUI 中将变更后的数据交给 Snapshot,通过 dataSource 的 apply 方法实现数据刷新同步 UI,这里笔者仅仅使用了 appendItems,如果业务复杂还可以 delete、move、insert 来处理 Snapshot 数据。
var currentSnapshot = NSDiffableDataSourceSnapshot()

func updateUI(animated: Bool = true) {

currentSnapshot = NSDiffableDataSourceSnapshot()

let items = chatController.displayMsg

currentSnapshot.appendSections([.socket])

currentSnapshot.appendItems(items, toSection: .socket)

self.dataSource?.apply(currentSnapshot, animatingDifferences: animated)

self.tableView.scrollToRow(at: IndexPath.init(row: currentSnapshot.numberOfItems(inSection: .socket) - 1, p: 0), at: .bottom, animated: true)

}
定义 DataController 来处理聊天室数据,并使用 Combine 将变更数据状态分发出来,让 ChatViewController 订阅然后更新 UI。
var chatController = ChatDataController()

var hodler: Any?

hodler = chatController.didChange.sink { [weak self] value in

guard let self = self else { return }

self.updateUI()

}
至此关键代码都已经讲解完了,可以看到我们通过 Diffable Data Source 无需实现 numberOfSections,numberOfRowsInSection 等方法,也无需计算变更的 indexPaths, 几行代码便可以简单高效的处理复杂的增删改业务,感兴趣的读者可以在这里查看[示例源码](https://github.com/GesanTung/iChatRoomWithDiff)。
结语
Diffable Data Source 之前只能依赖三方库的实现的 Features 得到官方原生 UIKIt 的支持,相信用不了多久便可以在生产业务中使用,如电商类购物车,即时聊天等频繁增删的业务场景可以很轻松实现。
推荐阅读:


