三uniapp的tabBar组件
上一章节的认识
上一章节我们主要认识了pages.json配置文件中的pages和globalStyle代表的含义,本章节主要说一下经常使用的tabBar组件,tabBar组件和pages、globalStyle也是平级的。
这里看看我们直接的代码
{
	"pages": [ //pages数组中第一项表示应用启动页,参考:https://uniapp.dcloud.io/collocation/pages
		{
		"path": "pages/index/index",
		"style": {
				//"navigationBarTitleText": "uni-app"
			}
		}
	],
	"globalStyle": {
		"navigationBarTextStyle": "black",
		"navigationBarTitleText": "uni-app测试",
		"navigationBarBackgroundColor": "#55aa7f",
		"backgroundColor": "#F8F8F8"
	}
}
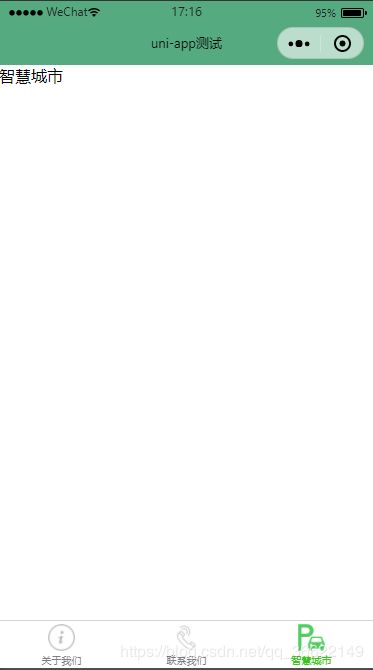
效果展示
整理思路
看完了是不是觉得在很多地方都看过呀,话不多说 开始撸代码(撸起袖子开始干)吧。
干之前我们选撸撸思路吧
- 因为有了新的三个页面,所以我们肯定要创建三个页面
- 在页面配置项将三个页面配置成tabBar组件形式
- 在首页设置一个方法,跳转到三个页面的其中一个页面
创建页面
点击项目右键——>新建页面(默认模板即可)
三个页面分别为tab1、tab2、tab3

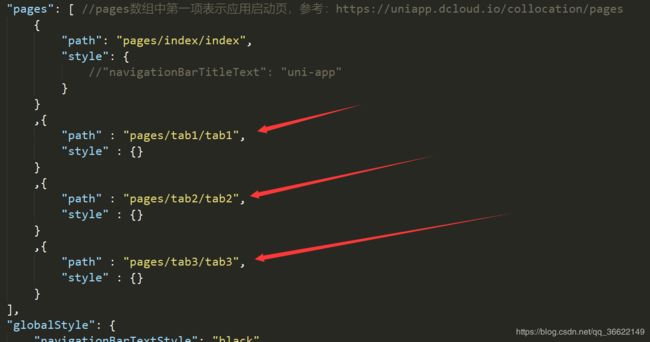
三个页面新建完毕之后,我们打开page.json文件看一看。

上图可以看到在这个文件内,uniapp自动为我们添加了这三个页面,真的是好贴心哦,若是想单独设置每个页面的标题、颜色等属性,则在style中直接设置即可。
然后我们在官方文档中找到这tabBar组件
https://uniapp.dcloud.io/collocation/pages?id=tabbar
代码如下:
{
	"pages": [ //pages数组中第一项表示应用启动页,参考:https://uniapp.dcloud.io/collocation/pages
		{
			"path": "pages/index/index",
			"style": {
				//"navigationBarTitleText": "uni-app"
			}
		}
	    ,{
            "path" : "pages/tab1/tab1",
            "style" : {}
        }
        ,{
            "path" : "pages/tab2/tab2",
            "style" : {}
        }
        ,{
            "path" : "pages/tab3/tab3",
            "style" : {}
        }
    ],
	"globalStyle": {
		"navigationBarTextStyle": "black",
		"navigationBarTitleText": "uni-app测试",
		"navigationBarBackgroundColor": "#55aa7f",
		"backgroundColor": "#F8F8F8"
	},

	"tabBar": {
	    "color": "#7A7E83",
	    "selectedColor": "#3cc51f",
	    "borderStyle": "black",
	    "backgroundColor": "#ffffff",
	    "list": [{
	        "pagePath": "pages/tab1/tab1",
	        "iconPath": "static/image/about.png",
	        "selectedIconPath": "static/image/about_sel.png",
	        "text": "关于我们"
	    }, {
	        "pagePath": "pages/tab2/tab2",
	        "iconPath": "static/image/call.png",
	        "selectedIconPath": "static/image/call_sel.png",
	        "text": "联系我们"
	    },
		{
		    "pagePath": "pages/tab3/tab3",
		    "iconPath": "static/image/default1.png",
		    "selectedIconPath": "static/image/default1_sel.png",
		    "text": "智慧城市"
		}
		]
	}
}
图片这里我们在阿里巴巴的字体网站中下载几个png字体即可使用。
| 序号 | 属性名 | 属性意思 |
|---|---|---|
| 1 | pagePath | 跳转的页面路径 |
| 2 | iconPath | 默认的图片路径 |
| 3 | selectedIconPath | 选中时候图片路径 |
| 4 | text | 页面名称 |
展示效果
方法一
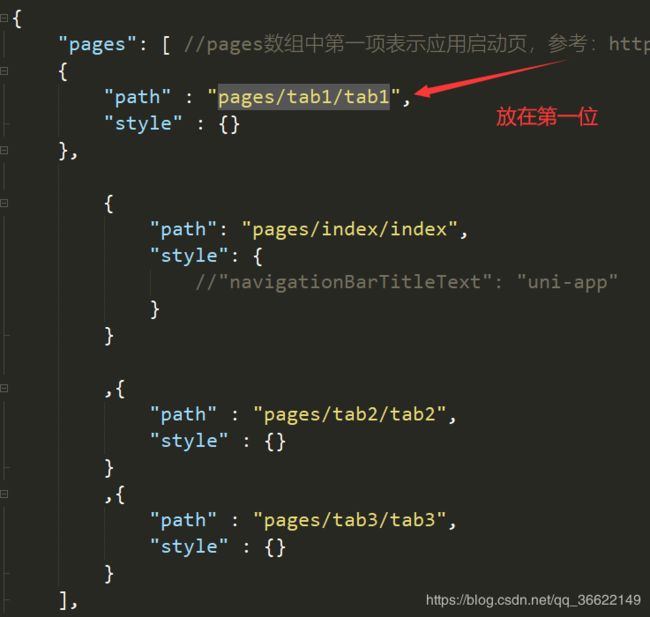
最后我们可以将pages/tab1/tab1放在pages数组中的第一位即可展示出来。

方法二
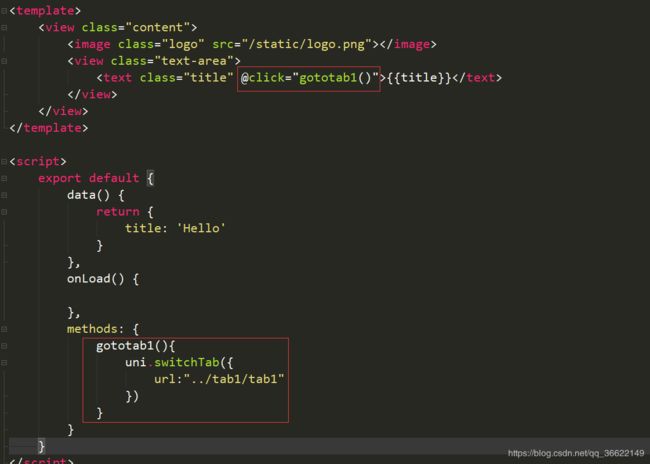
也可以通过在index/index的method方法中添加一个跳转方法

此方法可能牵涉到Vue的开发,若您不了解Vue的开发方式,建议可以去Vue官方网站学习一波。
这里说一下uni.switchTab方法,该方法只适用于跳转到tabBar页面上,而且是不能携带参数的,跳转到 tabBar 页面只能使用 switchTab 跳转
若是跳转到普通页面,
则直接使用uni.navigateTo(OBJECT)或者uni.redirectTo(OBJECT)
- uni.redirectTo(OBJECT)
关闭当前页面,跳转到应用内的某个页面。(可以传参数)
举个栗子:
uni.redirectTo({
    url: 'test?id=1'
});
- uni.redirectTo(OBJECT)
关闭当前页面,跳转到应用内的某个页面
uni.redirectTo({
    url: 'test?id=1'
});
- uni.reLaunch(OBJECT)
关闭所有页面,打开到应用内的某个页面。
uni.reLaunch({
    url: 'test?id=1'
});
补充知识
传入的参数,在新的页面中可以使用onload方法进行接收。
举个栗子:
//在起始页面跳转到test.vue页面并传递参数
uni.navigateTo({
    url: 'test?id=1&name=uniapp'
});
// 在test.vue页面接受参数
export default {
    onLoad: function (option) { //option为object类型,会序列化上个页面传递的参数
        console.log(option.id); //打印出上个页面传递的参数。
        console.log(option.name); //打印出上个页面传递的参数。
    }
}


