基于linux下服务器之间的文件的共享
一、cifs文件系统
1.进入smb共享文件
服务器:
yum search samba
yum install samba samba-client samba-commom -y 安装samba机器组件
systemctl start smb 开启服务
systemctl enable smb.service开机自动重启
systemctl stop firewalld
systemctl disable firewalld
netstat -antlupe | grep smb 查看端口
id student
smbpasswd -a student 用户必须存在
pdbedit -x student 删除用户
pdbedit -L
getsebool -a | grep samba 查看selinux的开关
getsebool -P samba_enable_home_dirs on 打开共享文件samba的开关
客户端
yum install samba-client -y 下载可以共享文件的服务
smbclient -L //172.25.88.55 -U student列出student共享目录
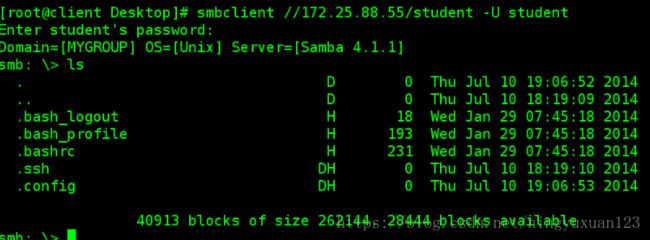
smbclient //172.25.88.55/student -U student 查看student用户目录下的内容客户端
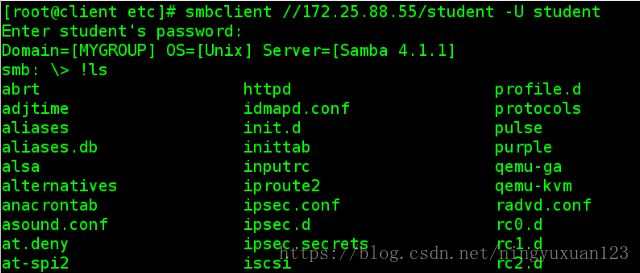
cd /etc
smbclient //172.25.88.55/student -U student
!ls 查看可上传文件
put passwd上传文件服务器
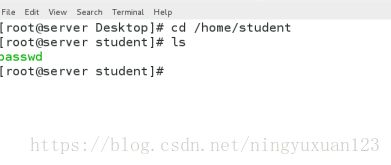
cd /home/student 共享文件的家目录
ls 查看,存在passwd文件客户机
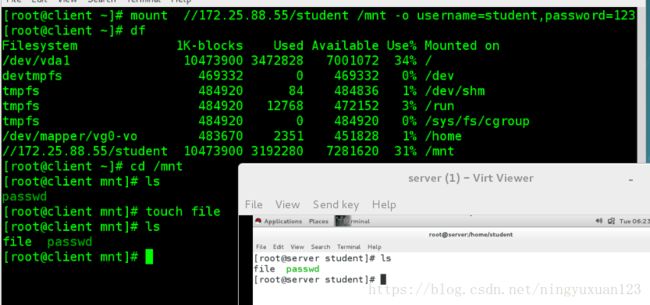
mount //172.25.88.55/student /mnt/ -o username=student,password=123
cd /mnt
touch file
服务器
cd /home/student
ls
存在file文件3.如何开机自动挂载
客户端
第一种:
(1) vim /etc/fstab
//172.25.88.55/student /mnt cifs defaults,username=student,password=123
mount -a
df挂载
reboot开机重启(必须保证服务器打开,负责开机失败)
第二种
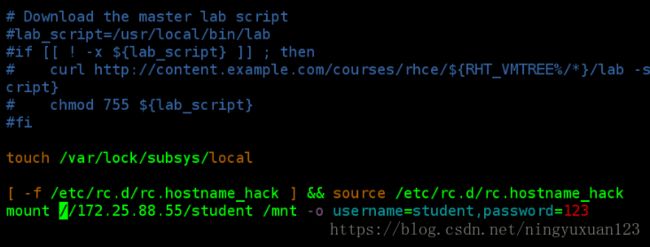
(2)vim /etc/rc.d/rc.local
mount //172.25.88.55/student /mnt -o username=student,password=123
chmod +x /etc/rc.d/rc.local
reboot服务器
rpm -qc samba-common 查看配置文件
vim /etc/samba/smb.conf
workgroup = mygroup可以修改工作组的名字
systemctl restart smb.service重启服务
smbclient -L //172.25.88.55 -U student
服务器
samba的黑白名单的设定
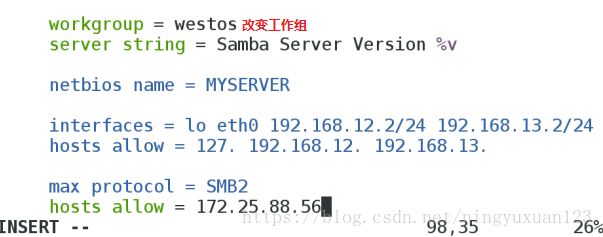
vim /etc/samba/smb.conf
hosts allow=172.25.88.55
客户端(109)
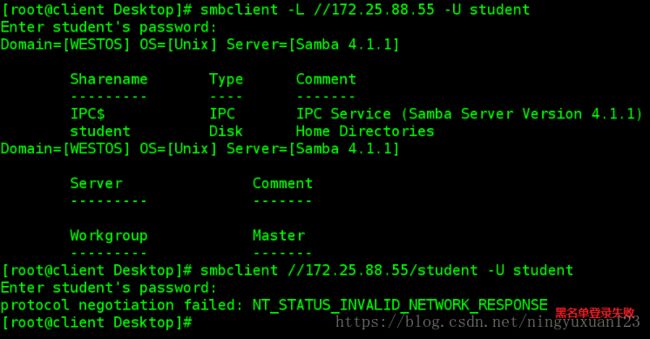
smbclient -L //172.25.88.55 -U student
其他用户被拒绝
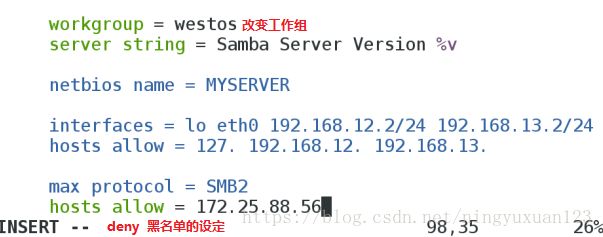
vim /etc/samba/smb.conf
hosts deny=172.25.88.56
smbclient -L //172.25.88.55 -U student被拒绝
其他用户允许
4.共享自己新建目录
服务器
mkdir /dir
 vim /etc/samba/smb.conf
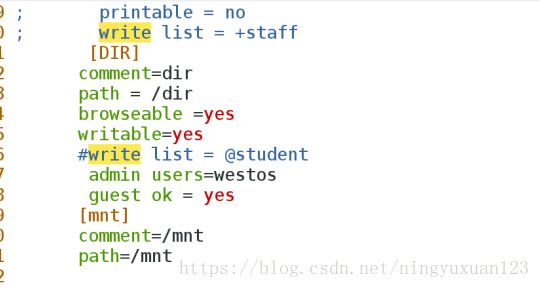
 [DIR]
322        comment=/dir
323        path = /dir
324
客户机
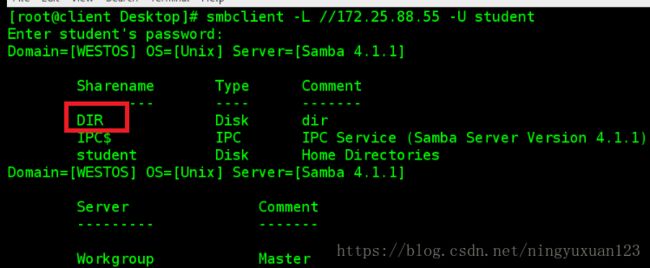
smbclient -L //172.25.88.55  出现新建目录
服务器
semanage fcontext -a -t samba_share_t '/dir(/.*)?'
semanage fcontext -l | grep /dir 对/dir的安全上下文进行查看
restorecon -FvvR /dir 刷新安全上下文
客户机
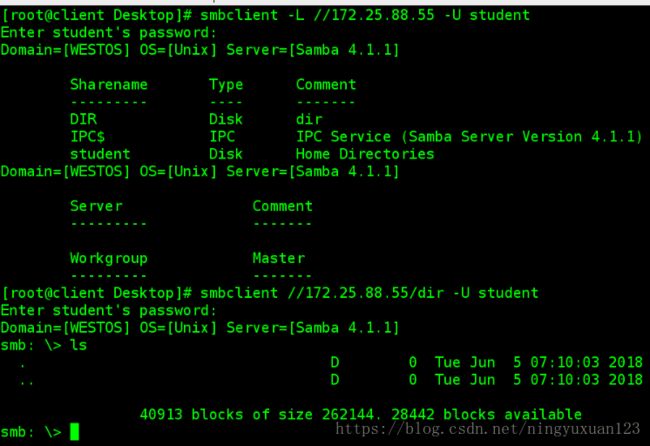
smbclient //172.25.88.55/DIR -U student
ls能够查看内容共享系统目录
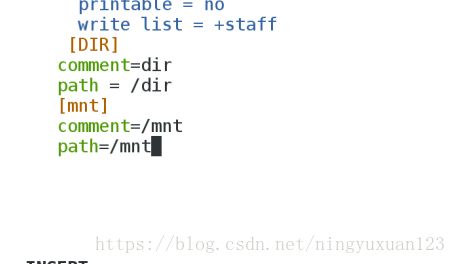
[mnt]
326 comment =/mnt/
327 path = /mnt
systemctl restart smb.service
setsebool -P samba_export_all_ro on
cd /mnt
touch file{1..3}
客户机
smbclient //172.25.88.55/mnt -U student
ls 查看文件file{1..3}vim /etc/samba/smb.con
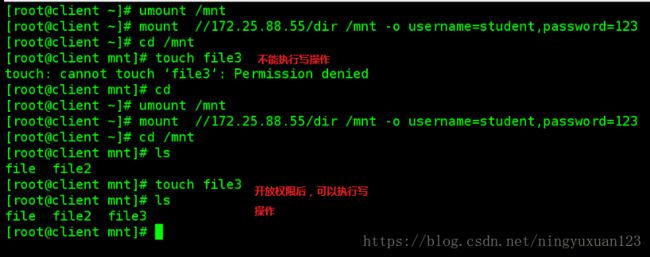
是否允许浏览 browseable
是否可写 writable
允许用户列表 write list
允许组可写 write list = @或者 +
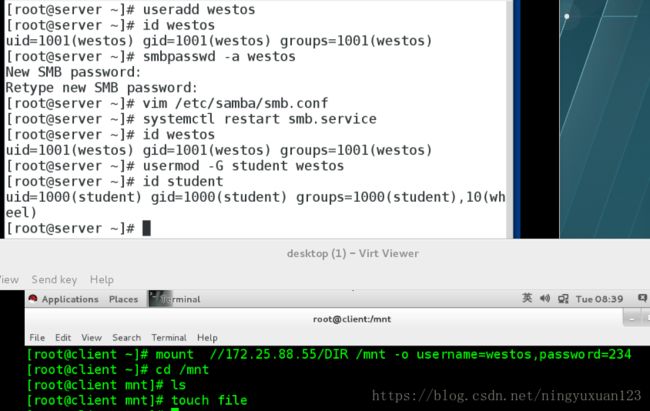
管理员身份设置为westos admin users =westos
客户端
yum install cifs-utils -y
man mount.cifs进行查看具体格式信息
vim /root/smbpass
username=student
password=123
退出保存
mount -o credentials=/root/smbpass,sec=ntlmssp,multiuser //172.25.88.55 /mnt
                        挂载认证文件      认证方式   多用户认证
cd /mnt
ls
useradd test
su - test
cd /mnt ls 失败
 cifscreds add -u westos 172.25.88.55 用westos的身份进行验证
cd /mnt
ls   正确查看
cifscreds add 添加认证用户
cifscreds clear 清除缓存的用户认证服务器
vim /etc/samba/smb.conf
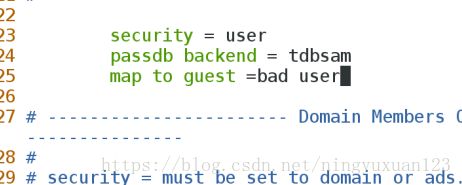
125 map to guest=bad user
328 guest ok =yes
systemctl restart smb.service
客户机
mount //172.25.88.55/DIR /mnt -o username=guest,password=""
df
smbclient //172.25.88.55/DIR服务器
yum install nfs-utils -y
systemctl start nfs
vim /etc/exports
/mnt *(sync,rw,no_root_squash,anonuid=1000,anongid=1000) 对操作者身份自动转为root用户 将用户特定设置为student用户
/dir 172.25.88.0/24(sync) 172.25.88.250(sync,rw) 对于172.25.88这个网段的只有sync数据同步操作,对于172.25.88.250的主机不仅有数据同步还有读写操作
exportfs -rv刷新nfs客户机(172.25.88.55)
mount 172.25.88.56:/dir/ /mnt
cd /mnt
touch file失败
cd
umount
客户机(172.25.88.250)
mount 172.25.88.55:/dir/ /mnt
cd /mnt
touch file成功
showmount -e 172.25.88.55显示服务器exports文件的目录服务器:
systemctl start nfs
systemctl stop firewalld
vim /etc/exports
1 /dir 172.25.88.0/24(sync,rw,no_root_squash)
exportfs -rv
chmod 777 /dir客户端:
systemctl start nfs
systemctl stop firewalld
showmount -e 172.25.88.55显示共享文件
yum install autofs
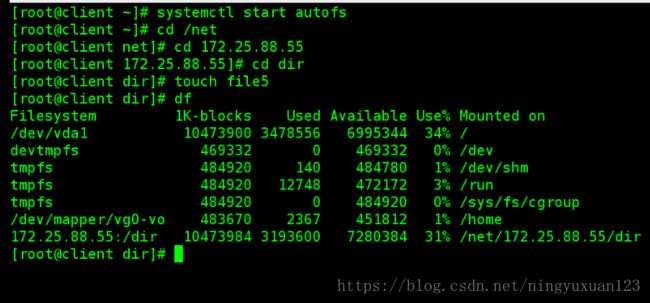
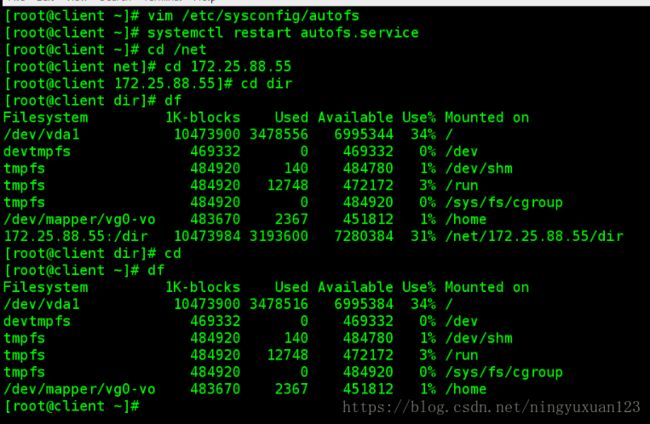
systemctl start autofs
cd net
cd 172.25.88.55
cd dir
touch file5
df 自动挂载vim /etc/sysconfig/autofs 编辑autos的主配置文件
其他版本
vim /etc/autos.conf
timeout=5s闲置时卸载的时间
systemctl restart autofs.service
cd /net
cd 172.25.88.55
cd /dir
df自动挂载
cd退出使用,5s之后自动卸载
指定挂载点设置
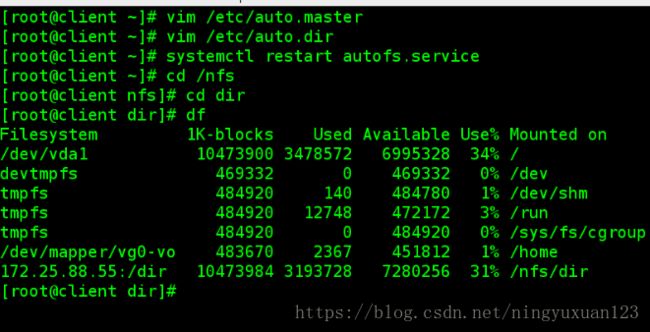
vim /etc/auto.master
/nfs  /etc/auto.dir指定特定挂载点的上层目录
vim /etc/auto.dir
dir  -rw,vers=3   172.25.88.55:/dir
指定挂载点  版本为3     挂载对象
systemctl restart auto.service
cd /nfs
cd dir
df  查看自动挂载,挂载点变为/nfs/dir
mount 对挂载信息进行查看


